Avid Pro Tools stands tall as a powerhouse in the world of audio production, offering unparalleled capabilities for music creation and engineering. Understanding and manipulating sample rates within Pro Tools is pivotal for ensuring optimal audio quality and compatibility across different projects.
Determine Sample Rate in Pro Tools
New Session Settings
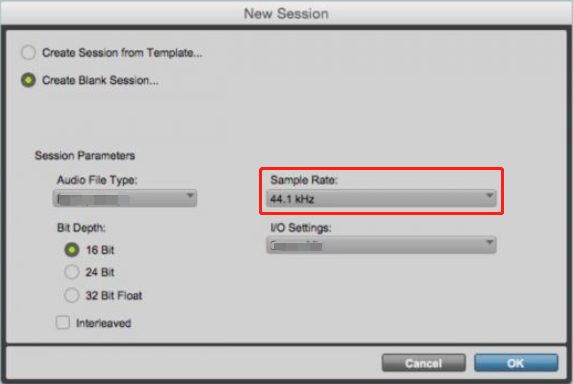
Where can the sample rate for a new Pro Tools session be determined? When creating a new session in Pro Tools, the sample rate can be determined and set in the initial dialog box before creating the session. This step is crucial as the selected sample rate will define the resolution and quality of your audio recordings within that session.

Playback Engine Settings
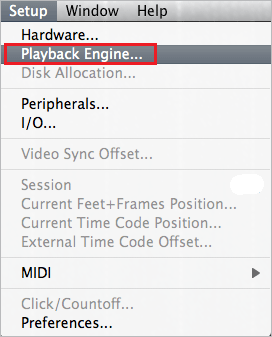
To check or change the sample rate within an existing session, navigate to Setup > Playback Engine in Pro Tools. Here, you can view and adjust the current sample rate settings for the active playback engine.

How to Change Sample Rate in Pro Tools?
In general, the steps for changing sample rate in Pro Tools’ different versions are similar.
Pro Tools 9 and 10 Sample Rate
- Open Pro Tools.
- Go to Setup > Playback Engine.
- In the Playback Engine dialog box, choose the desired sample rate from the dropdown menu under H/W Buffer Size.
- Click OK to apply the changes.

Pro Tools 11 Sample Rate and Beyond
- Access Setup > Playback Engine as before.
- Select the desired sample rate from the dropdown menu.
- Confirm the change by clicking OK.
Troubleshoot “Pro Tools Can’t Change Sample Rate” Issue
# Incompatibility Errors
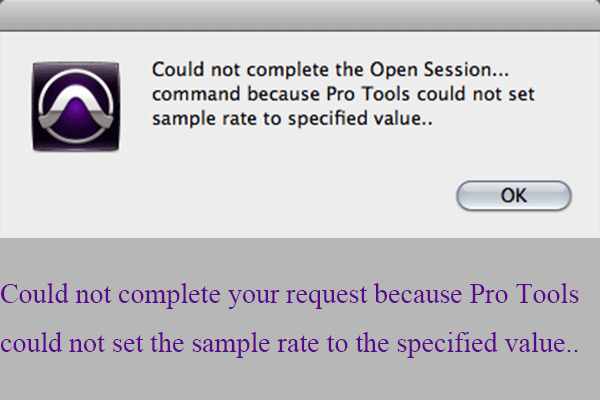
If you encounter an error stating “The current playback engine does not support a sample rate of 48kHz”, it implies that the selected sample rate might not be compatible with your current playback engine. To resolve this, switch to a compatible sample rate supported by your audio interface or hardware.
# Driver and Hardware Compatibility
Ensure that your audio interface or hardware supports the desired sample rate. Check for updated drivers or firmware that might resolve compatibility issues with Pro Tools.
# Session Compatibility
Changing the sample rate within a session might affect the quality and alignment of existing audio files. It’s advisable to back up your session before altering the sample rate, as changing it can potentially compromise the session’s integrity.
How to Change Sample Rate Outside of Pro Tools?
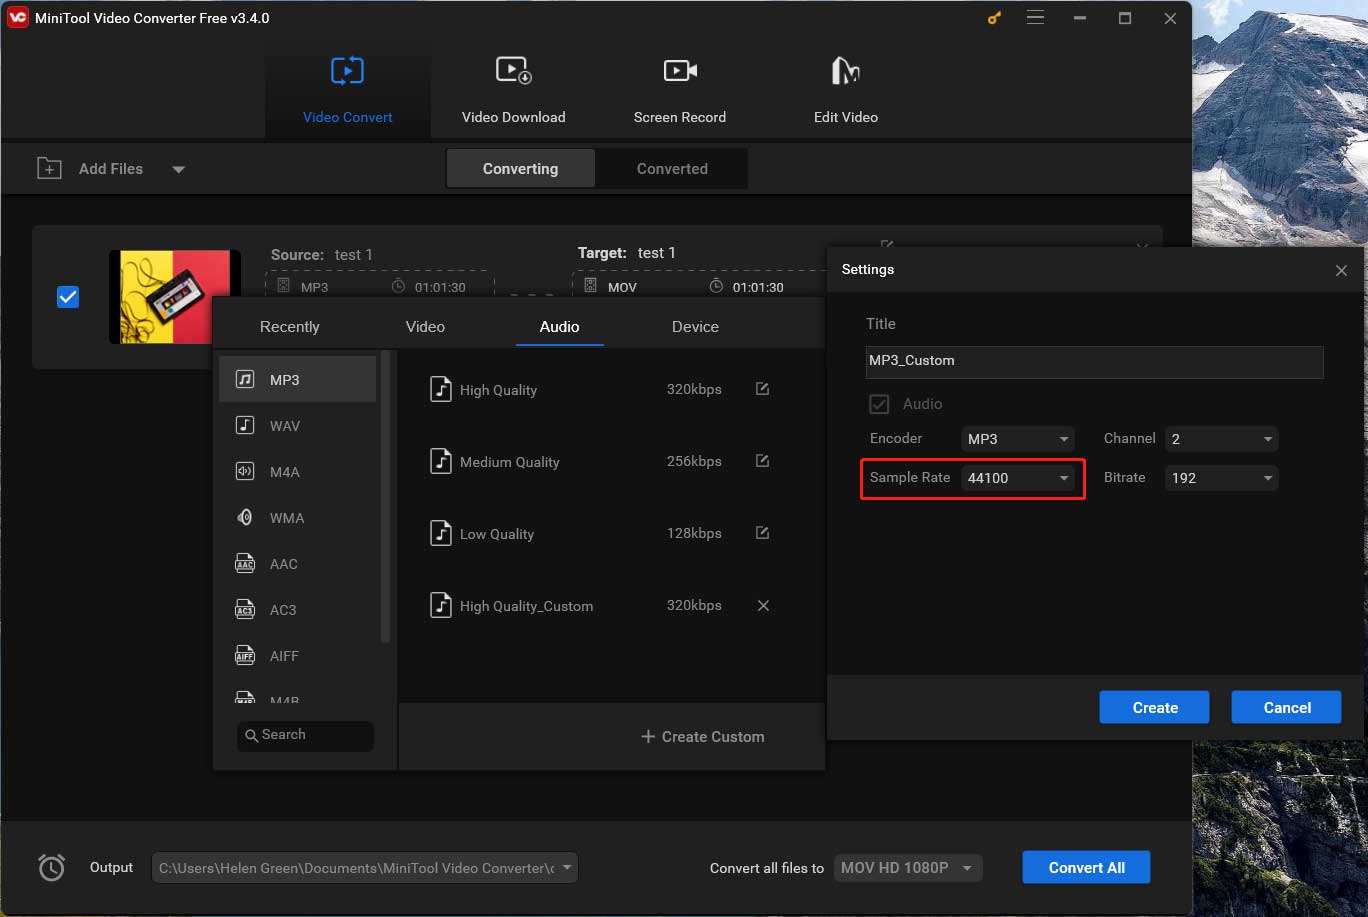
If you have created and saved an audio file with Pro Tools but find that you have used the wrong sample rate, how do you solve the problem? Instead of spending much time recreating the audio, you can take a shortcut by directly altering the sample rate of the audio relying on a professional and reliable sample rate converter like MiniTool Video Converter, which allows you to easily convert the sample rate of an audio file in a few clicks.
MiniTool Video ConverterClick to Download100%Clean & Safe
In addition to the audio sample rate, MiniTool Video Converter also enables you to change audio bitrate, audio channel, and audio encoder. Moreover, this program permits you to convert the encoder, bitrate, resolution, and frame rate of a video.

Final Thoughts
Understanding how to manipulate sample rates within Pro Tools is fundamental for achieving the desired audio quality and compatibility across projects. Whether creating a new session or modifying an existing one, navigating the settings in Pro Tools allows you to harness the full potential of this powerful audio workstation. By being aware of potential compatibility issues and troubleshooting methods, users can confidently navigate sample rate adjustments in Pro Tools, ensuring seamless audio production experiences.
Also Read


User Comments :