When delving into the realm of audio recording, one of the fundamental considerations is the sample rate and bit depth settings. These technical parameters play a pivotal role in capturing and reproducing sound faithfully. Understanding their significance and choosing appropriate settings can significantly impact the quality of your recordings.
What Is Sample Rate and Bit Depth?
Sample rate refers to the number of samples of audio carried per second, measured in Hertz (Hz). What sample rate should I record at? Common sample rates include 44.1 kHz, 48 kHz, 96 kHz, and higher, denoting the number of samples taken each second during recording.
Bit depth determines the resolution or dynamic range of audio. It represents the number of bits of information in each sample and commonly comes in 16-bit, 24-bit, or 32-bit formats. Higher bit depths allow for greater precision in capturing the nuances of sound.

What Sample Rate Should I Use?
What sample rate and bit depth should I use? The appropriate settings depend on various factors, including the project's nature, intended use, and available storage space. What’s the best sample rate to record with? For most recording purposes, a sample rate of 44.1 kHz or 48 kHz with a bit depth of 24 bits is sufficient and widely used for music production, podcasts, and general audio work.
Why Is It Important to Use a High Sample Rate When Recording Sound?
Higher sample rates, such as 96 kHz or beyond, are favored for specific applications, like professional music production, where utmost fidelity and manipulation flexibility are required. Recording at higher sample rates can capture more frequency information and provide more headroom for post-production alterations.
What Sample Rate Do Pro Studios Use?
Pro studios often use sample rates of 96 kHz or even 192 kHz, primarily for high-end music production, film scoring, or sound design. However, those higher sample rates demand more storage space and computing power.
What Sample Rate Does YouTube Use?
YouTube and most online platforms typically use 44.1 kHz sample rate and 24-bit or 16-bit depth for audio uploads, as it offers a good balance between quality and file size.
What Sample Rate Should I Use in Fl Studio?
FL Studio and other digital audio workstations (DAWs) allow flexibility in settings. For general purposes, starting with a sample rate of 44.1 kHz and a bit depth of 24 bits is a good choice.
What Sample Rate and Bit Depth to Use?
When recording in a home studio or for personal projects, 44.1 kHz or 48 kHz at 24 bits is often considered ideal. It maintains good quality while keeping file sizes manageable.
For high-fidelity music or critical audio projects where extensive editing and processing are anticipated, using higher sample rates like 96 kHz or 192 kHz at 24-bit depth can be advantageous.
What Sample Rate and Buffer Size Should I Use?
Buffer size determines the amount of audio data temporarily stored for smooth playback/recording. Smaller buffer sizes reduce latency but may strain the CPU, while larger buffers might increase latency but ensure stable performance. Adjusting the buffer size depends on the system's capabilities and the recording environment.
Is It Possible to Change the Sample Rate of an Audio?
If you have recorded a piece of audio at a wrong sample rate, instead of spending much time and energy to conduct a new recording, you can quickly convert the recorded audio to your desired sample rate with a professional sample rate converter like MiniTool Video Converter.
MiniTool Video ConverterClick to Download100%Clean & Safe
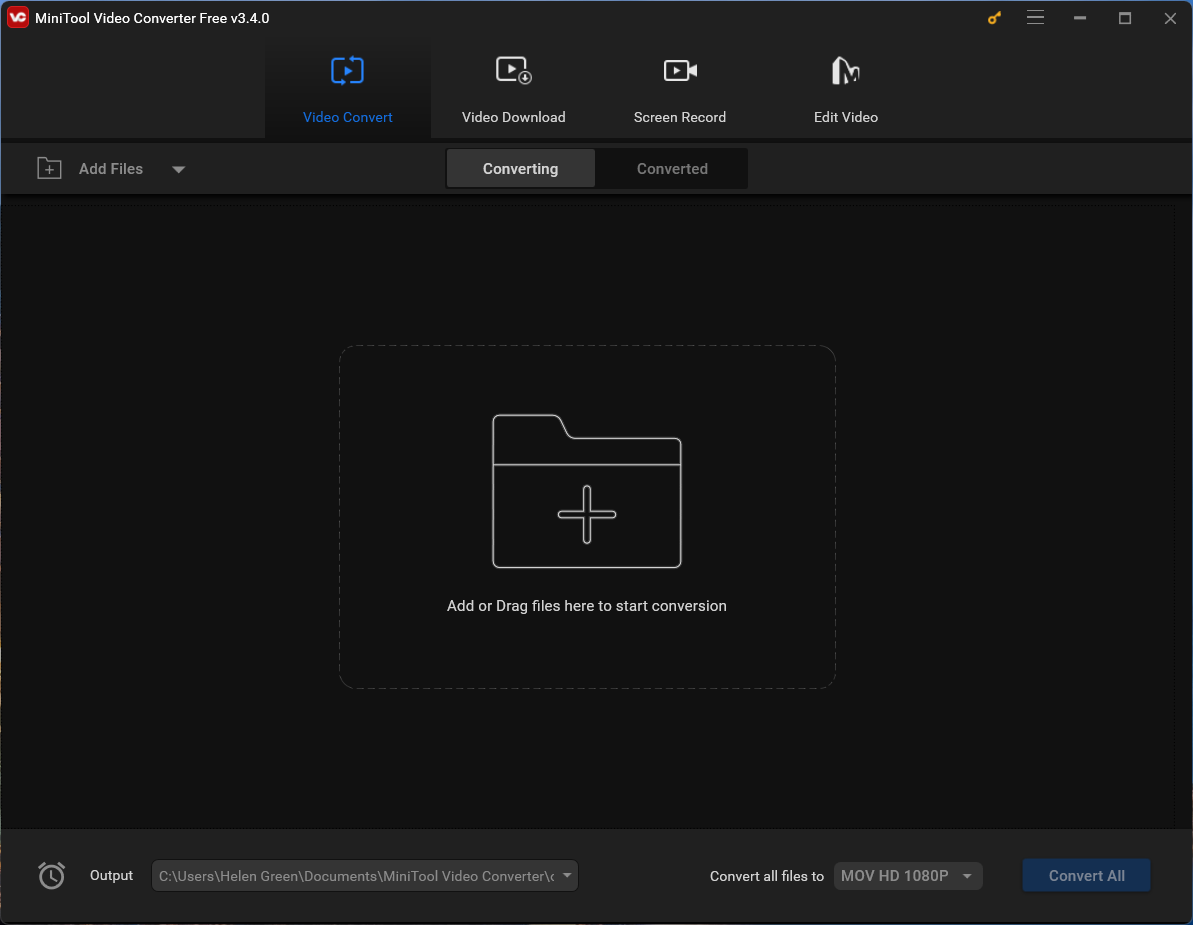
1. Download, install, and launch MiniTool Video Converter on your Windows PC.
2. Click the Add or Drag files here to start conversion option to upload your recording.
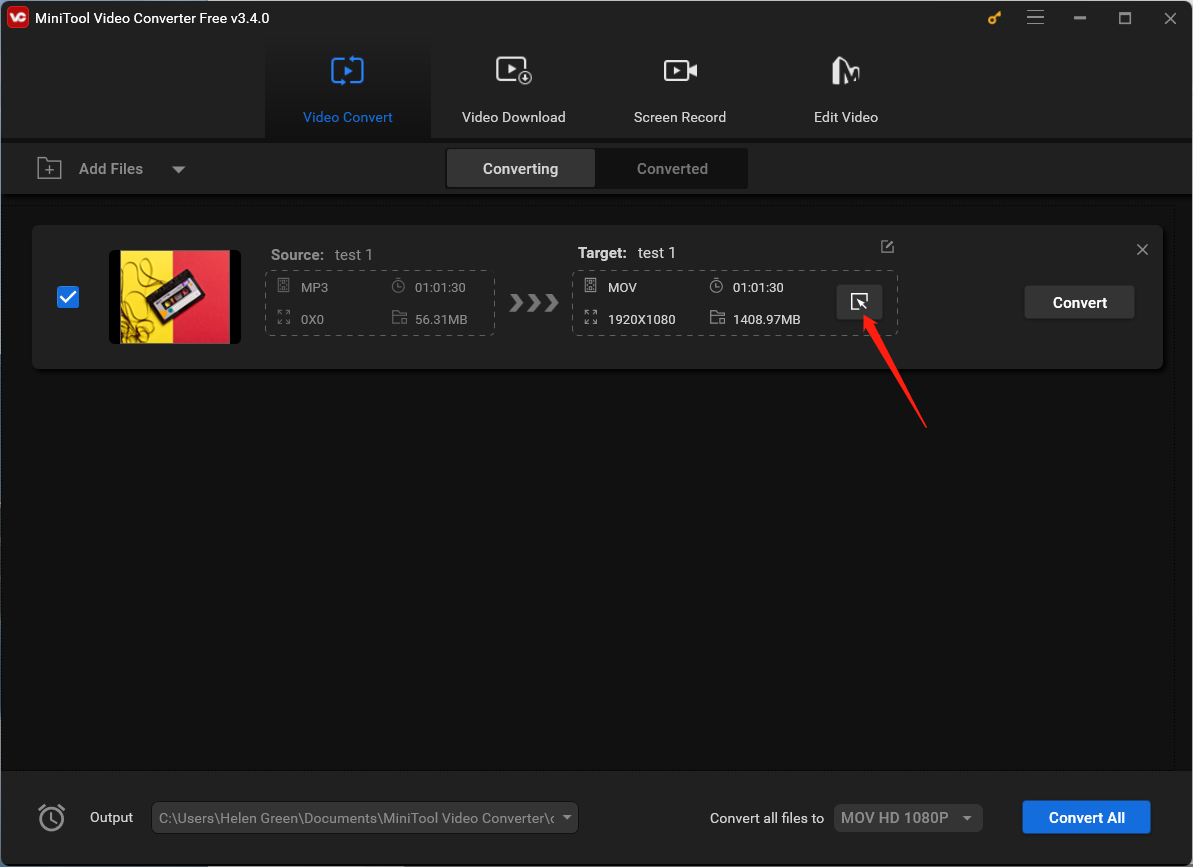
3. Click the settings icon under the Target section.
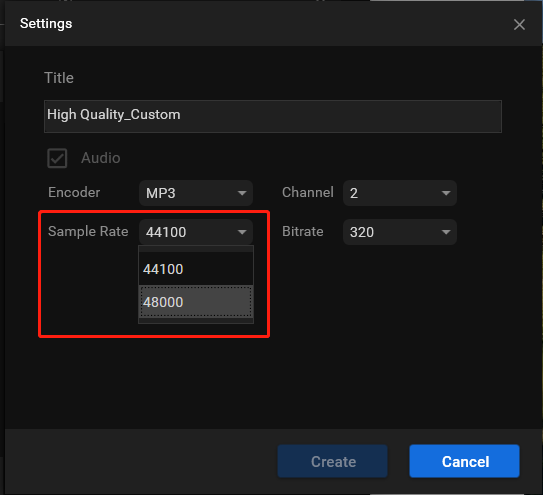
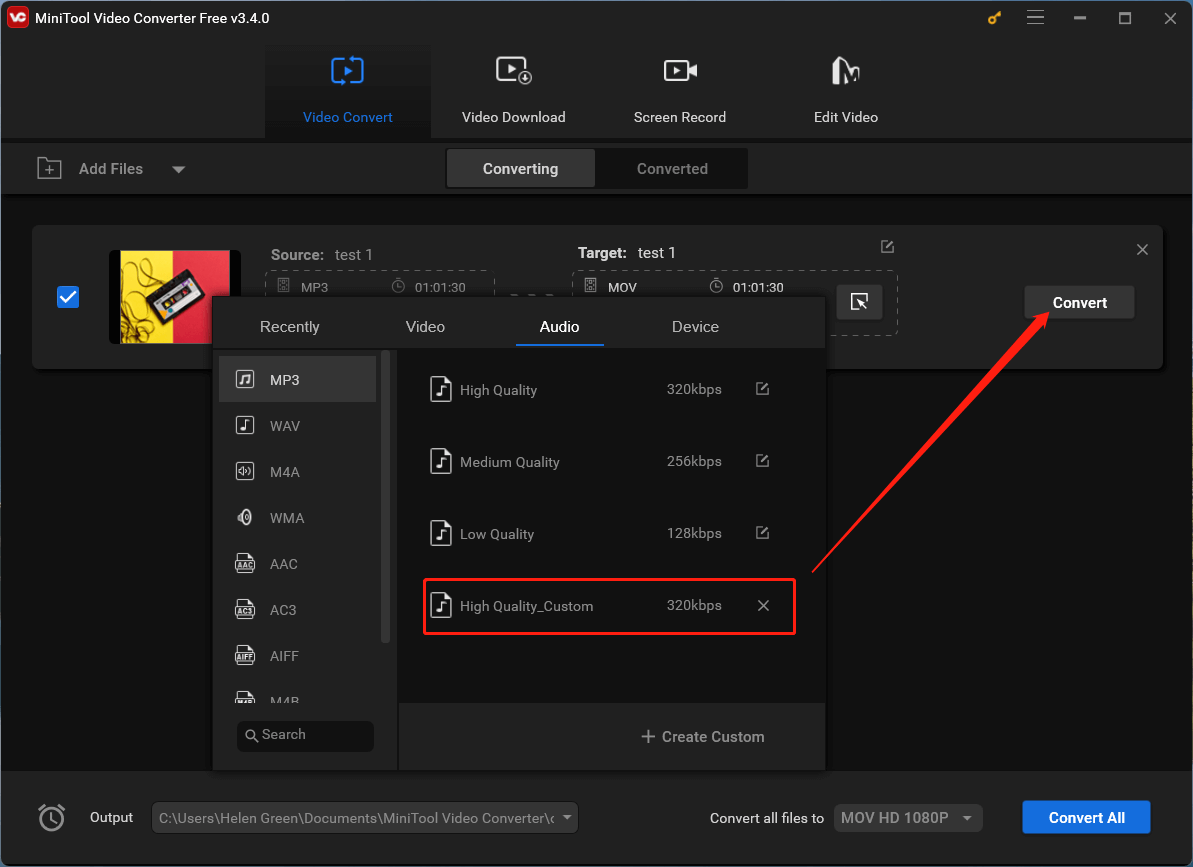
4. In the next popup, switch to the Audio tab from the top menu, keep the audio format unchanged from the left menu, and choose an audio quality in the right area. Click the settings icon behind the chosen audio quality option to change its sample rate. Or you can directly choose the Create Custom option.
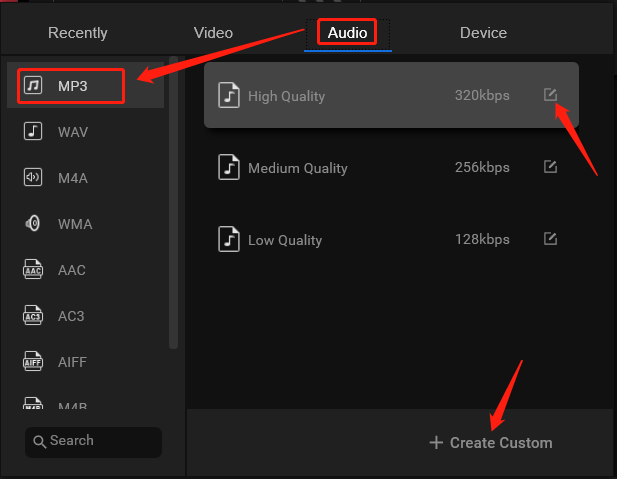
5. In the next window, you are able to alter the sample rate of the original audio as well as its encoder, channel, and bitrate. Don’t forget to click the Create button to save the changes.
6. Find your customized audio format option in the list, select it, and click the Convert button to start the conversion.
When it is completed, you will get a recording audio with your personalized sample rate.
Conclusion for What Audio Sample Rate Should I Use?
Selecting the appropriate sample rate and bit depth involves considering the specific needs of your project, balancing audio quality, storage space, and processing requirements. While higher sample rates offer increased fidelity, they may not be necessary for all applications. Understanding those technical aspects empowers recording enthusiasts and professionals to make informed choices for optimal audio production.
About The Author

Position: Columnist
Helen is a tech writer with over 10 years of experience. She specializes in creating easy-to-follow guides for video editing, media file conversion, and computer performance. Helen doesn't just write—she tests every software herself and listens to feedback from users and experts. Her goal is to make complex programs simple so that everyone can solve their tech problems with confidence.
User Comments :