Does the Asana file size limit affect your video uploading? This article explains why to compress videos for Asana. Besides, it also recommends 2 fantastic compressors to you: MiniTool Video Converter and FreeConvert.
What Is Asana
Asana is a cloud-based task management tool for enterprises developed by Asana, Inc. It is one of the most popular collaboration tools in corporate teams. Asana helps enterprise teams plan, organize, assign, track, and manage tasks.
Asana can help with project breakdown, prioritization, and progress monitoring. It is widely used in marketing campaigns, product launches, and team planning. Therefore, Asana is an ideal tool for simplifying communication, optimizing workflow, and clarifying responsibilities.
Main features of Asana:
1. Task management
2. Team management
3. Project overview
4. Gantt chart support
5. Communication
6. Tools Integration
7. …
Why Compress Video for Asana
To manage projects and teams, we inevitably need to upload multiple videos to better present some tutorials, marketing planning, or other problems. However, Asana has a file size limit on uploaded videos, which only allows us to upload each file under 100MB. If your files are larger than 100MB, you can store them in cloud services such as Google Drive, Dropbox, OneDrive, or Box. These services integrate with Asana and can bypass local upload limits. Alternatively, you can compress videos to under 100MB before uploading them.
How to Compress Video Size for Asana
Can’t find a suitable Asana video compressor to shrink video size? The following section will share with you 2 enhanced compressors.
1. Use MiniTool Video Converter
MiniTool Video Converter can help you meet the Asana file size limit. It allows you to compress videos for various applications, such as Vimeo, Canva, WordPress, Notion, and Streamable. MiniTool Video Converter also empowers you to compress a variety of formats, including MP4, MKV, MOV, AVI, WebM, M2TS, M4V, FLV, and more.
MiniTool Video Converter enables you to compress videos to your desired level from 100% to 10% of the original size. Does it support batch compression? Of course! MiniTool Video Converter supports compressing videos in bulk. You can even compress 5 tasks at a time.
MiniTool Video Converter also supports customizable settings to adjust resolution, frame rate, encoders, channels, and sample rate. Besides, it prepares MP4, WebM, and MKV as the output formats. Below is a tutorial on how to reduce video size for Asana using MiniTool Video Converter.
Step 1. Get MiniTool Video Converter
Click on the download button to download and install MiniTool Video Converter. Then, run it.
MiniTool Video ConverterClick to Download100%Clean & Safe
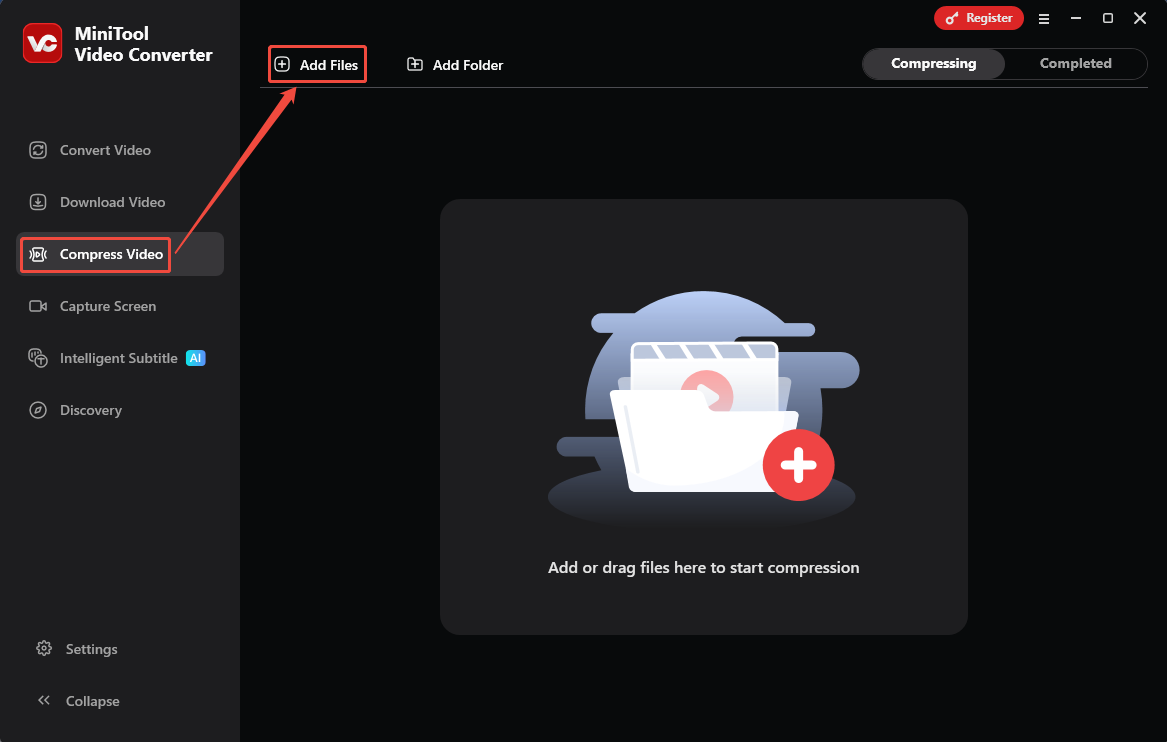
Step 2. Import the Target Video
Switch to the Compress Video module. There, click the Add Files option to import the target videos.
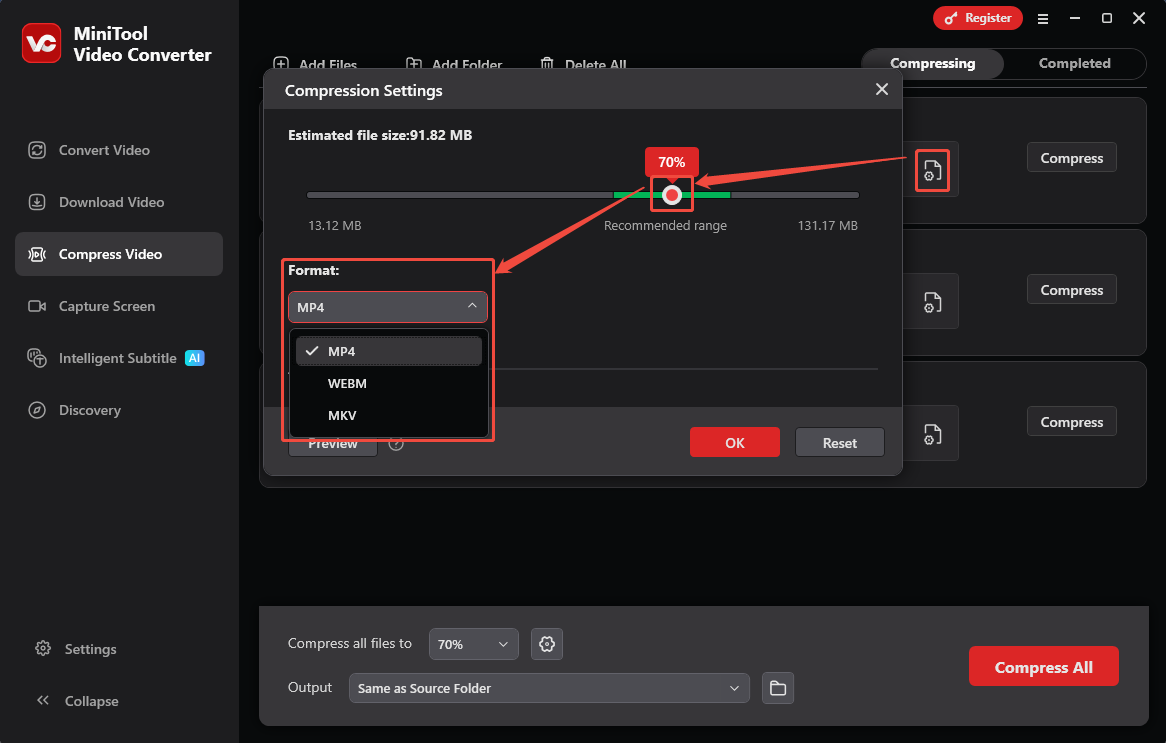
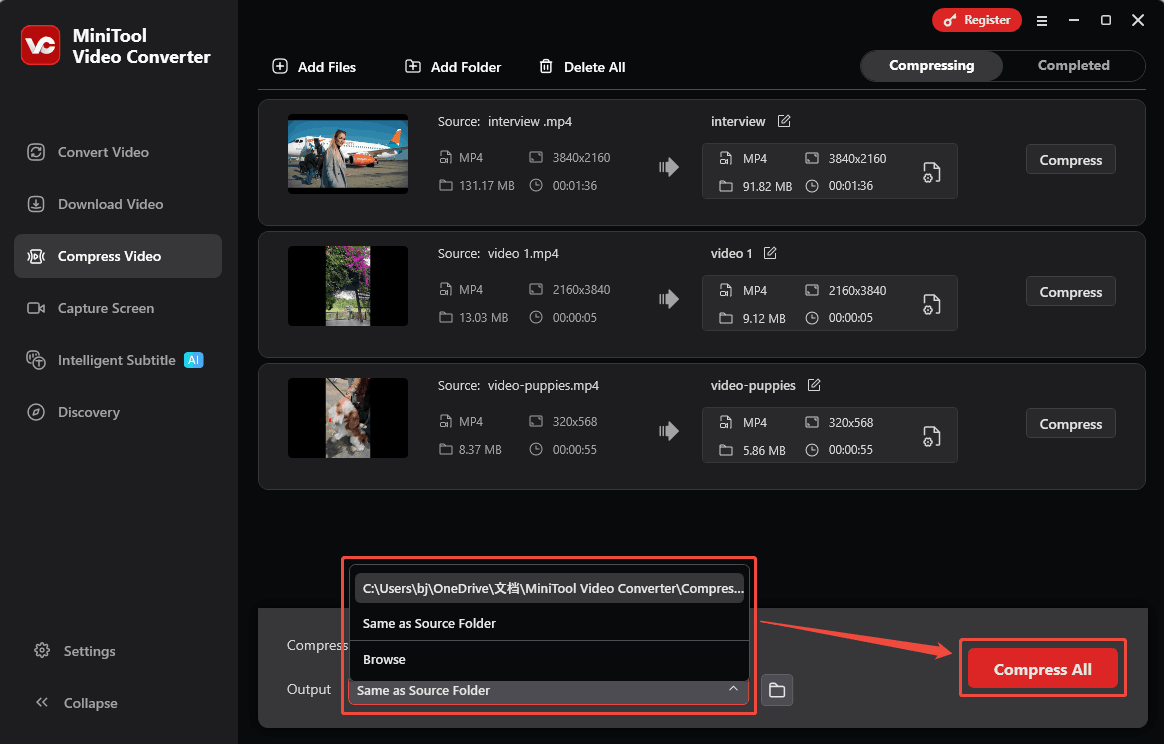
Step 3. Adjust the Compression Percentage
Click on the Gear icon to open the Compression Settings window. There, drag the red slider to adjust the output video size to under 100MB. Then, expand the Format option to pick an output format for the compressed video.
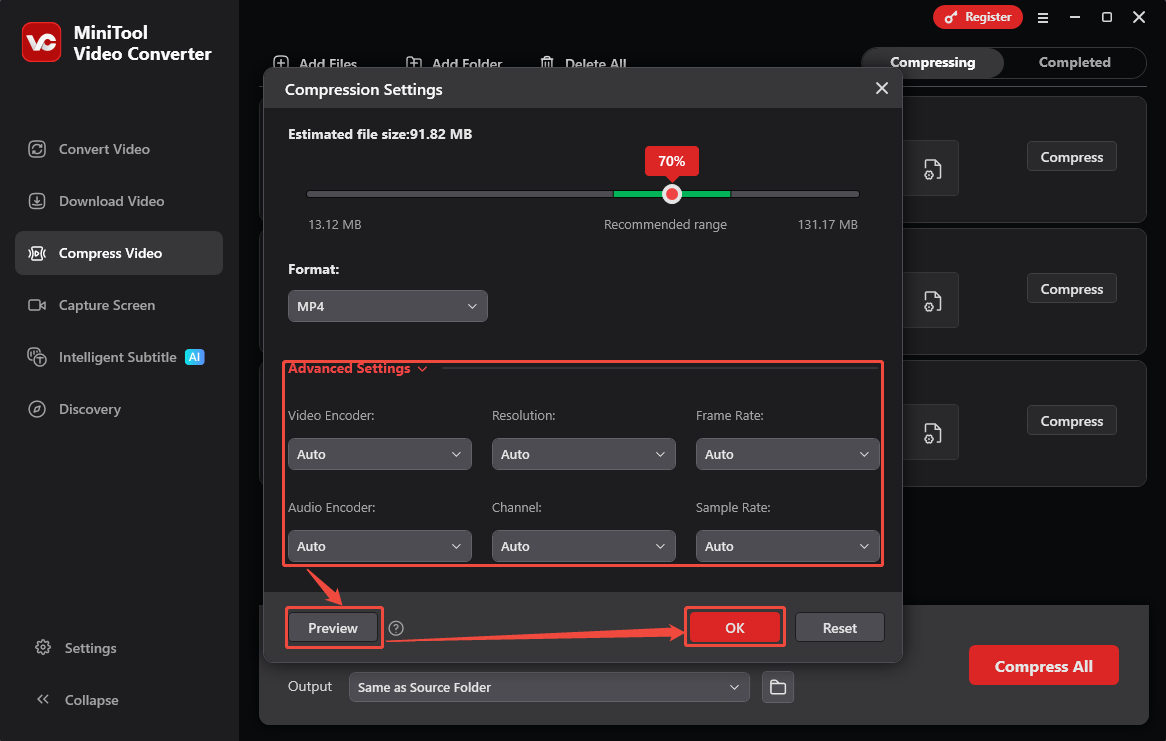
Expand the Advanced Settings option to change the video encoders, resolutions, frame rates, audio encoders, channels, and sample rates. To preview the converted video, you can also click on the Preview option. Then, click on the OK button to save these changes.
Step 4. Start the Compression
Expand the Output option to choose a save folder on your computer. Then, click on the OK button to start the compression process.
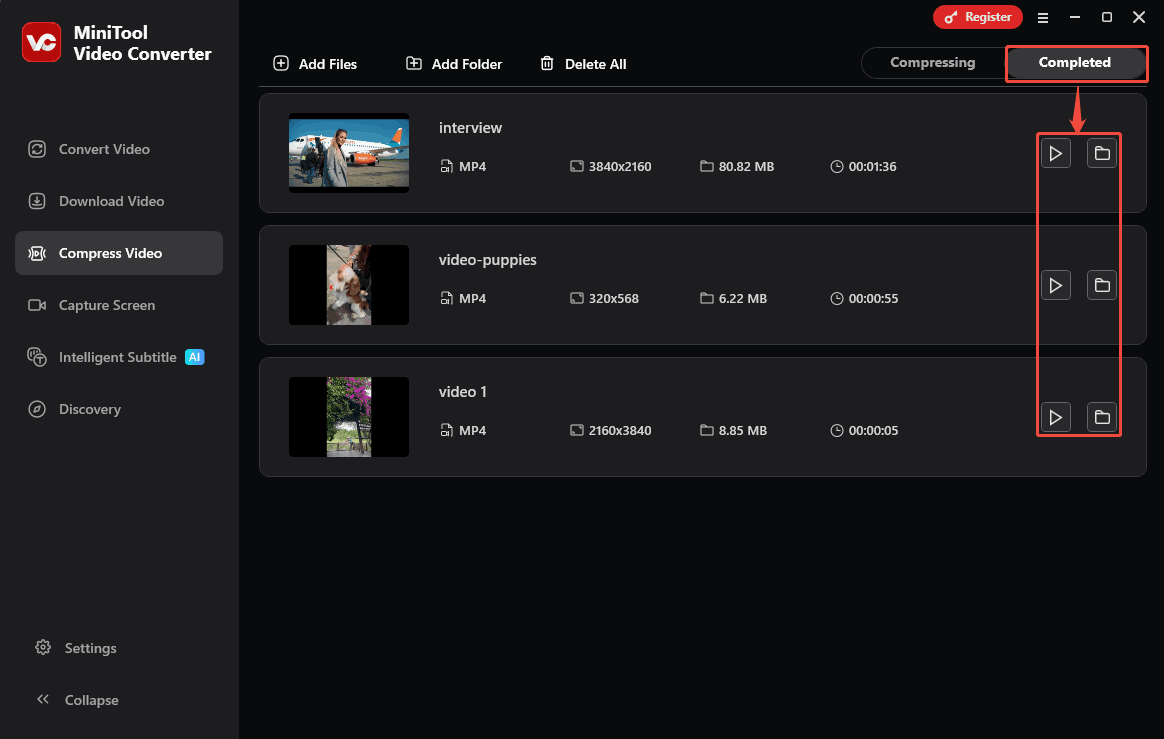
Step 5. Check the Compressed Video
When the compression process finishes, this video compressor will go to the Completed tab. There, click on the Play icon or the Folder icon to check or locate the compressed video in your save folder.
MiniTool Video Converter is an efficient tool to make videos fit the Asana file size limit. You can complete the compression by simply following the steps above.
2. FreeConvert
FreeConvert is an online compressor that supports you in compressing videos for Asana. Apart from reducing video size, it also compresses audio, image, PDFs, documents, and GIFs. There are customizable advanced settings you can fine-tune video codecs and compression size. FreeConvert also allows you to add subtitles to the compressed videos.
The steps below are how to shrink video size with FreeConvert.
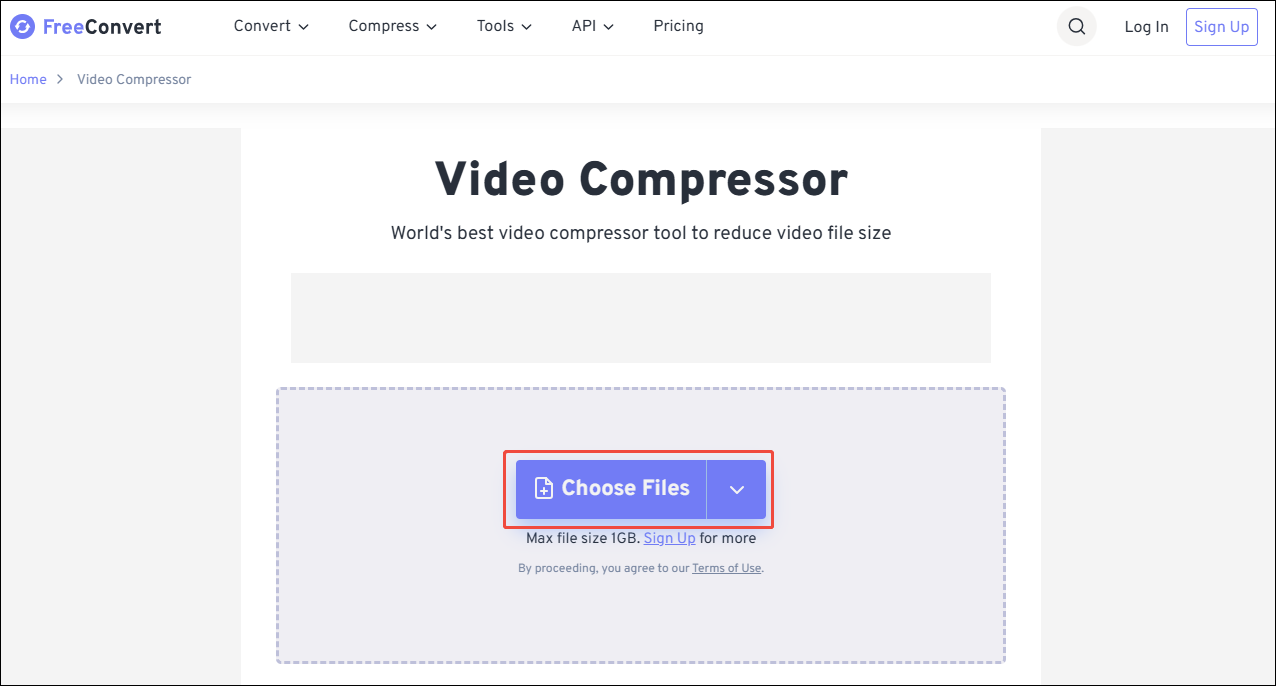
Step 1. Navigate to FreeConvert’s Webpage
Go to https://www.freeconvert.com/video-compressor to enter FreeConvert’s webpage.
Step 2. Upload the Target Video
Click on the Choose Files option to upload the target video.
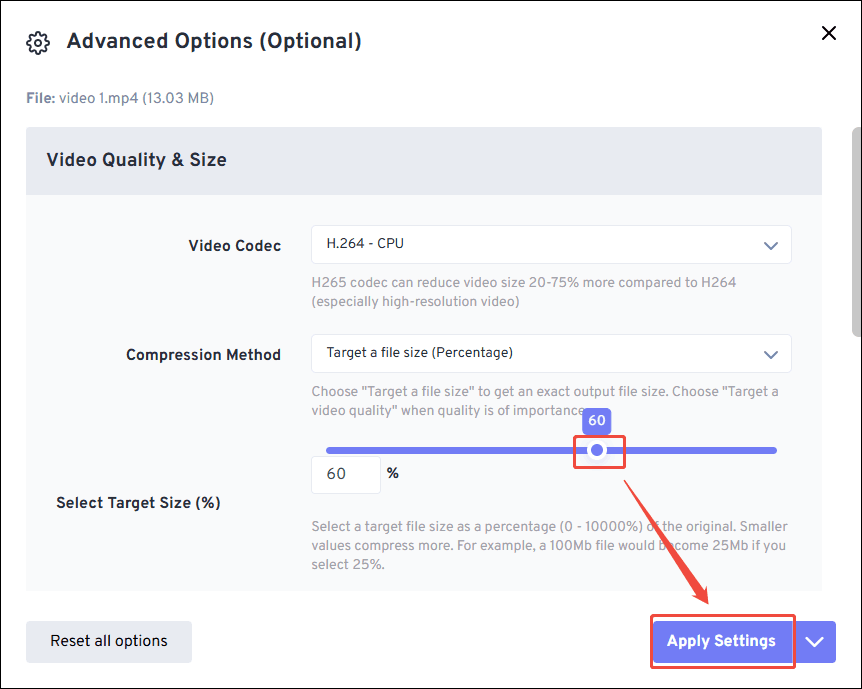
When the conversion task is uploaded, click on the Gear icon to trigger the Advanced Options window. Here, you can customize the compression level freely. Then, click on the Apply Settings button to apply the changes.
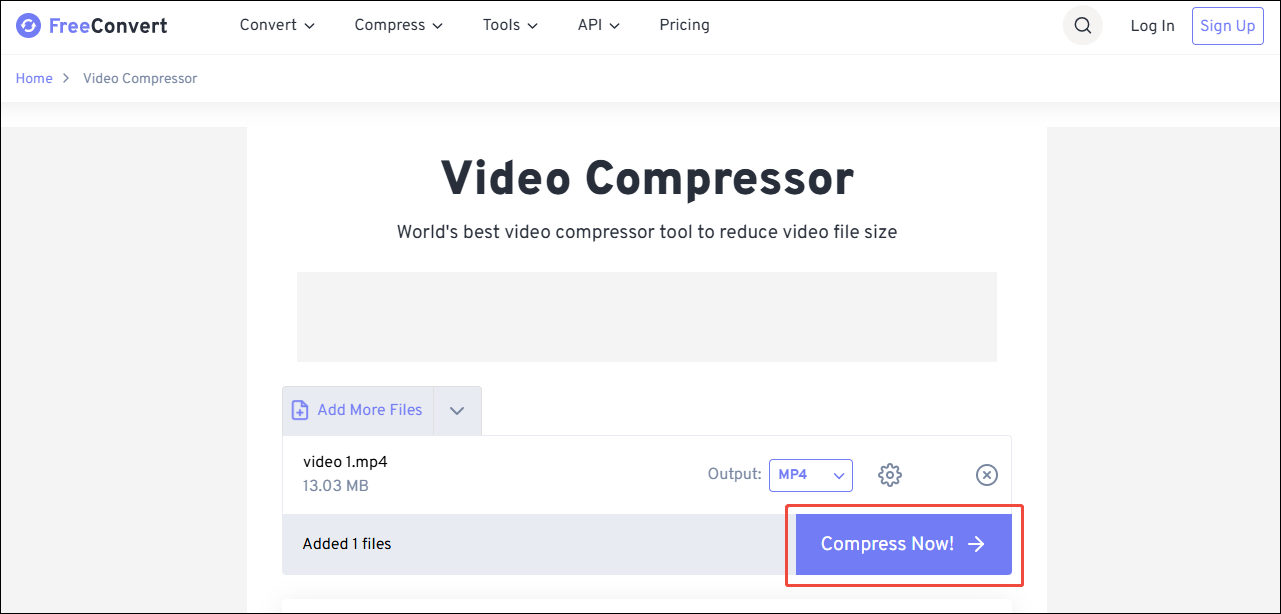
Step 3. Begin the Compression
Click on the Compress Now button to begin the compression process.
Step 4. Download the Compressed Video
Once the compression finishes, click on the Download button to save the compressed video.
Using FreeConvert to deal with the Asana file size limit is a can’t miss choice. However, it only provides 1GB of upload capacity per file for users who are not logged in.
Final Words
This article shows what Asana is and the reasons for compressing videos for Asana. It also shares how to meet the Asana file size limit with 2 methods, including using MiniTool Video Converter and FreeConvert.
User Comments :