GitHub has a 10MB video size limit. To help you bypass the video size limit, this post shows you how to compress video for GitHub with MiniTool Video Converter, MiniTool MovieMaker, or Online File Compressor.
Does GitHub Have a Video Size Limit
Does GitHub have a file size limit for those who want to upload a video? The answer is yes. Specifically, GitHub has a 10MB video size limit for free users. If you have paid for the Paid GitHub Plans, the video size limit will be extended to 100MB.
How to Compress Video for GitHub
To compress videos for GitHub without hassle, you can use MiniTool Video Converter, MiniTool MovieMaker, or Online File Compressor.
Method 1. Use MiniTool Video Converter (Offline)
If you want to compress video for GitHub with simple clicks, never miss MiniTool Video Converter.
Why Choose MiniTool Video Converter
MiniTool Video Converter is a free video compressor without watermarks. With it, you can compress up to five GitHub videos simultaneously. What’s more, MiniTool Video Converter doesn’t have a file size limit.
Moreover, MiniTool Video Converter supports various video formats, including MP4, MKV, MOV, WMV, AVI, WEBM, and so on. In addition, since it has a well-organized interface, entry-level users can accomplish the compression tasks effortlessly.
How to Compress Video for GitHub with MiniTool Video Converter
Below is a detailed guide on how to compress video using MiniTool Video Converter.
Step 1. Download and install MiniTool Video Converter.
MiniTool Video ConverterClick to Download100%Clean & Safe
Download MiniTool Video Converter by clicking on the download button above. Then, follow the on-screen prompts to install this video compressor for GitHub.
Step 2. Import the videos.
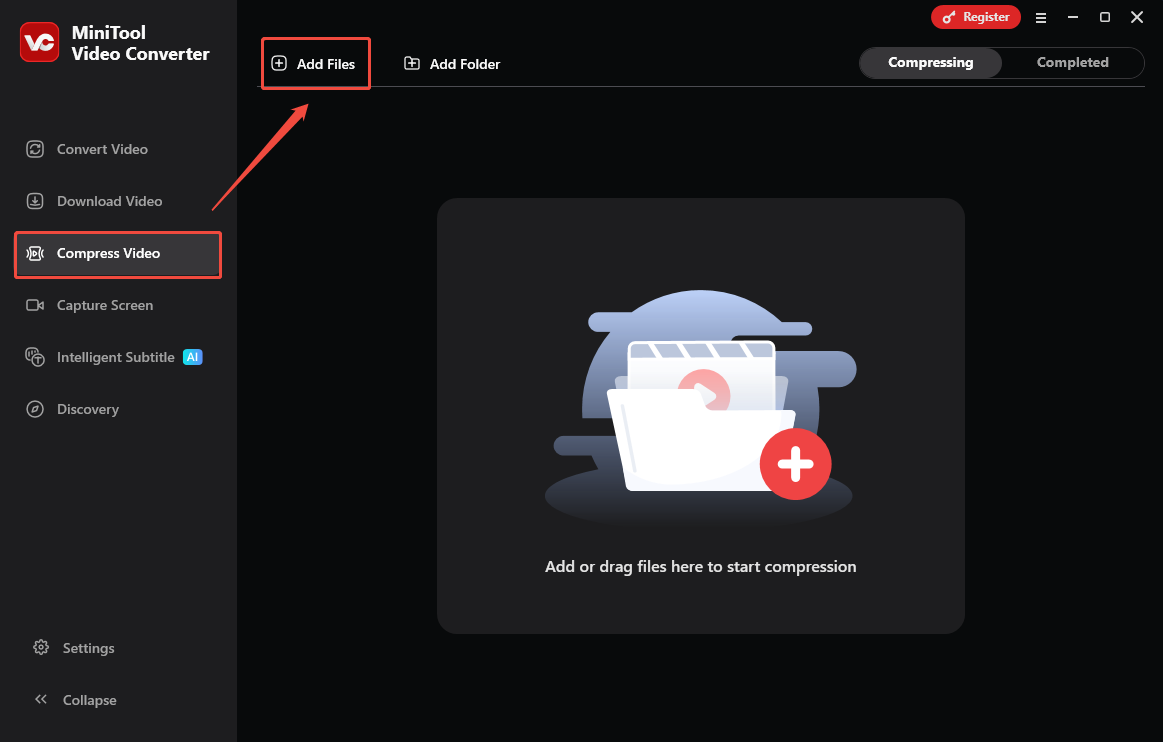
After launching MiniTool Video Converter, click on the upper-left Add Files option to import the GitHub videos that you want to compress.
Step 3. Specify the compression settings.
Click on the Settings icon to enter the Compression Settings window. There, adjust the compression level by dragging the red slider. Then, expand the Format option and choose the output format. Next, expand the Advanced Settings option to customize the video encoder, audio encoder, resolution, frame rate, sample rate, and audio channel.
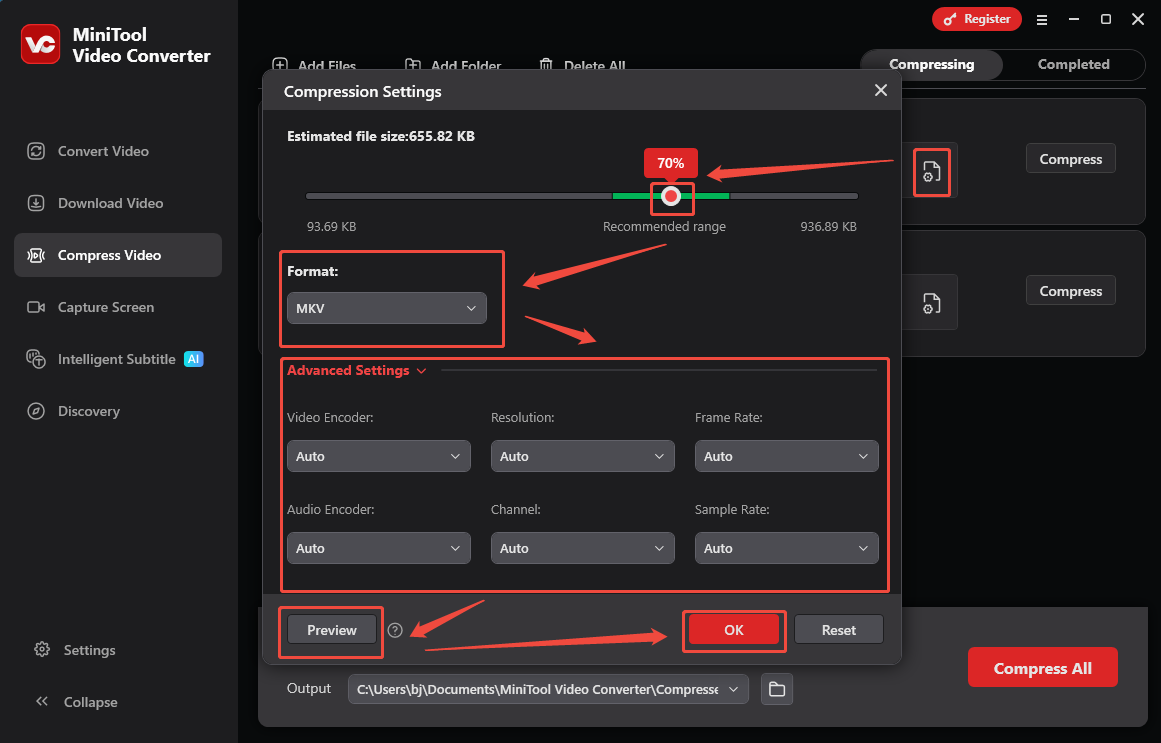
To check whether the compression level is appropriate, click on the Preview button. To apply the compression settings, click on the OK button. Finally, repeat the above operations to configure the compression settings of other video files.
Step 4. Set an output folder and start compression.
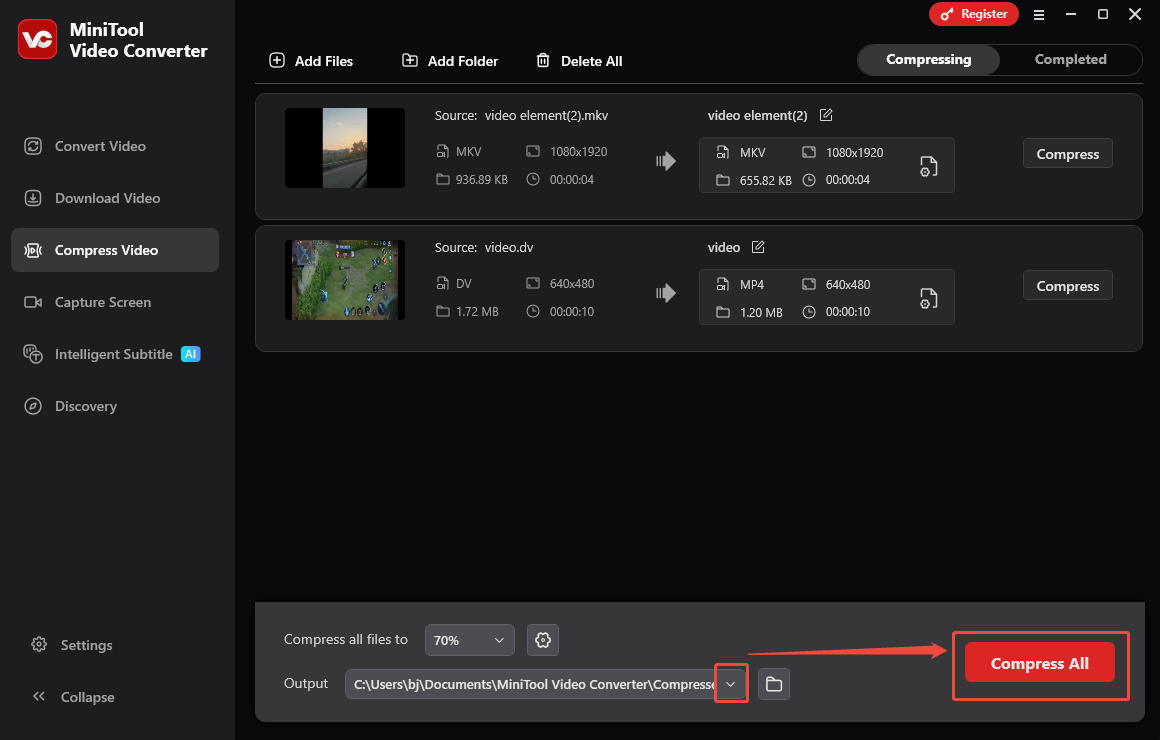
Expand the bottom Output option to choose a saving path for the compressed videos. Then, click on the Compress All button to begin the compression process.
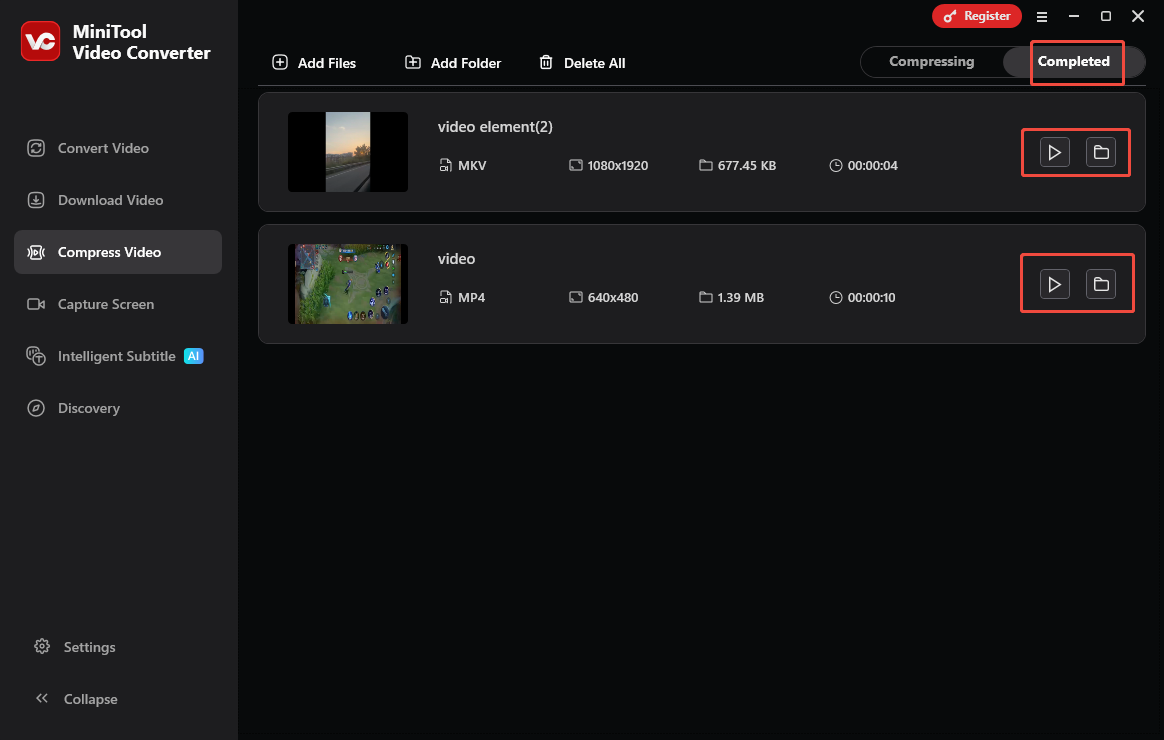
Step 5. Check the compressed videos.
When the file compression process ends, this file compressor will automatically switch to the Completed section. There, click on the Play icon to view the output videos. If you want to locate these videos, click on the Folder icon.
MiniTool Video Converter is more than a video compressor for GitHub. It also functions as a free screen recorder.
Method 2. Use MiniTool MovieMaker (Offline)
Another versatile application that empowers you to compress GitHub videos is MiniTool MovieMaker.
What Is MiniTool MovieMaker
MiniTool MovieMaker allows you to compress GitHub videos by customizing the resolution, frame rate, and bitrate. Also, it enables you to make your videos smaller by trimming or speeding up. In addition, MiniTool MovieMaker empowers you to convert your videos to a more compressed format, like MP4.
How to Compress GitHub Videos with MiniTool MovieMaker
Below are the detailed steps to compress video for GitHub using MiniTool MovieMaker.
Step 1. Download and install MiniTool MovieMaker.
MiniTool MovieMakerClick to Download100%Clean & Safe
Click on the download button above to download and install MiniTool MovieMaker on your PC.
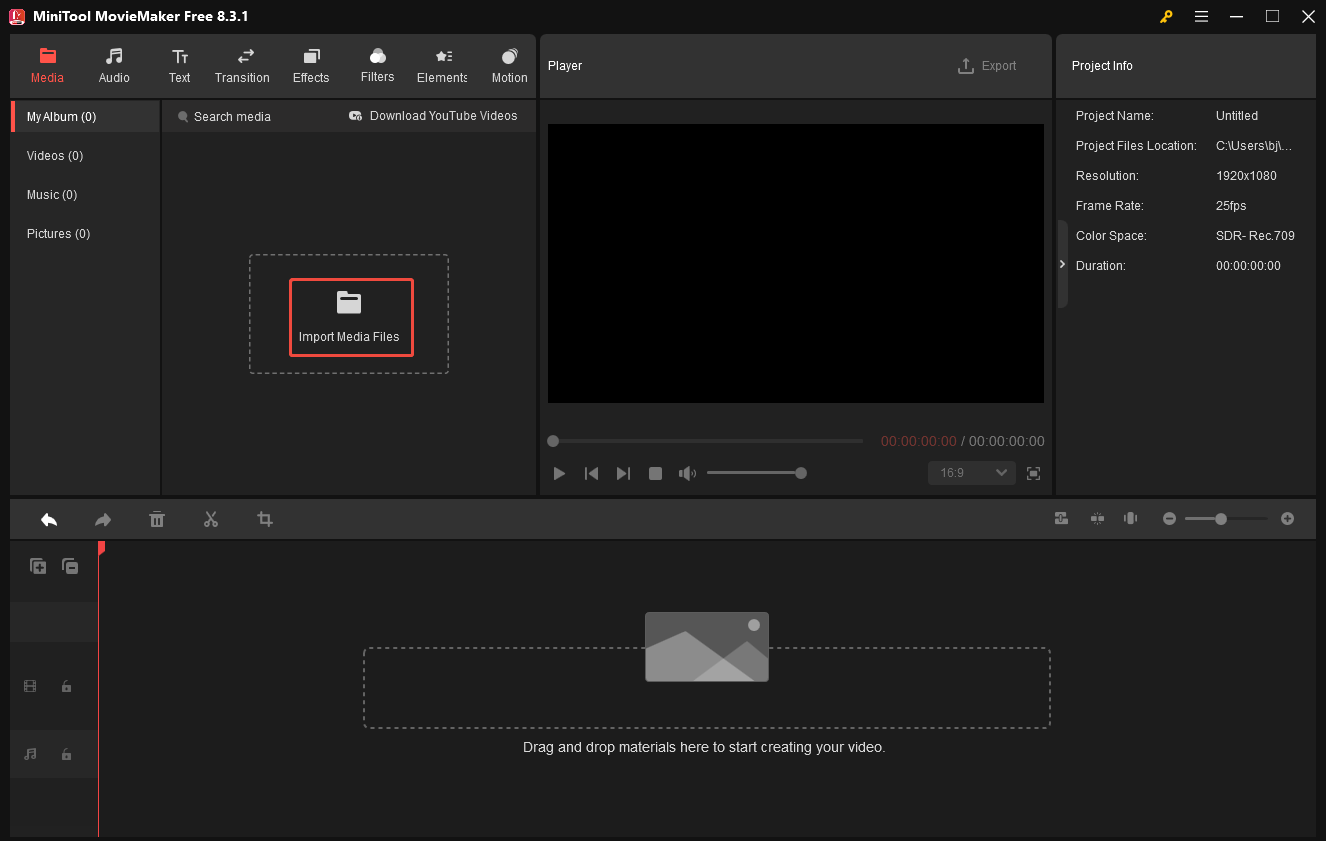
Step 2. Import a GitHub video.
After launching MiniTool MovieMaker, close the promotion window. Then, click on the Import Media Files area to import the GitHub video that you want to compress. Next, drag the video file onto the timeline below. If necessary, you can also trim the video to reduce its file size.
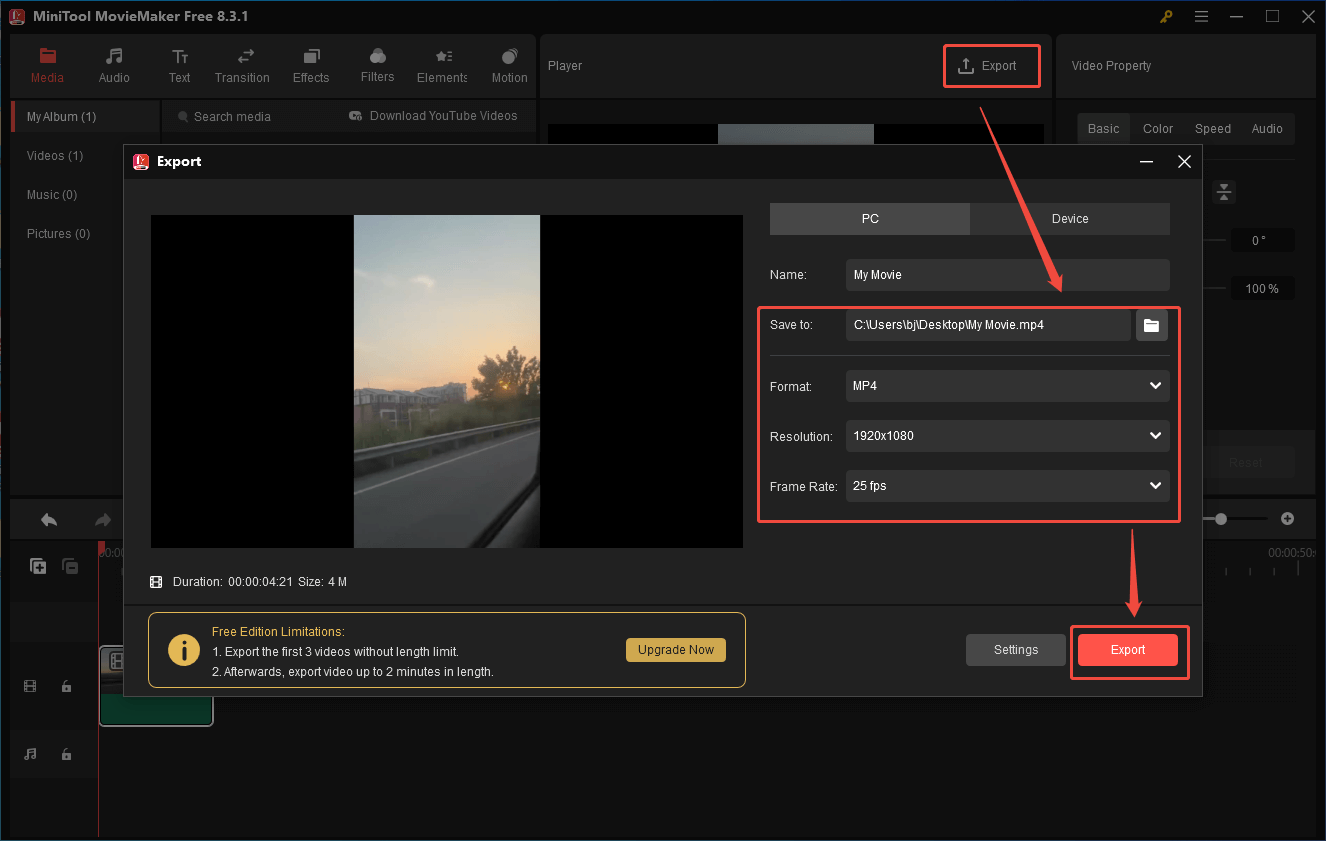
Step 3. Configure the output settings.
Click on the Export icon at the upper left of the Player section to enter the Export window. There, you are free to choose a saving path for the compressed video. Meanwhile, you can choose the output format, frame rate, and resolution as you want. Finally, click on the bottom-right Export button to save the compressed video.
Step 4. Check the output video.
When the video saving process completes, click on the Find Target button in the pop-up window to locate and view the compressed video.
With the above-detailed steps, it will never be difficult for you to compress video for GitHub easily and quickly.
Method 3. Use Online File Compressor (Online)
Want to compress video for GitHub without downloading extra software? If so, never miss Online File Compressor. With Online File Compressor, you can upload your GitHub videos from multiple sources, including your device, URL, Google Drive, OneDrive, and Dropbox. Below is a step-by-step tutorial on how to compress GitHub videos with Online File Compressor.
Step 1. Go to the interface of Online File Compressor.
Visit https://www.compress2go.com/compress-video.
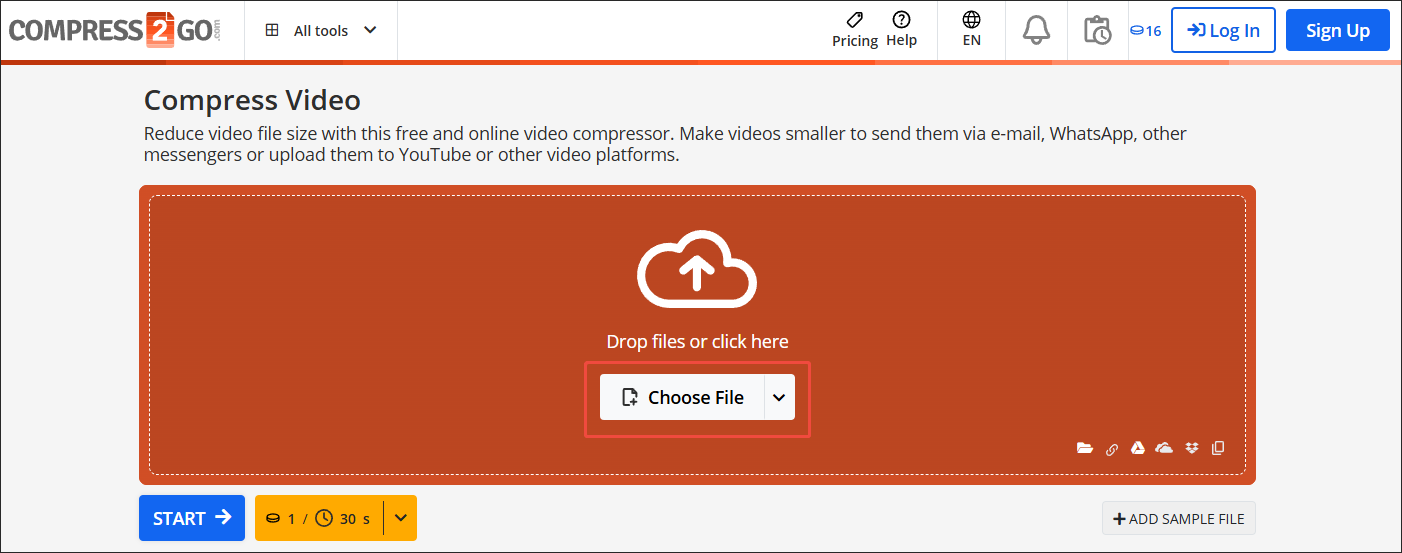
Step 2. Upload your GitHub videos.
Click on the Choose File button to import the GitHub videos that you want to compress.
Step 3. Start compression.
Begin the compression process by clicking on the START button.

Step 4. Check the output videos.
When the file compression process ends, download and check the compressed videos.
Undoubtedly, Online File Compressor is a great compression tool. However, it contains some dispensable advertisements.
In Summary
How to break the 10MB GitHub size limit? You can compress video for GitHub with MiniTool Video Converter, MiniTool MovieMaker, or Online File Compressor. If you want a clean user interface or want more advanced compression settings, try MiniTool Video Converter.
About The Author

Position: Columnist
With over 6 years of experience as a tech writer, Eien specializes in creating clear, simple guides for video conversion, transcription, screen recording, etc. He stays connected with the tech community and its readers to understand the real-world problems users face. By combining their feedback with his own hands-on testing, Eien always provides proven solutions to complex software problems in time.
User Comments :