Zoom supports transcribing meeting audio to text. This article will guide you through how to get the Zoom transcription. It also explains how to use third-party tools, such as MiniTool Video Converter, Otter.ai, and Clipchamp, to do it.
What Is Zoom?
Zoom is a video conferencing platform. It supports features such as screen sharing, chat, webinars, cloud recording, and virtual backgrounds. Furthermore, it allows up to 100 users to participate in meetings. Zoom has desktop and mobile apps, as well as a web version. This allows users to use Zoom on various devices, such as Windows, macOS, iOS, and Android.
![How to Compress Zoom Recording Effectively [Windows/Online]](https://images.minitool.com/videoconvert.minitool.com/images/uploads/2025/08/how-to-compress-zoom-recording-thumbnail.jpg)
Why You Should Transcribe Zoom Audio
In my opinion, there are two main reasons for converting Zoom audio to text.
1. Generate Meeting Minutes
Transcribing Zoom meetings as text files makes organizing information and creating meeting minutes easy. AI-powered tools can help you grasp the information, especially when the speaker is speaking quickly.
2. Share Information with Colleagues
If teammates are unable to attend Zoom live meetings, the transcripts of Zoom audio allow them to quickly grasp the key points of the meeting in minutes without having to watch the full recording.
How to Transcribe Zoom Audio to Text
Want to get Zoom transcription easily? Try these three quick methods: activate Zoom’s auto-transcription feature, drop the recording into an audio-to-text converter, or let a smart video editor automatically generate subtitles for you.
Method 1: Get a Transcription through Zoom Directly
Zoom has a built-in transcription feature. It can automatically convert spoken words in meetings into text. This feature can be used to generate captions in real time for meeting participants or to transcribe post-meetings to text.
Who Can Use the Zoom Transcription Feature
First, you should know that Zoom’s built-in transcription feature is only available to paid users. That means you can use this feature only if you purchase Zoom’s Pro, Business, Education, or Enterprise plan. What’s more, only the meeting host can use this feature to transcribe Zoom audio to text. Participants can request live captions with the host’s permission.
How to Transcribe a Live Zoom Meeting to Text
If you have a paid Zoom account and you are the meeting host, you can use Zoom’s automatic transcription to add live captions to your meetings. The generated live captions will appear below the video.
Now, follow these steps to add real-time captions to your Zoom meetings:
Step 1: Log in to Your Zoom Account
Go to Zoom’s web portal (https://zoom.us/). Then, click the Sign in option at the upper-right corner and log in to your account.
Step 2: Go to Settings
Click on your profile in the top right corner, then select Settings.
Step 3: Turn on Real-Time Captions
Go to the Meeting tab and turn on the In Meeting option.
Step 4: Enable Captions in Meeting
Now, start a meeting. Then, click the Live Transcript or Show Captions button in the toolbar to display live captions for the participants.
Turning on live captions turns spoken words into on-screen text so everyone can follow along more easily.
How to Transcribe Post-Meetings to Text
Zoom’s audio transcription feature automatically transcribes your recorded meetings into text. The transcribed text will be saved as a VTT file in your recording session list. Please note that this feature only applies to meetings that you record and upload to the cloud. It does not work with other video or audio files on your device.
Zoom’s cloud recording transcription feature supports multiple languages, including English, Spanish, French, German, Italian, Russian, and more. You can enable this feature for cloud recordings in your account settings.
Now, you can follow the steps below to get your post-meeting transcripts:
Step 1: Turn on Cloud Recordings
Sign in to the Zoom web portal. Then, expand the My Account option and click on Settings in your profile page. Then, click the Recording tab, check if the Cloud recording option is enabled. If not, switch it on.
Step 2: Enable Automated Zoom Transcription
Go to Advanced cloud recording settings. Then, check on the Create audio transcript option and click Save to confirm your changes.
Step 3: Record the Zoom Meeting
During the meeting, click the Record button in the bottom toolbar and choose Record to the Cloud. Once the meeting is complete, click the End Meeting button.
Step 4: Download the Zoom Recording Transcript
Once the recording is complete, Zoom will send the host a link to the recording file and a link to the meeting transcript. Then, click the links to navigate to the files and download them.
As an online conferencing platform, Zoom offers a practical meeting transcription feature. However, this feature is unavailable to non-paying users. Alternatively, you can use a free audio-to-text converter, such as MiniTool Video Converter.
Method 2: Use an Audio-to-Text Tool
Here are 2 free tools to transcribe audio to text. Both can quickly and accurately transcribe Zoom recordings.
Option 1: MiniTool Video Converter
MiniTool Video Converter is a multi-functional software that supports speech-to-text conversion. You can record a Zoom meeting and save it to your computer. Then, use this software to transcribe the recorded video or audio.
MiniTool Video Converter supports various video and audio formats, including MKV, MP4, MOV, AVI, MP3, WAV, M4A, OGG, etc. Furthermore, after transcription, you can edit the text and export it as an SRT or TXT file.
Here is how to use MiniTool Video Converter to transcribe Zoom recording to text free:
Step 1: Download and Install MiniTool Video Converter
Click the download button below to download the installation package of MiniTool Video Converter. Then, follow the on-screen instructions to install this free video/audio-to-text converter.
MiniTool Video ConverterClick to Download100%Clean & Safe
Step 2: Select an AI Model
Launch this application and switch to the Intelligent Subtitle tab. Then, click Choose Video and select an AI Model. Click OK to download it.

Step 3: Upload Zoom Recording
In the pop-up window, select the recorded Zoom meeting and click Open.
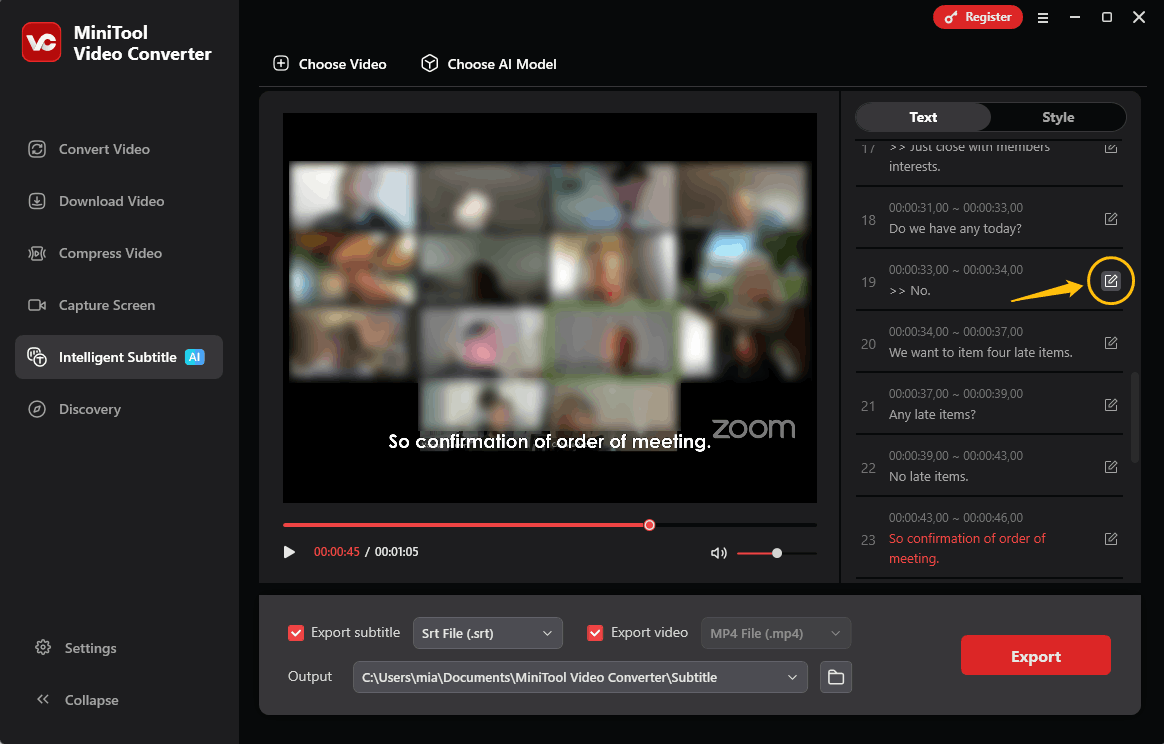
Step 4: Edit the Zoom Transcription
After a few seconds, you will see the generated text appear in the panel on the right. Here, click the edit icon next to each sentence to modify the text.
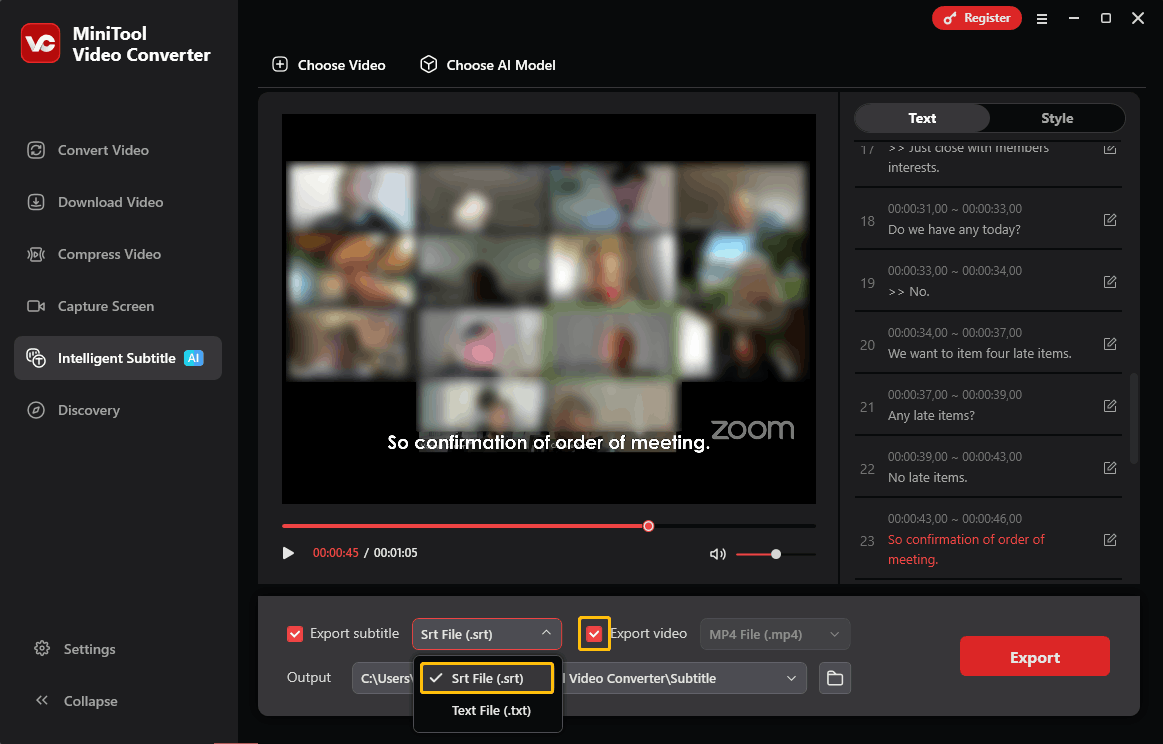
Step 5: Choose Exported Format
Expand the Export subtitle option and choose whether to save the text in an SRT or TXT file. If you import a video, MiniTool Video Converter will automatically select the Export video option. Selecting this option allows you to get the Zoom meeting video with subtitles.
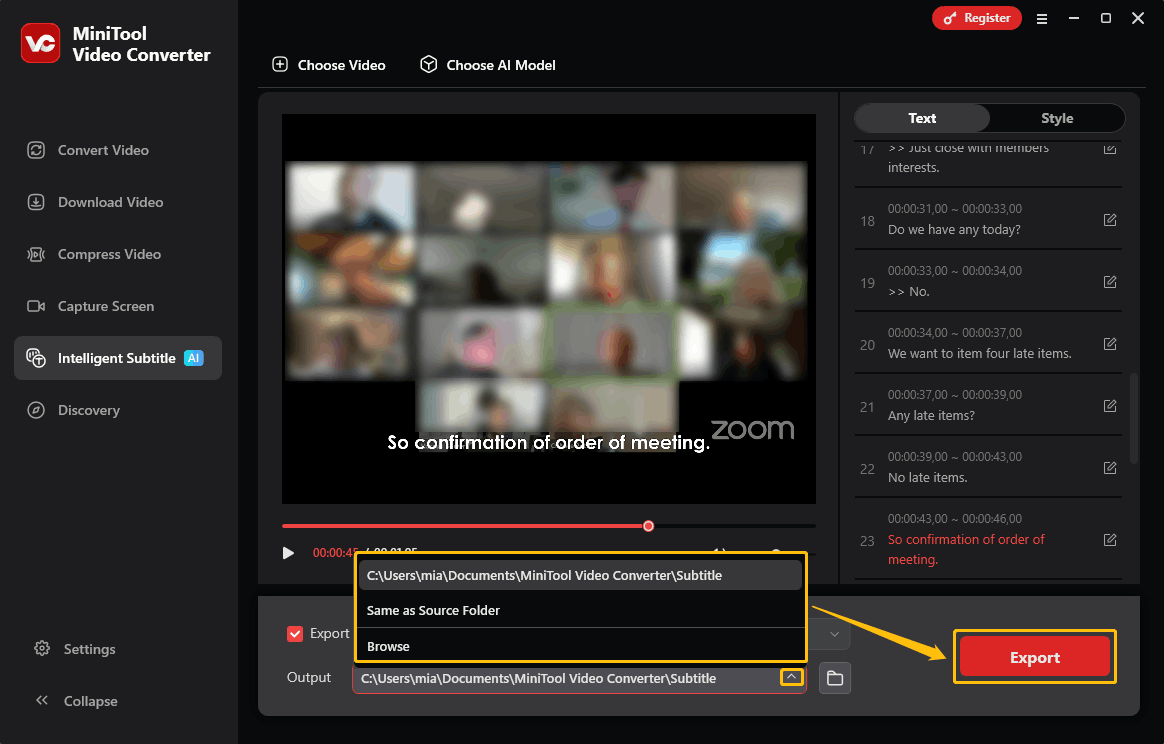
Step 6: Select the Save Location
Expand the bottom Output option to pick where to save the text file.
Step 7: Export the Transcribed Text
Click Export to locate the Zoom transcripts.
MiniTool Video Converter runs very smoothly. The transcribed text is also very accurate. If you import a video, this software can also generate subtitles to display at the bottom of the video. You can also customize the subtitle’s font, color, background color, and more.
In addition, MiniTool Video Converter supports conversion between various video and audio formats. If your video file is too large due to various factors, you can also use it to compress the video file size.

Option 2: Otter.ai
Otter.ai is an online tool specifically designed for transcription. It supports real-time transcription of meetings, speeches, interviews, and more. It can also convert video or audio files from your device into text. Otter.ai can recognize different speakers, making it ideal for capturing meeting content.
You can record your Zoom meeting and then upload the file to Otter.ai, which supports a wide range of video and audio formats, including MP4, AVI, MOV, WMV, MPG, MP3, AAC, WAV, M4A, and WMA, to create an instant transcript.
Step 1. Go to Otter.ai
Visit the Otter.ai website (https://otter.ai/). Then, click Start for free and sign in to your account.
Step 2. Import Your Zoom Recording
Go to the home page of Otter.ai. Then, click on the Import button in the top-right corner. Next, in the Transcribe audio and video window, click the Browse files button to import your Zoom recording file.
Step 3. Check the Transcripts
Otter.ai needs some time to transcribe your video or audio. Once the transcription is complete, click Go to transcript to view the generated meeting transcript.

Step 4. Edit the Transcript
In the new page, choose the Transcript tab. Then, you can click on the Edit Transcript option to modify the text. After that, click Done to save your changes.
Step 5. Export the Transcript
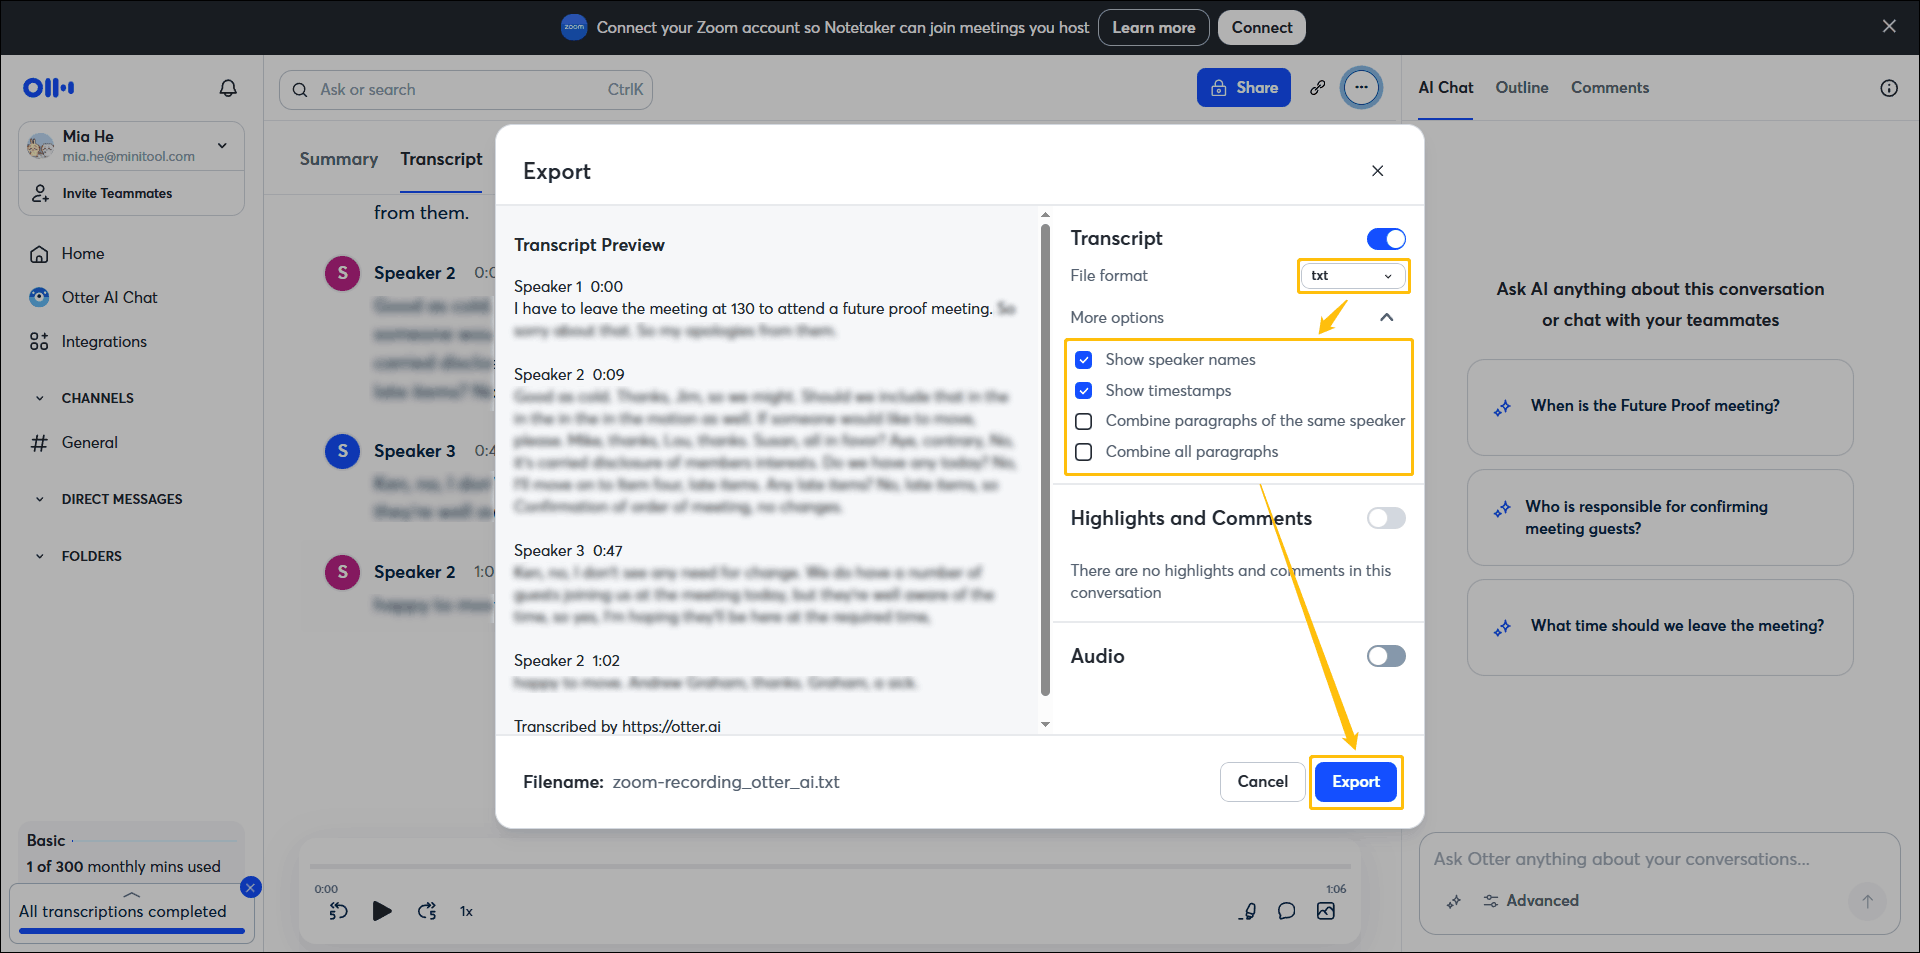
Click the more icon in the upper-right corner and select the Export option.

In the Export window, expand the File format option and select a text format. Then, choose whether to show speaker names, timestamps, and other options. Finally, click the Export button to save the transcript.
Otter.ai can be used without downloading desktop software and is relatively easy to operate. Follow these straightforward steps, and you can transcribe Zoom audio to text effortlessly. However, the transcription speed is a bit slow.
Method 3: Use a Video Editor with an Intelligent Subtitle Feature
Some video editing software includes AI-powered tools to help users generate video subtitles. Some even allow you to export the generated subtitles as SRT or other text formats. Therefore, you can also use this type of editing software to generate transcripts for Zoom meetings.
Clipchamp is a video editor that has the auto caption feature. If your computer is running Windows 11, you can find Clipchamp directly in the Start menu. It’s very convenient. Windows 10 users can grab the same free video editor on the Microsoft Store.
Now, you can follow these steps to transcribe Zoom recording to text free with Clipchamp:
Step 1: Upload Your Zoom Recording
Launch Clipchamp on your computer and click the Create a new video option. Then, click the Import media button in the upper-left corner, select the Zoom recording you want to transcribe, and click Open.
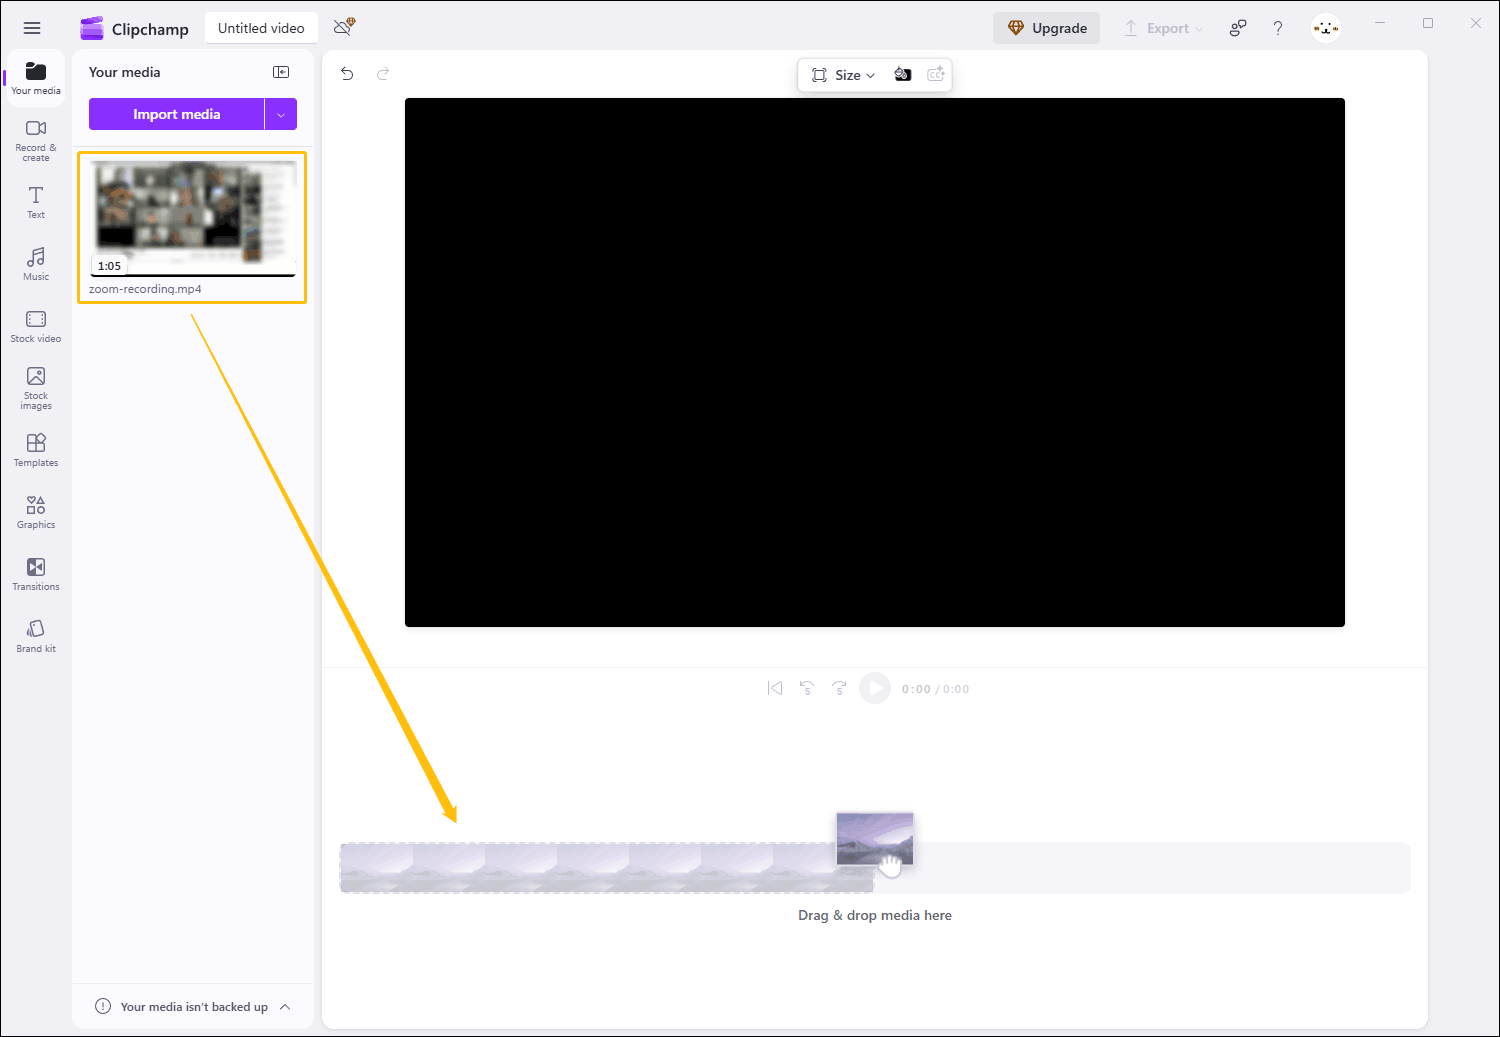
Step 2: Add the Zoom Recording to the Timeline
Add your video to the timeline by clicking the plus (Add to timeline) icon or simply dragging and dropping it.
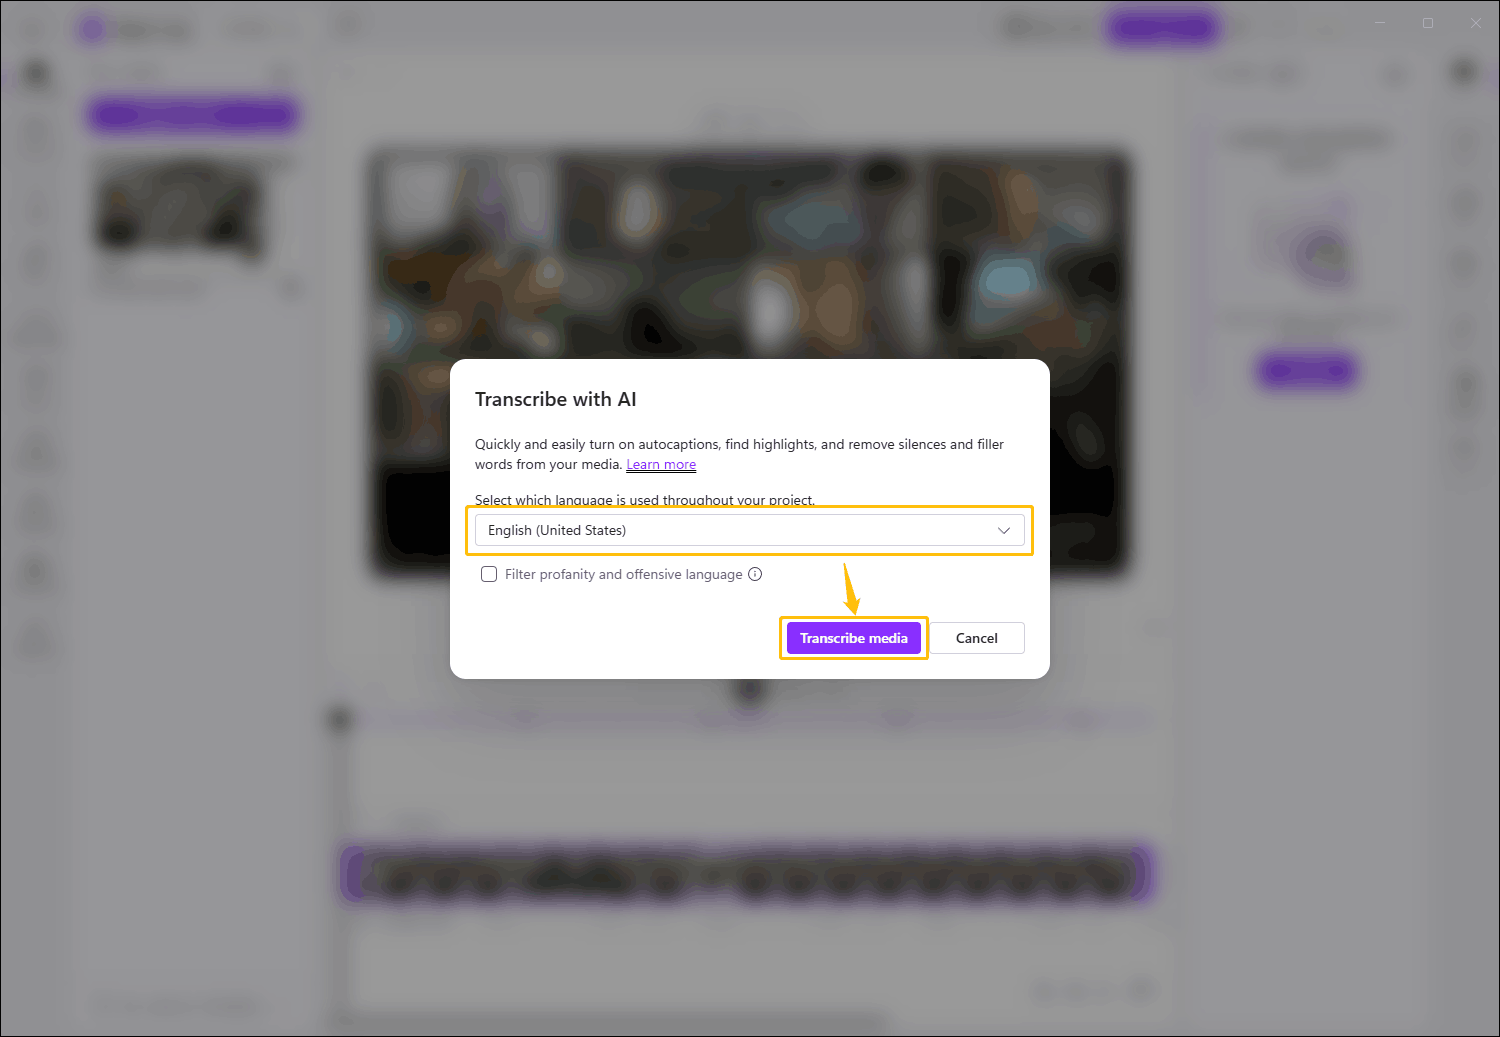
Step 3: Start Transcription
Click the Captions option at the top-right corner and choose Try now. In the pop-up window, select the language used in this video/audio, and click on Transcribe media.
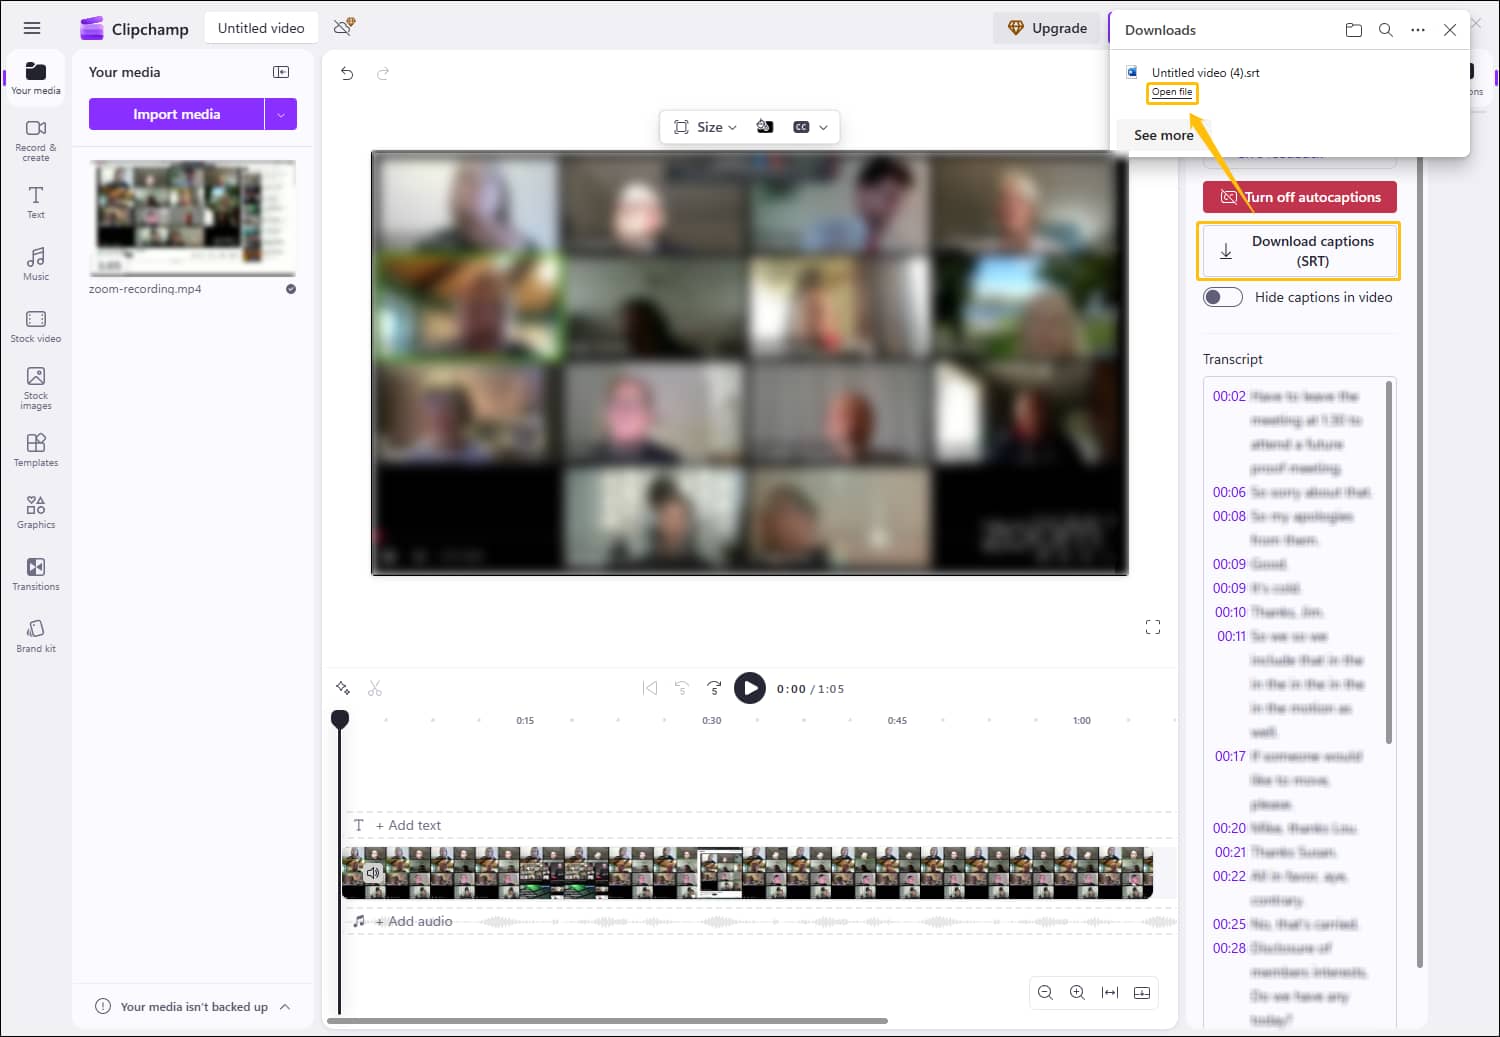
Step 4: Download the Transcript
Once the transcript appears, you can correct any errors in the right-hand panel, and then click Download Subtitle (SRT) to save the file to your computer.
Step 5: Open the SRT File
Click the Open file option, and the transcript of the Zoom recording will open in a Word document.
Clipchamp is a completely free application. It turns videos or audio into accurate SRT captions. However, its transcription speed is rather slow. This may be due to factors such as the high resolution of the videos being used. For faster Zoom audio-to-text conversion, MiniTool Video Converter is a better choice.
To Wrap Up
In this article, I've listed three methods for you to get Zoom transcriptions. For paid Zoom users, try Zoom's built-in transcription feature. For other users, the best way is to use a free video/audio-to-text converter. Of all the options I tested, MiniTool Video Converter stood out due to its extremely fast transcription speeds and accurate results.
If you have encountered any problems when using MiniTool Video Converter, please contact us via support@minitool.com, and we’ll get back to you fast.
User Comments :