Sometimes, we might get a Zoom recording of a large file size. To facilitate sharing with others or uploading, it is necessary to reduce the file size. You can do this by compressing the file. How to compress Zoom recording? MiniTool Video Converter and Clide can help! This post will tell you how to use them to compress a Zoom recording.
How to Compress Zoom Recording on Windows
How to send a Zoom recording that is too large? You can use MiniTool Video Converter’s video compressor to reduce the file size of your Zoom recording on Windows. It supports resizing compressed videos to 100%-10% of the original. In addition, MiniTool Video Converter supports batch compression. It’s completely free, without any duration or quantity restrictions.
How to compress a Zoom recording? Next, I will show you how to compress videos with MiniTool Video Converter. Here are the steps:
Step 1. Download and Install MiniTool Video Converter
Download MiniTool Video Converter by clicking the download button below. Then, install it on your desktop.
MiniTool Video ConverterClick to Download100%Clean & Safe
Step 2. Launch and Import Your Video File
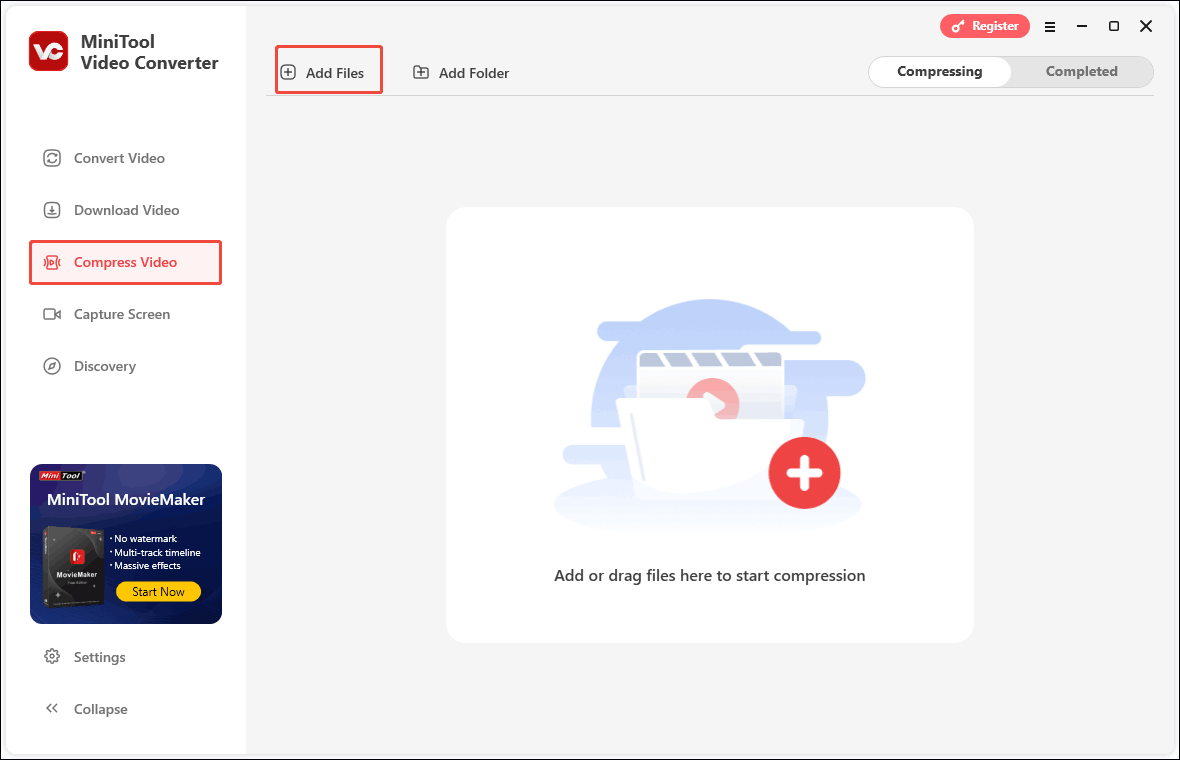
Launch MiniTool Video Converter and click the Compress Video tab on the left column. Click the Add Files option. In the Import Media window, you can select the video you want to compress and click the Open button.
Step 3. Adjust Compression Settings for Compressed Video
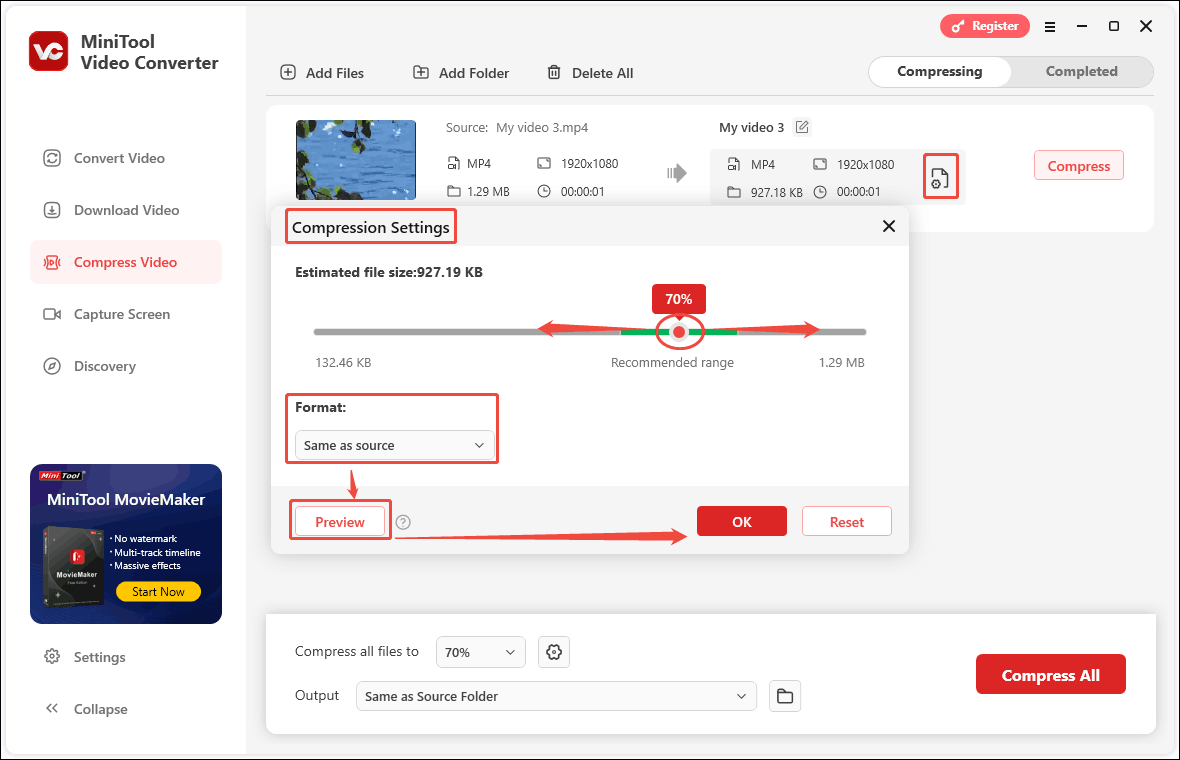
Next, you can set the compression level and output format in the Compression Settings window:
- Adjust compression size: Click the gear button on the compression task and the Compression Settings window will appear. Drag the red dot to adjust the compression level based on your needs.
- Adjust compression format: Expand the Format option and select the output format from the drop-down menu. Then, click the Preview button to check the compressed video quality.
After setting these, don’t forget to click OK to save your changes.
Step 4. Compress Your Video
Click on the Compress button to start compression.
Step 5. View and Locate Your Video
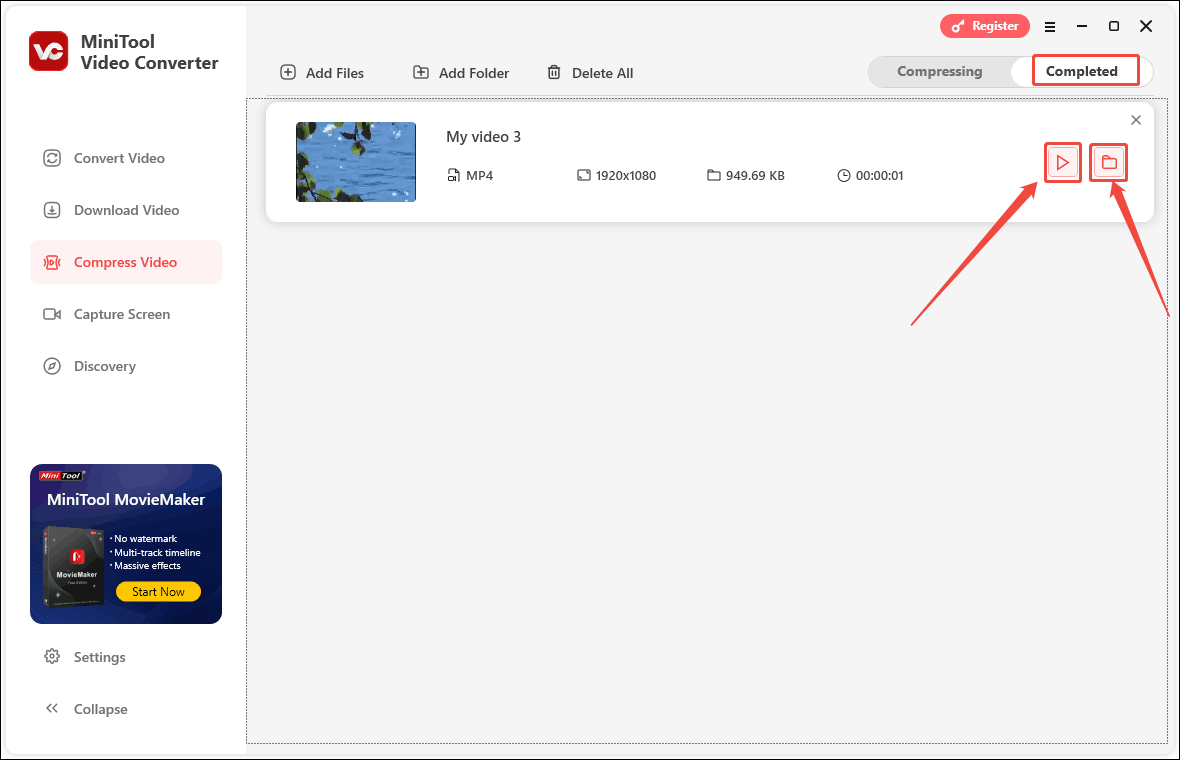
Then, this video compressor will switch to the Completed tab. Click on the play icon to view the compressed video. You can also click on the folder icon to locate its storage location.
What’s more, since only the host of the meeting recording can use its built-in recording feature, you need to ask permission from the host if you are just a meeting participant. How to record a Zoom meeting if you are a participant? The best way is to use the forth-party screen recorder without watermarks and time limits. MiniTool Video Converter is an excellent video conference recorder that can help you record Zoom meetings.
MiniTool MovieMakerClick to Download100%Clean & Safe

How to Compress Zoom Recording Online
You can also try to use an online tool to compress a Zoom recording if you have a stable Internet connection. Clideo is an all-in-one online video tool that enables you to compress a video, edit a video, make a slideshow, etc. As a useful video compressor, it supports a wide range of formats and you can use it to compress a Zoom recording. But it will add a watermark to your work if you are a free user. Below is a guide on how to compress Zoom recording with Clideo.
Step 1. Go to the website of Clideo and click the Compress option.
Step 2. Click the Choose file button and you can choose to upload your Zoom recording from your computer, Google Drive. Google Photos, or Dropbox.
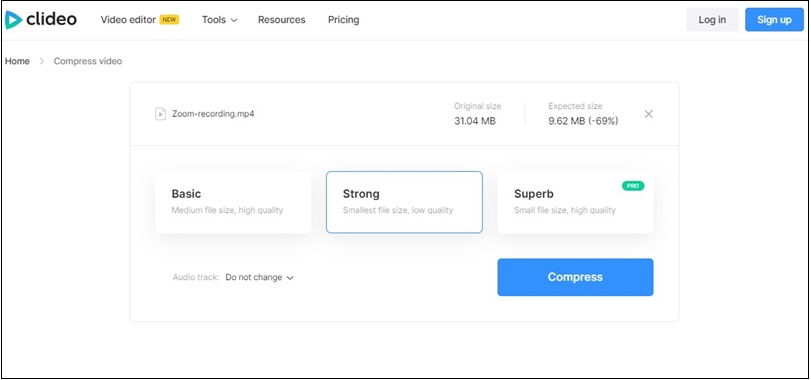
Step 3. After the recording is uploaded, you can choose the compression level. You can select the Strong option and you can preview how big the compressed video will be.
Step 4. Click the Compress button to start compression and click Download to save the compressed Zoom recording.

Conclusion
To save your storage space, share your Zoom recording with others, or upload easily, you’d better compress it. How to compress Zoom recording? The above has offered you 2 ways. If you want to compress a Zoom recording offline, MiniTool Video Converter is the best choice. If you have a stable Internet connection, you can use Clideo.
User Comments :