This article will explain why you should transcribe meeting audio to text. It also presents four ways to obtain audio transcripts, including using a paid online tool: Notta, and three free transcription tools: MiniTool Video Converter, Google Docs Voice Typing, and Windows Voice Typing.
How to Record a Meeting Audio?
For online meetings, first check if your meeting software has a built-in recording tool. Popular online meeting software such as Zoom, Microsoft Teams, Google Meet, and Cisco Webex all support audio recording.
For in-person meetings, you can use mobile apps (such as Fireflies or MeetGeek) or a dedicated voice recorder to record the meeting audio. Before recording, place the device in the center of the meeting room to ensure a clear recording of all speakers.
Why You Need to Transcribe Meeting Audio to Text?
Here are two main reasons for transcribing conference audio into text.
1. Enhanced Accessibility
Transcription makes the meeting content accessible to a wider audience, including people who have hearing impairments. Furthermore, the transcript that is created from the meeting audio can be translated into other languages, so colleagues who speak different languages can also understand what was discussed during the meeting.
2. Generating Meeting Minutes
After transcribing the meeting audio into text, this text serves as an accurate written record. This text records all statements and their speakers. It helps those who missed the meeting understand the content and provides a clear record for everyone to review, avoiding omissions or confusion.
Which Transcription Method Should You Choose?
Transcription methods can be divided into manual transcription and AI transcription. Manual transcription is time-consuming. The transcriber needs to pause the audio/video frequently to keep up. Some unclear sentences require slow playback to be understood. Furthermore, the cost of manual transcription is relatively high.
With the rise of artificial intelligence (AI), many software and online tools can now automatically transcribe audio to text. The transcription results are also very accurate. Some tools even allow users to edit the transcribed text, further enhancing accuracy.
Therefore, I recommend using an AI transcription tool that can transcribe quickly and supports editing the transcribed text.
4 Ways to Transcribe Meeting Audio to Text (Free & Paid)
To obtain highly accurate transcribed text and a highly efficient transcription experience, using AI-driven transcription tools is the best choice! Next, I’ll show you 4 methods for transcribing meeting audios into text, including 1 paid method and 3 free methods. All of them utilize artificial intelligence. So, you can transcribe audio effortlessly.
Method 1: Use Notta (Paid)
Notta is an online platform specializing in AI-powered transcription services. It can convert video and audio in most formats into text. Notta supports multiple languages, including English, French, Spanish, Portuguese, Japanese, Korean, Russian, and more. Languages in the video or audio can be pre-selected before transcription to ensure more accurate transcription results. Furthermore, Notta allows you to export the transcribed text in various formats, including SRT and TXT.
Here is a guide on how to transcribe meeting audio to text with Notta:
Step 1: Log in to Notta
Visit this website directly: https://app.notta.ai/. Then, select an account and log in.
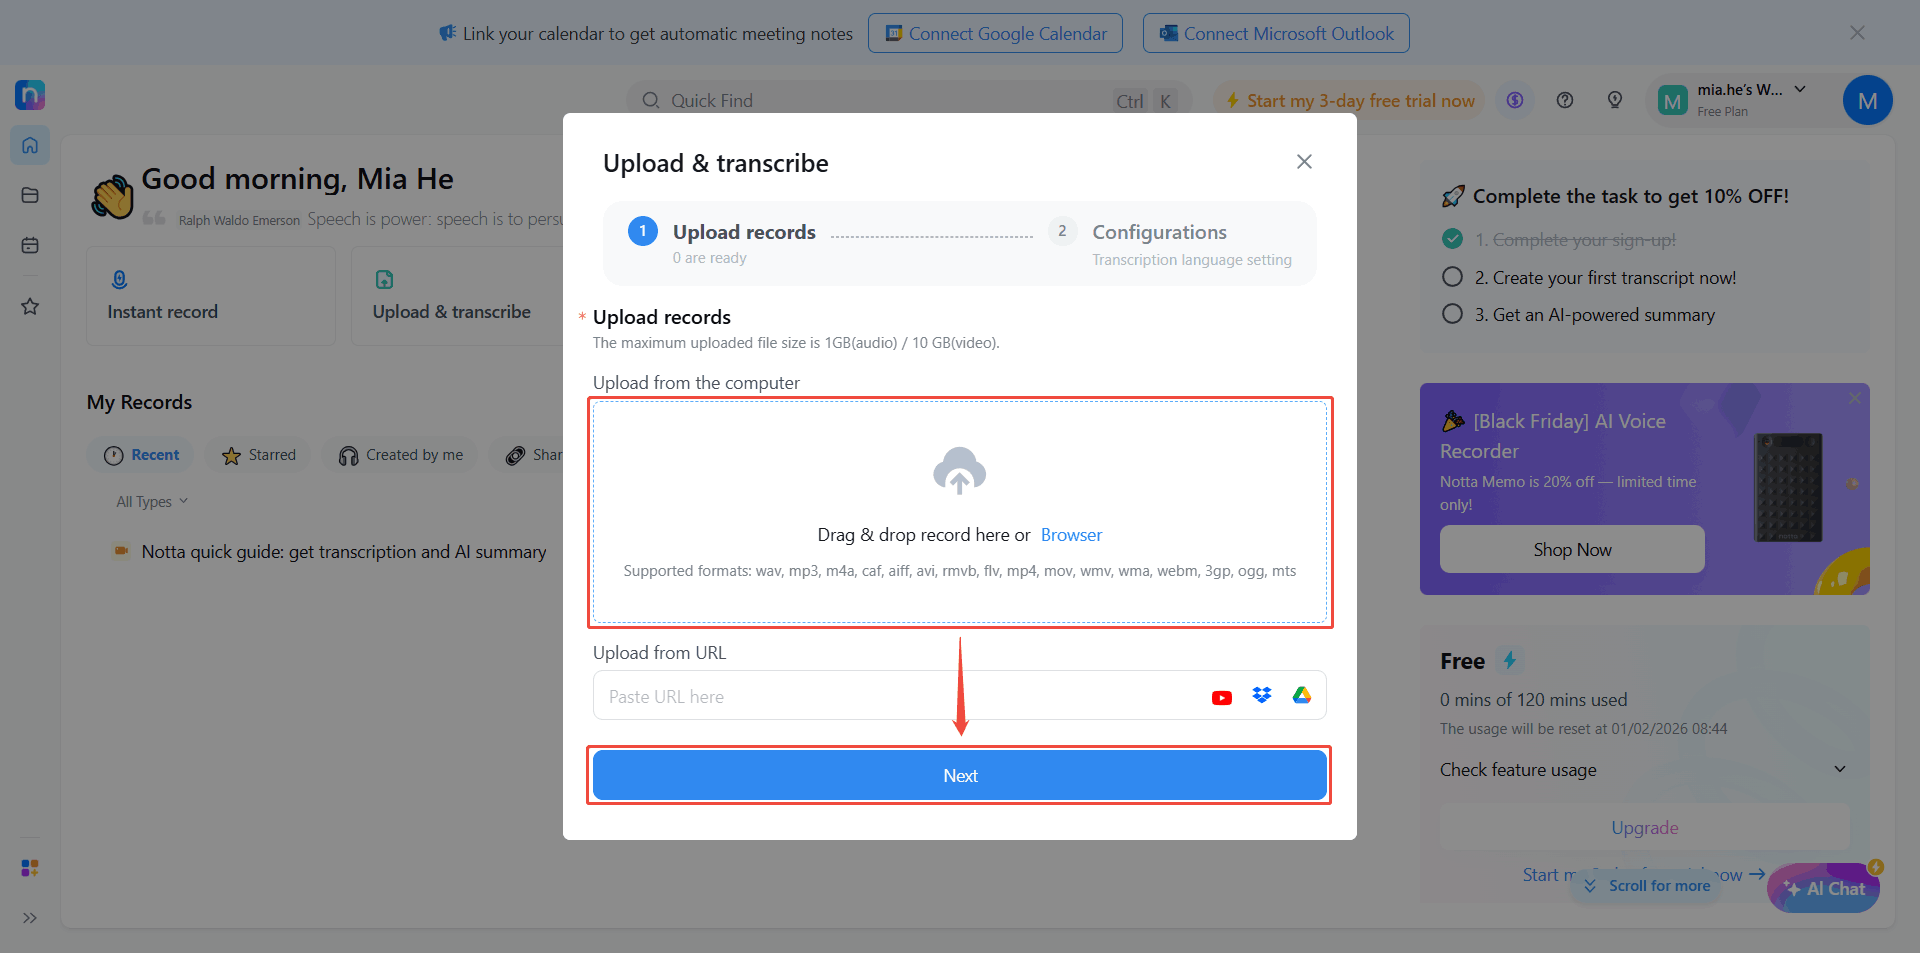
Step 2: Upload Your Audio
Once you see the dashboard, choose the Upload & transcribe option. Then, in the pop-up window, click anywhere within the dotted box to upload the meeting audio you need to transcribe. After uploading, click Next.
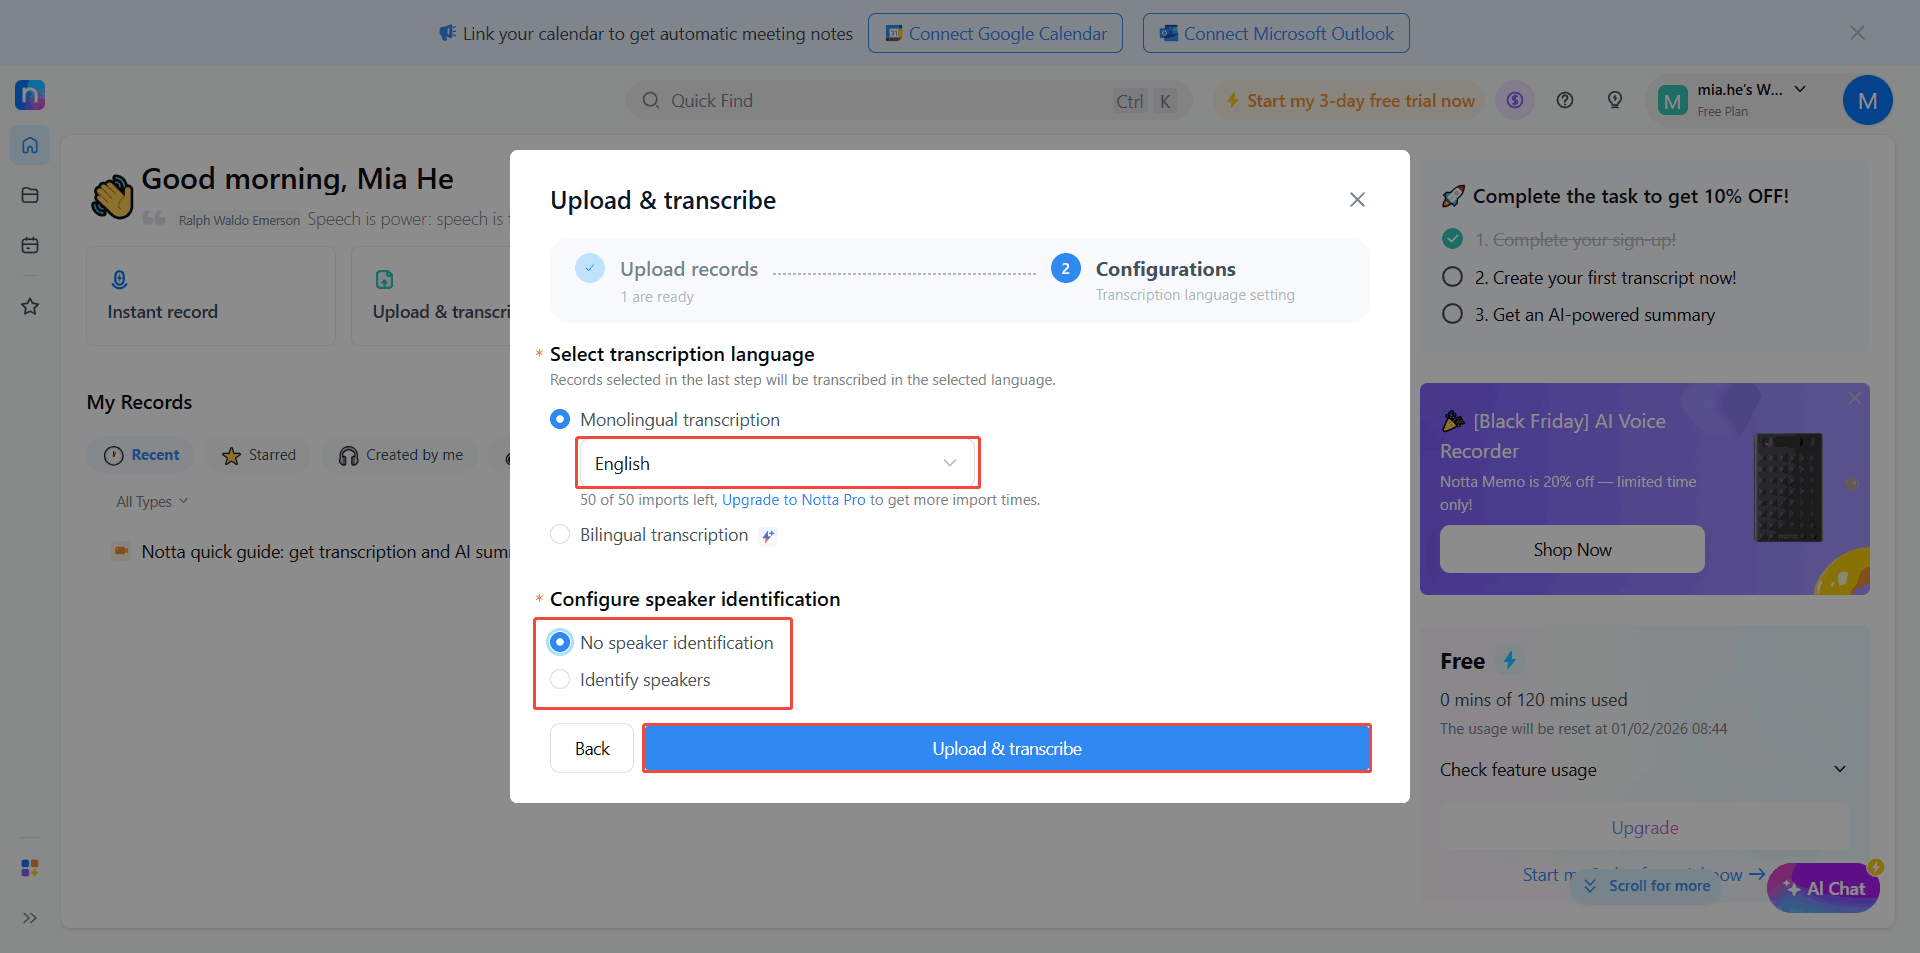
Step 3: Set Transcription Language
If the audio uses only one language, select Monolingual transcription and then choose the language in the audio. For audio that uses two different languages, choose Bilingual transcription, then select the two languages used in the audio.
Step 4: Set up Speaker Identification
In the Configure speaker identification section, choose whether to distinguish the speaker.
Step 5: Start Transcription
Click the Upload & transcribe button to start transcription.
Step 6: Open the Completed Transcription Task
Click the All Records option in the left column and select the completed transcription task.
Step 7: Download the Audio Transcript
Click the Download option above the player. Then, choose the output format in the pop-up window and download it.
Notta can convert meeting audio to text and summarize it in minutes. However, there is the audio upload size limitation. Additionally, you should upgrade to a paid plan if you want to export the text as an SRT file. Don’t want to purchase a Notta plan? Read on for three free and simple methods.
Method 2: Use MiniTool Video Converter (Free)
MiniTool Video Converter is a multi-functional software, including audio-to-text conversion. It supports importing various audio formats, including MP3, WAV, M4A, CAF, AIFF, WMA, and more. You can use this software to transcribe your meeting audio.
Even if your meeting audio has a large file size, MiniTool Video Converter can successfully and quickly convert it into text. This application also supports sentence-by-sentence editing of transcribed text. Furthermore, it allows you to export transcripts in SRT or TXT text format.
How to transcribe meeting audio to text? If you already have the meeting audio on your computer, you can follow these steps to convert it to text:
Step 1: Install MiniTool Video Converter on Your PC
First, you can download and install MiniTool Video Converter by clicking the download button below. Then, run this application on your computer.
MiniTool Video ConverterClick to Download100%Clean & Safe
Step 2: Choose an AI Model
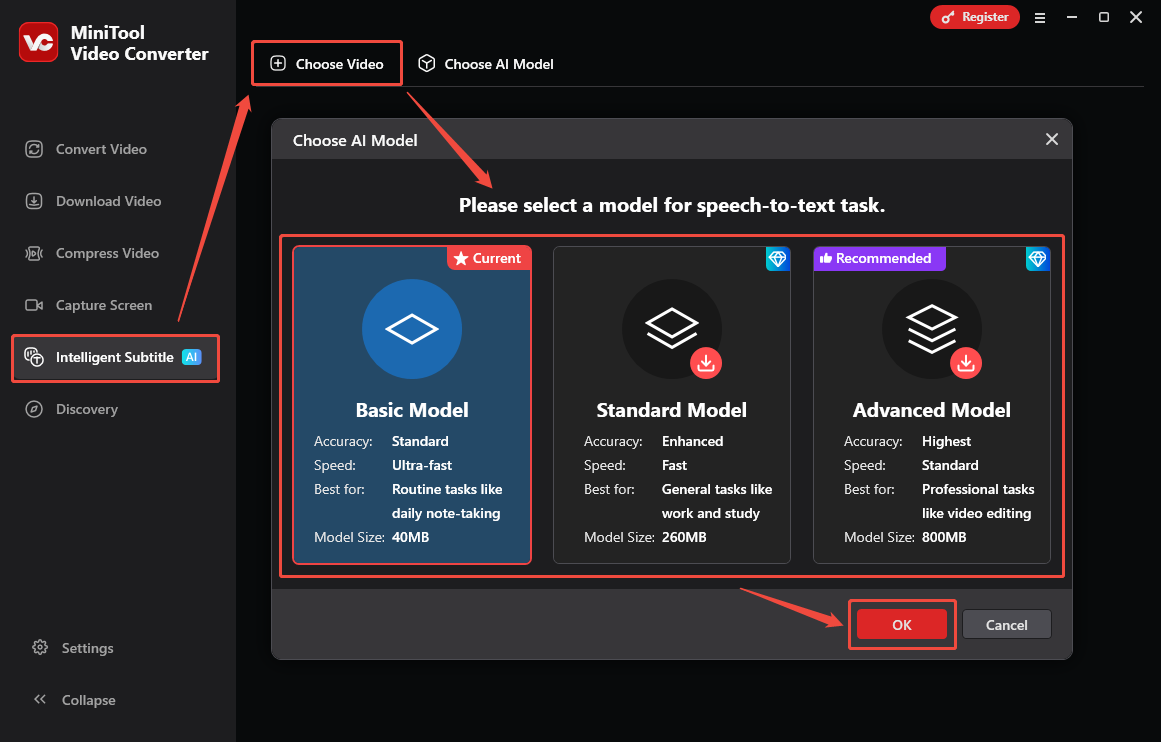
After launching MiniTool Video Converter, go to the Intelligent Subtitle tab. Then, click on the Choose Video option. In the Choose AI Model window, choose the AI model you want. For example, I select the Basic Model and click on OK to download it.
Step 3: Import Your Audio File
Once the AI model is downloaded, the Import Media window will open automatically. Then, you can select the meeting audio you saved and click OK to upload it to this application.
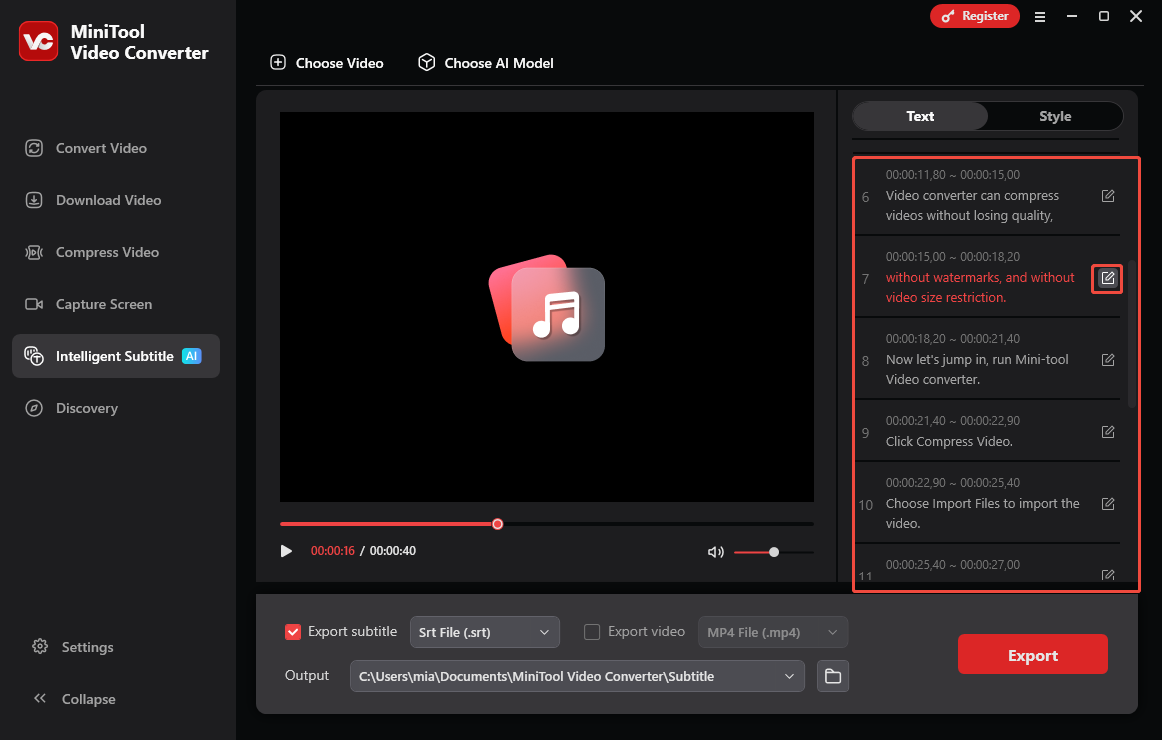
Step 4: Edit the Text If Necessary
After the file is uploaded, the audio will automatically begin transcription. Once transcription is completed, the transcript will appear in the right panel of the interface. You can then check the transcript. If there are any words or sentences that need to be modified, click the corresponding edit icon to make changes.
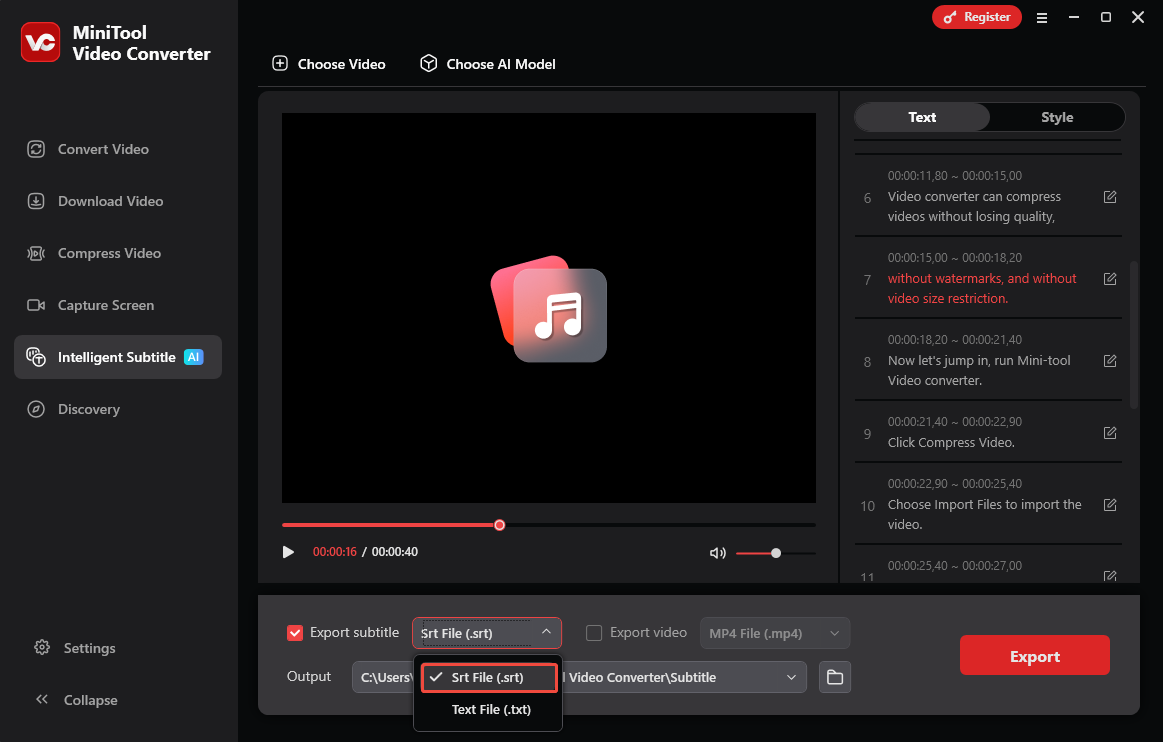
Step 5: Set the Output Format
Expand the Export subtitle drop-down menu at the bottom and pick either SRT or TXT format. Here, I select Srt File (.srt) as an example.
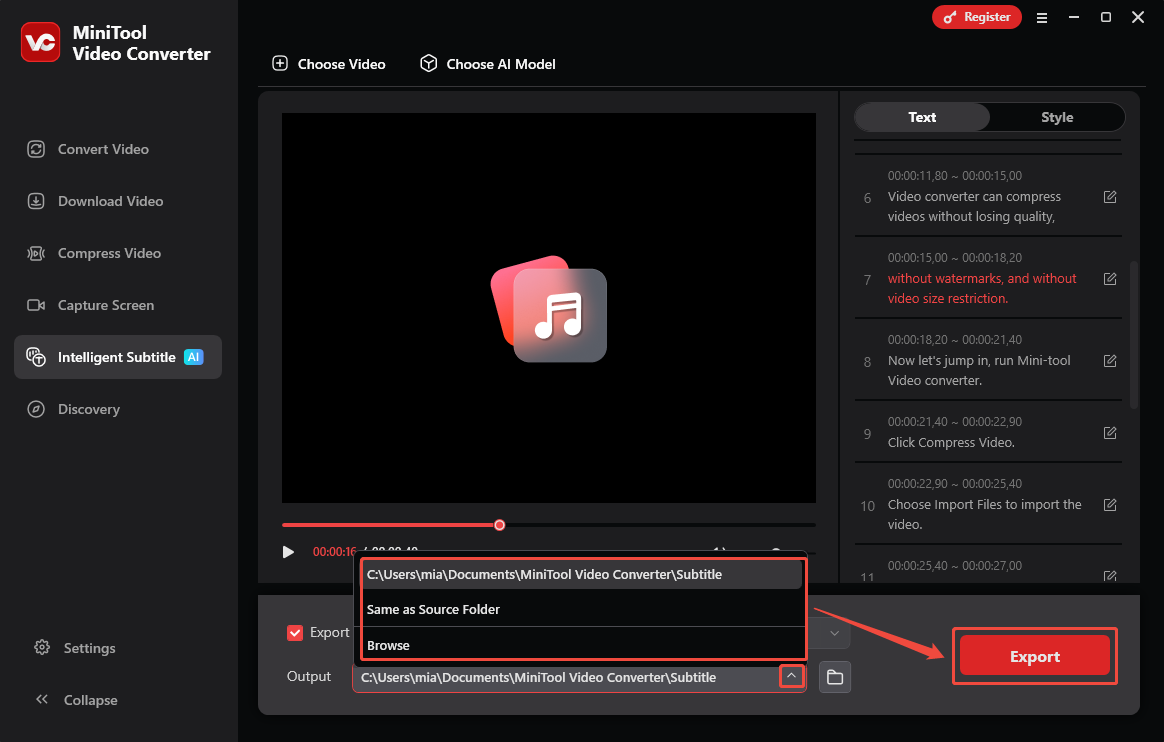
Step 6: Choose the Output Folder and Start Transcription
Unfold the bottom Output option to pick where to save the text file. Then, click on the Export button in the lower-right corner. When transcription finishes, the folder opens automatically so you can review the text file.
As a multi-functional desktop application, MiniTool Video Converter is stable and has rich features. In addition to converting audio to text, it also supports transcribing video to text, adding subtitles to videos, converting video files, modifying audio and video file parameters, compressing videos, and more.
MiniTool Video Converter is an excellent software for users who frequently process audio and video files! If you don’t want to download any software, try the following method.
Method 3: Use Google Docs Voice Typing (Free)
Google Docs is a web-based word processing tool. Its main functions are similar to Microsoft Word, allowing for text editing and formatting. Google Docs automatically saves your work and allows multiple people to edit the same document simultaneously. Furthermore, it offers voice input, recognizing your speech and converting it into text.
Google Docs supports multiple languages, including English, Spanish, French, German, Japanese, and Hindi. It intelligently recognizes and marks any uncertain words for quick correction. You can use Google Docs’ Voice Typing feature on your computer browser or mobile app. The following steps demonstrate how to use Google Docs to transcribe meeting audio to text in real-time, using Chrome as an example.
Step 1: Open a New Document
Navigate to https://docs.google.com/ and sign in with your Google account. Then, click Blank document.
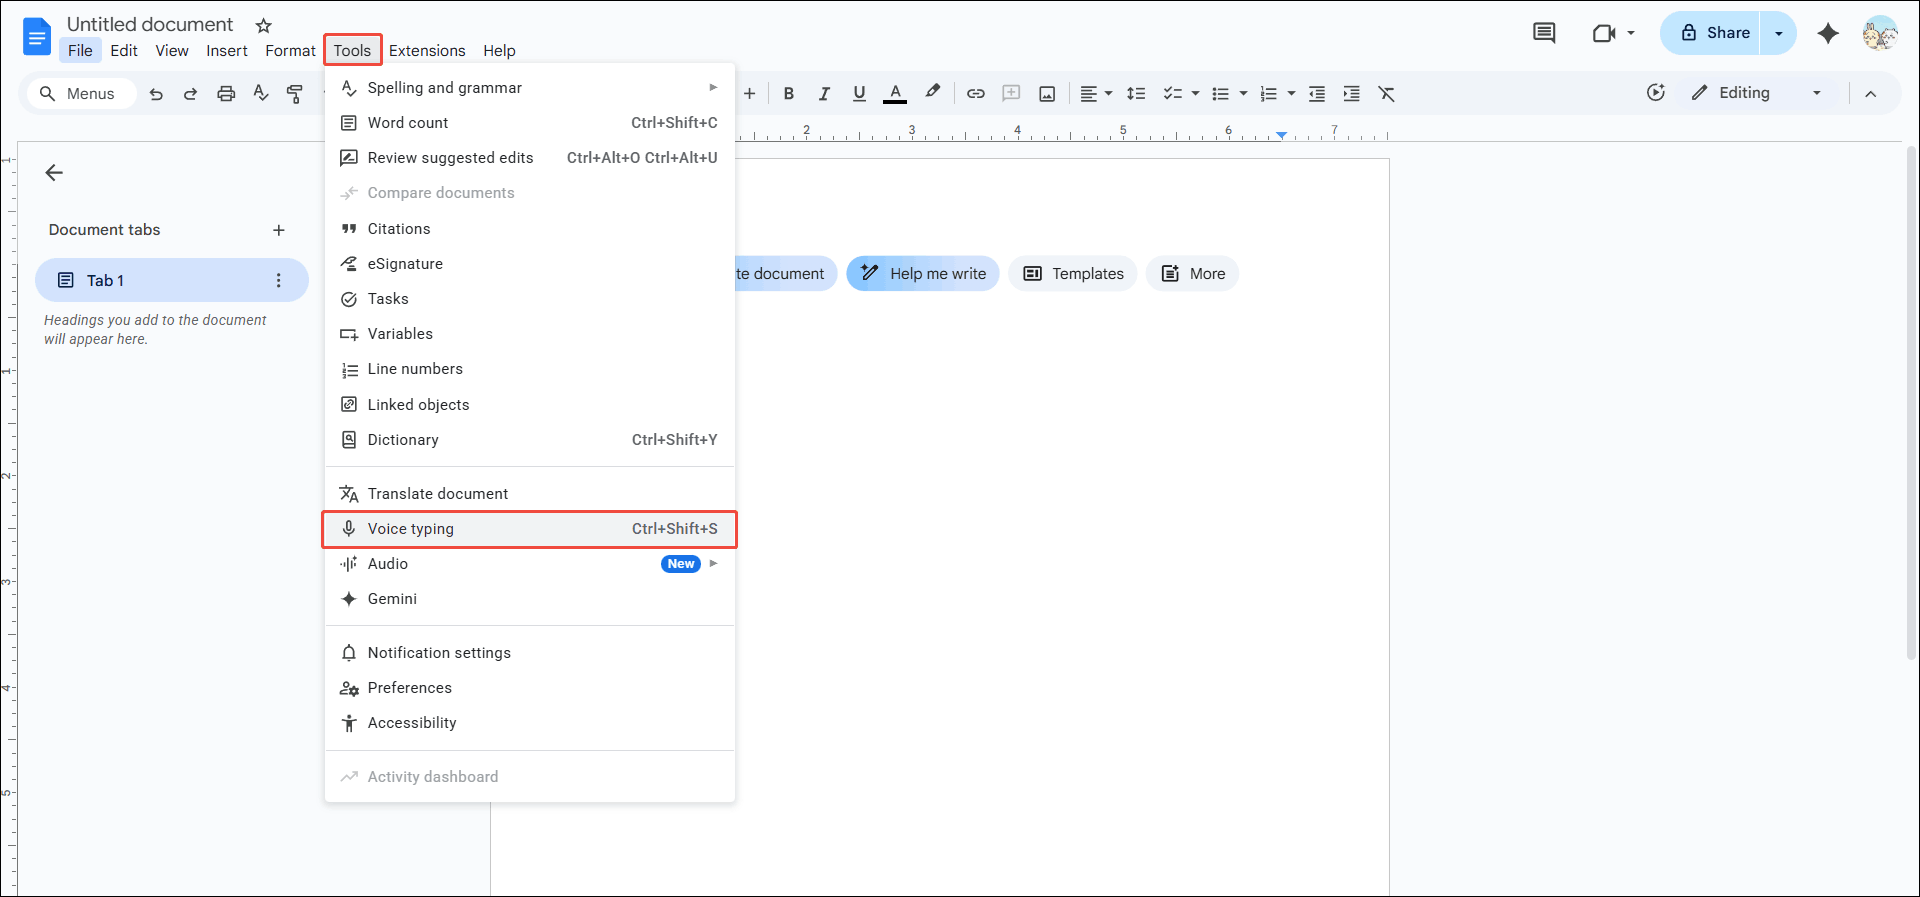
Step 2: Enable Voice Typing
Switch to the Tools tab at the top of the document and choose Voice typing from the drop-down menu.
Step 3: Choose a Language and Start Transcribing
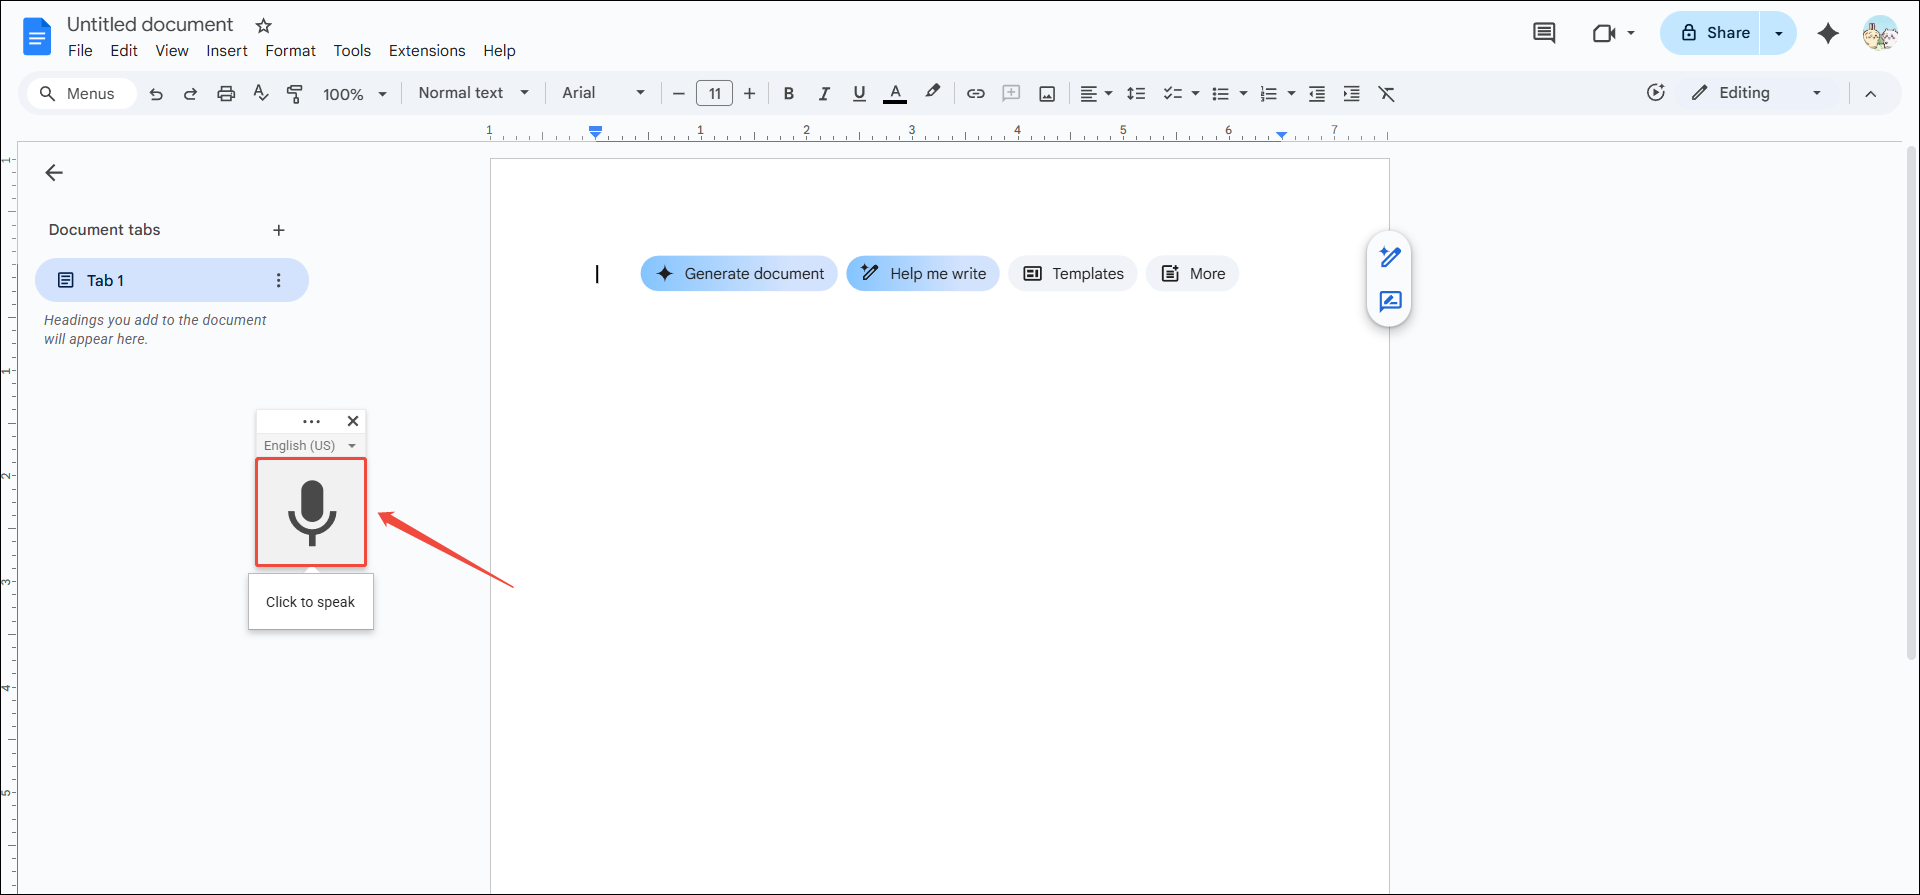
A small floating box will appear. You can click the more icon and drag it wherever you like on the page. Then, click the language option below the more icon and select the language you want to transcribe. After that, hit the microphone to start transcribing.
Step 4: Speak or Play the Audio
Google Docs can turn live speech into text as you talk and it can also transcribe a pre-recorded file. Just play the audio near your microphone, and the words will appear on the page.
Step 5: Pause Recording and transcribing
When the meeting ends, or after your audio has finished playing, click the microphone icon to pause transcribing.
I think Google Docs does a very good job of real-time speech transcription. It’s accurate and free. However, you still need to format the transcribed text yourself. Also, when you want to use it to transcribe existing audio, the results may not be as accurate.
Method 4: Use Windows Voice Typing (Free)
If you are a Windows user, you can find a practical built-in speech-to-text tool on your computer! This tool requires you to open a program that allows text input, such as Microsoft Word. Then, press the Windows key and the H key on your keyboard simultaneously. This will activate Windows’ Voice Typing function. It’s ideal for drafting, note-taking, and transcribing meeting audio into text.
Below, I will demonstrate how to enable the Windows Voice Typing tool and use it to transcribe meeting audio to text:
Step 1: Enable Voice Typing on Windows
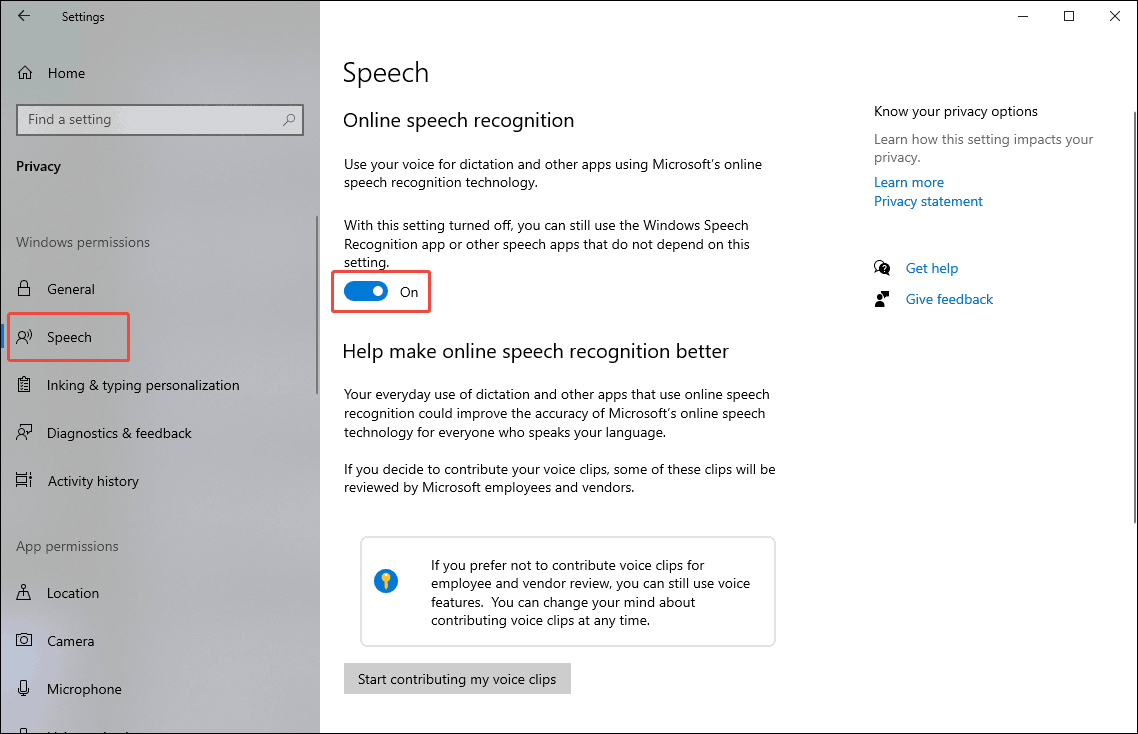
First, check if your Windows PC has enabled the speech-to-text feature. To do so, click the Start button in the bottom left corner of your desktop, select Settings, choose the Privacy option, and then switch to the Speech tab. Here, find the Online speech recognition option and enable it.
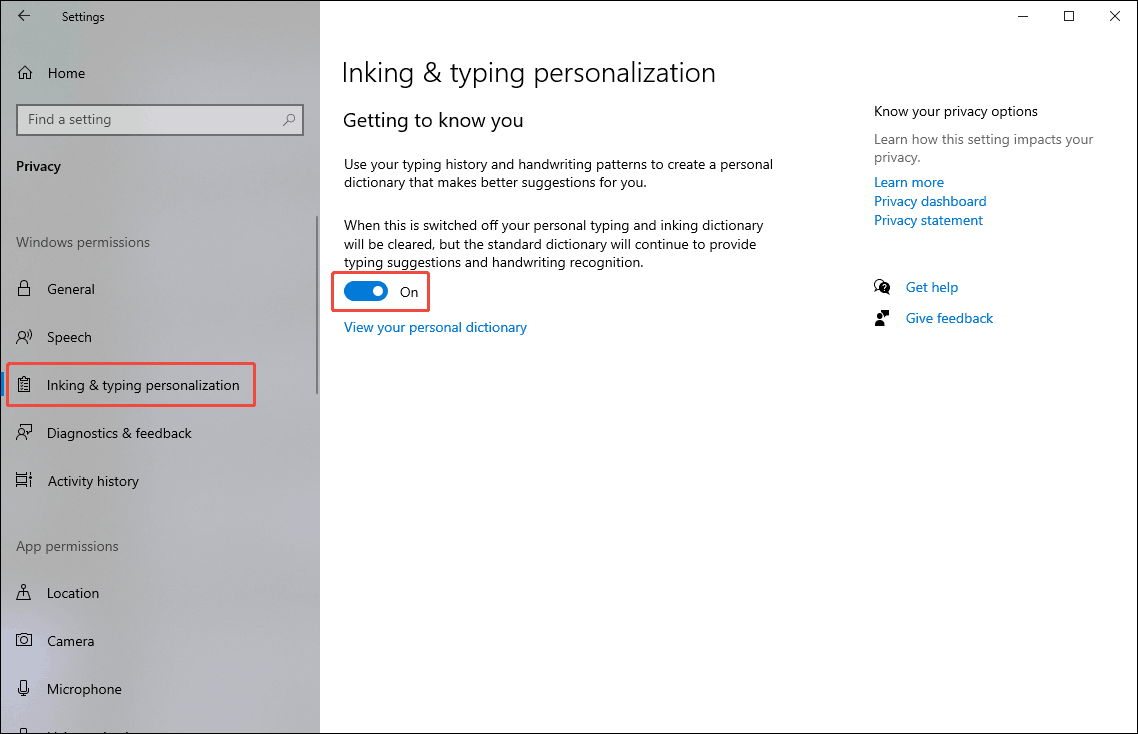
Switch to the Inking & typing personalization tab and toggle on the Inking & typing personalization option.
Step 2: Activate Windows Voice Typing Feature
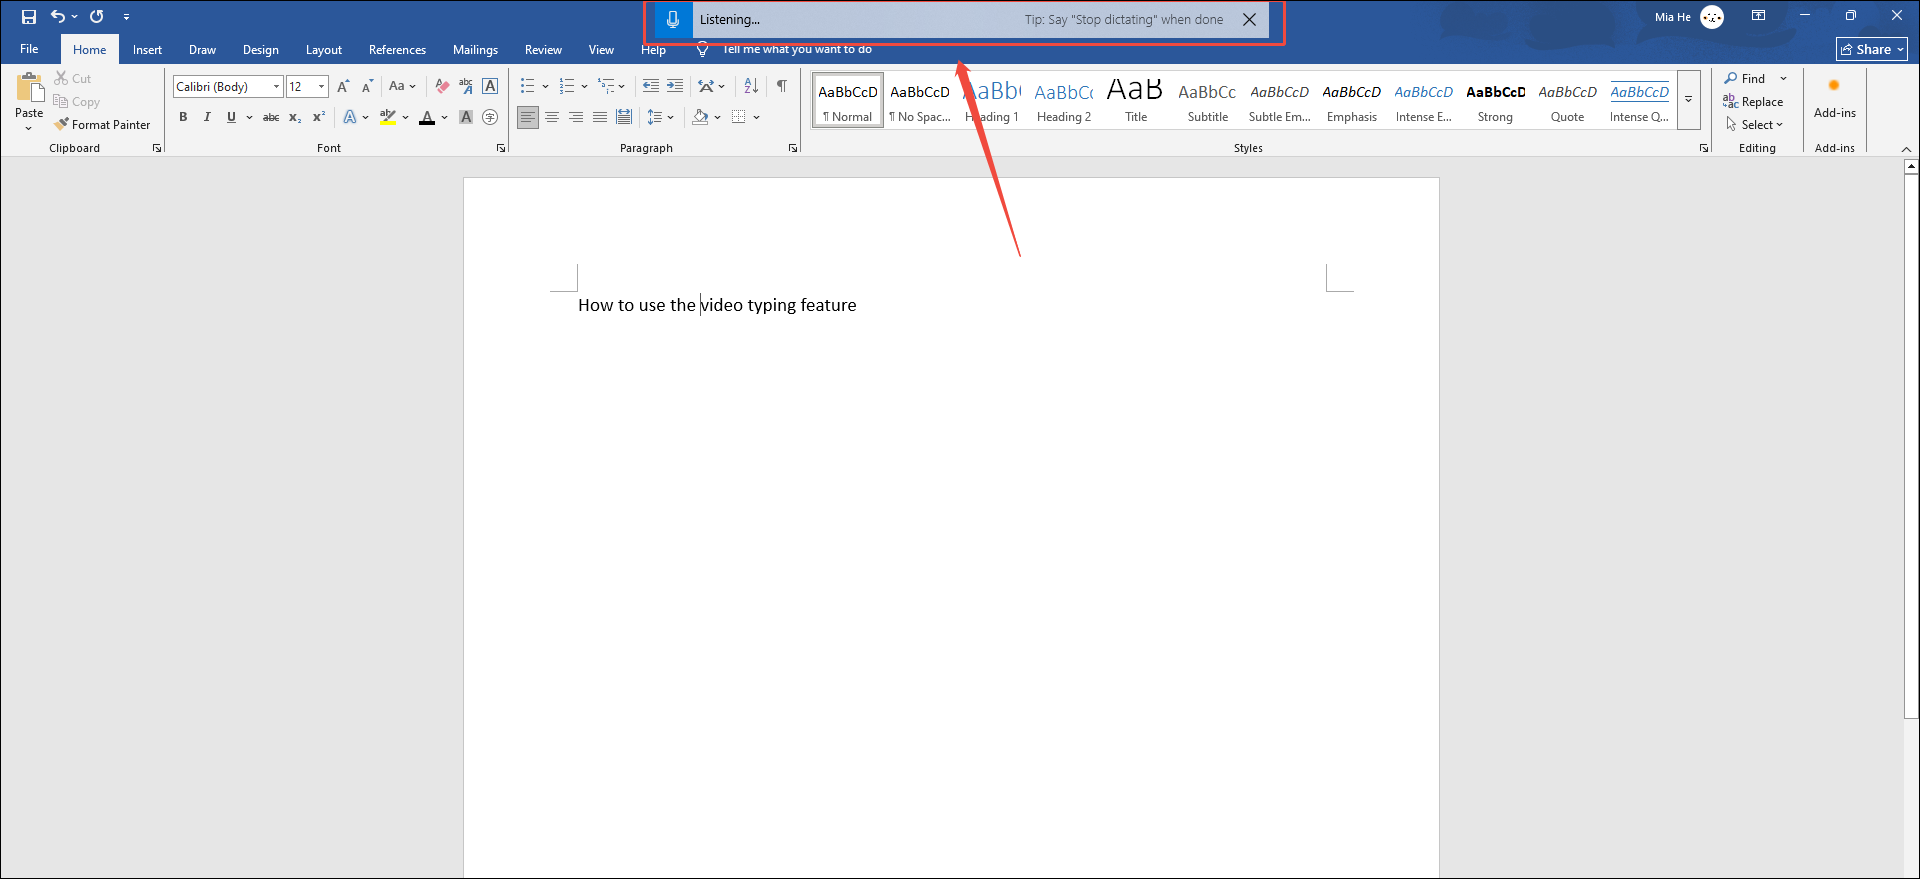
Create a new Word document. Then, try pressing Windows + H, and a text box will appear at the top of the screen.
Step 3: Start Transcribing
Next, Windows will automatically start transcribing the audio received by your microphone. For accurate speech recognition, please speak as close to the microphone as possible or play the audio close to the microphone.
Step 4: End Voice Typing and Save the Transcript
To end Windows Voice Typing, simply say “Stop listening”, press the Win + H, or click the microphone icon in the text bar. Then save this Word document.
No software download is required. If you are using a Windows computer, you only have to plug in a microphone and activate the built-in Voice Typing tool on any device running Windows 10 or Windows 11, and you can immediately convert meeting audio to text.
Final Words
This article presents 4 methods to help you transcribe meeting audio to text. Which one should you choose? If you want to transcribe existing audio files, Notta (Paid) and MiniTool Video Converter (Free) are excellent options! If you want to transcribe audio in real-time, I recommend using Google Docs and Windows’ Voice Typing feature.
If you have encountered any problems when using MiniTool Video Converter, please contact us via support@minitool.com, and we’ll get back to you fast.
User Comments :