To transcribe audio to text, automatic transcription is more efficient than manual transcription. This article gives you 5 methods to extract text from audio, including using MiniTool Video Converter, Notta, Google Docs Voice Typing, and Microsoft Word Dictation.
What Is Audio to Text Transcription
Audio-to-text transcription is the process of converting audio files into text. Transcribing an audio file helps people to understand its content quickly. Currently, there are two main types of transcription: manual and automatic transcription.
Manual transcription is accurate. However, it is time-consuming. Automatic transcription is more efficient and can also accurately recognize text. Furthermore, some transcription tools allow you to edit these transcripts to ensure accuracy and correct punctuation.
Benefits of Transcribing Audio to Text
Converting audio to text is necessary. It can bring many benefits:
1. Accessibility
Some people with hearing impairments can understand audio content through transcribed text. Converting audio to text and publishing it on a platform can also help you to reach a wider audience.
2. Ease of Storage
Text files are generally smaller than audio files. Therefore, text transcripts are easier to store than audio files. Furthermore, text files can be printed out for reading.
3. Quick Access to Information
Listening to audio can be time-consuming. Using an app to transcribe the audio into text allows readers to quickly read the information.
4 Methods to Transcribe Audio to Text
If you’re searching for ways to transcribe audio into text, here are four tools worth trying.
1. Use MiniTool Video Converter
MiniTool Video Converter is a multifunctional application that supports transcribing audio or video to text, converting audio and video files, compressing videos, and recording your computer screen. Its intelligent subtitle feature can help you extract text from audio for free!
With MiniTool Video Converter, you can quickly convert audio files into SRT or TXT formats. You can also modify the generated text to ensure its accuracy. Additionally, this application can be used to generate subtitles for your videos. MiniTool Video Converter allows you to edit video captions. For example, you can customize the subtitle’s font, color, background color, and more.
How to transcribe audio to text for free with MiniTool Video Converter? Follow the instructions below:
Step 1: Download and Install MiniTool Video Converter
Click the download button below to download the installation package of MiniTool Video Converter. Then, follow the on-screen instructions to install this free application.
MiniTool Video ConverterClick to Download100%Clean & Safe
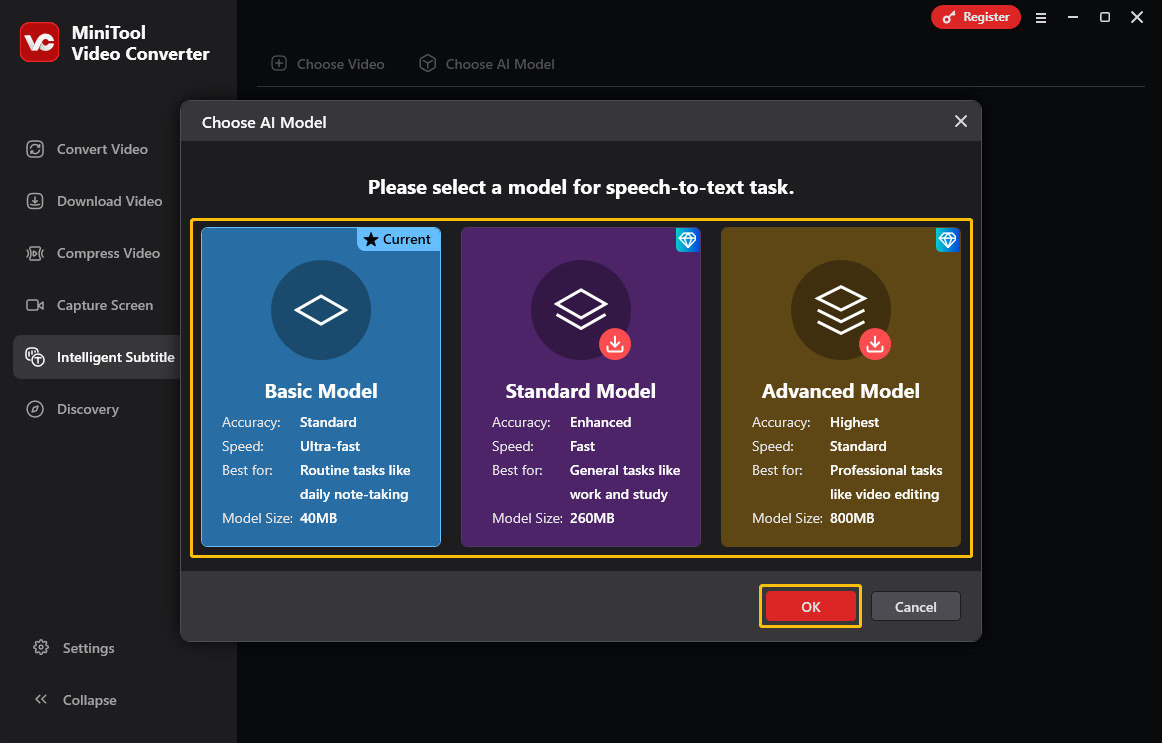
Step 2: Select and Download an AI Model
Launch this audio to text converter and switch to the Intelligent Subtitle tab. Then, click the Choose AI Model option. In the pop-up window, choose an AI Model and click OK to download it.
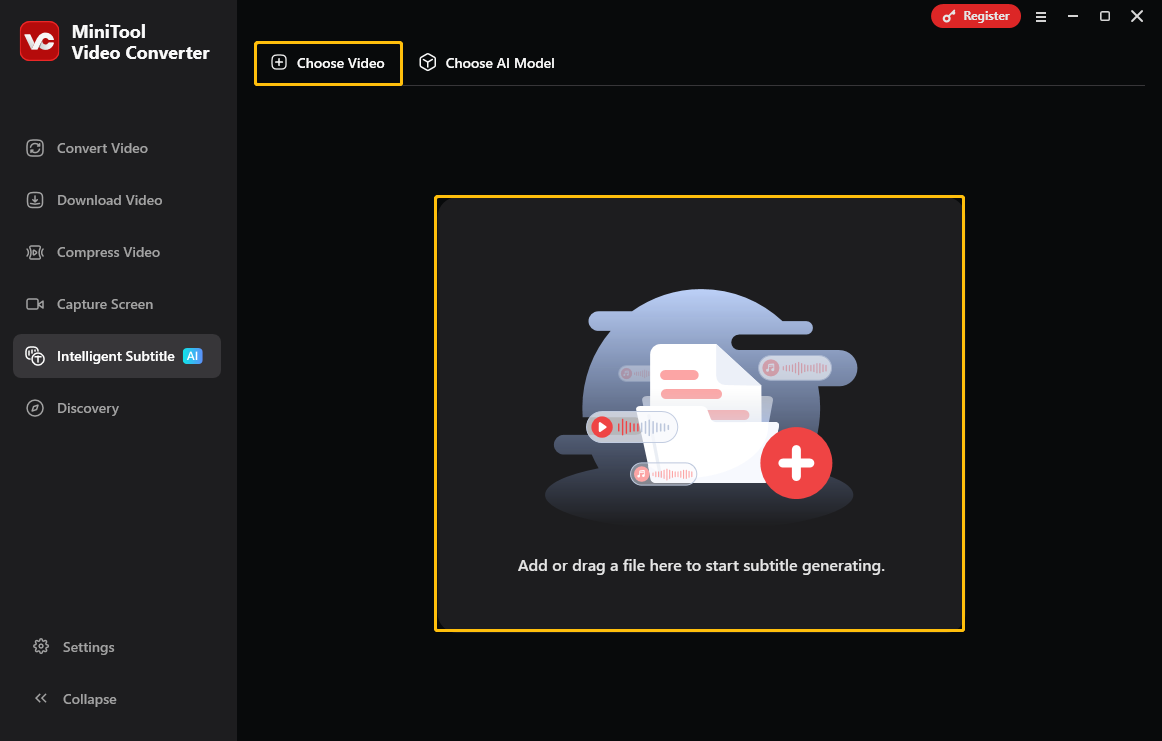
Step 3: Upload an Audio File
Click the Choose Video option to upload your audio file. You can also drag and drop your audio file into the Add or drag a file here to start subtitle generating area.
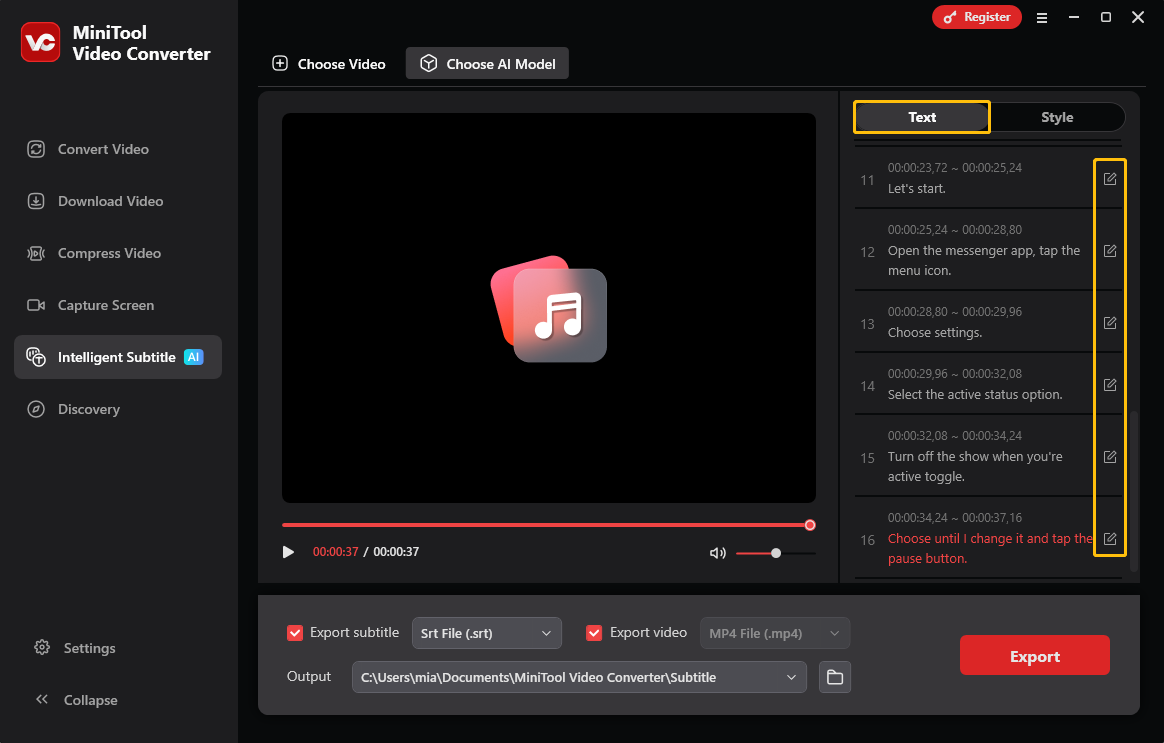
Step 4: Edit the Generated Text
Under the Text tab of the right text editing panel, you can see the generated text. Click the edit icon next to each sentence to modify the text.
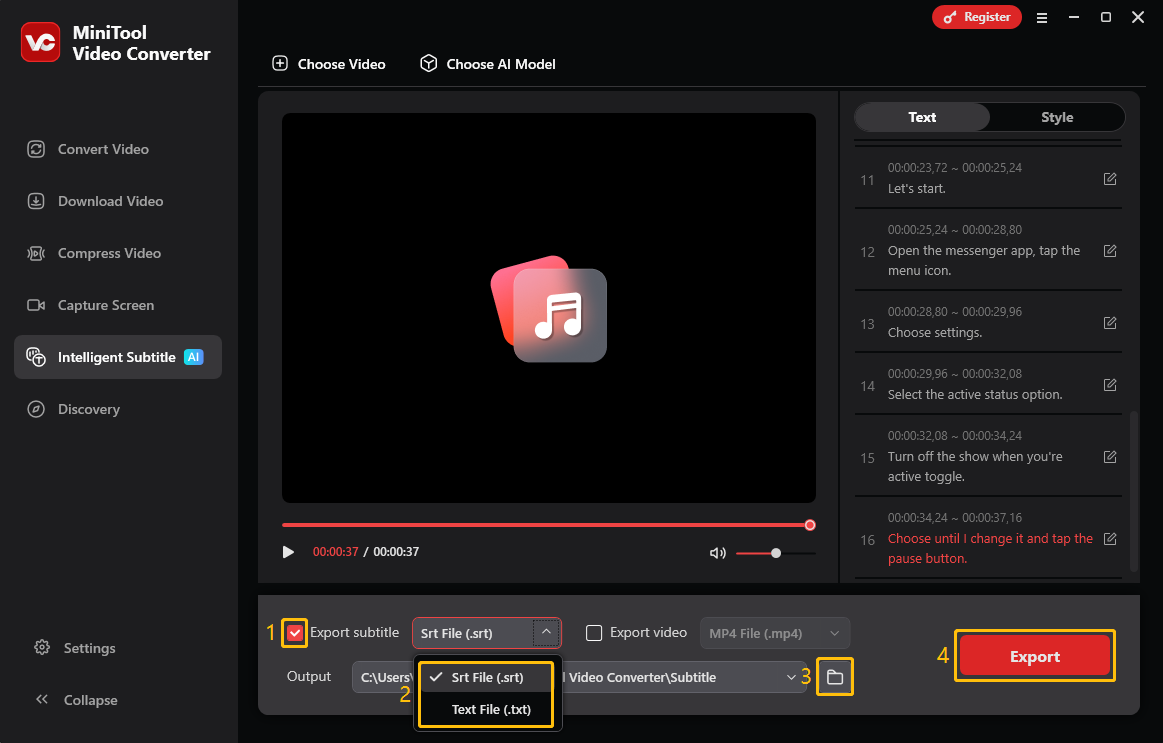
Step 5: Choose Exported Format
MiniTool Video Converter has the Export subtitle option checked by default. You can choose to save the converted text as an SRT or TXT file.
Step 6: Select the Save Location
Click the folder icon to choose a folder to store the transcribed text.
Step 7: Export the Transcribed Text
Click the Export button to save the generated text. Next, a window will automatically pop up, showing the location where the file is saved on your computer.
MiniTool Video Converter is also a free video converter that supports thousands of formats. You can convert any video or audio file to a specific format. Furthermore, you can customize the parameters of the export format. It also supports screen recording, video compression up to 8K, and much more.
Transcribing audio to text just got easier with MiniTool Video Converter!Click to Tweet
2. Use Notta
Notta is an online audio to text converter. It supports a variety of audio and video formats, including WAV, MP3, M4A, CAF, AIFF, AVI, RMVB, FLV, MP4, MOV, and more. It also supports transcription in over 58 languages. So, it is ideal for recording meetings and interviews. However, Notta also has certain limitations. It supports uploading files up to 1GB and up to 5 hours of video or audio. The transcribed text can be saved in TXT and SRT.
Here is a guide on how to use Notta to convert an audio file to text:
Step 1: Navigate to Notta
Open a desktop browser and visit https://www.notta.ai/en/tools/audio-to-text-converter.
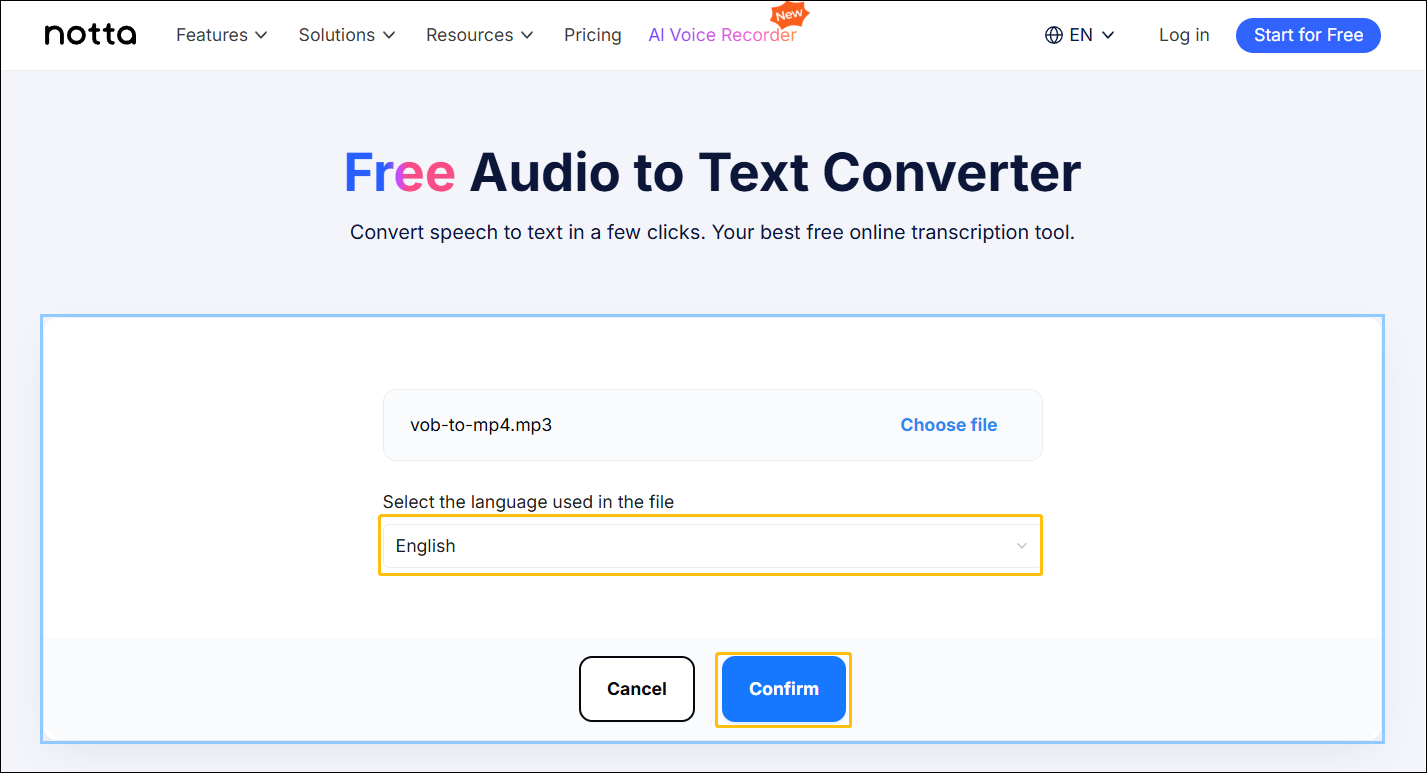
Step 2: Upload Your Audio File
Click the Choose files button and select the audio you want to transcribe. You can also drag and drop your audio file to the dotted box.
Step 3: Choose a Transcription Language
Expand the option under Select the language used in the file and choose a language you want. Then, click the Confirm button.
Step 4: Save the Transcribed Text
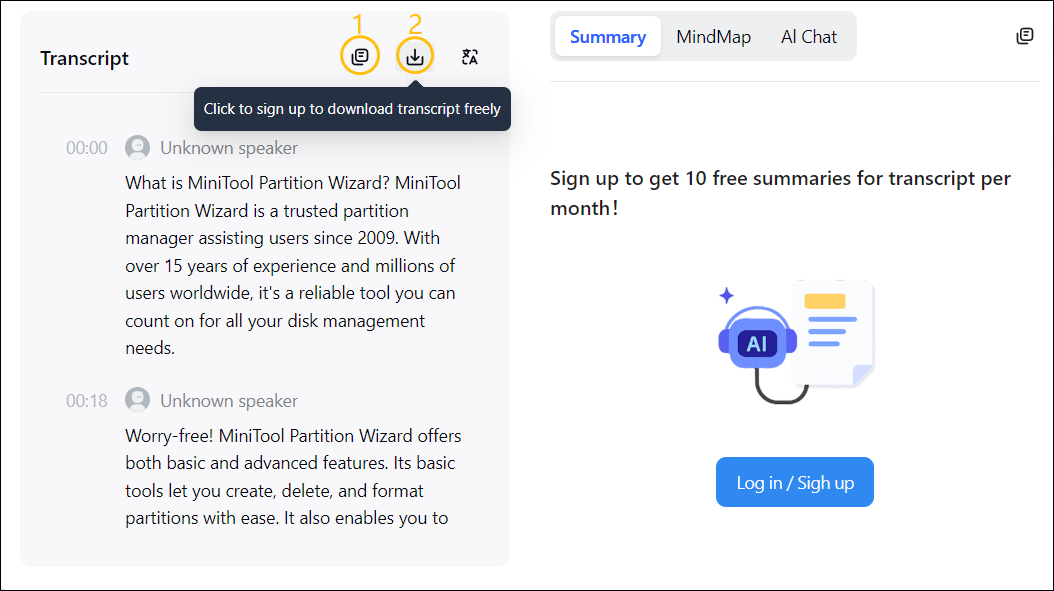
After a few seconds, you can see the transcribed text below the file upload area. You can save the text in the following two ways:
- Copy the Text: Click the Copy button to copy the text. Then, create a new Word document on your computer. Paste the copied text into the document and save it.
- Download the Text File: Click the download icon and you will be taken to a new page. Then, sign up with your Google, Microsoft, or Apple account and save the transcript.
Notta allows you to transcribe audio online. However, it’s not completely free. Notta’s free plan only supports up to 5 minutes of audio per transcription. If you want Notta’s automatic proofreading and other advanced features, you need to purchase Notta Pro.
3. Use Google Docs Voice Typing
Google Docs is a word processor. Like Microsoft Word, it supports document creation and editing. However, it also supports automatic document saving, collaborative document creation, and more. I discovered that Google Docs includes a voice typing feature. This feature allows you to convert speech to text. The voice typing feature supports multiple languages. It can also display words that may be misrecognized and provide correction suggestions.
This feature is available both in the desktop browser and on mobile apps. Now, I will take a desktop browser as an example to show you how to use Google Docs to transcribe audio to text in real-time.
Step 1: Open a New Document
Navigate to https://docs.google.com/ and sign in with your Google account. Then, click Blank document.
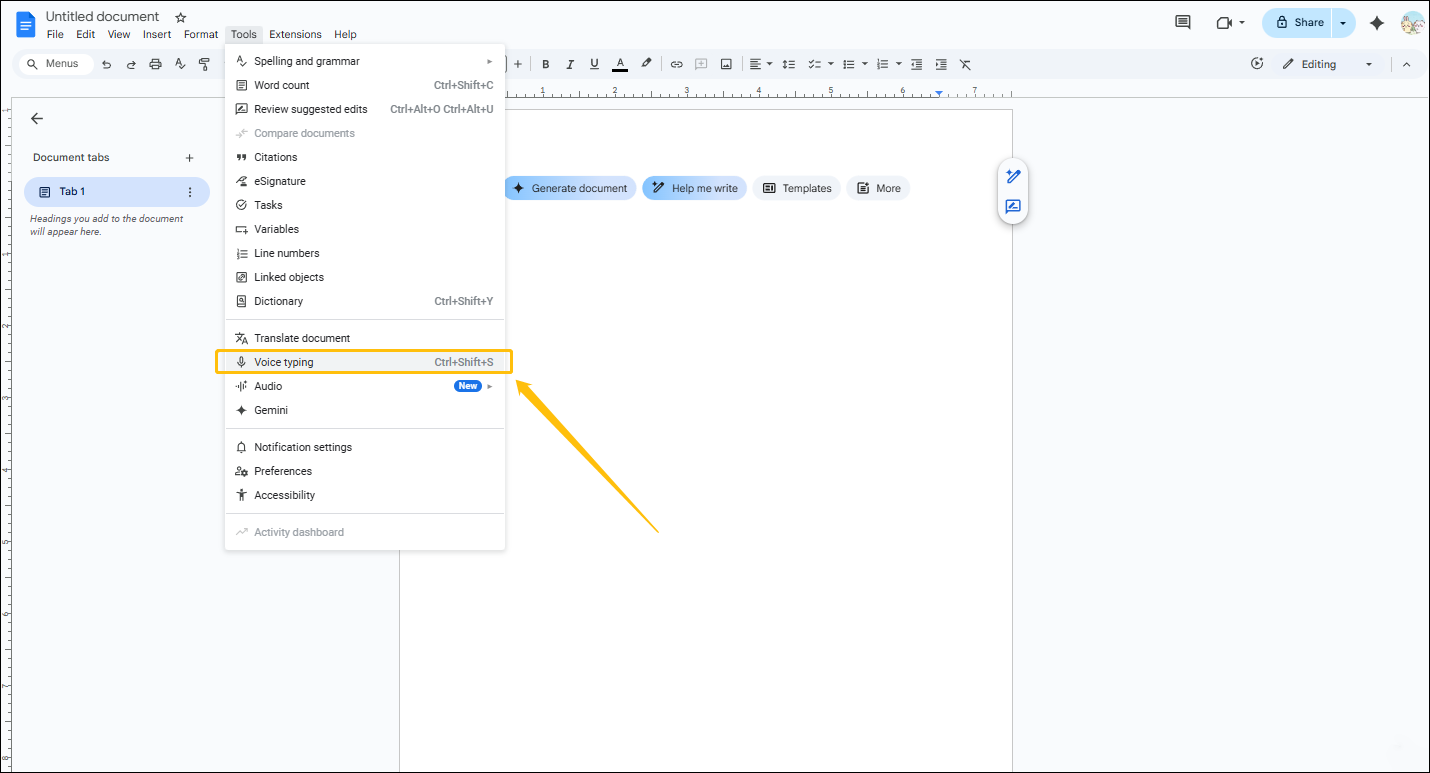
Step 2: Activate Voice Typing
Click the Tools tab at the top of the document and choose Voice typing from the drop-down menu.
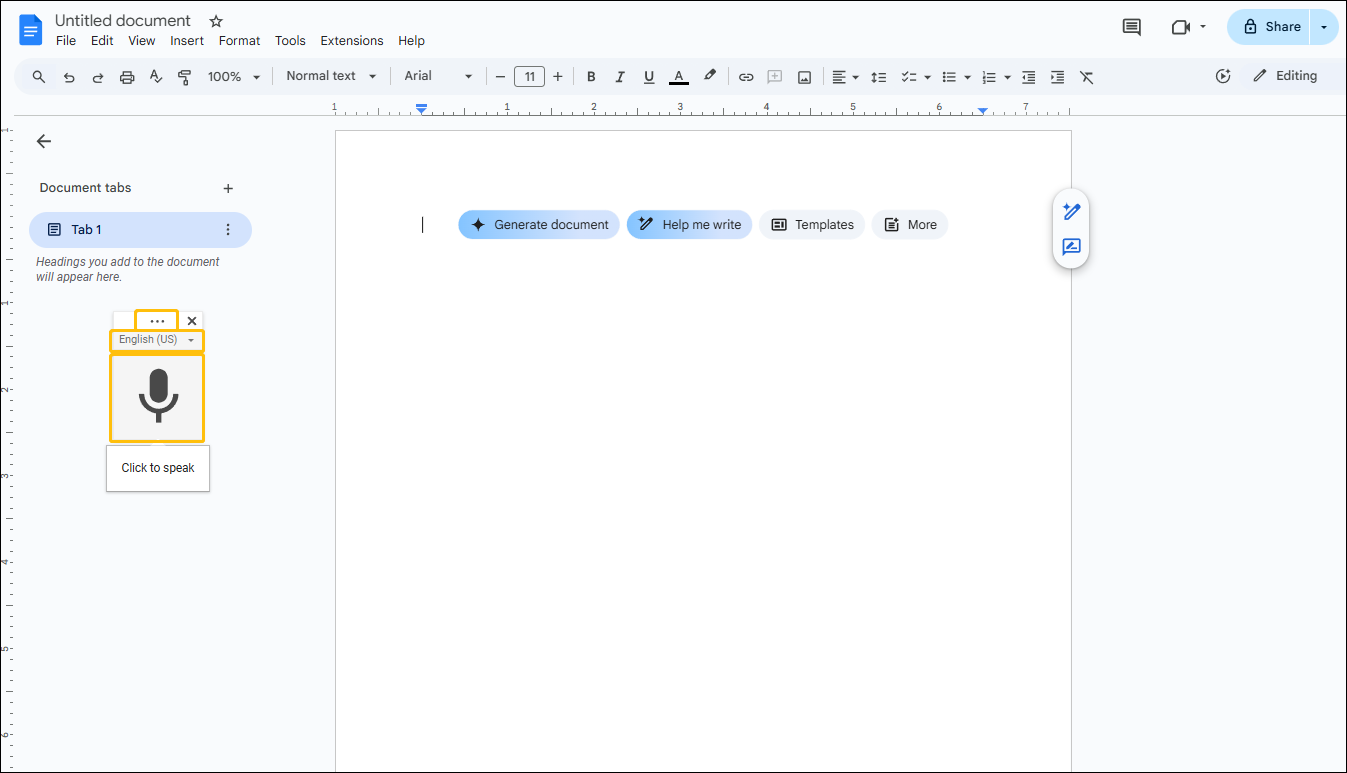
Step 3: Choose a Language and Start Transcribing
You will see a small floating window. If you want to move the window to another area on the page, you can left-click the more icon and drag it to a specific place. Then, select the language you want to transcribe. After that, click the microphone icon to start transcribing.
Step 4: Speak or Play the Audio
Next, you can speak directly and Google Docs will automatically transcribe what you say. You can also play an existing audio file close to the microphone and let Google Docs recognize and transcribe it into text.
Step 5: Pause Recording and transcribing
Click the microphone icon to pause recording and transcribing.
Overall, Google Docs is a great option for transcribing voices in real time. However, it might not be very suitable for transcribing existing audio.
4. Use Microsoft Word Dictation
If you are a Microsoft 365 subscriber, you can use the Dictate feature to transcribe audio to text. Microsoft 365 allows you to record audio in Word and convert it to text. You can also upload audio or video files to convert to text. Uploaded files can be in WAV, MP4, M4A, and MP3 formats.
Microsoft 365 supports 80 languages, including English, Chinese, Dutch, Japanese, Korean, German, French, Spanish, and more. In addition, Microsoft 365’s Dictate feature can distinguish individual speakers, which is very useful. It can be used to record meetings and transcribe each speaker’s speech into text. Furthermore, you can review and modify the generated transcript.
Microsoft 365’s Dictate feature can effectively save time and improve efficiency. You can use Dictate in Microsoft 365 Word, Microsoft 365 Word for Mac, or Word for the web.
Want to know how to use it to transcribe audio? Below, I’ll take Word for the web as an example to show you how to record and transcribe audio and extract text from audio.
#1 Record and Transcribe Audio in Word
You can record audio directly in Microsoft 365 Word. The recorded audio can then be converted to text. Next, let me show you the process.
Step 1: Go to the Word for the Web
Select a browser and visit https://word.cloud.microsoft/.
Step 2: Create or Upload a Document
In the Word for the web, click the Create blank document button to create a new document. You can also choose Upload a file to add your Word document.
Step 3: Record Audio
Choose the Home tab, expand the Dictate option, and choose Transcribe.
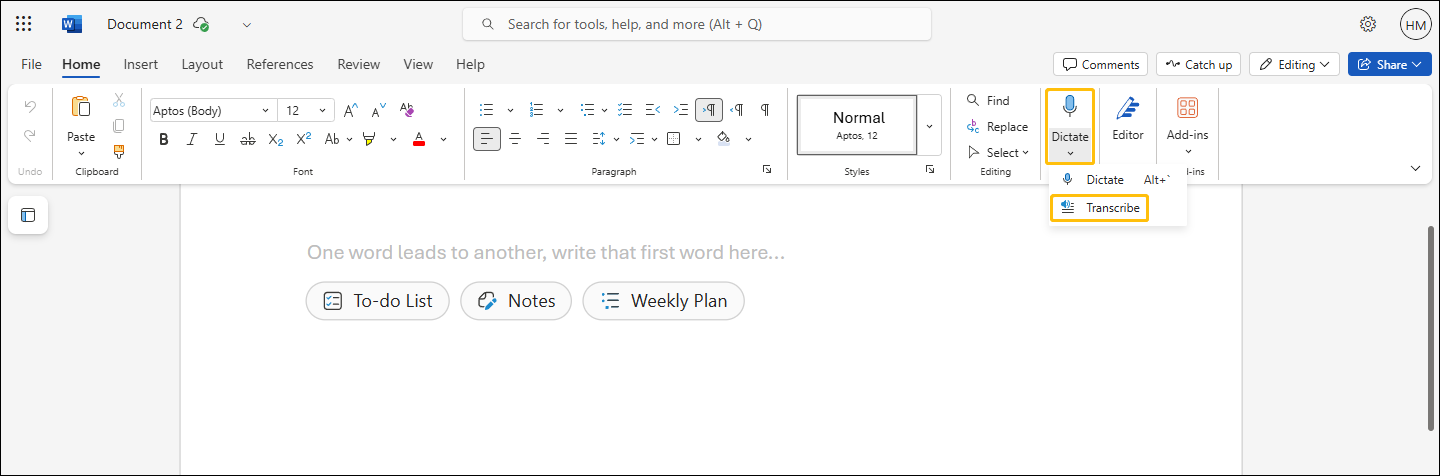
Then, choose Star recording in the Transcribe panel.
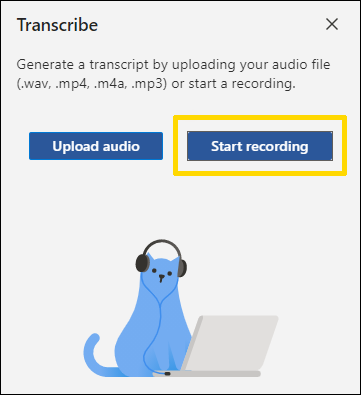
When you see the microphone outline turn blue, recording has begun.
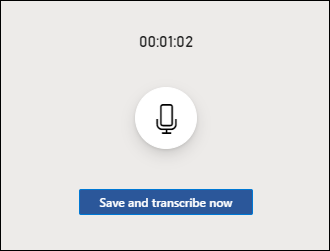
Step 4: Pause or Resume Recording
Click the microphone button to pause or resume recording.
Step 5: Transcribe the Recorded Audio
After recording, click the Save and transcribe now button to start converting the audio you just recorded.
Step 6: Check the Transcribed Text
The transcribed text will appear in the document and can be edited by you.
How about transcribing an audio file on your computer? I’ll reveal it to you in the next section.
#2 Extract Text from Audio
Microsoft 365 Word also allows transcribing audio files from your computer. Here are the steps on how to do it:
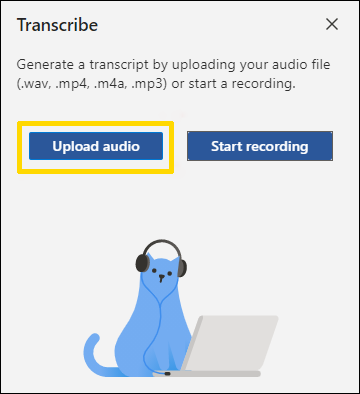
Step 1: Upload Your Audio File
Expand the Dictate option and click the Transcribe option from the drop-down menu. Then, choose Upload audio in the Transcribe window to select an audio file. You can upload an audio file in WAV, M4A, or MP3 formats.
Step 2: Transcribe Your Audio
The audio file will automatically be transcribed once uploaded.
Step 3: Check the Transcribed Text
The transcribed text will be displayed in the document and you can modify it.
Bottom Line
In this article, I list 4 proven tools for you to transcribe audio to text. My top recommendation is MiniTool Video Converter because it recognizes audio quickly and accurately, and it’s free. While Notta also generates accurate transcripts, you have to pay to download them. In contrast, Google Docs’ voice typing feature sometimes makes mistakes when transcribing audio. Moreover, Microsoft 365 Word only supports free transcription with its online version.
If you encounter any issues while using MiniTool Video Converter, please contact us by sending an email to support@minitool.com.
User Comments :