WMV vs MOV: Are you interested in their differences? This article will compare them in terms of 6 aspects. Besides, it will also show you 2 enhanced video converters, including MiniTool Video Converter and MiniTool MovieMaker, to convert WMV to MOV and vice versa.
What Is WMV
WMV stands for Windows Media Video, a digital video format developed by Microsoft. Therefore, it's primarily designed for Windows systems and the Microsoft ecosystem. WMV files are typically small in size, making them easy to store, transfer, and share.
Furthermore, WMV is highly compatible with online streaming platforms such as Safari and Google Chrome. It also prioritizes compression efficiency, even with high-resolution videos. WMV doesn't take up much storage space. Importantly, its video quality doesn’t obviously lose after compression. Based on these characteristics, the WMV is widely used for presentations and video playback on Windows computers.
However, WMV isn’t suitable for professional video editing. Most non-Windows devices and video editors may not fully support WMV, limiting WMV files’ flexibility when editing or sharing videos across different platforms.
What Is MOV
MOV is a multimedia container format created by Apple. It's well-compatible with the Apple ecosystem and is commonly used for macOS, iOS, and professional video production. MOV can store high-quality video and audio. It supports multiple media tracks, including video, audio, subtitles, and metadata. MOV is one of the most popular formats in the Apple family.
WMV vs MOV: 6 Differences
What are the differences between WMV vs MOV? I want to help you understand them better by the following 6 key differences.
#1 Usage
MOV is generally easier to edit. Many video editing software programs can handle MOV files, especially on macOS. Also, MOV is very convenient for recording on Apple devices. It is also suitable for storing high-quality video, helping to retain more detail in the video.
Tools that can edit WMV are more limited, especially outside of Windows systems. WMV is commonly used for screen recording and simple video capture on Windows computers. Also, WMV's high compression efficiency makes it easy to save.
#2 Video Quality
MOV supports both HD (High Definition) and UHD (Ultra High Definition) resolutions,offering excellent clarity and detail. When used with advanced codecs like RroRes and HEVC, MOV enables the editing and playback of high-fidelity, high-compression videos, which balance file size and video quality.
Furthermore, MOV offers fantastic color depth and more accurate color gamuts. It is beneficial for video production and editing.
While the WMV format provides sufficient image quality for everyday video needs, its codec is designed for efficient compression, resulting in less refined video quality compared to MOV. WMV typically supports lower color depths, sufficient for most general applications, but lacks the capabilities for professional color adjustments.
#3 Compression Efficiency
WMV is known for its powerful compression capabilities. It can retain video quality as much as possible while reducing file size, which is very helpful for online sharing and storage.
MOV is compatible with a variety of codecs, including H.264, HEVC, and Apple's ProRes. In many cases, it uses a lighter compression level to retain the original video quality. Therefore, MOV’s compression efficiency is lower.

#4 Compatibility
WMV plays best on Windows devices. While some media players and tools on other systems can open it, compatibility can’t be consistently guaranteed. It may encounter issues, such as import failures or file corruption.
MOV is highly compatible with the Apple ecosystem and is also widely supported by professional video software on Windows. Overall, MOV has broader cross-platform support.
#5 Playback and Streaming
WMV plays smoothly on Windows without requiring additional codecs. Also, WMV files are small, making them popular for online streaming.
MOV plays best on Apple devices, but is also compatible with mainstream media players on other systems. MOV files can also be streamed, but larger files may require a good network connection.
#6 Distribution and Sharing
WMV is well-suited for fast distribution, especially on Windows. For email or cloud sharing, it is easier to send because of its small size.
MOV is often used for professional distribution, such as movies or other high-quality works in Apple apps. Plus, it is also suitable for sharing for various purposes, although some large files may take longer to transfer.
WMV vs MOV: Which One Performs Better
How do you choose between WMV and MOV? To reduce file size, quickly share video files, and enjoy smooth playback on Windows, WMV outperforms MOV. Its high compression efficiency results in smaller storage space and makes it easier to upload or send. For playback, presentations, or distribution, WMV is usually more practical.
If you value video quality, editing flexibility, and cross-platform compatibility, MOV is better than WMV. MOV retains more visual detail and is compatible with many professional editing tools. If you need to perform professional video editing or use it on different devices, especially within the Apple ecosystem, MOV is also the ideal choice.
Why Convert Between WMV and MOV
While both WMV and MOV are popular video formats, they are suitable for different systems and usage scenarios. Therefore, users often convert between these 2 formats as needed.
Why convert MOV to WMV? The reason is usually to achieve better device and system compatibility. MOV supports the Apple ecosystem. However, without an additional player, it may not play smoothly on Windows systems. Converting MOV to WMV also avoids file corruption in Windows-supported applications.
File size and sharing needs are also important reasons for converting MOV to WMV. MOV files are usually large, which isn’t convenient for email, cloud upload, or rapid sharing. In this case, converting MOV to WMV helps reduce file size while maintaining smooth video playback.
Why convert WMV to MOV? Many professional video editors prefer to use MOV as their editing template. MOV supports higher-quality video data and multitracking. If you have a WMV file but need to edit it in MOV-compatible software, WMV to MOV conversion becomes an essential step before editing.
Converting between WMV and MOV is not just a format change. More importantly, it makes videos easier to play, edit, store, and share in various situations.
How to Convert WMV and MOV
Now that you understand the reasons for their conversion. Need a suitable WMV and MOV converter? Based on my experience, I’d be happy to recommend 2 practical converters.
1. MiniTool Video Converter
MiniTool Video Converter is designed for fast conversion of various formats. It accepts WMV, MOV, and over 1,000 other formats, meeting all your format conversion needs. Furthermore, MiniTool Video Converter includes advanced parameter adjustment functions, allowing for customizable adjustments to resolutions, frame rates, bitrates, sample rates, and audio channels.
What if you need to handle multiple conversion tasks at the same time? MiniTool Video Converter can help you convert up to 5 tasks simultaneously. Furthermore, it can convert video formats compatible with some major social media platforms, including Vimeo, YouTube, Facebook, and Instagram.
What’s more, MiniTool Video Converter also enables you to convert formats to be compatible with mobile devices, such as Apple, Samsung, Huawei, and Android. Apart from video conversion, it supports converting between video and audio, like FLV to AAC, MP4 to WMA, MP3 to AVI, etc.
Advantages:
- Wide format support.
- High conversion speed.
- No watermark, ads, or size limits on output.
- User-friendly interface.
Now, let’s take a short time to learn how to complete WMV and MOV conversion with MiniTool Video Converter.
Step 1. Download and Install MiniTool Video Converter
Download MiniTool Video Converter by simply clicking on the download button. Then, follow the on-screen prompts to install it.
MiniTool Video ConverterClick to Download100%Clean & Safe
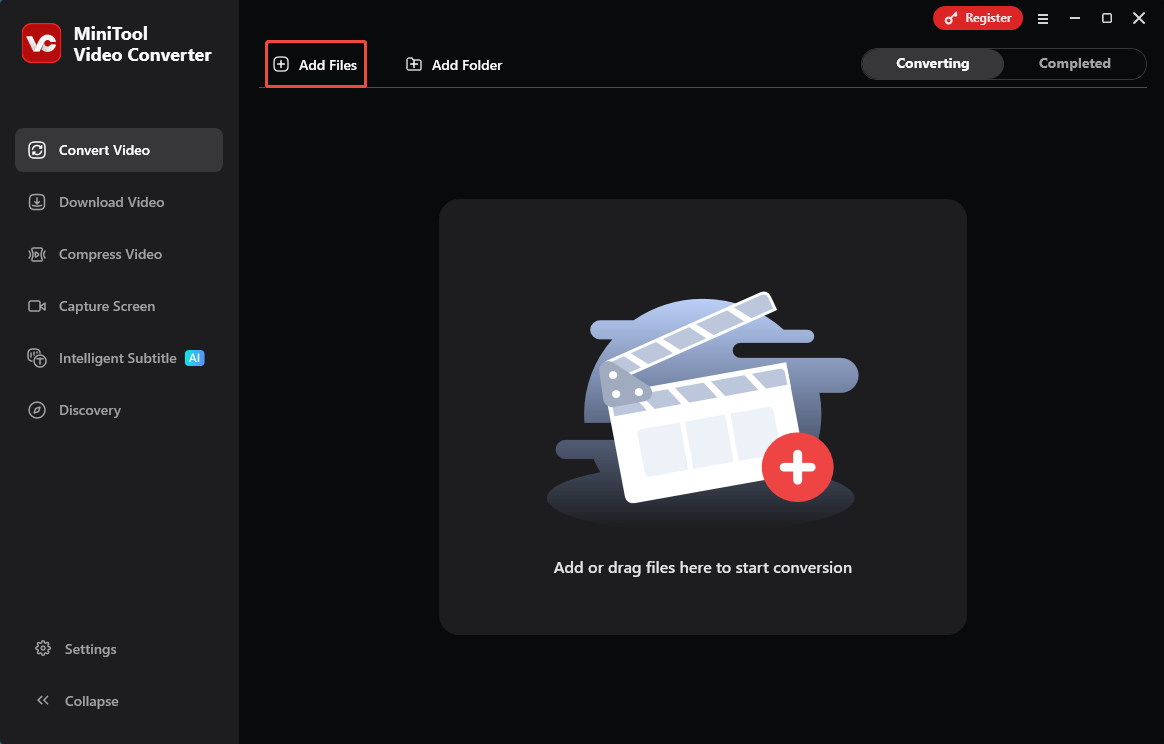
Step 2. Import Your WMV File
Run MiniTool Video Converter. Then. click on the Add Files option to import your WMV video.
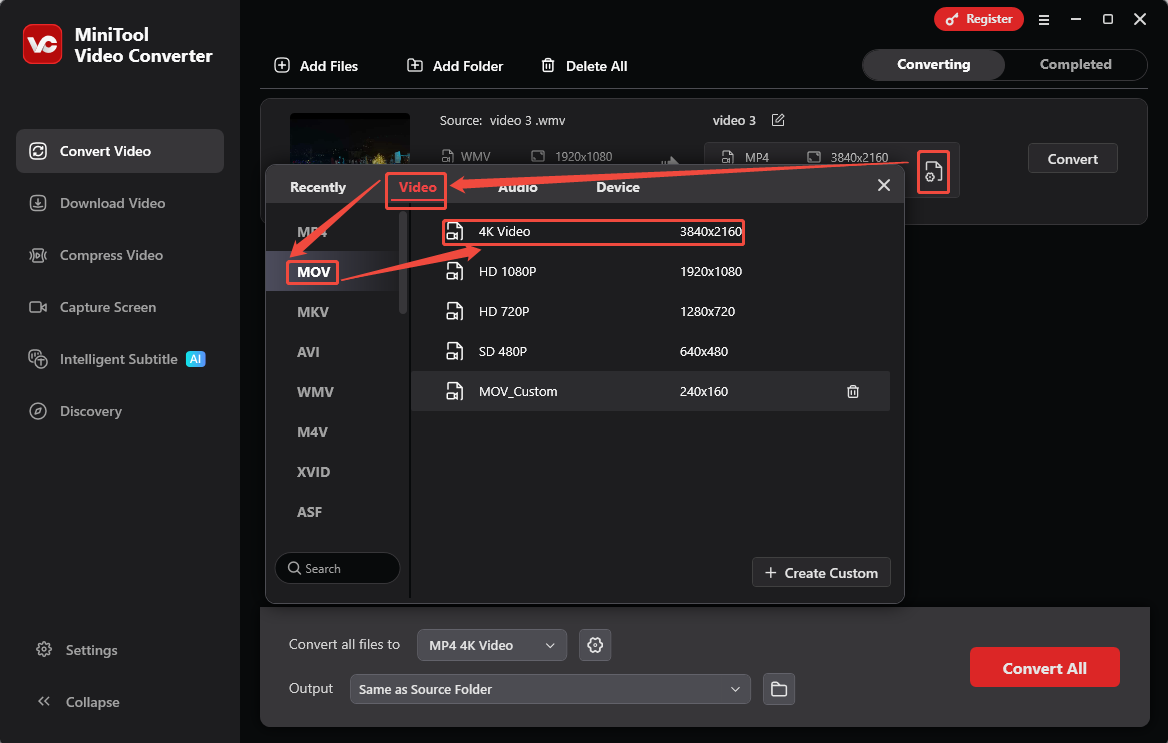
Step 3. Complete the Output Format Settings
Click on the Gear icon on the main interface to open the output format window. There, switch to the Video tab and click on the MOV module in the left column. Then, pick a suitable resolution as needed. Here, I select 4K Video as an example.
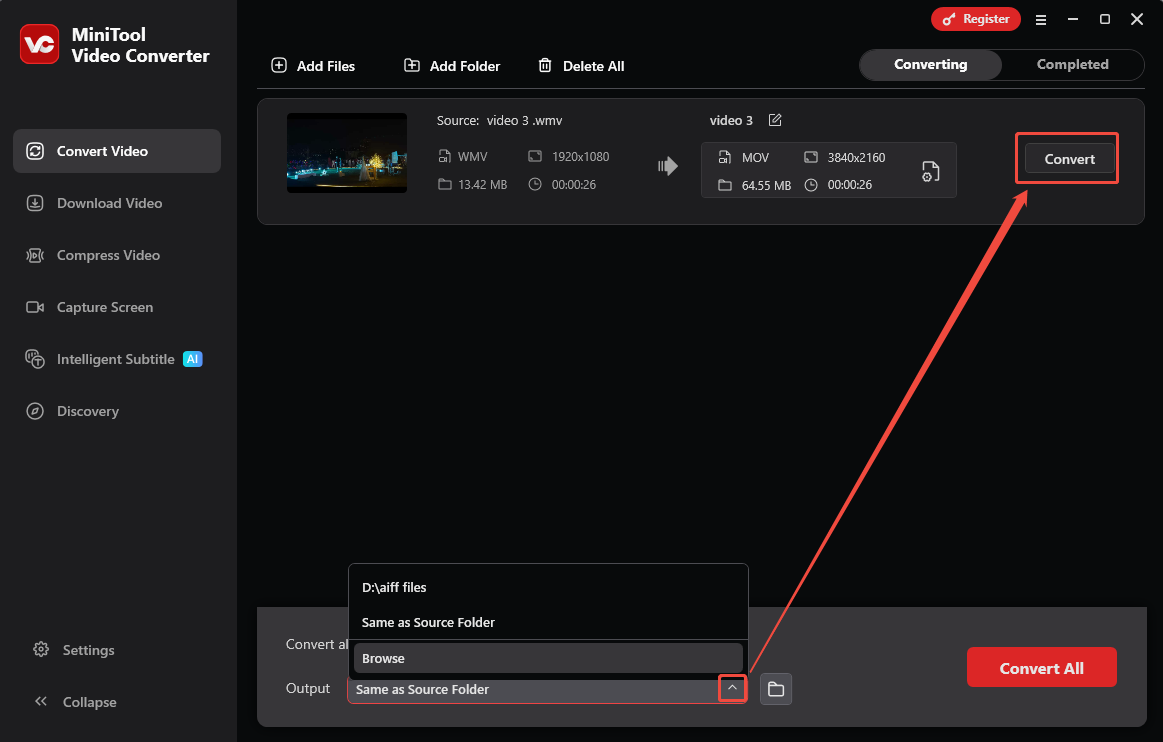
Step 4. Choose a Destination and Start Conversion
After setting the output format, expand the Output option to select a saving path. Then, click on the Convert button to start the conversion process.
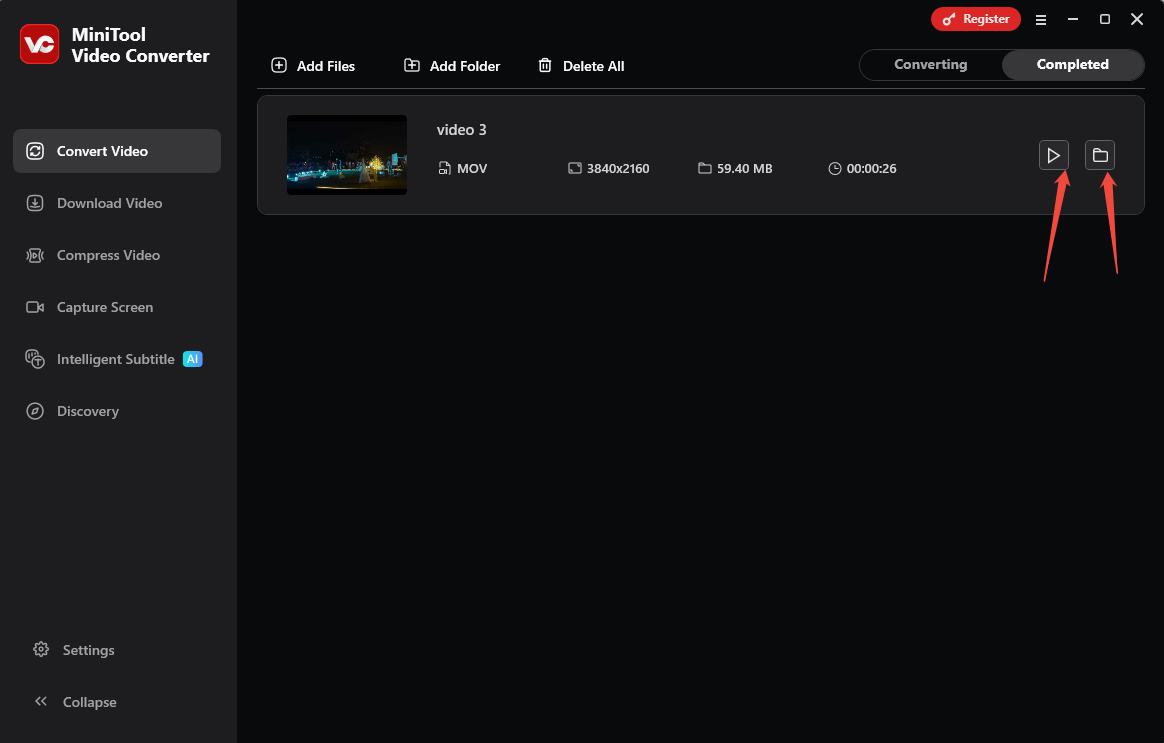
Step 5. Watch the Converted Video
Once the conversion process ends, this video converter will go to the Completed tab. Here, click on the Play icon to watch and check this converted video. Then, you can click on the Folder icon to locate the converted video.
MiniTool Video Converter is a format conversion expert that helps you convert videos without losing video quality. Additionally, you can refer to the steps above to convert MOV to WMV as well.
Want to quickly and freely convert WMV and MOV formats? Try MiniTool Video Converter!Click to Tweet
2. MiniTool MovieMaker
MiniTool MovieMaker is a fabulous tool for converting WMV and MOV. If you want more than the basic conversion, it allows you to add audio/video effects, filters, transitions, motions, and elements into your WMV or MOV videos.
In addition, MiniTool MovieMaker also enables you to fine-tune video and audio properties, such as video contrast, saturation, brightness, audio volume, and music fade in and out. Another pleasant surprise is that it can also help you split, crop, trim, merge, flip, and rotate your videos.
MiniTool MovieMaker also empowers you to adjust the video resolution, frame rate, and aspect ratio, which includes 4 forms: 16:9, 9:16, 4:3, and 1:1.
Advantages:
- Built-in editing and conversion tool.
- Multiple export formats.
- Beginner-friendly workflow.
- High-quality output parameters.
There is a tutorial on how to convert WMV to MOV using MiniTool MovieMaker with a few simple steps.
Step 1. Get MiniTool Video Converter
Click on the download button below to download and install MiniTool MovieMaker. Then, launch it.
MiniTool MovieMakerClick to Download100%Clean & Safe
Step 2. Upload WMV File
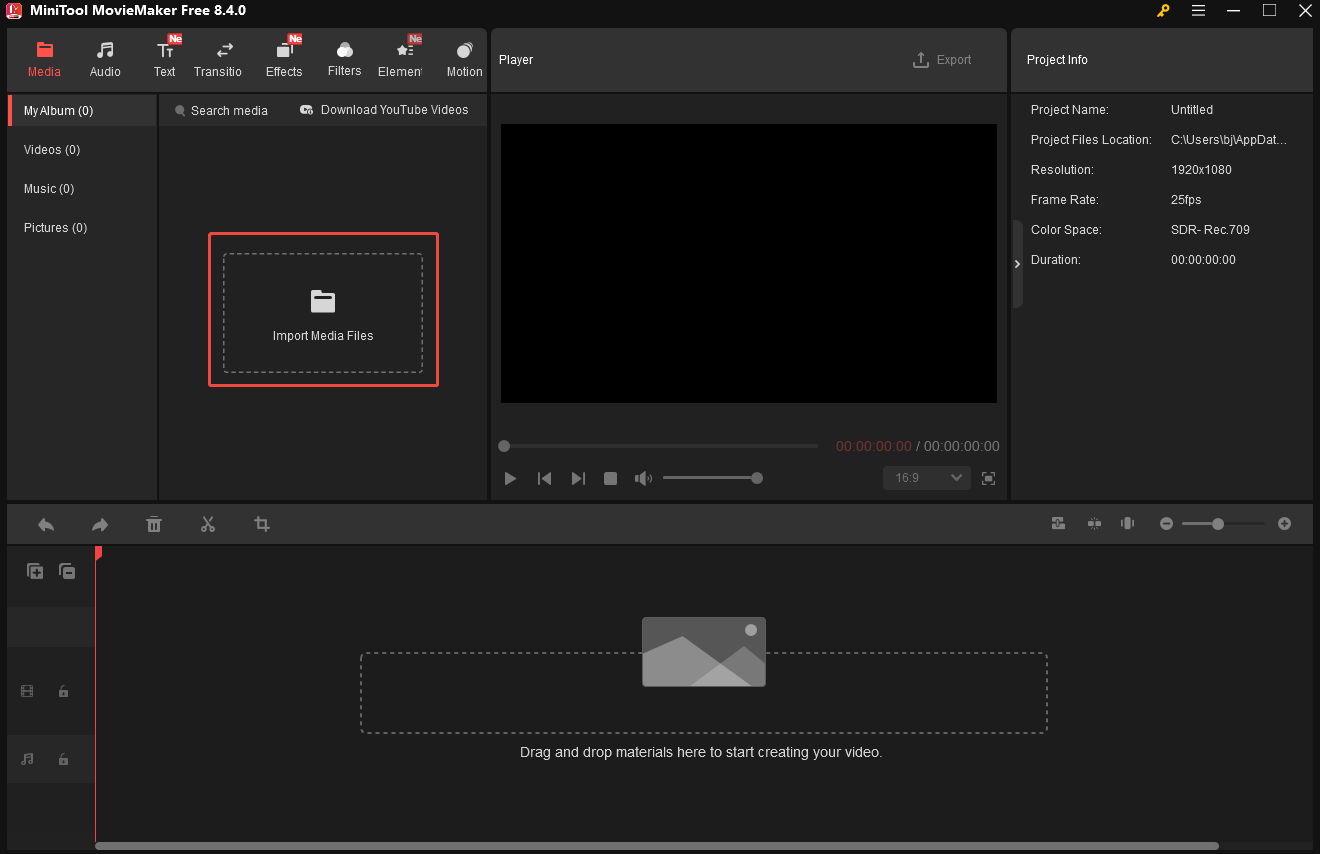
Click on the Import Media Files option to upload the WMV video.
Step 3. Add WMV File onto Timeline
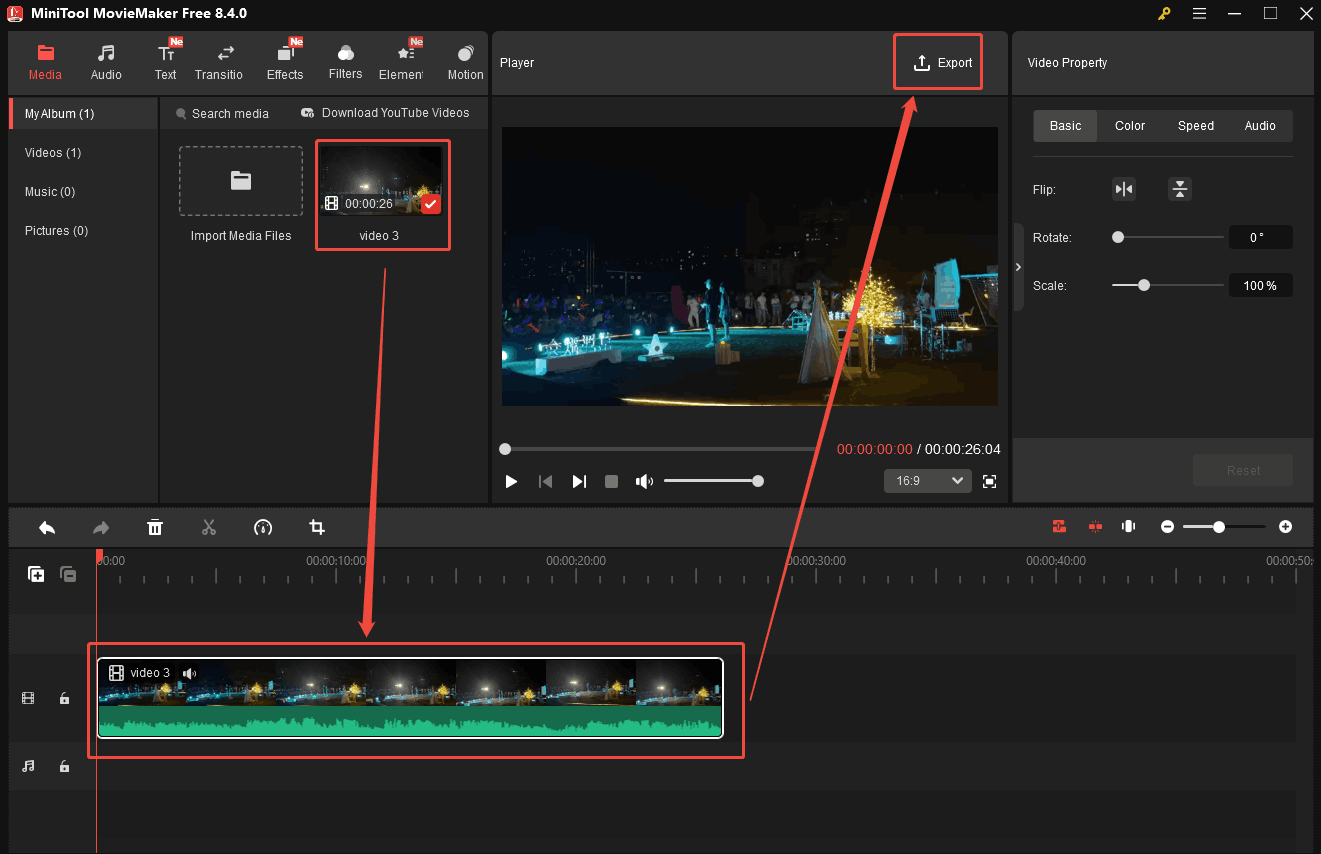
Drag the uploaded WMV video onto the timeline. Then, click on the Export button to trigger the Export window.
Step 4. Set MOV as the Output Format
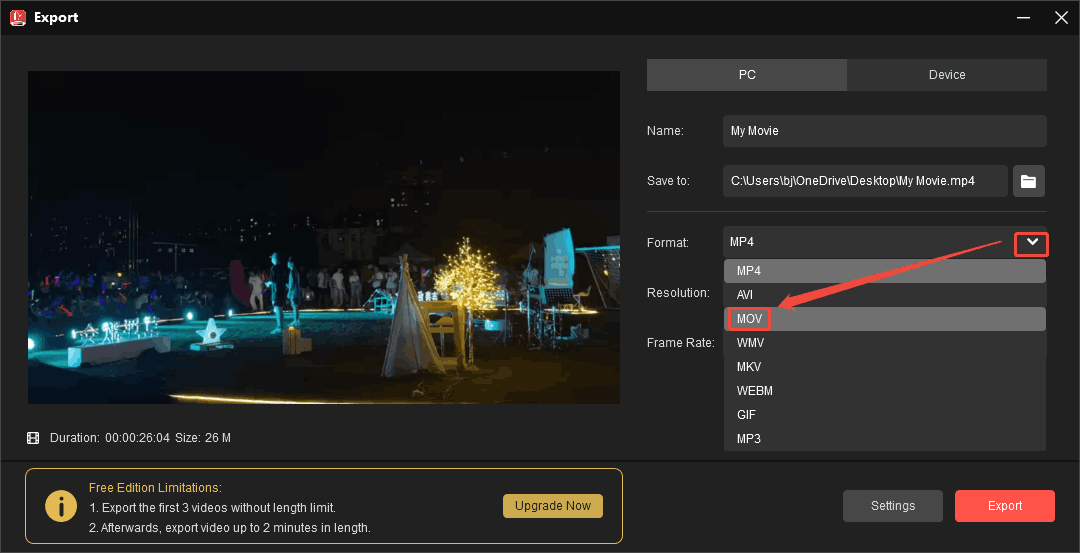
In the Export window, expand the Format window to choose the MOV option.
Step 5. Begin the Conversion
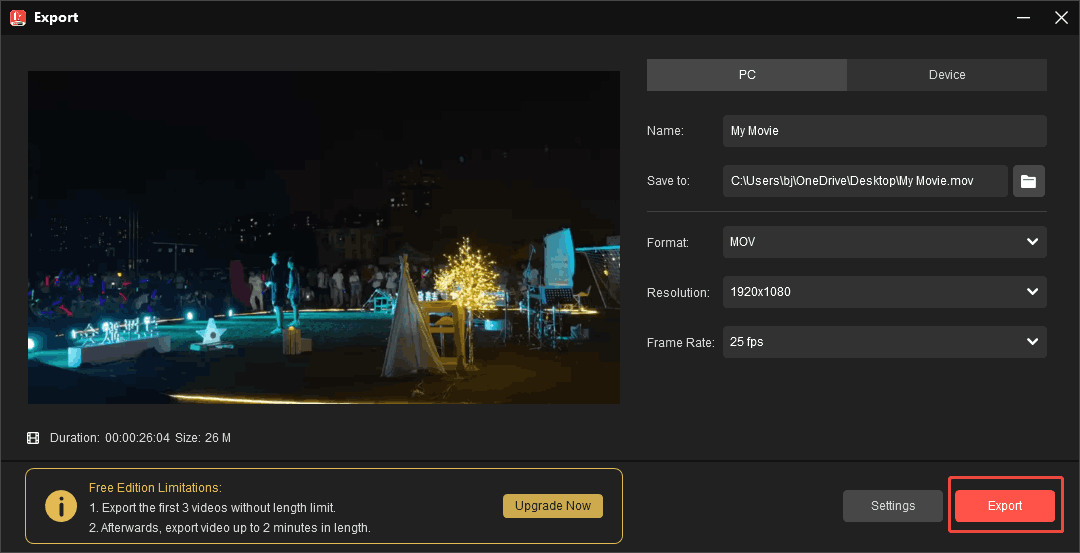
After setting the converted format, click on the Export button to begin the conversion. Then, click on the Find Target button to locate your converted video.
MiniTool MovieMaker is an efficient tool to convert WMV to MOV. It can also help you convert MOV to WMV. What’s more, if you need to edit the converted video, using MiniTool MovieMaker is an ideal choice.
Bottom Line
Based on WMV vs MOV, this article compares them from usage, video quality, compression efficiency, compatibility, playback and streaming, and distribution and sharing. Also, it explains why to convert between WMV and MOV. What’s more, it recommends 2 top-grade converters: MiniTool Video Converter and MiniTool MovieMaker.
If you’d like to learn more about MiniTool Video Converter and MiniTool MovieMaker, feel free to contact our team via email at support@minitool.com. We'll provide you with professional answers. Alternatively, you can send me a message on X. I'll reply as soon as possible.
User Comments :