Cassette tapes may be an outdated audio format, but many people still have cherished recordings on them that they want to preserve. Converting from cassette tape to MP3 files is a great way to ensure that your audio recordings remain accessible and easy to enjoy. In this article offered by MiniTool video converting tool, we will discuss how to convert audio cassette to MP3, including the equipment you'll need and the steps involved in the process.
What You’ll Need
To convert tape to MP3, you will need a few things. First, you will need a cassette player that is in good working order. You can either use an old cassette player that you already have, or you can purchase one online or at a local electronics store. Next, you will need a cable that connects the cassette player to your computer’s audio input. You can use either an RCA cable or a 3.5mm audio cable, depending on the input jacks available on your computer. Finally, you will need audio recording software that can capture the audio signal from the cassette player and save it as an MP3 file.
MiniTool Video Converter is an excellent and easy-to-use screen and audio recording program that can easily capture the visual and audio activities on your computer. It is free to use without any limitation or watermark.
MiniTool Video ConverterClick to Download100%Clean & Safe
How to Convert Cassette to MP3?
Now that you have the necessary equipment, you can start the process of converting your cassette tapes to MP3 files. Follow these steps to get started:
Step 1. Connect the cassette player to your computer. Use an RCA cable or a 3.5mm audio cable to connect the line-out or headphone jack on the cassette player to your computer’s audio input.
Step 2. Download and Install audio recording software (MiniTool Video Converter) on your computer.
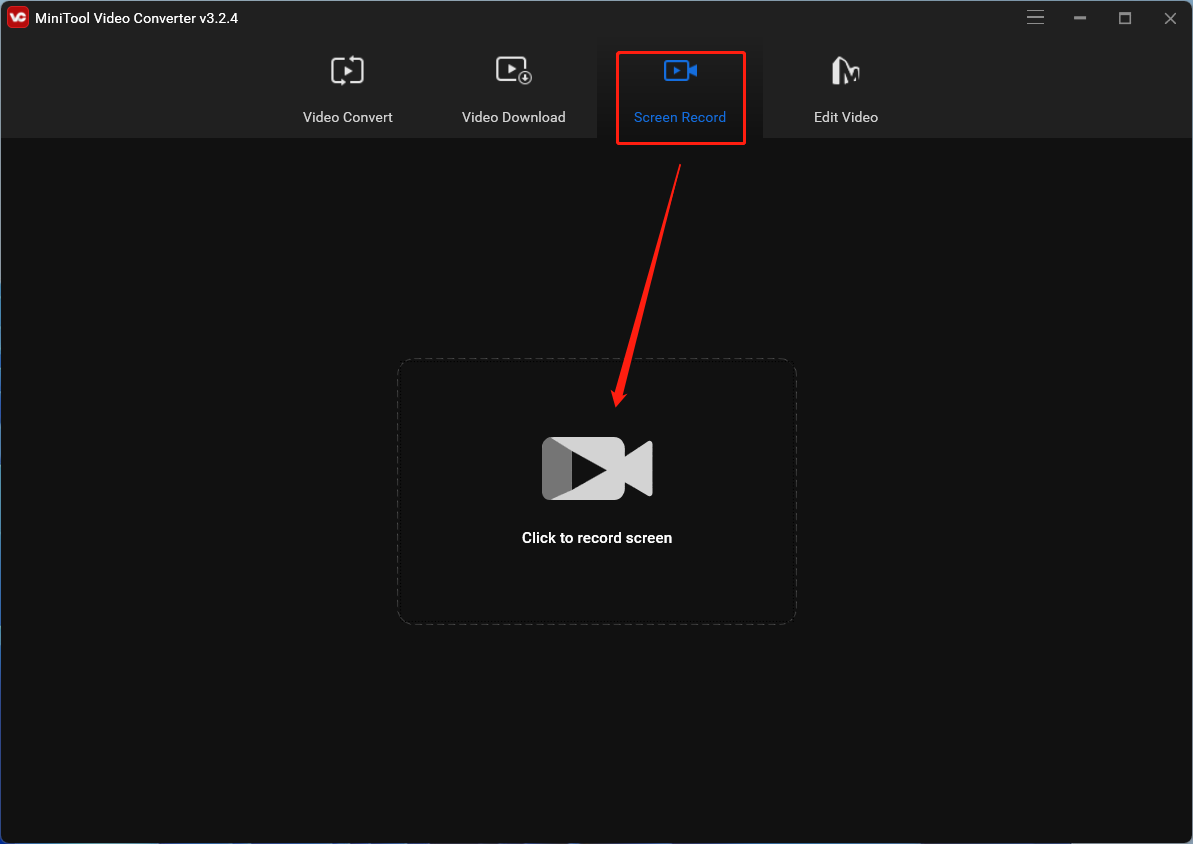
Step 3. Launch MiniTool Video Converter and go to its Screen Record tab from the top menu.
Step 4. Click the Click to record screen option to trigger the MiniTool Screen Recorder window.
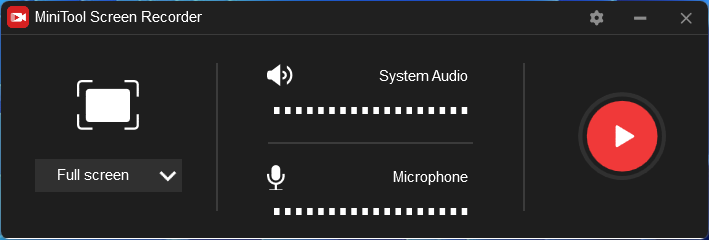
Step 5. There, you can adjust the screen area to record and many other settings by clicking the Settings icon (gear) in the upper right. But make sure you don’t mute the System Audio recording.
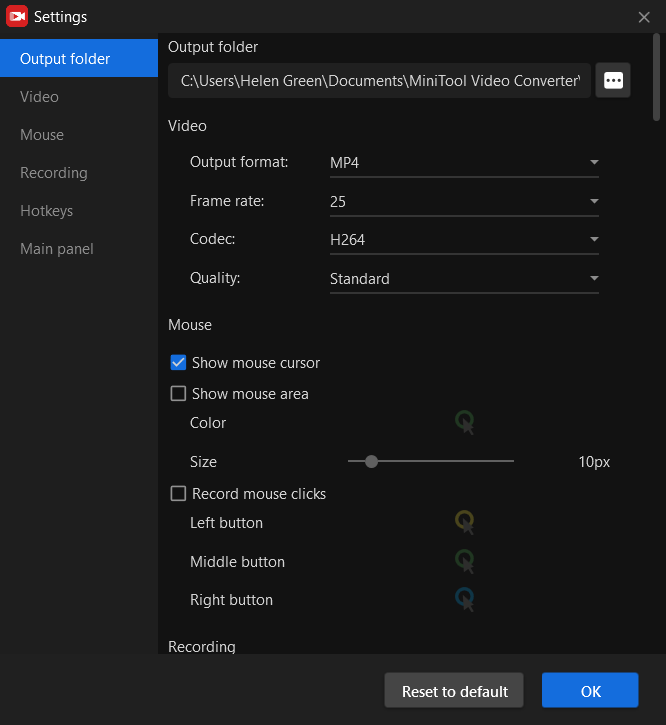
Step 6. You are able to change the save location, video format, mouse shape, etc. of your recording. Since you want to finally get MP3 audio, you can just keep all the default settings.
Step 7. Insert the cassette tape into the cassette player and set it to the beginning of the audio recording.
Step 8. Start playing the cassette tape and begin recording the audio signal by clicking the Record button (red circle) within the above MiniTool Screen Recorder window.
Step 9. Monitor the recording to ensure that the levels are not too high or too low, as this can result in poor sound quality. Adjust the volume as necessary.
Step 10. When the audio recording has finished playing, press F6 to stop the recording.
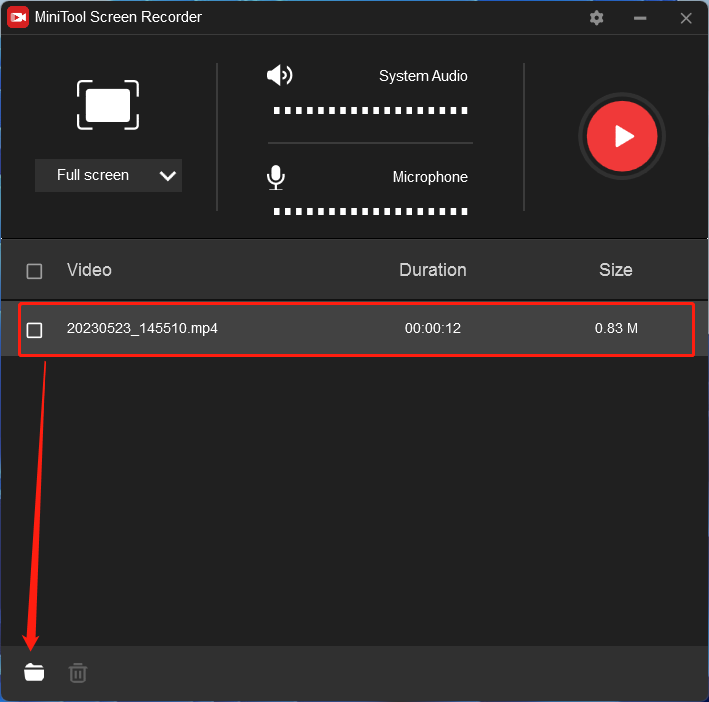
Step 11. The recorded video will be saved automatically. You can directly find it by clicking the Open folder icon at the bottom left of the MiniTool Screen Recorder window.
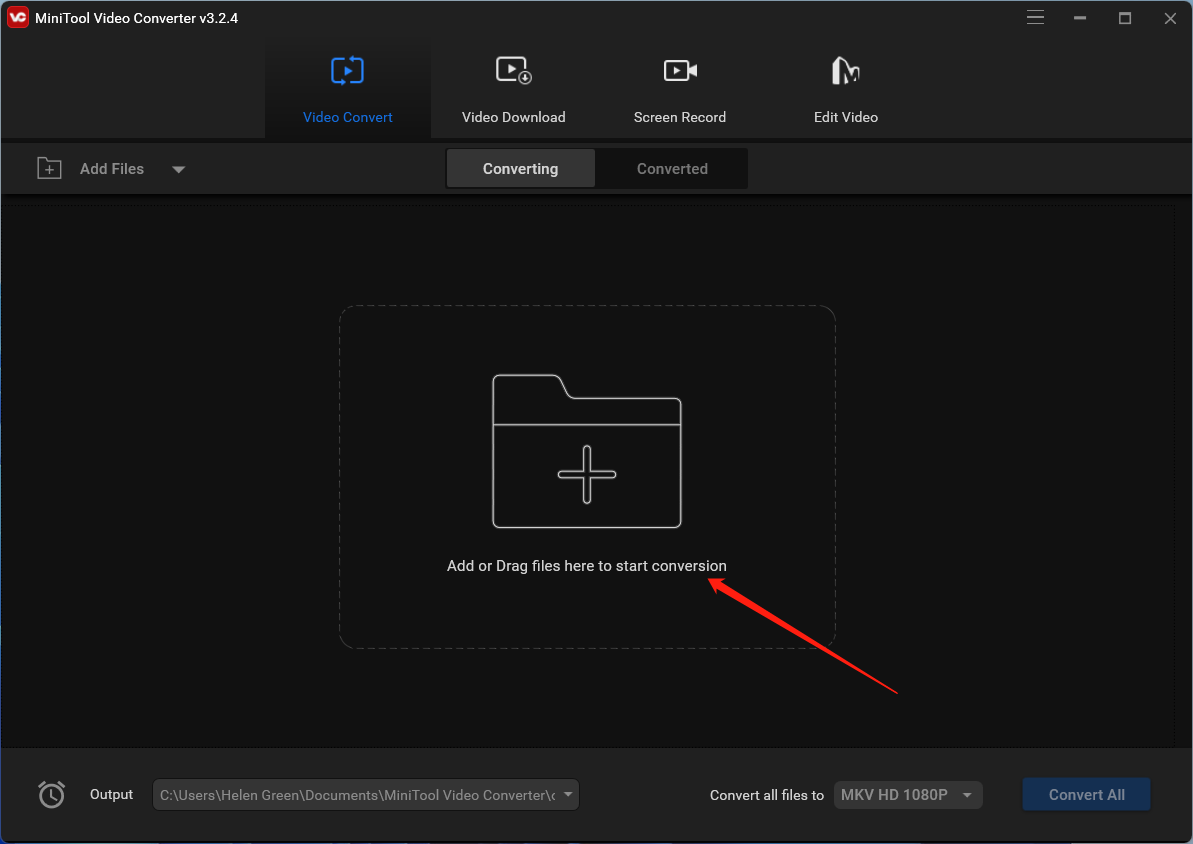
Step 12. Then, close the MiniTool Screen Recorder window and go back to the main interface of MiniTool Video Converter. There, switch to the Converting subtab under the Video Convert main tab and add or drag the recorded video there for conversion.
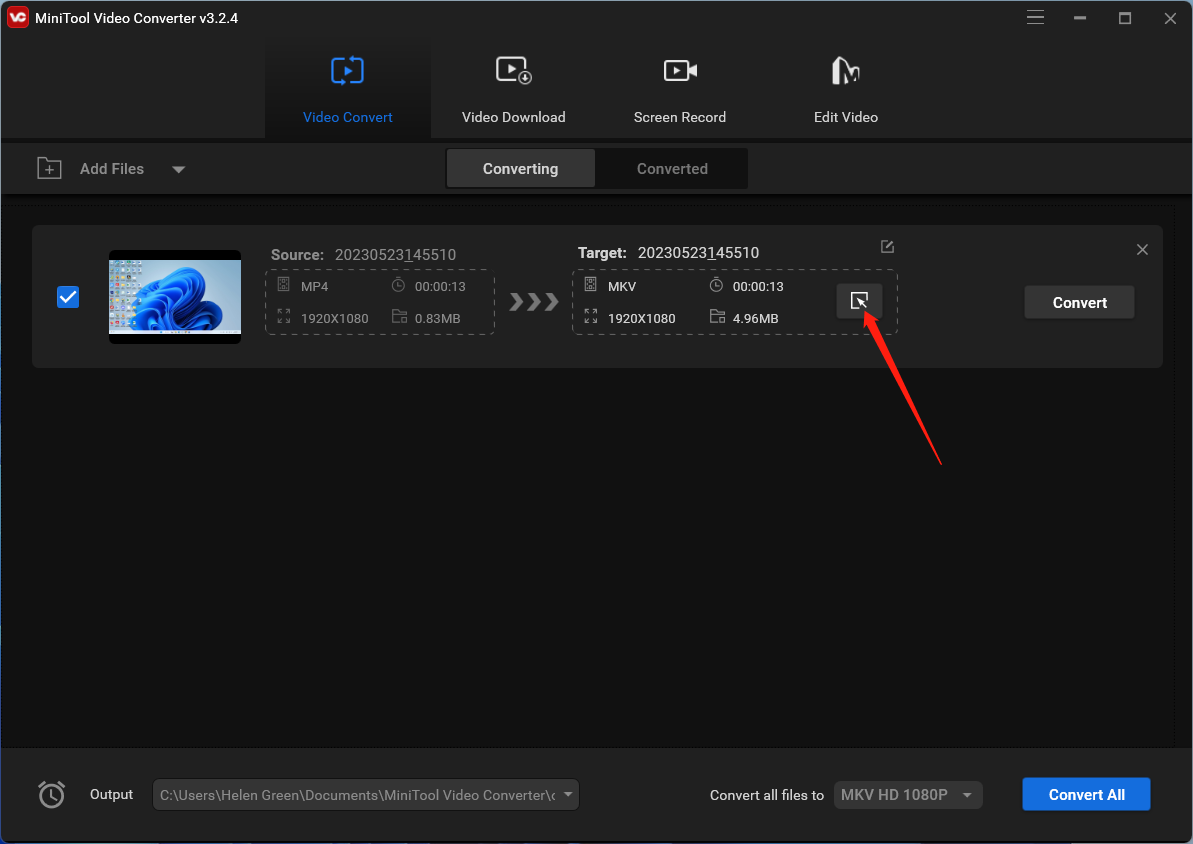
Step 13. When the file conversion is created, click the settings icon of the Target file.
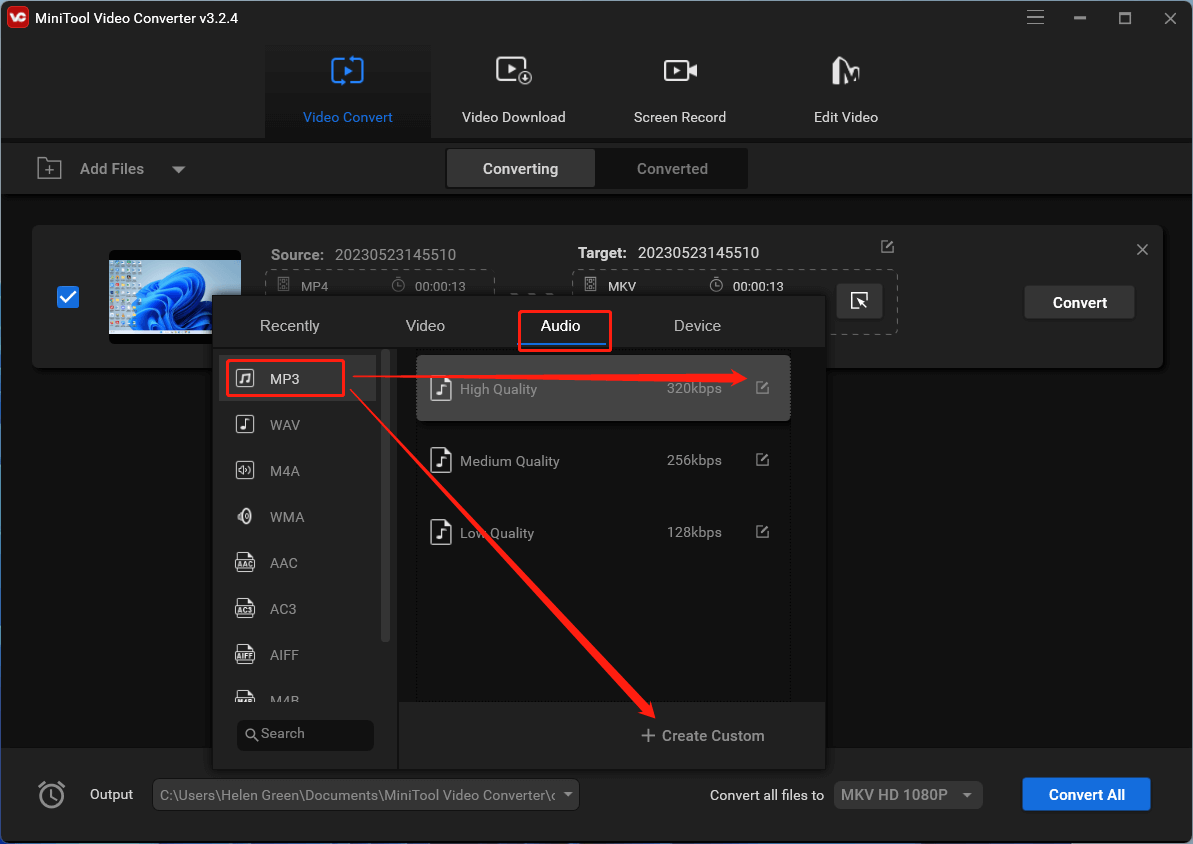
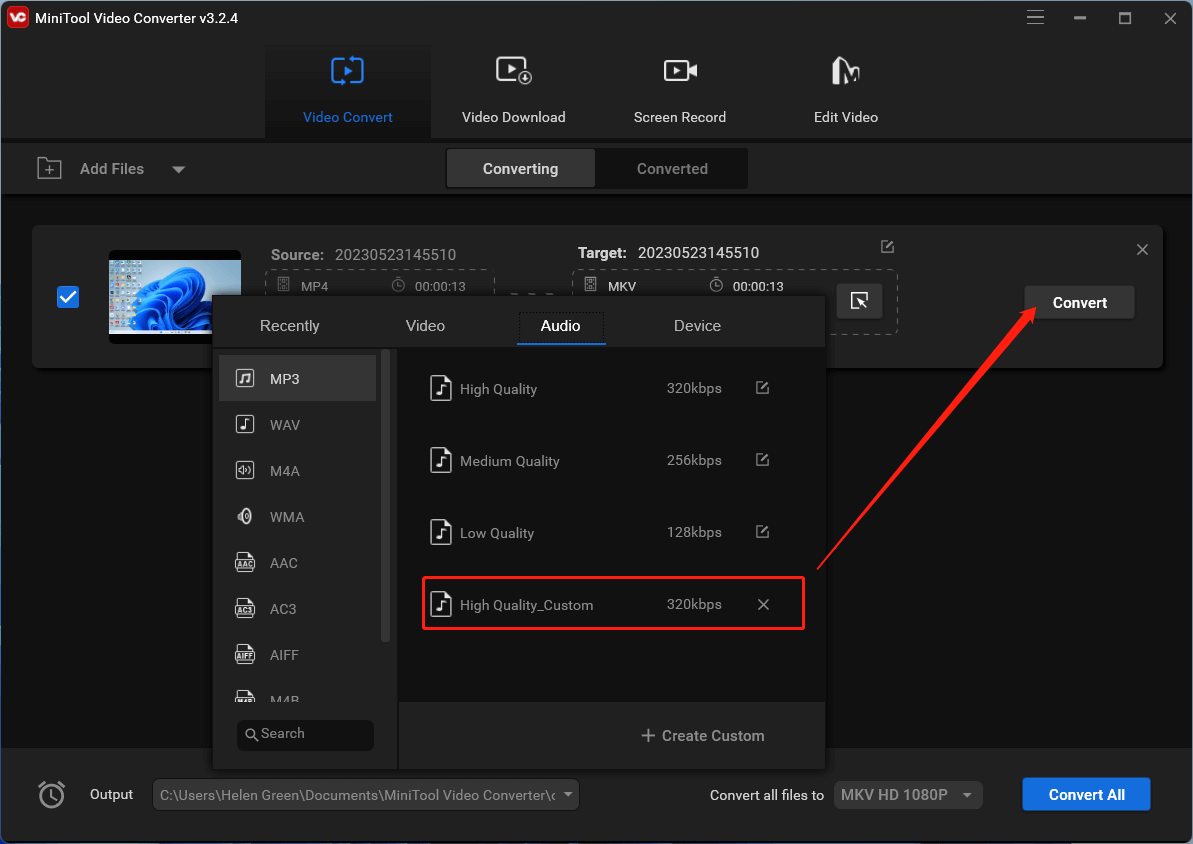
Step 14. In the new window, move to the Audio tab from the top menu and select MP3 from the left menu. Then, you can choose audio quality or specify more details by clicking the settings icon behind the option. Or just directly click Create Custom.
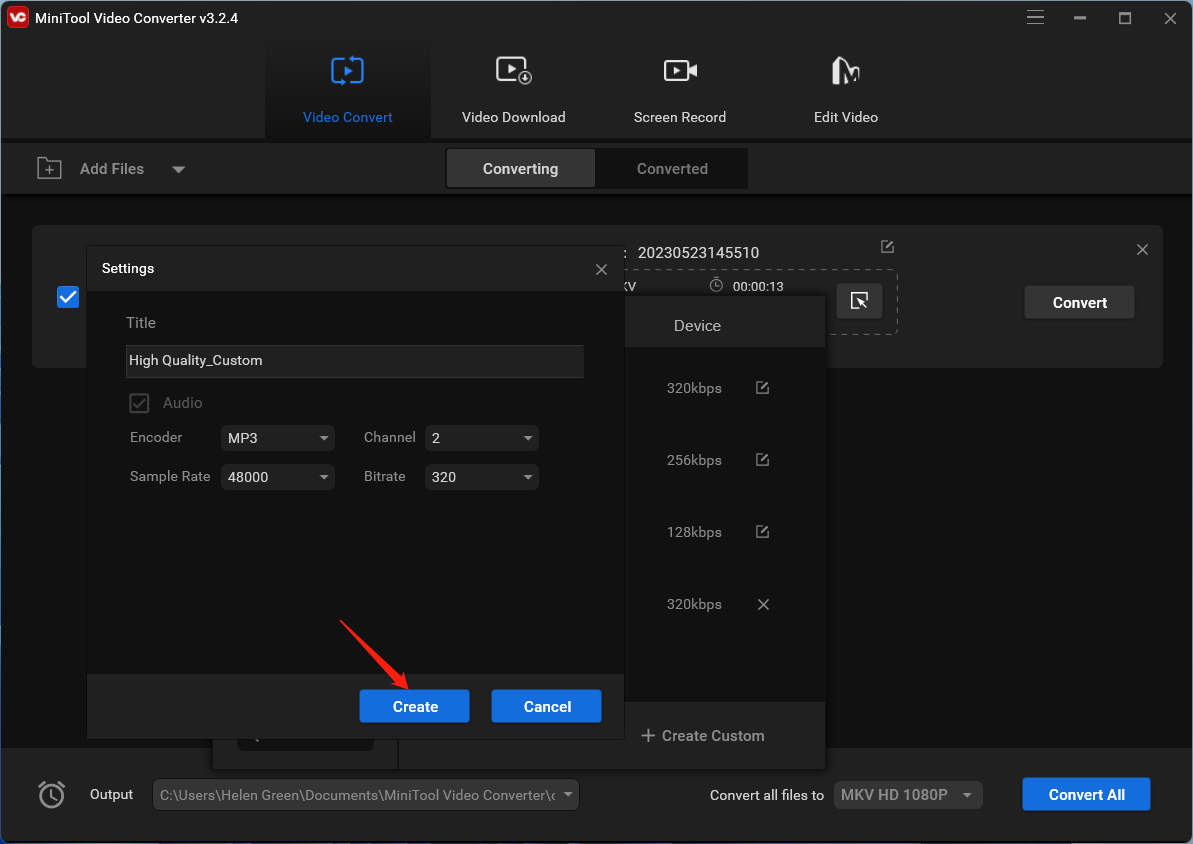
Step 15. In the next popup, you can personalize the encoder, channel, sample rate, and bitrate of your audio. Don’t forget to click the Create button to save the changes.
Step 16. Choose the customized audio format and click the Convert button to start the conversion.
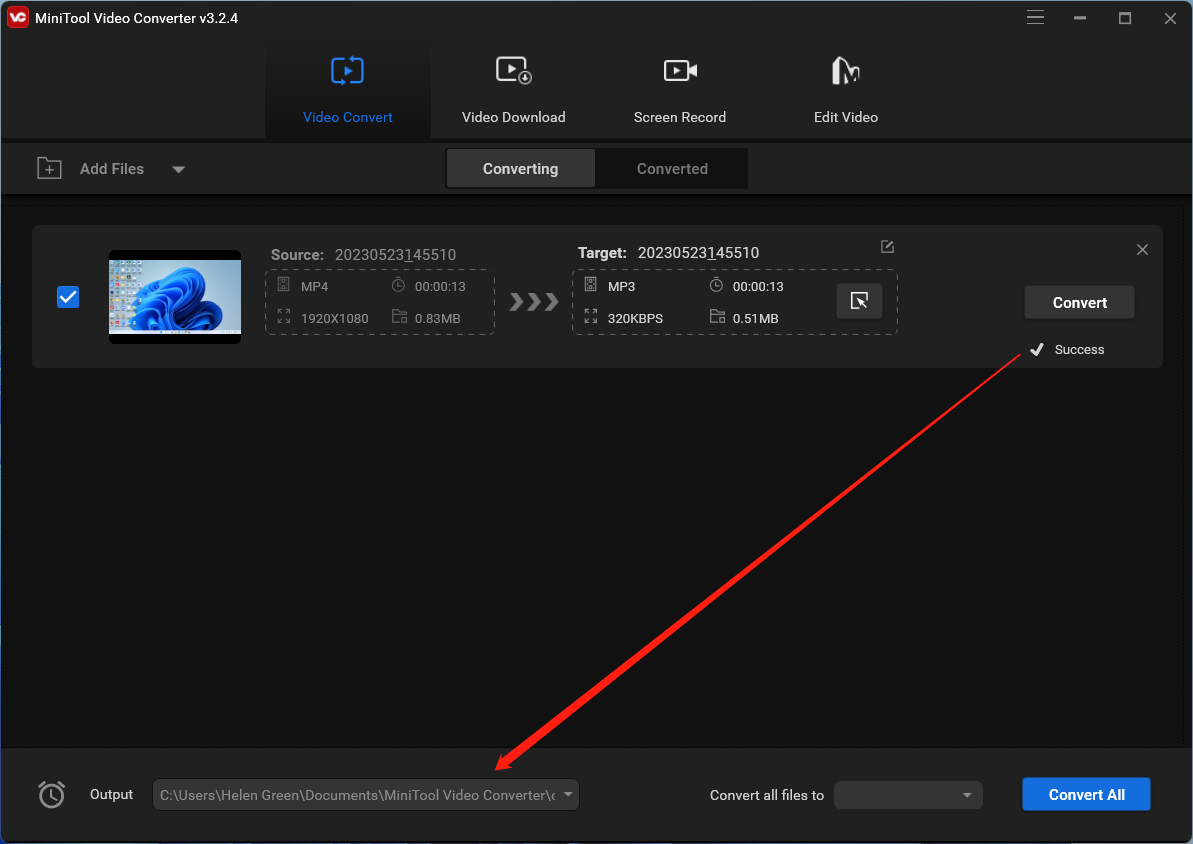
Step 17. Wait until the conversion finishes. Then, you can find the converted MP3 file in its stored location.
Repeat the recording process for the rest of the cassette tape, if necessary.
Tips for Converting Cassette to MP3
Here are a few tips to keep in mind as you convert your cassette tapes to MP3:
- Clean your cassette player before recording to ensure the best possible sound quality.
- Use a high-quality cable to connect the cassette player to your computer’s audio input.
- Monitor the recording levels throughout the recording process to ensure that the sound quality is optimal.
- Edit the recorded MP3 files to remove any unwanted noise or gaps in the audio.
Conclusion
Transferring cassette tapes to MP3 files is a great way to preserve old audio recordings and make them accessible in today’s digital age. With the right equipment and software, the process is relatively simple and straightforward. Whether you have old mixtapes or family recordings on cassette, converting them to MP3s will ensure that you can continue to enjoy them for years to come.
Related Articles
- How to Transfer MP3 to Cassette Tape? (Step-by-Step Guide)
- Betamax Player Review: History, Pros & Cons, Competitors, and Purchase
- Preserving Memories: From Betamax to DVD – A Step-by-Step Guide
- Preserving Nostalgia: Betamax Converter and Tape Conversion Services
- The Vintage Charm of VCR Tapes: Are They Worth Anything?


User Comments :