Nintendo Switch is one of the most popular video game consoles used to play various kinds of games. Sometimes, users would like to take a screenshot or even capture a video on Nintendo Switch and then share it with their friends. In this background, this free file converter post will offer 4 different methods to record Switch gameplay.
Playing games on Switch is a feast for eyes and ears, especially for the big fans. Commonly, the game players would like to record some peak, exciting, and unforgettable moments. They can share the screenshots or even the video capture with their friends. But you may askhow to record Switch gameplay. No worries. The following content will be helpful.
How to Record Switch Gameplay (the Most Basic Way)
Nintendo has designed a built-in recording feature for Switch: it allows you to take a screenshot or record a video easily.
How to Record on Nintendo Switch
If you’re using the consoles with system menu version 4.0.0 or higher, you can perform video capture directly by pressing the button.
- Power on your Nintendo Switch and go to play the game you want to record.
- Press and hold the Capture button on the left Joy-Con. It’s a square button with an indented circle.
- You should make a long press to start Switch video capture, instead of holding the button for 30 seconds.
- Wait for the Saving message to appear in the upper left corner of the screen.
- The new message will come with a play icon to inform you that the recording is finished and the video is saved to the Album.
Please note:
- Don’t make a second-long press on the Capture button during this process. Otherwise, the first video capture will be less than 30 seconds.
- If you only want to take a screenshot while playing video games on Nintendo Switch, you should press the Capture button and then release it.
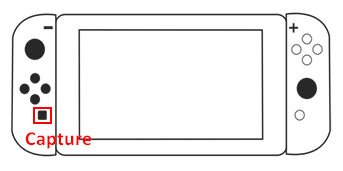
That’s the simplest way to record on Switch. If you also want to take some screenshots from the recorded video, please follow this guide:
- Go back to the home screen on Switch.
- Select Album and then All Screenshots and Videos.
- Specify the video you want to edit. It will then be played automatically.
- Press Y to pause the video when it shows the window you want to record.
- Select Editing and Posting and then Save as Screenshot.
- Repeat these steps to take more screenshots.
Now, you can go to the Album to view and edit the screenshots, if you like.
Attention: how to take a screenshot on Mac & Windows.
- How To Take A Screenshot On A Mac: Methods And Guides.
- How To Take A Screenshot On Windows 8 (Or 8.1): User Guide.
How to edit or trim a saved gameplay video:
Go to the HOME Menu-> choose Album -> choose All Screenshots and Videos -> specify the target video -> select Editing and Posting -> select Trim -> slide the left marker to decide where you want to start the video -> click Next -> slide the right marker to decide where you want to end the video -> click Save.
How to Record Nintendo Switch with Capture Card
Not all games are compatible with the built-in capture tool in Switch. If you want to record these games, you should look for other solutions. Using capture card Switch is a good choice.
What is the capture card? It’s actually a third-party hardware system designed to help Nintendo Switch users record video from their screen.
What You Need to Prepare for Capture Card Video Recording
In addition to the Nintendo Switch device and a capture card for Nintendo Switch, you also need these things:
- A Dock for Nintendo Switch (with both USB port and HDMI interface)
- HDMI cables that could be used to connect the Switch and the capture card
- A proper desktop computer
Does HDMI Carry Audio? How To Troubleshoot HDMI No Sound?
Two of the biggest advantages of using a capture card to record the Switch screen are:
- It unblocks the restriction of the games.
- It breaks the 30-second time limit.
Steps to Record Video with Capture Card Switch
Below are the detailed steps to record Switch gameplay with a capture card
Step 1: Connect the capture card to the Nintendo Switch.
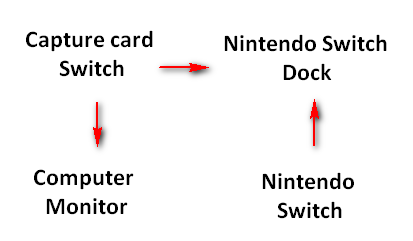
Get a Nintendo Switch Dock and two HDMI cables.
Plug one end of the first HDMI cable into the “HDMI OUT” port on the Nintendo Switch Dock and the other end into the “HDMI IN” port on the capture card.
Plug one end of the second HDMI cable into the “HDMI OUT” port on the capture card and the other end into the “HDMI IN” port on your monitor.
Step 2: Connect the Nintendo Switch and capture card.
You should connect your Nintendo Switch to the Nintendo Switch Dock you prepared.
Then, connect your capture card to the desktop computer via a USB cable.
Make sure the Nintendo Switch is recognized by your computer.
Step 3: record with the capture card Switch.
Launch the capture card software on the computer.
Locate the gameplay you want to record on Nintendo Switch.
Click on the Record button in the capture card software to start recording.
Click on the Stop button when you want to end the recording.
The capture card can also help you record PS4 gameplay, Xbox 360 gameplay, or the gameplay on many other game consoles.
Related reading:
How to Capture Switch Gameplay on PC
If you want to record Switch gameplay on a PC, a professional offline screen recorder is never dispensable. Hence, in the following content, I will highly recommend a credible screen recorder called MiniTool Video Converter. Simultaneously, I will show you how to capture Switch gameplay on PC step by step.
Overview of MiniTool Video Converter
As a watermark-free screen recorder, the MiniTool Video Converter empowers you to record any computer activities without time restrictions. In addition, this screen recording tool has a well-organized interface, which makes the recording procedures more understandable for newbies.
Plus, MiniTool Video Converter will save all the recording files in MP4 format, which means that you can upload your files to various platforms with ease and efficiency. In addition, it has preset several hotkeys to simplify the screen recording.
How to Record Switch Gameplay on PC with MiniTool Video Converter
Below are the detailed instructions on how to record Switch gameplay on PC using MiniTool Video Converter.
Step 1. Download and Install MiniTool Video Converter on Your PC.
MiniTool Video ConverterClick to Download100%Clean & Safe
Click on the download button above to download and install MiniTool Video Converter on your PC. Then, launch it.
Step 2. Activate the MiniTool Screen Recorder Panel.
Switch to the Screen Record module and click on the recording icon to access the MiniTool Screen Recorder window.
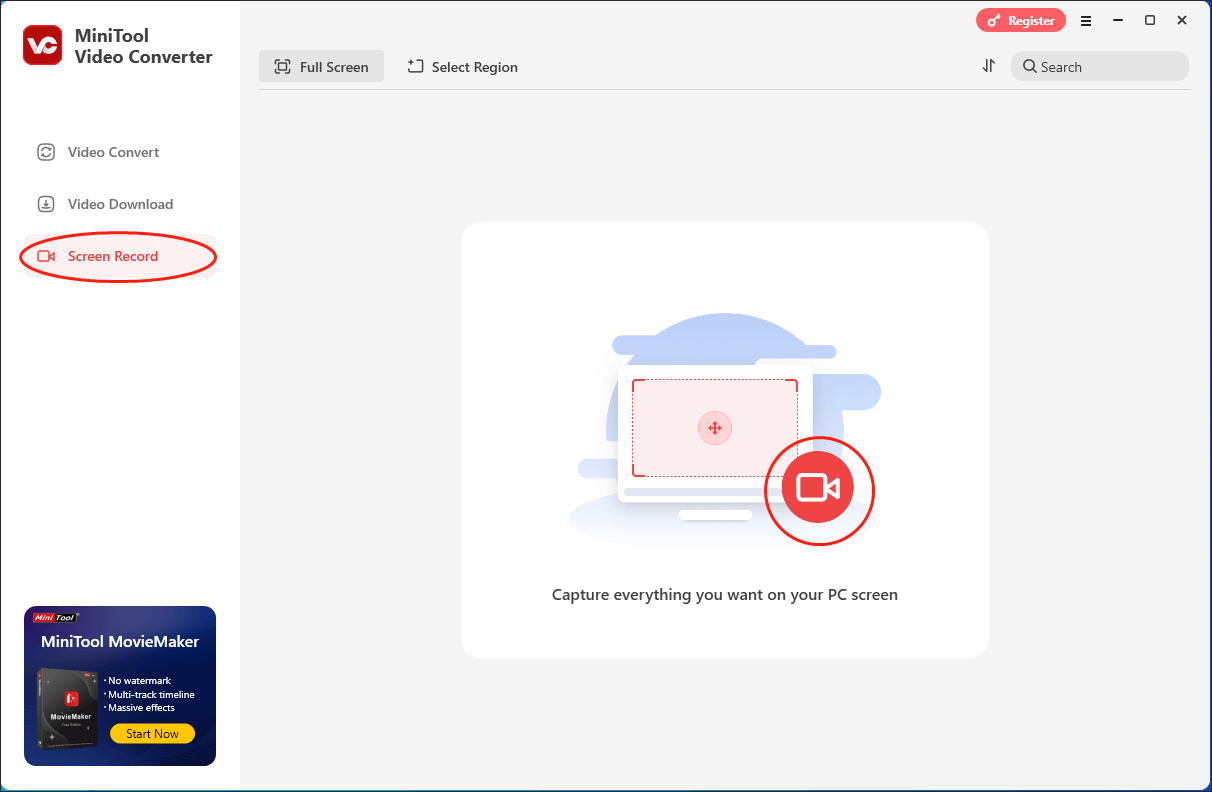
Step 3. Choose the Recording Area and Control the Audio Recording.
The MiniTool Screen Recorder will capture the whole screen by default. If you want to customize the recording area, press the Alt + R keys to select the recording region. Then, click on the System Audio icon or Microphone icon to manage the recording audio. Since you plan to record Switch gameplay, it is suggested you turn on the system sounds and turn off the microphone audio.
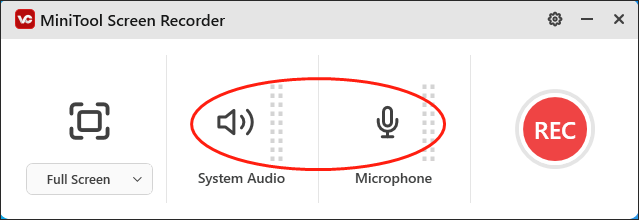
Step 4. Configure the Destination Folder, Recording Quality, and Frame Rate of Output Files.
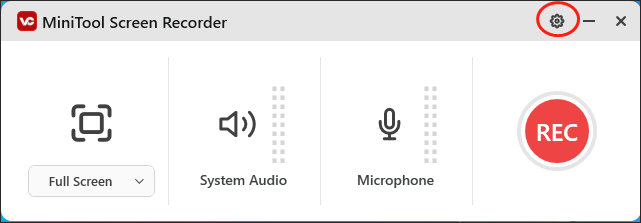
Click on the upper-right gear icon to access the Settings window.
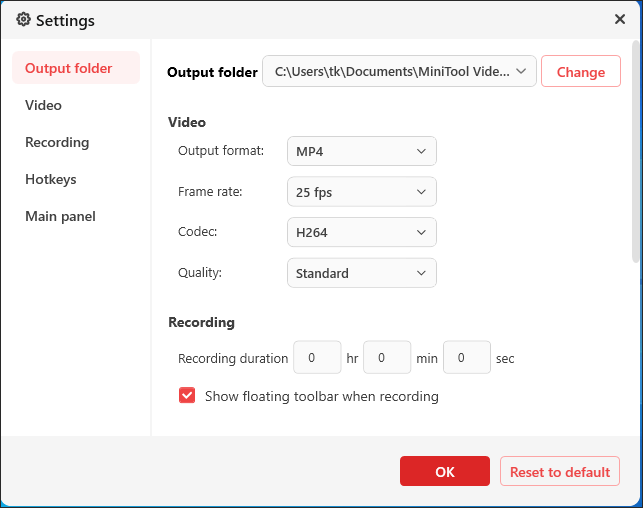
In the pop-up interface, choose a saving path for your recording file. Meanwhile, you are free to set the recording quality based on your needs. In addition, you can set the frame rate as 15fps, 20fps, 25fps, 30fps, and 50fps. Finally, click on the OK button to confirm the changes that you have made.
Step 5. Begin/End the Recording Task and Check the Recording File.
Press the F6 key to activate the recording task. After a 3-second countdown, begin your game journey. Once you have recorded what you want, end your recording by pressing the F6 key again Next, click on the folder icon in the file list to locate and check your recording file.
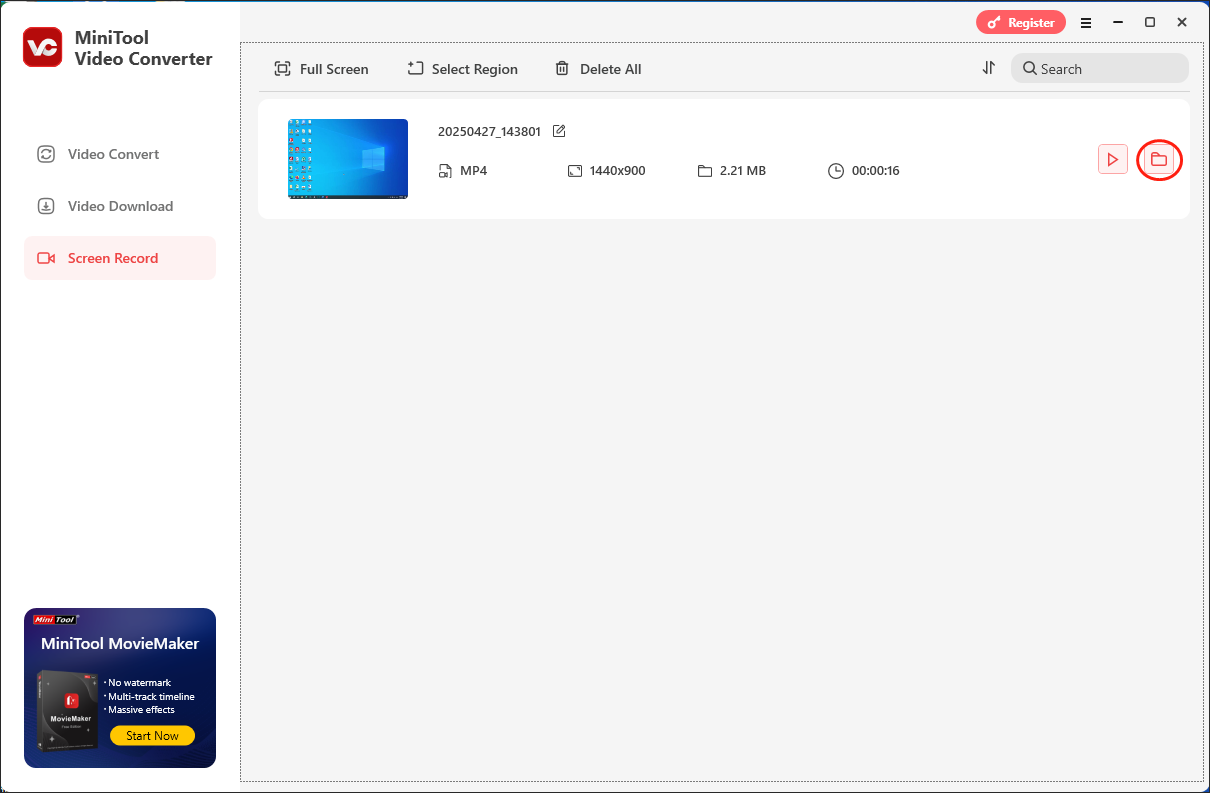
With the above-detailed steps, it will never be difficult for you to record Switch gameplay.
More Than a Switch Gameplay Recorder
To your surprise, MiniTool Video Converter is beyond a Switch gameplay recorder. Below are its other functions.
- It supports a wide range of conversion tasks, including AVI to MP4, WAV to MP3, MKV to MOV, and more.
- It allows you to compress large files by adjusting parameters like encoder, audio channel, resolution, frame rate, bitrate, and sample rate.
- It enables you to download playlists, songs, podcasts, movies, Shorts, and more content from YouTube.
- It makes your files compatible with various platforms and devices such as Vimeo, Instagram, Android, Apple, and so on.
If you want this feature-rich program, just click on the download button below.
MiniTool Video ConverterClick to Download100%Clean & Safe
How to Record Videos on Windows 10 with Game Bar
Also, you need to connect your Nintendo Switch console to the computer and make sure it can be recognized before starting to record Switch gameplay.
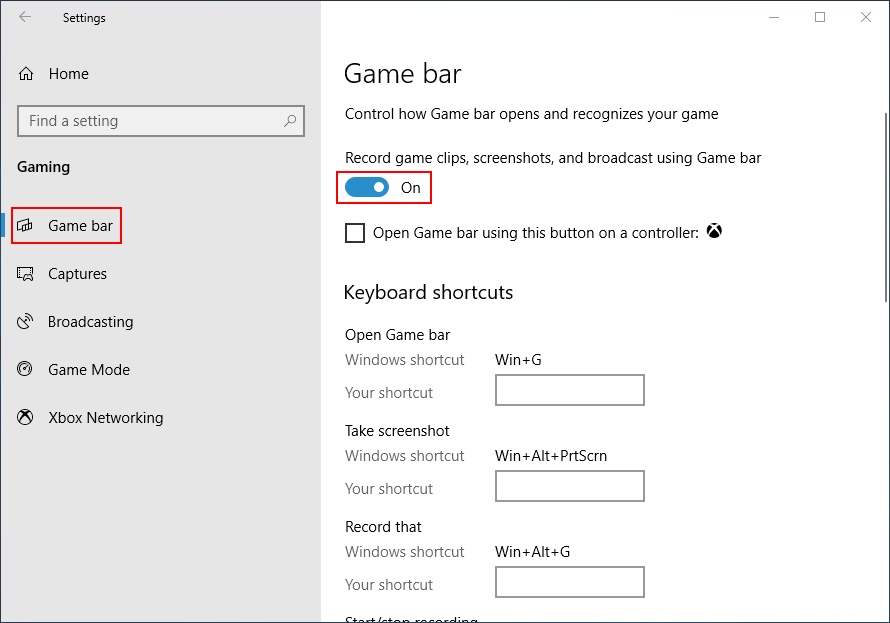
Step 1: enable the Game bar.
- Click on the Start button located in the lower-left corner of your PC screen.
- Click on Settings (represented by a gear icon) from the left sidebar.
- Select Gaming (Game bar, captures, broadcasting, Game Mode).
- Game bar is selected by default in the left panel.
- Look for the Record game clips, screenshots, and broadcast using Game bar option in the right panel.
- Toggle the switch under the option to On.
Step 2: start recording.
- Press Win+G to open the Game bar on Windows 10 quickly.
- Look for the Capture module and select it.
- Display the gameplay that you want to record on the computer screen.
- Click on the Start recording button or press Win+Alt+R on the keyboard.
- Perform any actions that you want to record.
- Click on the Stop recording button or press Win+Alt+R again when you want to end the recording.
- A notification will appear to inform you that the recorded video is saved in MP4 format.
Please go to check the video you get. If you also want to edit it, you should open the MP4 video with the Photos app and then select Edit & Create. (Do you want to convert MP4 to MP3 for free?)

You still have another choice to record the screen of your Windows 10 laptop or computer: recording via the webcam by using the Camera app.
Final Thoughts
If you search online, you can find a lot of Nintendo Switch gameplay easily. Some hot videos even have been viewed hundreds of millions of times. An idea might occur to you: recording Nintendo Switch gameplay yourself. But do you know how to record Switch gameplay?
This article focuses on introducing 4 useful ways to show people how to record on Switch or even a Windows PC. You should read them step by step if you also want to record Switch gameplay. In addition, if you have any problems when using MiniTool Video Converter, send an e-mail to [email protected] to ask for help. Also, you can share your problems with me on Twitter. I will do you a favor as quickly as possible.


User Comments :