Audacity is a free audio recording tool. You can use it to record computer audio and your voice. But sometimes, Audacity will not record sound on your device. How to fix the Audacity not recording sound issue? This article from the free file converter is here to help. It first gives a brief introduction to Audacity, followed by 5 reasons behind the failure, and ends with 6 practical methods to troubleshoot this problem.
I’ve been using Audacity for a few months now to record music. It’s worked pretty smoothly up until today. Since this morning, it is not picking up any audio from the computer or earbuds, barring me from recording anything.
Someone said that on the internet. Have you ever faced a similar recording issue while using Audacity? If so, this article is going to help you out.
Introduction to Audacity
First, let me give you a quick introduction to Audacity. Audacity is a popular open-source program for editing and recording digital audio. Is Audacity free? Yes. It is completely free. With it, you can record and edit audio without having to worry about the budget.
The interface is simple and easy to understand. The buttons and menus are clearly marked, so you can record, play, pause, and stop audio without any trouble.
What’s more, Audacity works well with many operating systems. Whether you use a Windows PC, a Mac, or Linux, you can download and install Audacity on your computer and start working on your audio projects right away.
After you record, you can use Audacity’s editing tools to improve your recorded audio. In addition, this tool supports lots of different audio file formats. Once you’re done editing, you can save your audio in different formats based on what you need.
Why Is Audacity Not Recording Sound
Audacity not recording Windows 10? Audacity can’t find audio devices? Is Audacity not detecting microphone? Why does Audacity not record sound? Are you facing those recording problems? Here are some reasons.
- You haven’t selected the corresponding audio source for capturing. You may ignore essential options in Audacity settings. Sometimes one setting in Audacity is off will cause the program.
- Audacity is not allowed to access your microphone. Why is Audacity not recording my voice? The reason can be that you haven’t permitted Audacity to access your microphone.
- Incorrect audio host selection. Audacity is compatible with a wide range of audio hosts. When it is set to an inappropriate audio host, that will lead to problems during the recording process.
- Incorrect sample rate selection. The sample rate determines how often the audio signal is measured during the recording process. If you select a sample rate that is not compatible with your audio device or the project requirements, it can lead to recording failures.
- Outdated software version. If you’re using an old version of Audacity, it can also cause Audacity not to record sound.

Audacity Not Recording? 6 Quick Fixes
- Adjust Audacity settings.
- Allow Audacity to access your microphone.
- Change the audio host to MME.
- Set proper audio sample rate.
- Update Audacity.
- Use an Audacity alternative – MiniTool Video Converter.
1. Adjust Audacity Settings
To adjust Audacity settings, you can:
Step 1. Open Audacity, click the Edit button, then choose Preferences.
Step 2. Go to Recordings and check the Play other tracks while recording (overdub), Record on a new track, and Detect Dropouts boxes.
2. Allow Audacity to Access Your Microphone
The Audacity not recording sound issue may be caused by Privacy settings. You can check if Audacity is allowed to use your microphone.
On Windows
Step 1. Open Settings, find the Privacy option, and click on it.
Step 2. Go to App permissions and tap on Microphone.
Step 3. Turn on the button under Allow apps to access your microphone.
Step 4. Under Choose which apps can access your microphone, find Audacity and turn it on.
On Mac
Step 1. Choose the Apple menu > System Preferences.
Step 2. Head to Security & Privacy > Privacy.
Step 3. Choose Microphone from the left panel.
Step 4. Check the Audacity option to allow it to access your microphone.
3. Change Audio Host to MME
There are many audio hosts for Audacity and MME is the default one. You may accidentally change it to another host and that will cause Audacity not recording desktop audio.
Step 1. Open the Audacity app and drop down the Audio Host list.
Step 2. From the dropdown list, choose the MME option and choose Stereo Mix as the recording device.
4. Set Proper Audio Sample Rate
The sample rate has a lot to do with the audio quality. Generally speaking, the higher the sampling rate is, the closer the recorded sound is to the original sound. However, if you choose an inappropriate sample rate, that can cause the recording issue. Refer to the manual of your recording device, as the manufacturer usually provides sample rate suggestions.
Here’s how to change the sample rate.
Step 1. Go to the Audio Settings menu of Audacity.
Step 2. Navigate to Quality, open the Project Sample Rate option, and choose a sample rate from the drop-down menus. Click Default Sample Rate if you want to keep your settings for each new project.
5. Update Audacity
Software developers often release updates. They do this to fix bugs, make the performance better, and improve how well the software works with different systems and devices.
If you’re using an old version of Audacity, it may have known issues related to audio recording that have already been resolved in newer releases. These bugs can stop the program from recording sound correctly.
Follow the steps below to update Audacity.
Step 1. Open Audacity, and click Help on the taskbar at the top of the screen.
Step 2. Select Check for Updates.
Step 3. On the following Audacity website, you can see the latest available version, which you can compare with your current installation to determine if an update is needed.
6. Use an Audacity Alternative – MiniTool Video Converter
If none of the above methods can fix the Audacity not recording problem, you can try another recorder. Here I recommend MiniTool Video Converter. This tool is free and doesn’t have time limits or watermarks.
Main Recording Features of MiniTool Video Converter
- Audio/Video Recording Function. MiniTool Video Converter allows you to record audio with ease. You can record the system audio, the microphone input, or both. It also allows you to record screen activities. For example, if you want to record a webinar, a video tutorial on your screen, or a gaming session, it can do the job.
- Flexibility to Change Settings for Recording. MiniTool Video Converter allows you to adjust the recording area. You can choose to record the entire screen or just a specific part of it. For instance, if you only want to record a particular window, you can select that window’s area for recording. There are also options to choose the recording output folder, frame rate, and duration depending on your needs.
- Ease of Use. The interface of MiniTool Video Converter is user-friendly and all buttons are set clearly. Even for those who are not very tech-savvy, it is easy to figure out how to start and stop the recording process.
How to Record Audio using MiniTool Video Converter
Step 1. Click the button below to download and install MiniTool Video Converter. Then, open it.
MiniTool Video ConverterClick to Download100%Clean & Safe
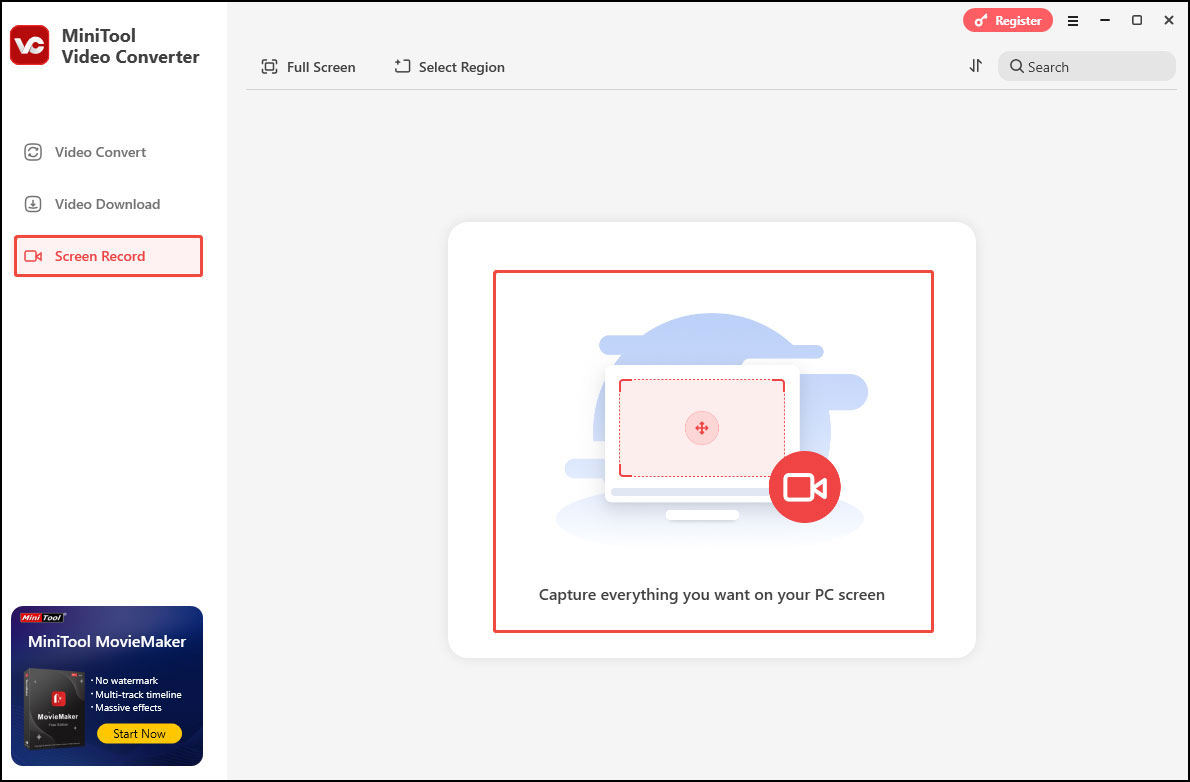
Step 2. Under the Screen Record tab, click the Capture everything you want on your PC screen area to enable the MiniTool Screen Recorder panel.
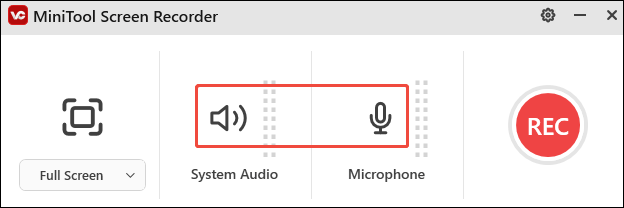
Step 3. In the MiniTool Screen Recorder panel, click the System Audio icon or the Microphone icon to capture the corresponding sound. You can also enable them both.
For more settings, click the gear icon in the upper right.
Step 4. Play the audio you want to capture. To start the recording process, you can press the default F6 key or click the red REC button. During recording, you can press F9 to pause/resume recording.
Step 5. Once done, press F6 to stop recording.
Step 6. Then, the main interface of the MiniTool Video Converter will appear with your recording listed. Click the play icon beside it to watch.
How to Convert the Audio Recording to MP3 or Other Audio Format
MiniTool Video Converter saves the recording in MP4 format. If you want to convert it to MP3 or other audio formats, here are 2 free and easy tools to help you with that.
MiniTool Video Converter
Besides an audio recording tool, MiniTool Video Converter is also a great free file converter. It can convert video to video, audio to audio, and video to and from audio. This tool supports many formats, including MP4, AVI, MOV, MP3, AAC, AC3, etc. That means you can extract audio from your MP4 recording and output it in MP3, AAC, AC3, or other formats. In addition, it can convert up to 5 files simultaneously. What’s more, you can change the video encoder, resolution, bitrate, and frame rate. For audio, you can modify the encoder, bitrate, channel, and sample rate.
Here’s how to convert extract audio from your video with MiniTool Video Converter.
Step 1. Download and install MiniTool Video Converter.
MiniTool Video ConverterClick to Download100%Clean & Safe
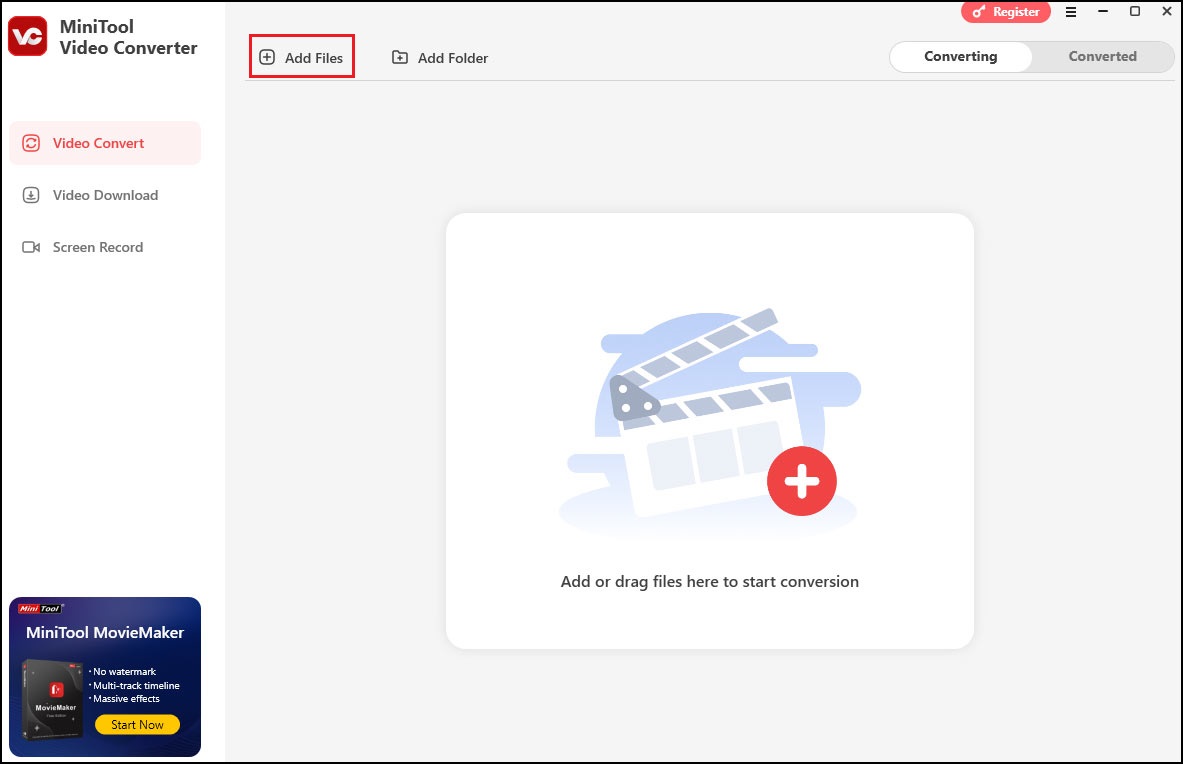
Step 2. Launch this program. Under the default Video Convert tab, select Add Files to load the MP4 recording file you want to convert.
Step 3. Click the pen icon next to the target file name to rename the file. Expand the Output option at the bottom to specify the destination folder.
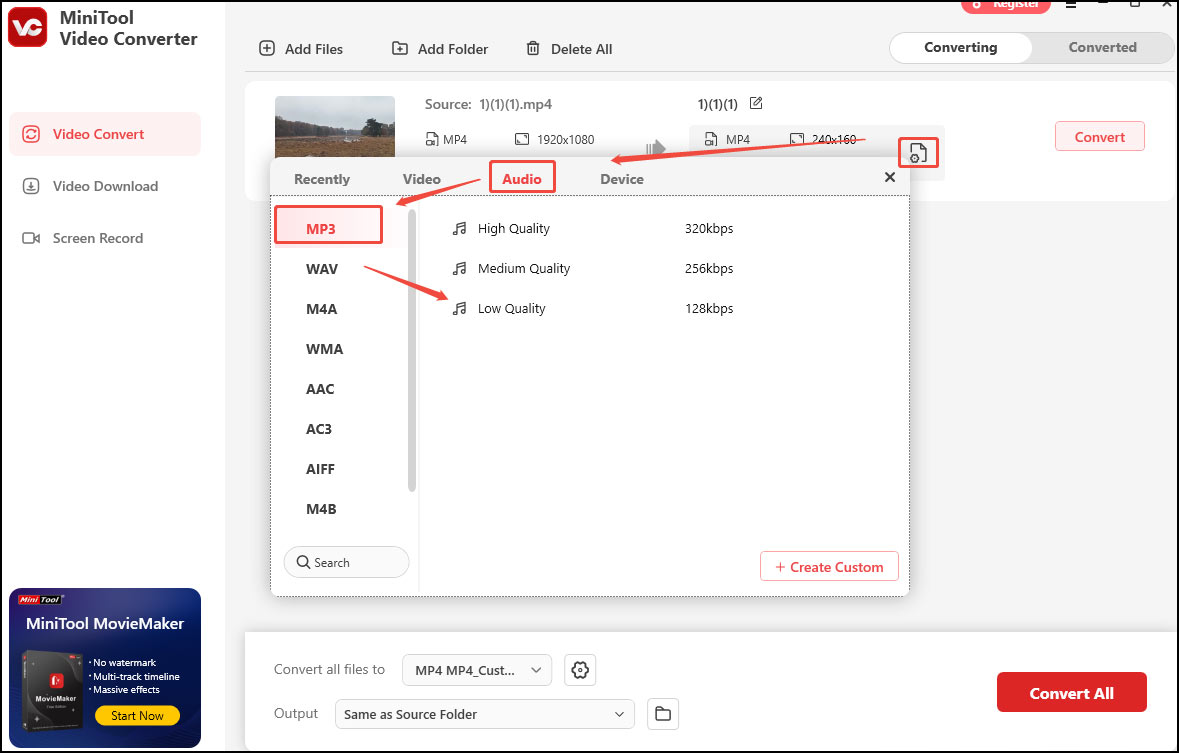
Step 4. Click the folder with a gear icon to open the output format list. Click the Audio tab and choose MP3 or other audio formats you like on the left. Then choose a preset profile on the right.
If you are not satisfied with the presets, click + Create Custom to generate a new video format according to your needs.
Step 5. Click the Convert button to begin the conversion.
Step 6. Once finished, you’ll be led to the Converted tab. Click the Open button to locate the converted video file.
MiniTool MovieMaker
MiniTool MovieMaker is a user-friendly video editing tool that offers a range of features for creating and editing videos. It provides basic editing functions such as trimming, cutting, splitting, and merging videos. It also offers countless transitions and effects to enhance the visual appeal of videos. For audio, you can change its speed, adjust the volume, apply audio effects, etc.
More importantly, it allows you to import and output various video and audio formats, including both MP4 and MP3. Thus, you can use it to extract audio from your MP4 recording and save it in MP3 format.
Here are the steps.
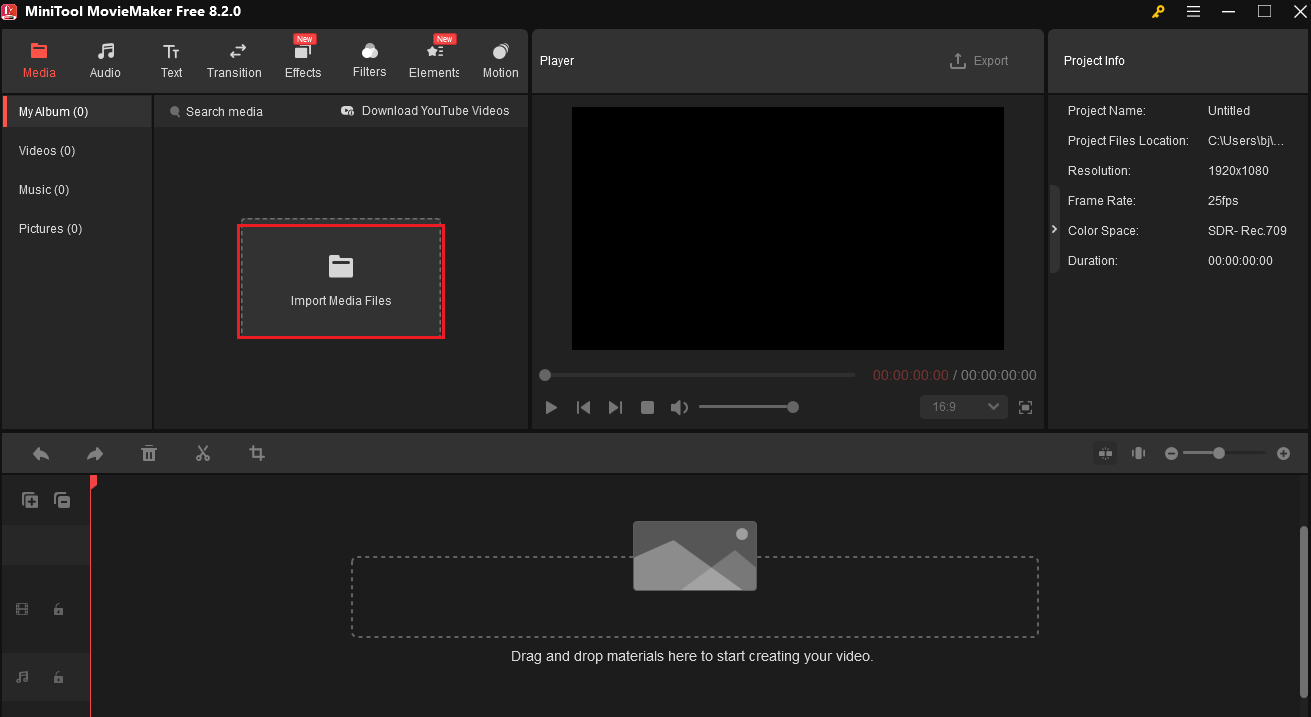
Step 1. Download, install, and launch MiniTool MovieMaker.
MiniTool MovieMakerClick to Download100%Clean & Safe
Step 2. Close the project window. Click Import Media Files to add your recording.
Step 3. Click the plus icon to add the video to the timeline.
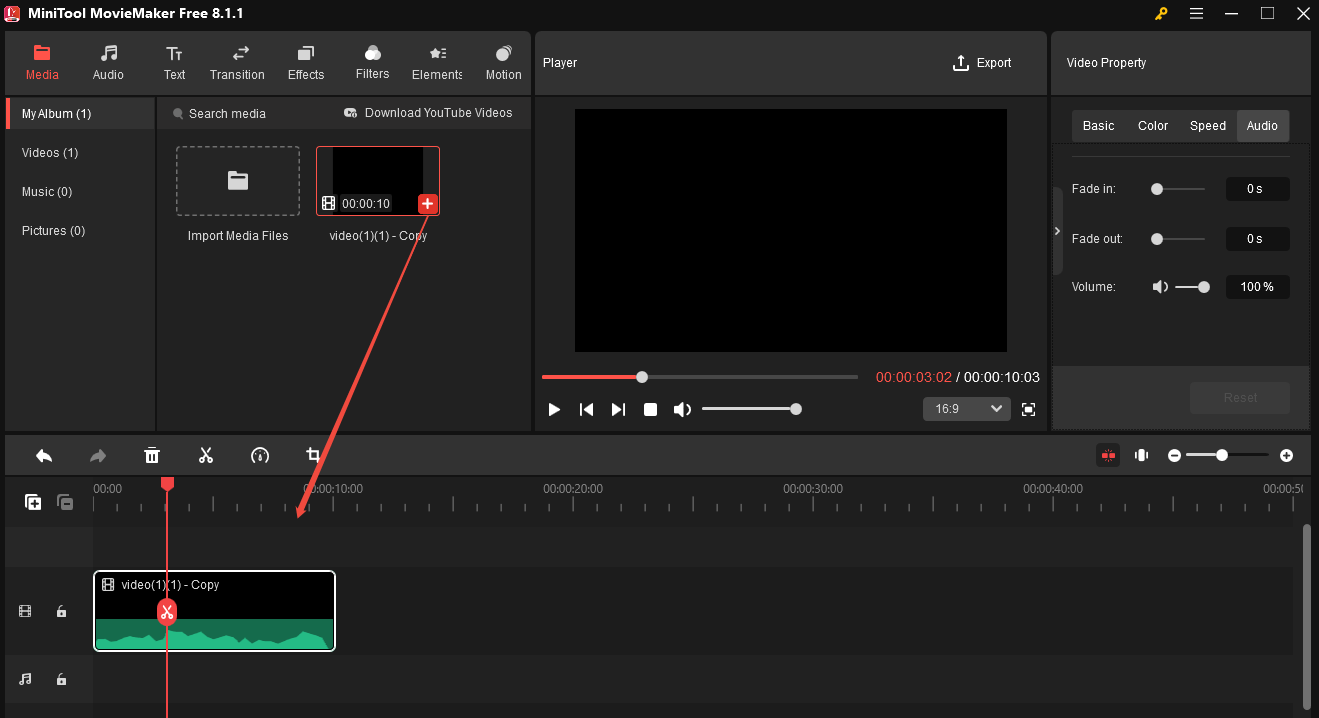
Step 4. Before exporting, you can edit the recording if needed.
Step 5. Click Export. In the Export window, expand the Format option and choose MP3 as the output format. Then, click the red Export button to extract audio from your recording.
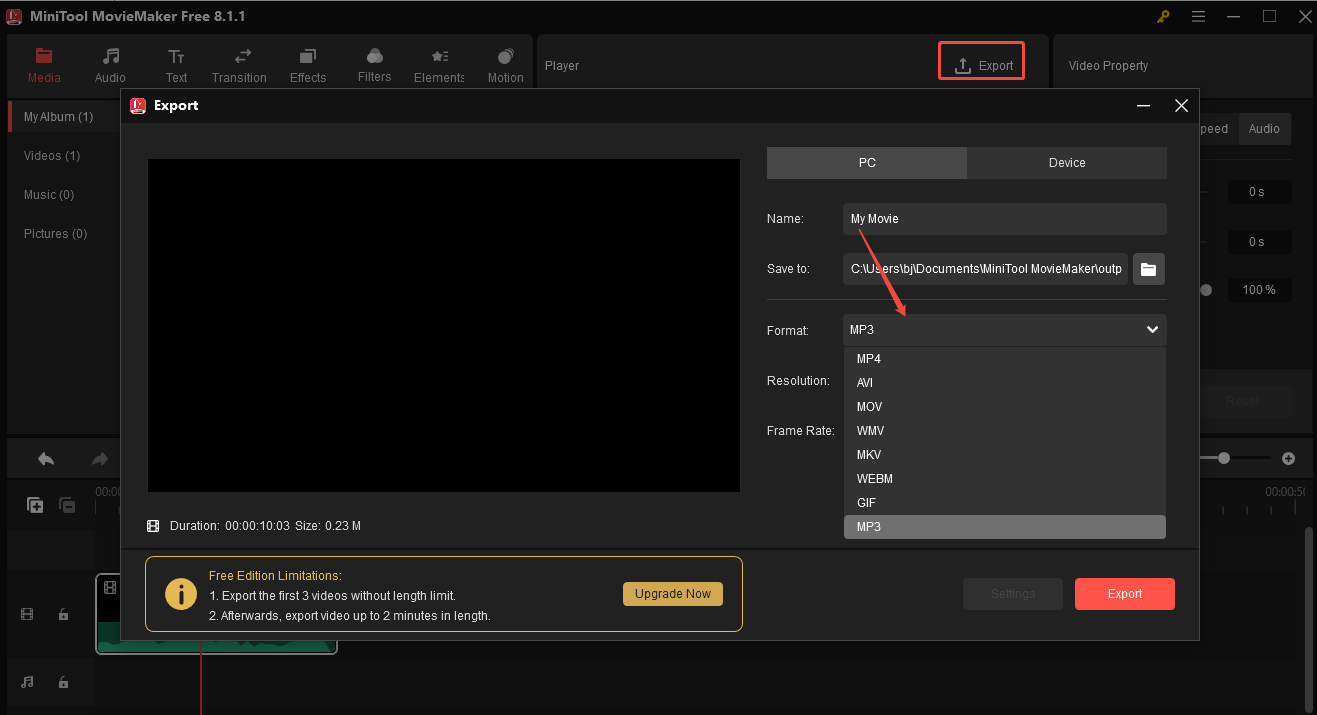
Step 6. Once done, a small window will pop up. Click Find Target to locate the MP3 file or click Close to close the window.
Conclusion
Why Audacity not recording sound? There are several reasons for the failure. This article explains 5 primary ones and gives corresponding solutions for each. By adjusting Audacity settings, allowing Audacity to access your microphone, changing the audio host to MME, setting the proper audio sample rate, or updating Audacity, the recording issue can be addressed. If none of these methods work, you can use MiniTool Video Converter as an alternative to record audio on your PC. Hope you find it useful.
Finally, if you need any help when you using MiniTool Video Converter or MiniTool MovieMaker, you can contact us via support@minitool.com.
User Comments :