There is more than one reason that can cause MP4 won’t play in iTunes. For different situations, the solution is unlike. This post will provide corresponding methods to solve the problem in various cases.
Case 1. MP4 Will Not Play in iTunes, But Works Fine with Other Players.
If you can play the target MP4 media files smoothly outside iTunes but have trouble in opening them within iTunes, the problem lies most probably in iTunes. You can try to fix the issue in the following aspects:
#1 Update or Downgrade iTunes
If you are using an old version of iTunes, then you need to upgrade it to the very latest version. If you just installed the newest version and the problem appears, it is recommended that you downgrade iTunes to your previous version.
Or you can try to uninstall and reinstall iTunes on your device.
#2 Re-encode MP4 with iTunes-Supported Codec
MP4 is just a video container. It can be encoded with H264/AAC, H265/HEVC, or MPEG-4 codec. iTunes only supports MP4 videos encoded with H264/AAC. Therefore, if your media files are MPEG-4 format, they can’t be played on iTunes. In such a situation, you need to change the codec of the target MP4s using a reliable video converter such as MiniTool Video Converter to iTunes-supported formats.
MiniTool Video ConverterClick to Download100%Clean & Safe
Step 1. Download and install MiniTool Video Converter on your PC.
Step 2. Launch the program to enter its main interface.
Step 3. Click the Add Files option in the upper left to upload the unplayable MP4 videos.
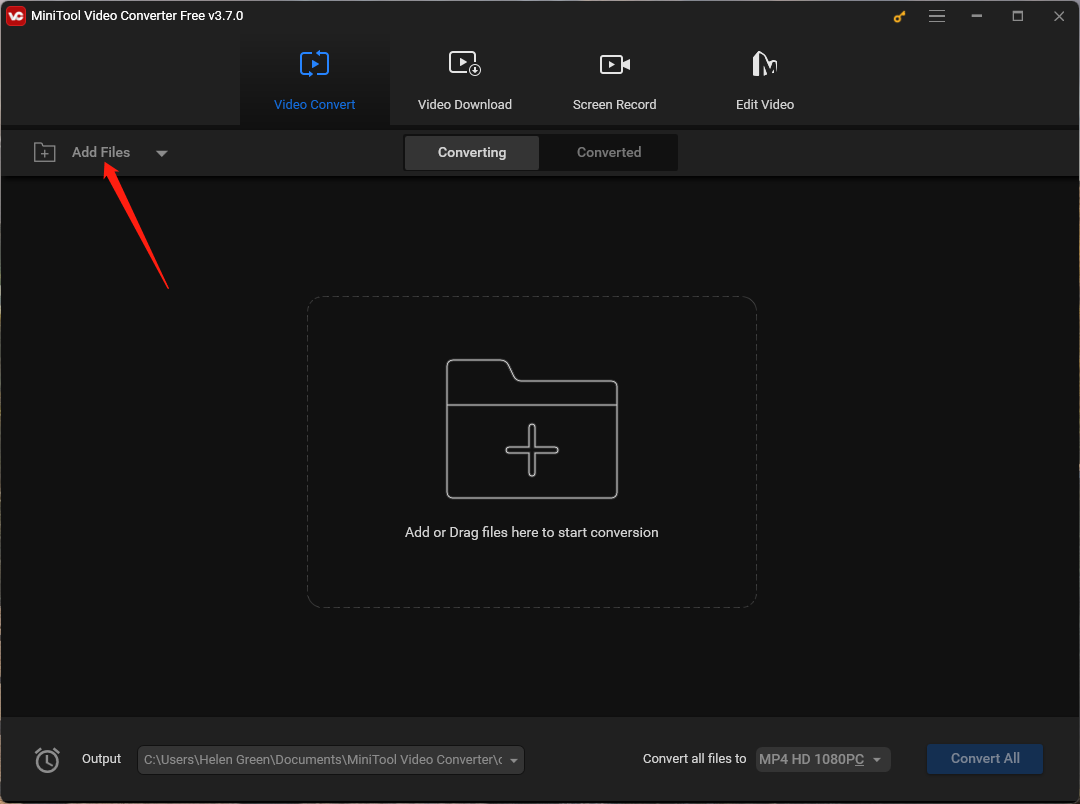
Step 4. It will create a conversion task for each video. Click on the settings icon within the Target section for each task if you want to convert them to different output formats. Otherwise, click the Convert all files to option to create a unique output format (recommend).
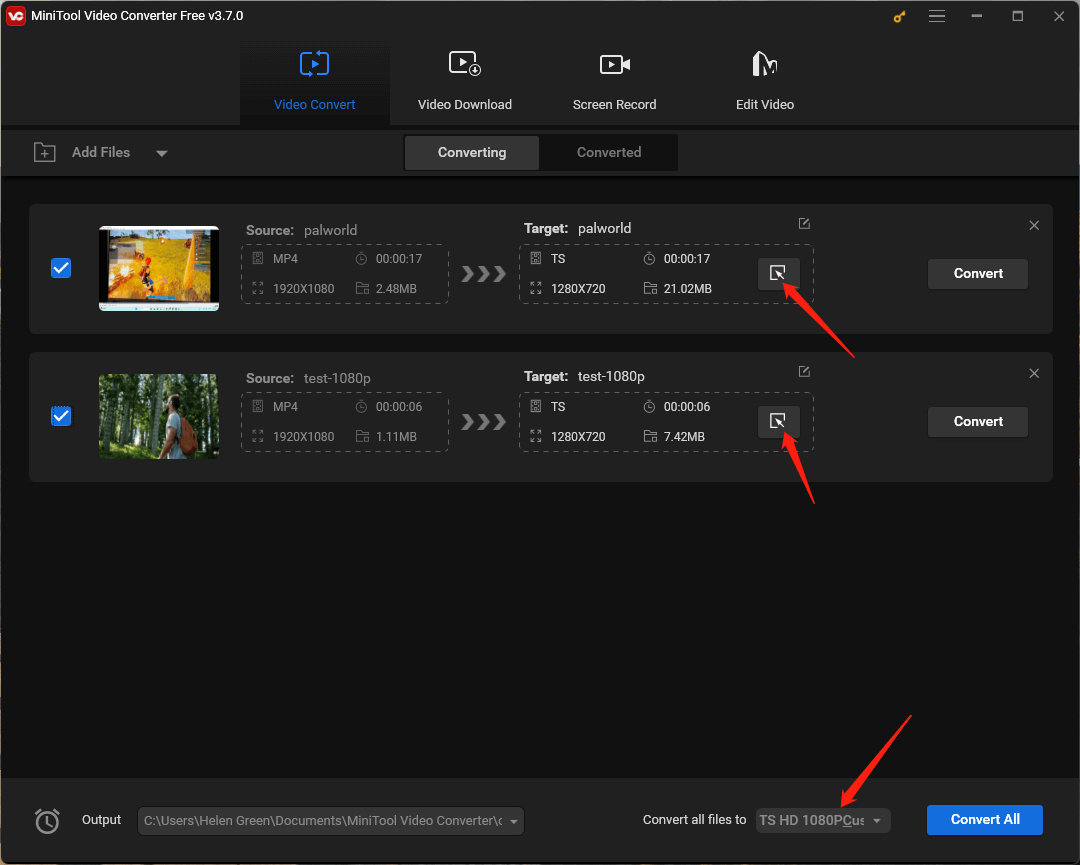
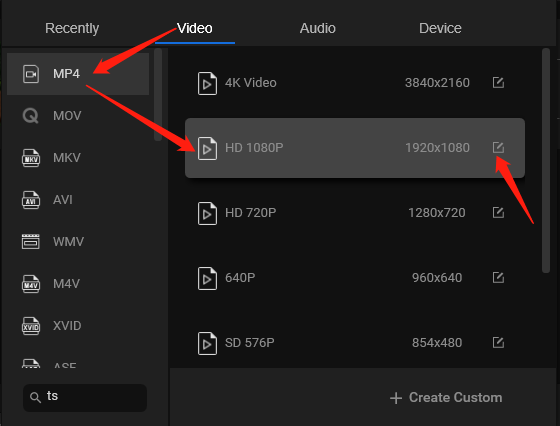
Step 5. In the new window, go to the Video tab from the upper menu, keep the MP4 container from the left console, and choose a suitable video resolution from the right area. Then, click the settings icon next to the chosen option.
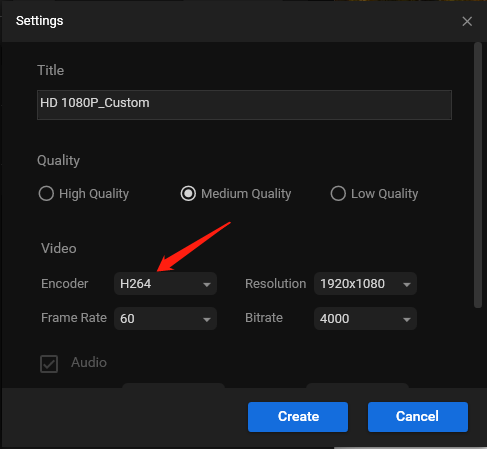
Step 6. Within the next popup, select H264 as the encoder for the output video format. For extra edits, you can personalize video quality, frame rate, bitrate, as well as the parameters of its built-in audio. Click the Create button to save changes.
Step 7. The created output video format will appear in the resolution option list in the previous window. There, find and click on the customized option to select it.
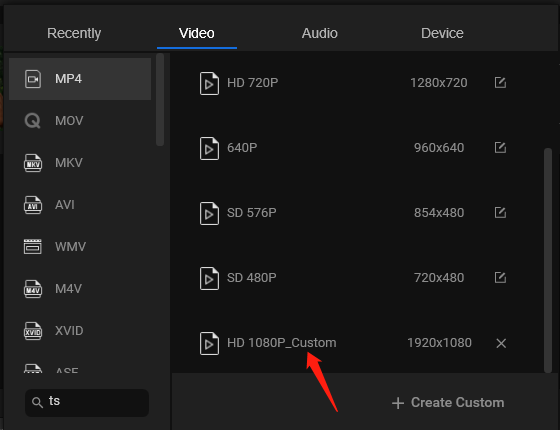
Step 8. Finally, click the Convert All option to begin the conversion. Of course, you can click the Convert button next to each conversion task, but it is troublesome.
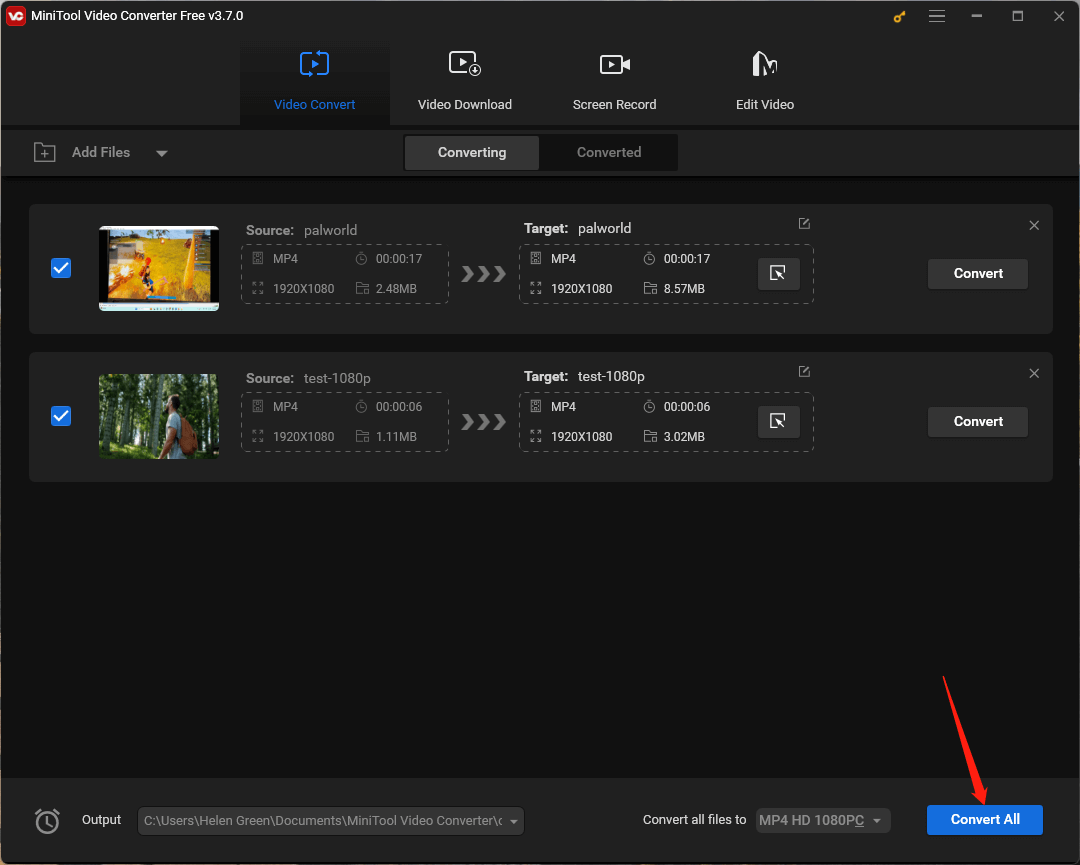
Eventually, you will get the converted MP4 files that can be played on iTunes. Since MiniTool Video Converter can only be used on Windows computers. You need to transfer the output videos to your Mac devices afterward. If you want to make the conversion right on Mac, you can rely on QuickTime Player, Adobe Media Encoder, VLC media player, etc.
#3 Install Some Supported Codecs
Sometimes, the MP4 won’t play in iTunes problem is caused by lacking necessary codecs on your hardware devices. Thus, just install them and the problem will be solved immediately. Here, you are recommended to download and install the K-Lite Codepack, which contains all codecs needed to view all kinds of media files.
Case 2. Can’t Find the Added MP4 Files in iTunes
If you try to add some MP4 videos into iTunes but can’t find them there, the fact may be due to that you go to the wrong location to check instead of that these files fail to be uploaded. If the uploaded videos aren’t purchased from the iTunes Store, they are downloaded from YouTube instead, they will be put into the Home Videos folder rather than the My Movies folder under the Movies category.
Conclusion
The iTunes can’t play MP4 problem should be solved until now, if unfortunately, you are still troubled by the issue, you can contact iTunes support for further help.
You May Also Like: How to Fix PS4 Media Player Can’t Play MP4 Issue Step-by-Step?


User Comments :