MuseScore (now called MuseScore Studio), owned by the Muse Group, is a free music notation application that is available on Windows, macOS, and Linux. As a music lover or creator, you may want to record MuseScore videos and share them with others. How to record MuseScore video? This MiniTool free video converter post will walk you through the methods to record MuseScore and guide you on how to export MuseScore as video.
How to Export MuseScore as Video
MuseScore has a feature that allows you to export MuseScore as a video as long as you connect your YouTube account to MuseScore. But the free account can only use the “Send to YouTube” feature once. This feature makes it convenient to share your MuseScore on YouTube easily. Here’s how:
Step 1. Go to MuseScore.com and log in to your account. Then connect your YouTube account to MuseScore.
Step 2. Click the Upload button and then drag and drop to load your Musescore file.
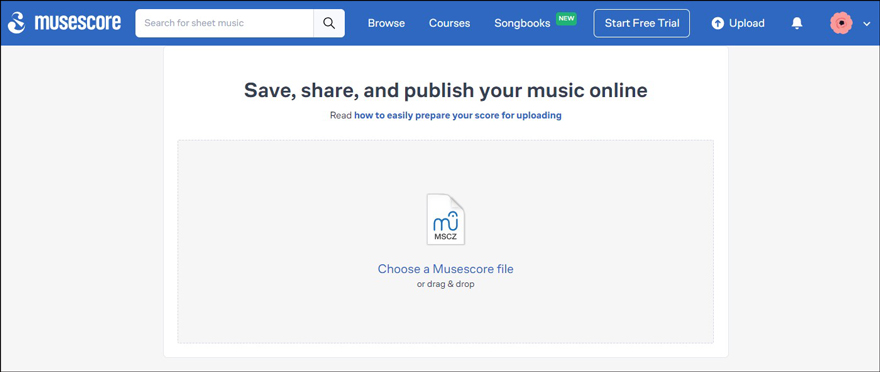
Step 3. Navigate to MuseScores, choose Public for permissions, complete the details, and click Publish.
Step 4. Choose the score you just published and select the Send to YouTube button next to the three-dot icon.
Step 5. Then MuseScore will generate a video and you a download link for the video. You can click the download link to save the MuseScore video.
Also read: 5 Best Music Notation Software That Will Fasten Your Workflow
How to Record MuseScore Video via MiniTool Video Converter
Why choose MiniTool Video Converter for MuseScore recording? It is a completely free screen recorder with no time limits, watermarks, ads, or bundles. Its intuitive interface and simple operation enable you to record MuseScore videos easily.
You can choose to record the entire screen or part of the screen according to your needs. Meanwhile, it allows you to record the screen with the option to record the microphone audio and system sounds separately or simultaneously. Below is a tutorial on how to record MuseScore video with MiniTool Video Converter.
Step 1. Download MiniTool Video Converter by clicking the button below and then install it on your Windows PC.
MiniTool Video ConverterClick to Download100%Clean & Safe
Step 2. Prepare your score in advance and then follow the below steps to complete the recorder settings.
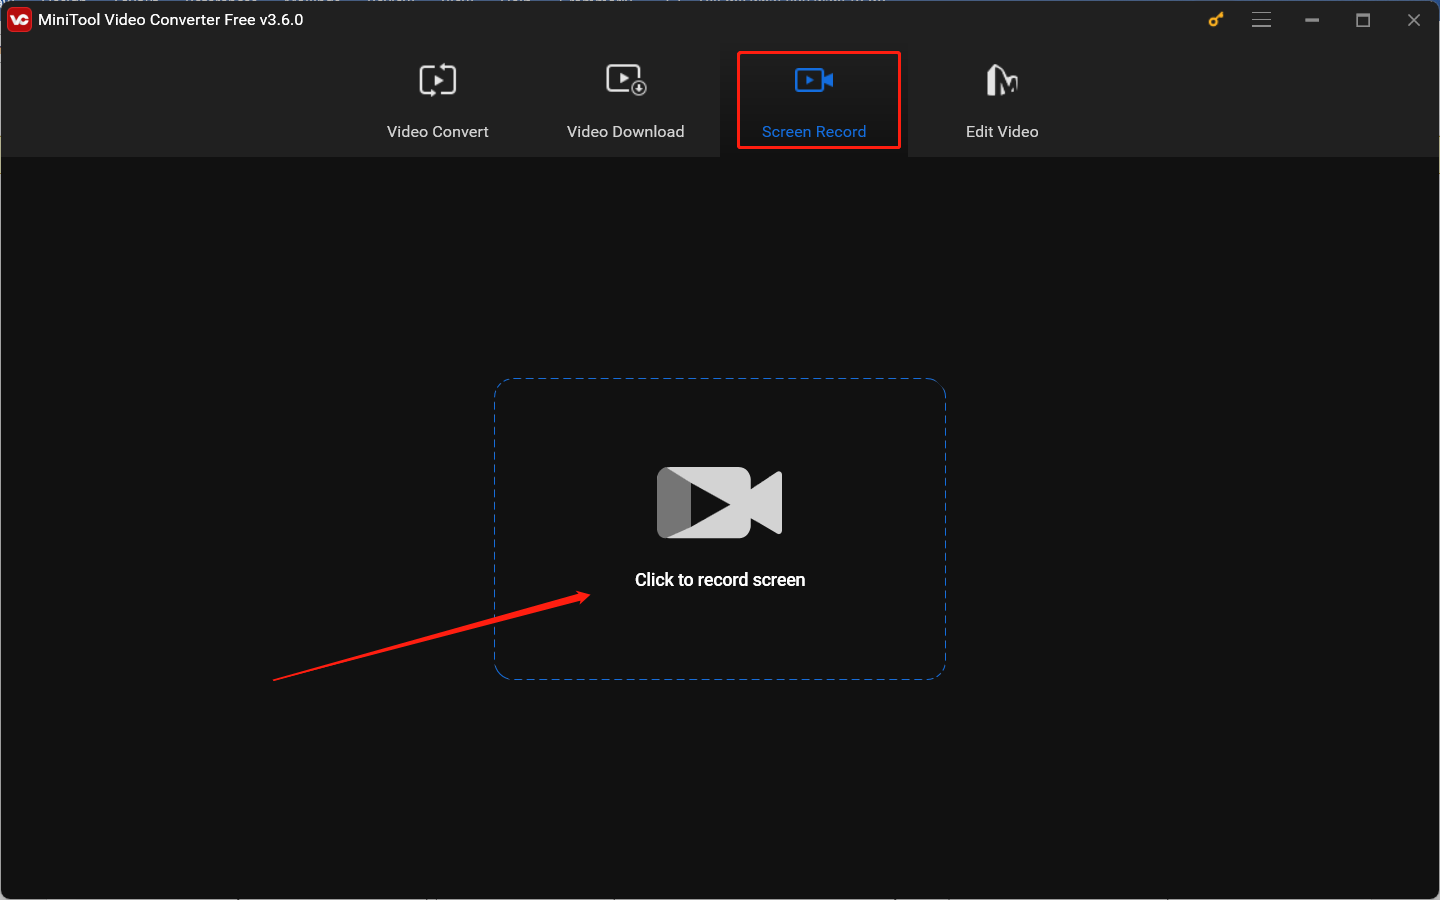
Step 3. Run this free screen recorder, switch from the Video Convert module to the Screen Record module, and click the Click to record screen region to access MiniTool Screen Recorder.
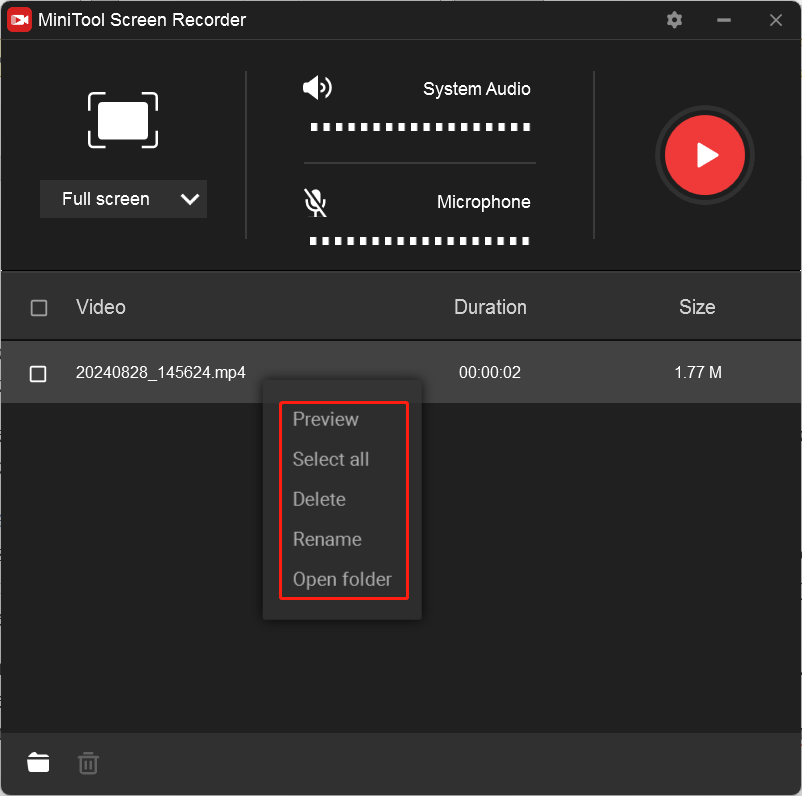
Step 4. In this panel, you can set the recording region and audio source. Additionally, you can click the gear icon at the higher right corner to adjust more settings like the recording frame rate, quality, and hotkeys.

Step 5. After making the above preparations, you can click the red Record icon or press the default F6 key to start recording. If there are parts you don’t want to record, you can press F9 to pause and resume the recording to skip those parts.
Step 6. Finally, click F6 again to finish the recording. Later, the recording will appear in the list of MiniTool Screen Recorder, you can right-click on it to preview, rename, delete, or locate it.
How to Record MuseScore Video via OBS Studio
OBS Studio is a cross-platform software for screen recording and live streaming. It can help you record scenes made up of various sources including window captures, display capture, capture cards, and others. You can follow the below steps to record a MuseScore video by OBS Studio.
Step 1. After installing OBS Studio on your Windows or Mac computer, launch it. Then run your MuseScore in the background.
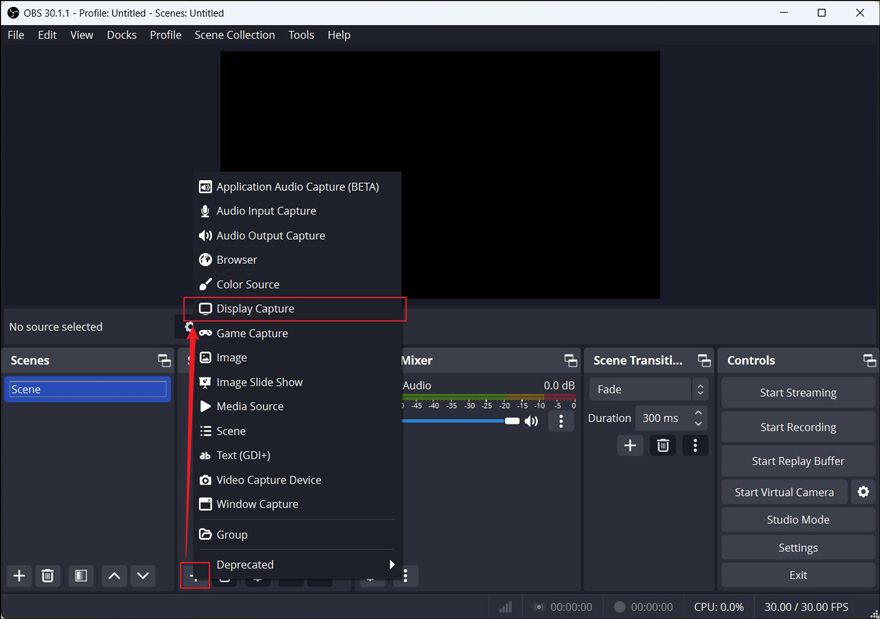
Step 2. In the Source section, click the plus icon and select the Display Capture option. Give a name to the Display Capture and click OK. Next set the properties for Display Capture and click OK.
Step 3. Before starting recording, you can go to File > Settings to personalize the recording settings. Later, you can click the Start Recording button to record MuseScore. Hit the Stop Recording button to complete the recording process.
Conclusion
How to record MuseScore video? You can use OBS Studio or Bandicam for recording. Alternatively, you can choose to export MuseScore as a video through the “Send to YouTube” feature.


![How to Record Bigo Live Easily in 3 Ways [PC/iPhone/Android]](https://images.minitool.com/videoconvert.minitool.com/images/uploads/2024/08/record-bigo-live-thumbnail.jpg)
User Comments :