Variable Frame Rate vs Constant Frame Rate
Frame rate shows how quickly a number of frames (images) appear within a second. There’re two types of frame rates, variable frame rate (VFR) and constant frame rate (CFR).
Variable frame rate means the frame rate of the video is flexible and it changes over time, while constant frame rate indicates that the frame rate remains constant throughout the video.
In terms of video recording, VFR is an effective way to produce small file size. However, many video editing applications like Adobe Premiere Pro or DaVinci Resolve can’t deal with video that has a variable frame rate. To avoid this problem, you need to convert VFR to CFR.
Convert Variable Frame Rate to Constant Frame Rate
If you want to change variable frame rate to constant, you can use HandBrake, a free and open-source video transcoder that can convert videos from nearly all formats to MP4, MKV, and WebM.
As a popular video converter, HandBrake not only offers a rich variety of presets but also allows you to change video frame rate, video codec, dimensions, and more. Also, this program lets you convert variable frame rate to constant frame rate.
Step 1. Download and install HandBrake on your computer.
Step 2. Open HandBrake and click File to open your video.
Step 3. Move to the Video tab, and change the Framerate (FPS) from Peak Framerate to Constant Framerate. Then, expand the drop-down menu next to Framerate (FPS)and choose a frame rate for your video.
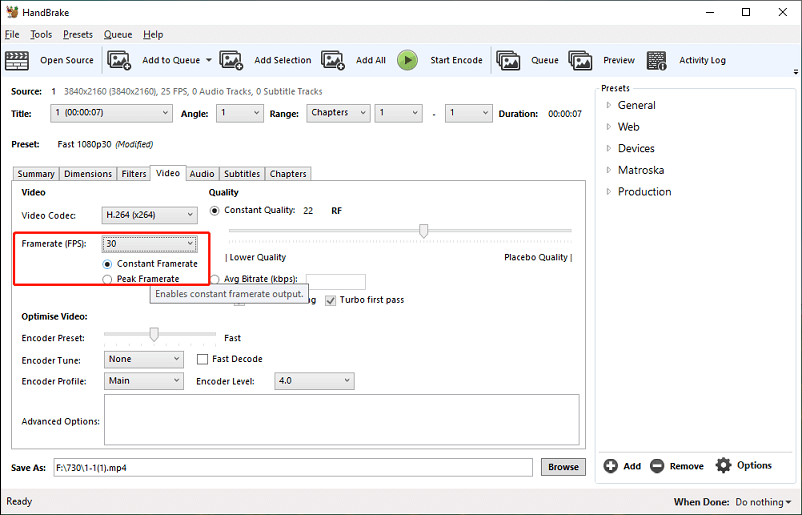
Step 4. Go to the Summary tab and select a format from MP4, MKV, and WebM.
Step 5. Click on Browse at the bottom to choose a folder to save the converted video.
Step 6. Click the green Start Encode button at the top to start the VFR to CFR conversion.
How to Change Frame Rate of a Video on Windows
In addition to HandBrake, you can also use MiniTool Video Converter to change the frame rate of a video. It’s a free video and audio converter that can convert between various file types. Moreover, it lets you change the video frame rate, encoder, resolution, and bitrate.
Follow the steps below to change the frame rate of a video.
Step 1. Download and install MiniTool Video Converter on your PC.
MiniTool Video ConverterClick to Download100%Clean & Safe
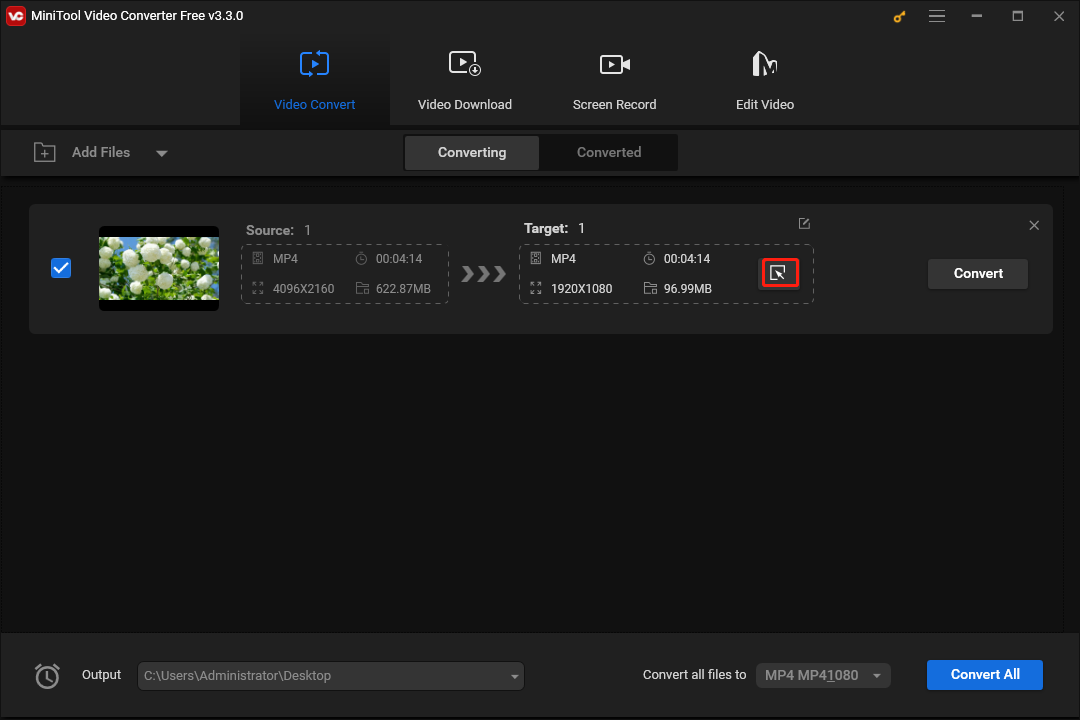
Step 2. After installation, launch MiniTool Video Converter. Under the default Video Convert tab, click the Add or Drag files here to start conversion area to upload your video. Click the button circled in the below screenshot to open the output window.
Step 3. Go to the Video tab, choose a format like MP4, and click the + Create Custom to open the settings window. Give this custom a name and choose the video quality, encoder, resolution, and bitrate.
Then, expand the Frame Rate menu and choose a number from the list, and click Create to create a new format.
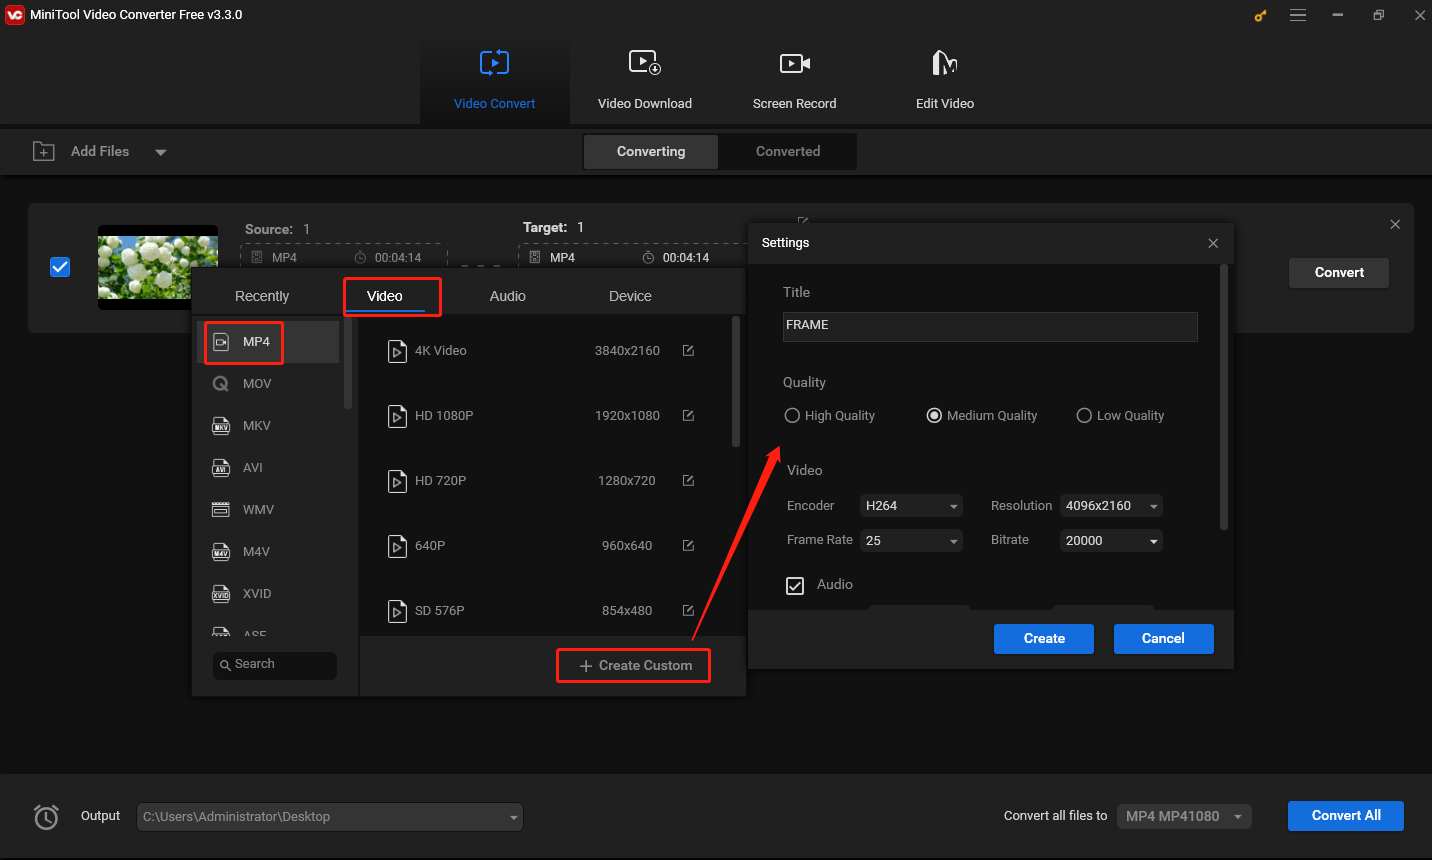
Step 4. Find and click the new format to choose it.
Step 5. Click the Convert button to start the conversion task. Once done, go to Converted tab, and click Show in folder to locate the converted video.
What’s more, MiniTool Video Converter allows you to record your computer screen for free, and it supports 15, 20, 25, and 30FPS screen recording.
Conclusion
If you need to convert variable frame rate to constant frame rate for editing the video, HandBrake won’t let you down. In addition, you can try MiniTool Video Converter to change the frame rate of a video.



User Comments :