How to improve video quality after recording? The specific steps include running the enhancer, uploading the recorded video, selecting a proper enhancement level, and starting the export process to improve the quality of the recording. This article recommends using the excellent video enhancer: MiniTool Video Converter.
Since I’m not good at recording, my videos are usually not clear enough to upload directly to social media or share with others. Therefore, I use enhancement tools to improve video quality before uploading. After trying several tools, I found MiniTool Video Converter to be the best choice for improving the quality of my recorded videos.
How to Improve Video Quality After Recording
Using MiniTool Video Converter to enhance video quality after recording, only need to complete a few simple steps. The enhanced recording greatly improves the visual experience. Below is a detailed guide on how to improve video quality after recording using MiniTool Video Converter.
Fast Track:
1. Download and install MiniTool Video Converter
2. Import the target recording
3. Set an enhancement level
4. Preview the enhanced video effect
5. Start exporting
6. Check the enhanced video
Step 1. Obtain MiniTool Video Converter
Download MiniTool Video Converter and follow the on-screen prompts to install it.
MiniTool Video ConverterClick to Download100%Clean & Safe
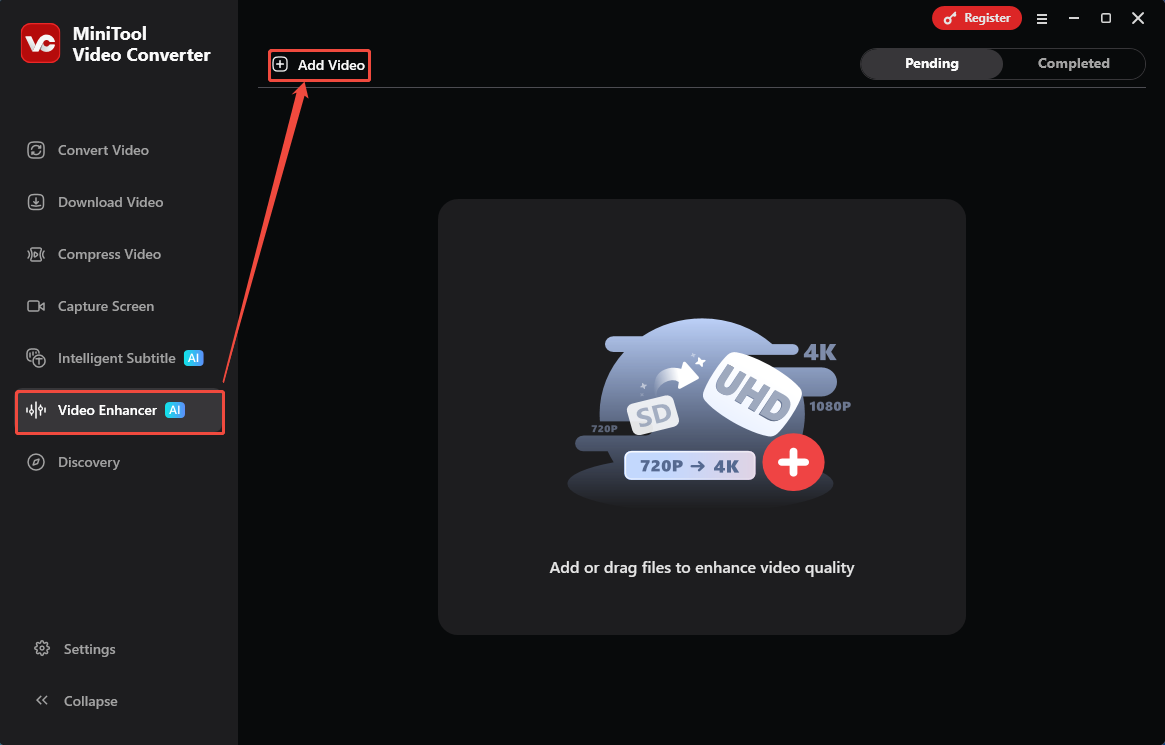
Step 2. Import the Recording
Launch MiniTool Video Converter. Then, switch to the Video Enhancer tab. There, I click on the Add Video option to upload the target recording file.
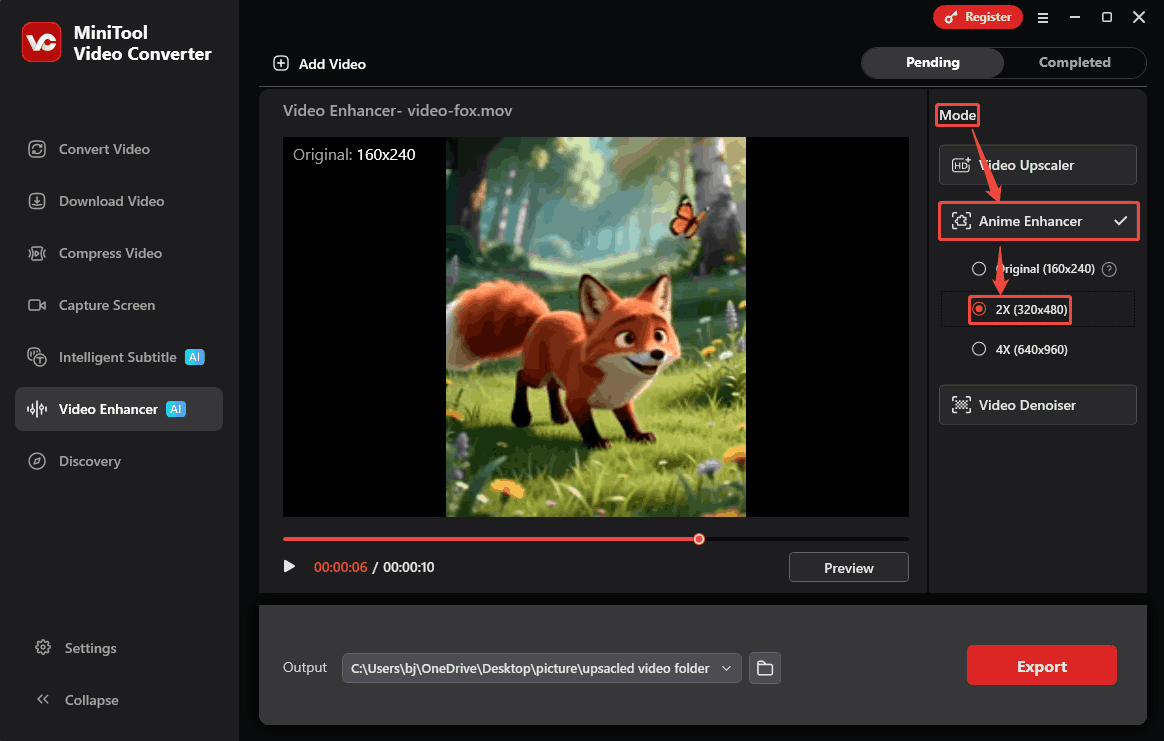
Step 3. Set an Enhancement Level
On the right side of the imported recording, I go to the Mode section. Under that, expand the Anime Enhancer mode. From here, choose a desired enhancement level. I select the 2X (320x480) option.
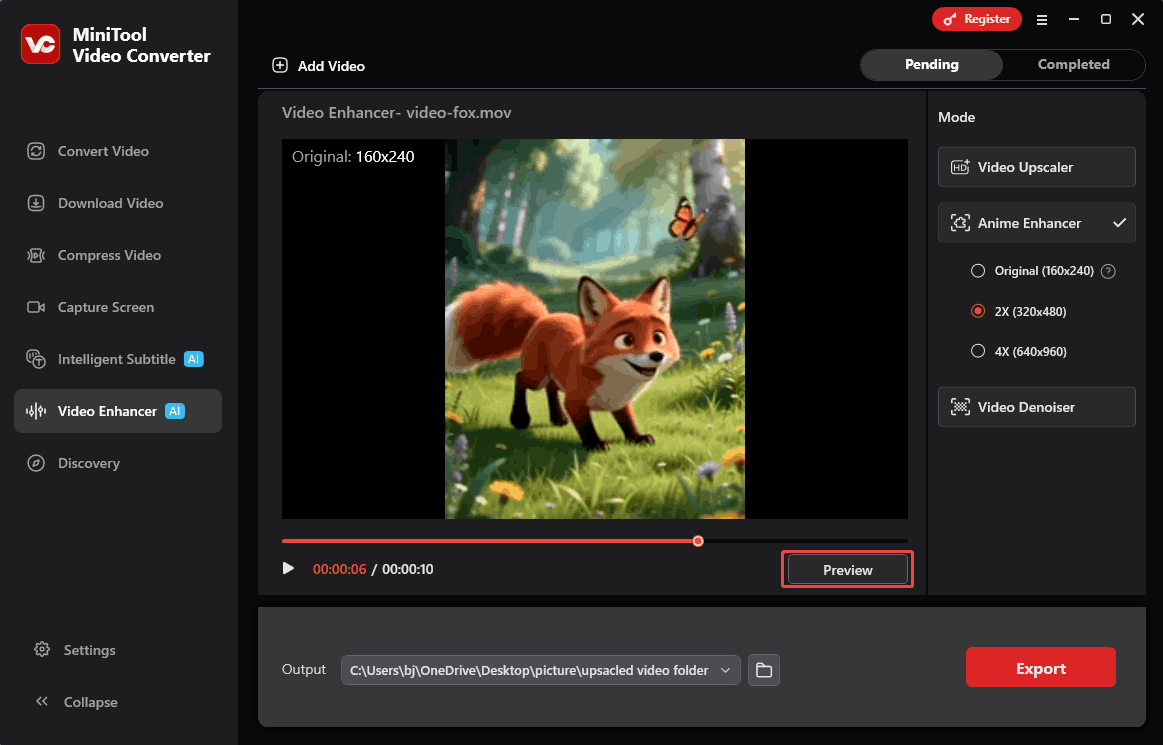
Step 4. Preview the Enhanced Video at Key Frames
After that, I click on the Preview button under the video player to view the before-and-after effect side by side at key frames.
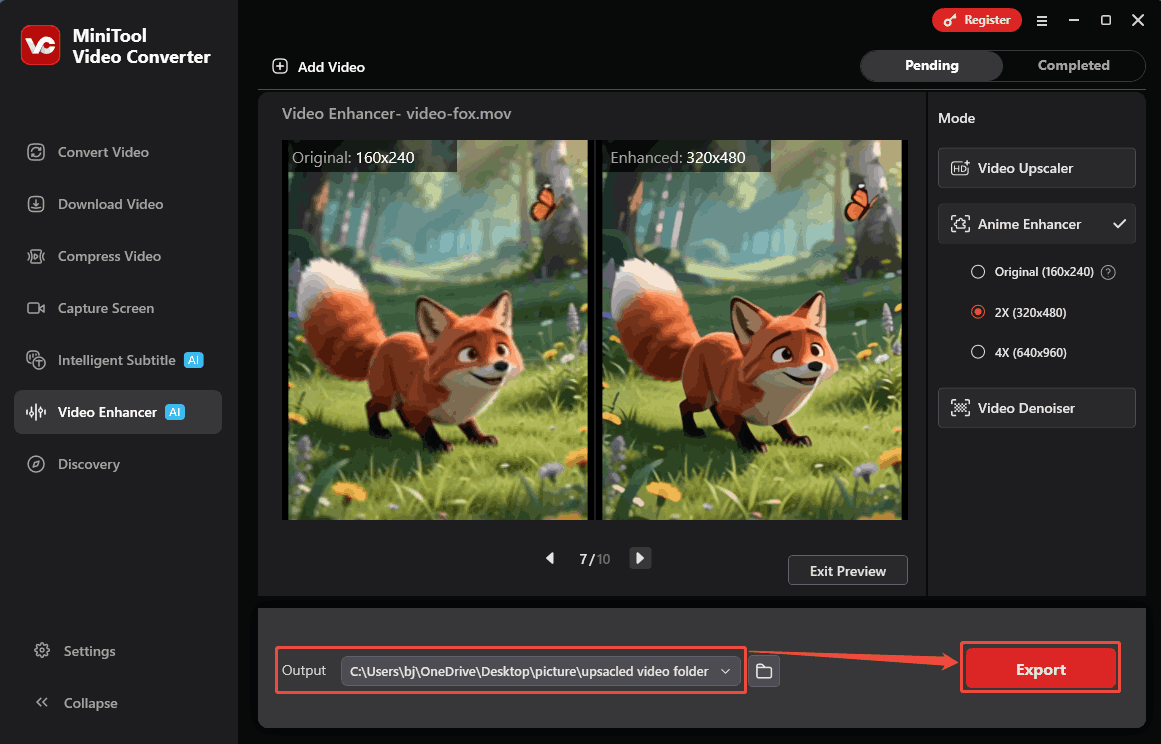
Step 5. Start the Export Process
Before exporting my video, I expand the Output option to specify a storage location for the enhanced recording. Then, click on the Export button to start the output process.
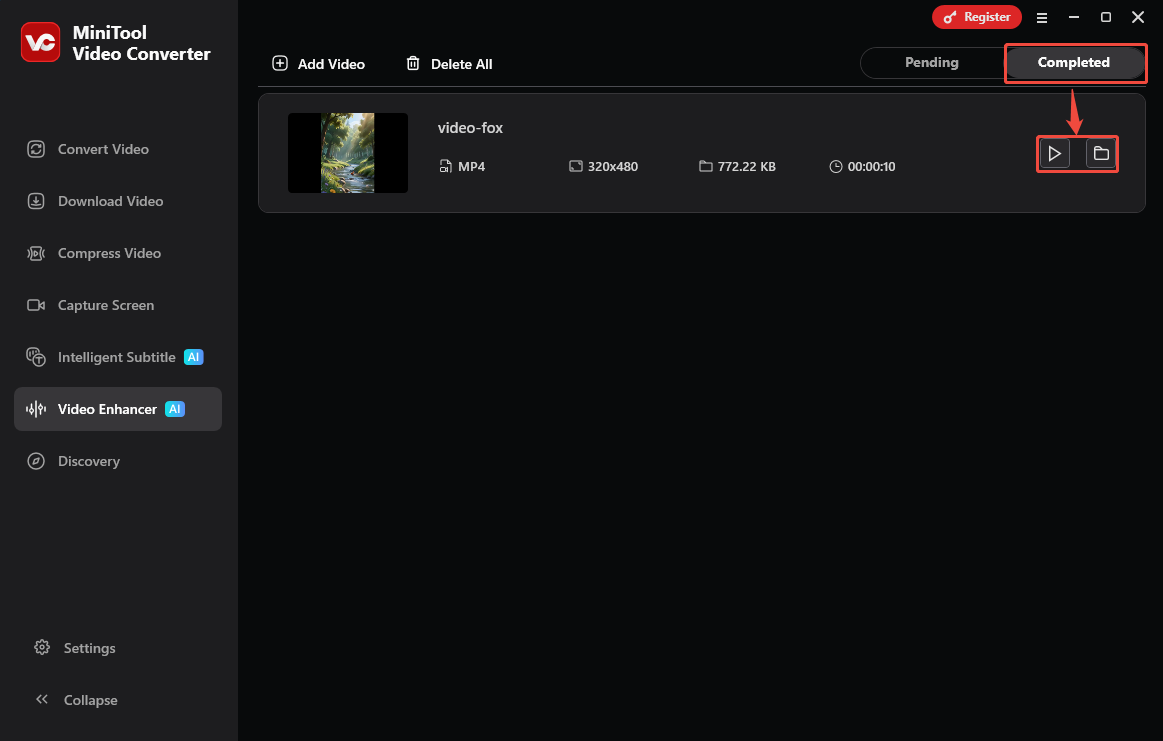
Step 6. Check the Enhanced Video
When the export process ends, this exported video will automatically land on the Completed tab. Here, I can click on the Play icon to check it. Or click on the Folder icon to locate this enhanced video on my computer.
MiniTool Video Converter makes it easier to enhance video quality after recording. It is user-friendly, even for beginners. Moreover, it allows me to improve my recordings to the original level, the 2X level, or the 4X level. Even the original level can improve the recording quality more than before the enhancement.
MiniTool Video Converter also enables me to preview the before-and-after effects side by side at certain key frames. In addition, it supports importing various video formats, including MP4, MKV, MOV, AVI, FLV, WebM, 3GP, and more.

Why Improve Video Quality After Recording
Considering the visual effects of recording, it is crucial to enhance the video quality of recorded videos in terms of the variety of scenarios they may be used in, and the need for high-quality sharing and spreading. This not only improves video quality but also increases its added value. The recorded video usually needs to be enhanced. The following are the common reasons.
- Visual effects
- Application scenarios
- Sharing and spreading
1. Visual Effects
Recorded videos may suffer from issues, such as blurry details, dull colors, and poor lighting. These flaws may negatively impact the viewing experience, making the video less appealing. Post-production video quality enhancement can sharpen blurry lines, restore natural colors, and brighten dull videos. The improved visual effects result in clearer and more detailed videos, leading to a more comfortable viewing experience.
2. Application Scenarios
Most recorded videos are used in various daily and professional settings. Personal travel logs, life chronicles, and videos showcasing highlights all require clear image quality to keep long-term preservation value. For commercial uses such as product promotions, company introductions, and online courses, high-quality videos enhance professionalism and earn trust. Because these scenarios have certain requirements for video presentation, it is necessary to enhance the video quality after recording to meet different application needs.
3. Sharing and Spreading
Some recorded videos are compressed when shared on social media platforms, resulting in reduced clarity. If some platforms excessively compress videos, it can make an already blurry image even blurrier. Improving recording quality allows for better display and sharing on social media platforms, thereby garnering more likes, comments, and shares.
Tips to Avoid Recording Low-quality Videos
Before recording, keep the 3 tips below in mind to effectively avoid recording a poor-quality video.
- Recording environment
- Recording parameters and software updates
- Recording format
1. Recording Environment
The shooting environment directly determines the original quality of the recorded video. It’s best to shoot under soft natural light. In addition, choose a clean and simple background to avoid affecting the overall quality. Try to keep the footage stable during recording. Shaky footage will also affect the viewing experience. A suitable and controllable recording environment can effectively avoid many video quality problems.
2. Recording Parameters and Software Updates
Proper software settings are an effective way to shoot high-quality original videos. Before recording, adjust to a suitable resolution and frame rate. In addition, regularly updating your screen recording software can also improve the recording experience. Suitable recording settings can reduce the need for post-production quality adjustments.
3. Recording Format
The recording format also affects video quality. Choosing a format essentially means choosing the codec encapsulated within it. Lossy compression codecs compress image quality, while lossless compression codecs preserve the original video quality to the greatest extent possible. Therefore, when recording video, it is recommended to choose a high-quality lossless compression encoding format to retain more original details. A proper recording format not only ensures video clarity but also good compatibility.
MiniTool Screen RecorderClick to Download100%Clean & Safe
Bottom Line
How to improve video quality after recording? This post shows 6 easy steps using MiniTool Video Converter to complete video enhancement. Besides, it shows why improving video quality, including visual effects, application scenarios, and sharing and spreading. The post also gives 3 tips to avoid recording bad-quality video.
If you have any questions or suggestions about MiniTool Video Converter or MiniTool Screen Recorder, feel free to contact the MiniTool official via email at support@minitool.com.
Import high-resolution videos whenever possible
Adjust colors and lighting in the editor
Set the export format to MP4 to upscale the final video to 4K resolution
User Comments :