How to enhance video clarity? The enhancement process is very easy, including launching the video enhancer, adding the target video, choosing a video enhancement level, beginning the export process, and checking the enhanced video. This article recommends using the excellent tool: MiniTool Video Converter.
If you need to upload videos to social media platforms to attract more followers or share important course content with students for self-study, you need to ensure that those videos are clear and concise to attract viewers or better help students learn.
How to Enhance Video Clarity
MiniTool Video Converter is a fantastic video enhancer. It can obviously enhance video clarity powered by AI. Using this application just needs a few simple steps. The following is a detailed tutorial on how to use the video clarity enhancer: MiniTool Video Converter.
Fast Track:
1. Download MiniTool Video Converter
2. Upload the target video
3. Set an enhancement level
4. Preview the enhanced video
5. Start exporting
6. Check and locate the enhanced video
Step 1: Download and Install MiniTool Video Converter
Download and install MiniTool Video Converter through its on-screen instructions. Then, run this application.
MiniTool Video ConverterClick to Download100%Clean & Safe
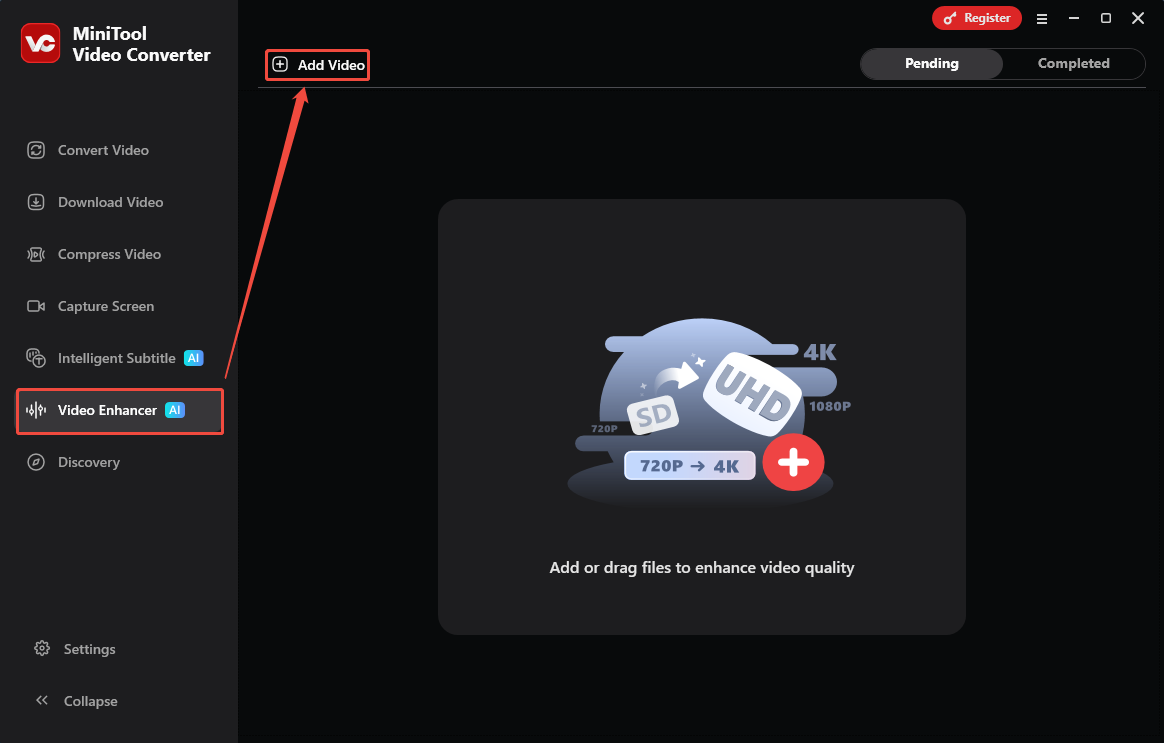
Step 2: Upload the Target Video
In the MiniTool Video Converter main interface, go to the Video Enhancer tab. There, I click on the Add Video option to import my target video.
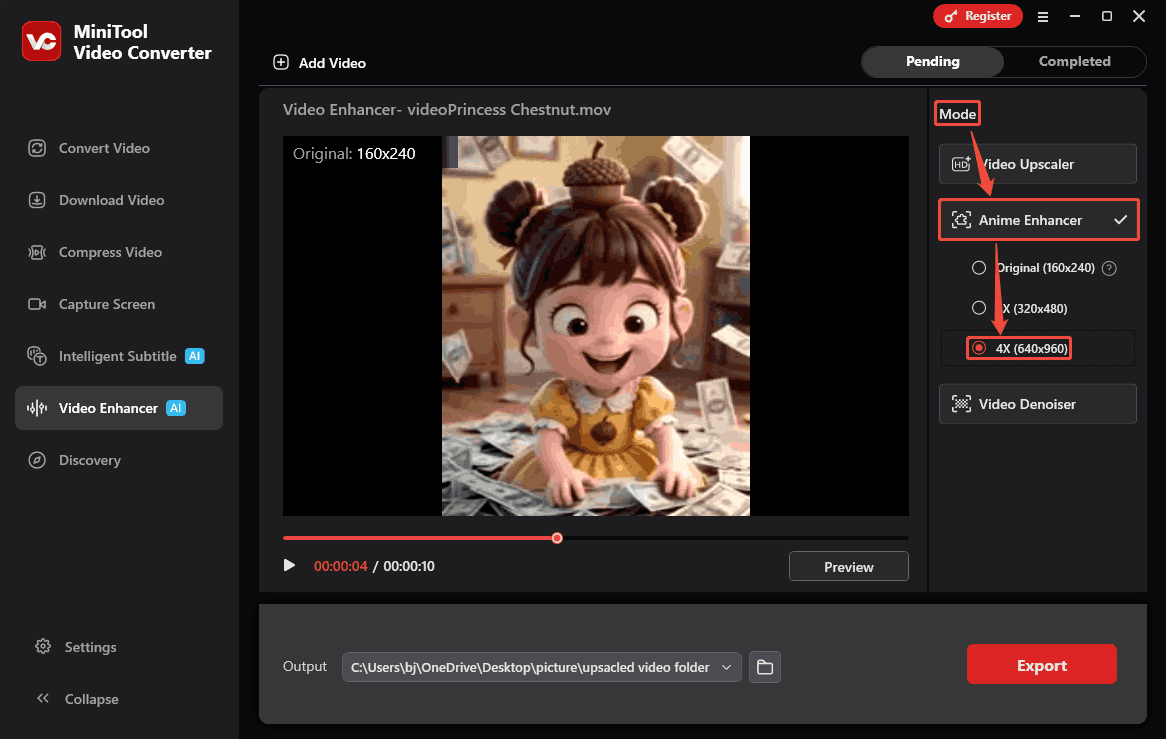
Step 3: Specify an Enhancement Level
After uploading the target video, focus on the Mode section. Here, expand the Anime Enhancer mode. and specify an enhancement option to make the video clearer. I choose the 4X (640x960) option.
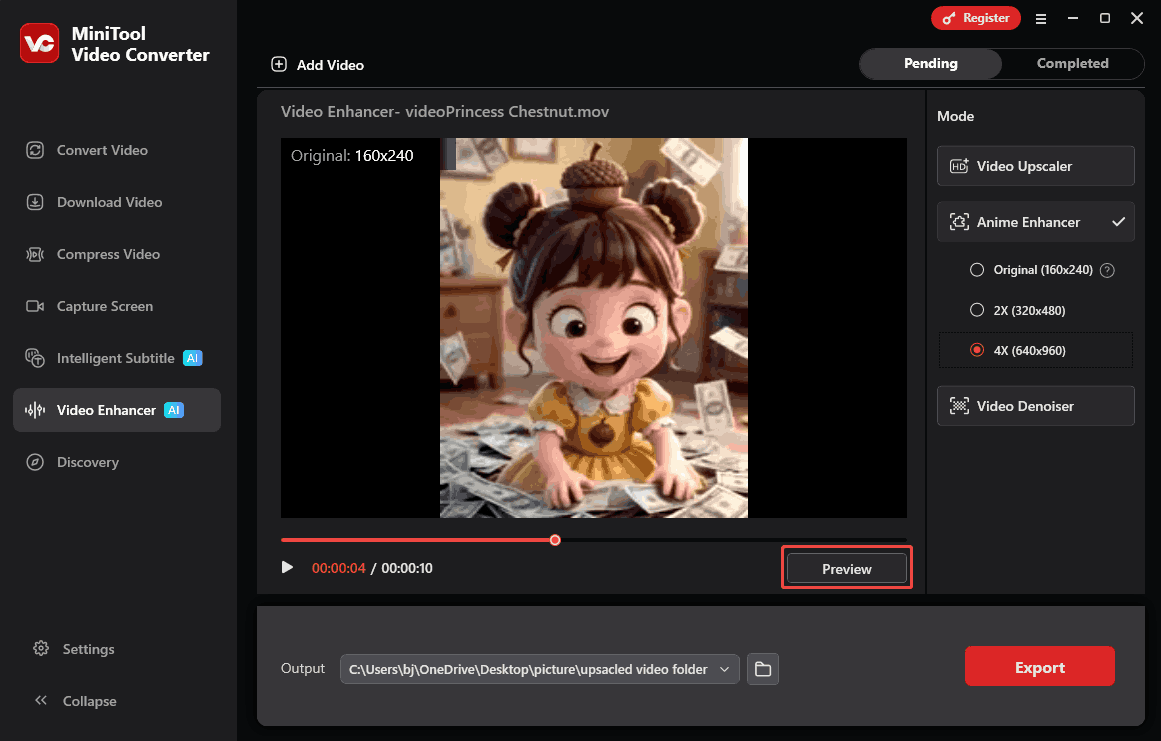
Step 4: Preview the Enhanced Video
Under the video player, I click on the Preview button to view the improved video and compare it to the video before enhancement at key frames.
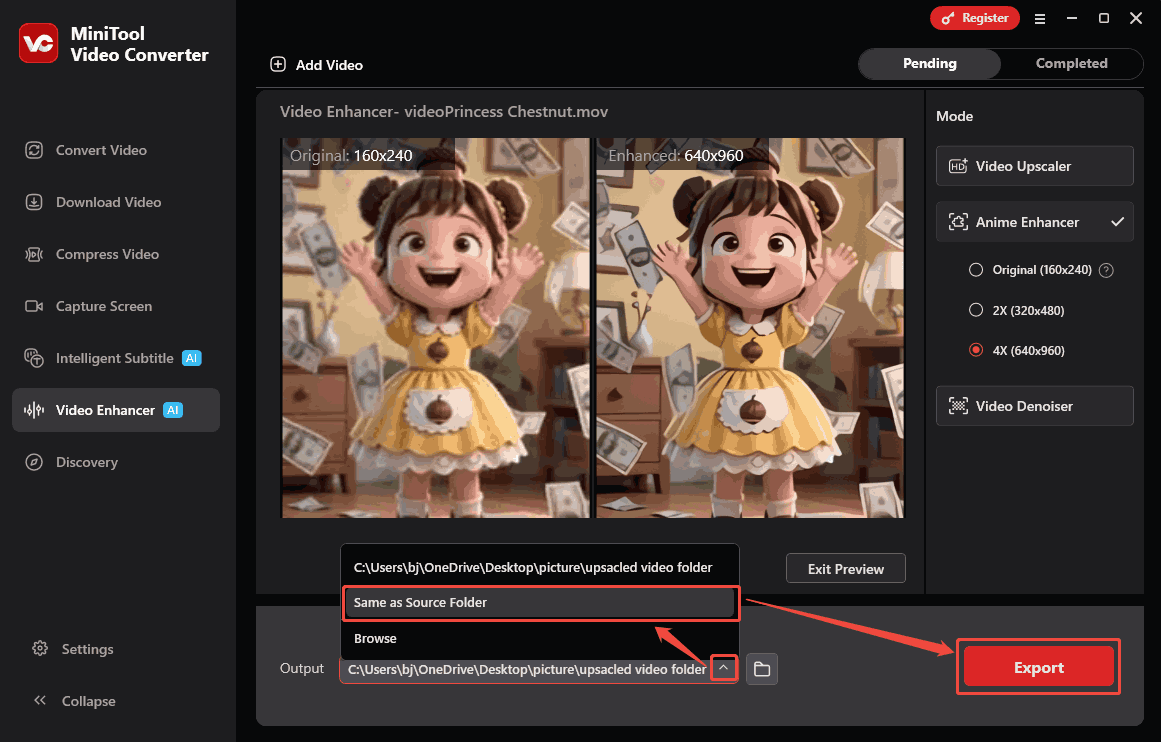
Step 5: Begin the Export Process
Before beginning the enhancement, I expand the Output option to choose a storage location as the output destination folder for the exported video. Here, I select the Same as Source Folder option. Then, click on the Export button to begin the export process.
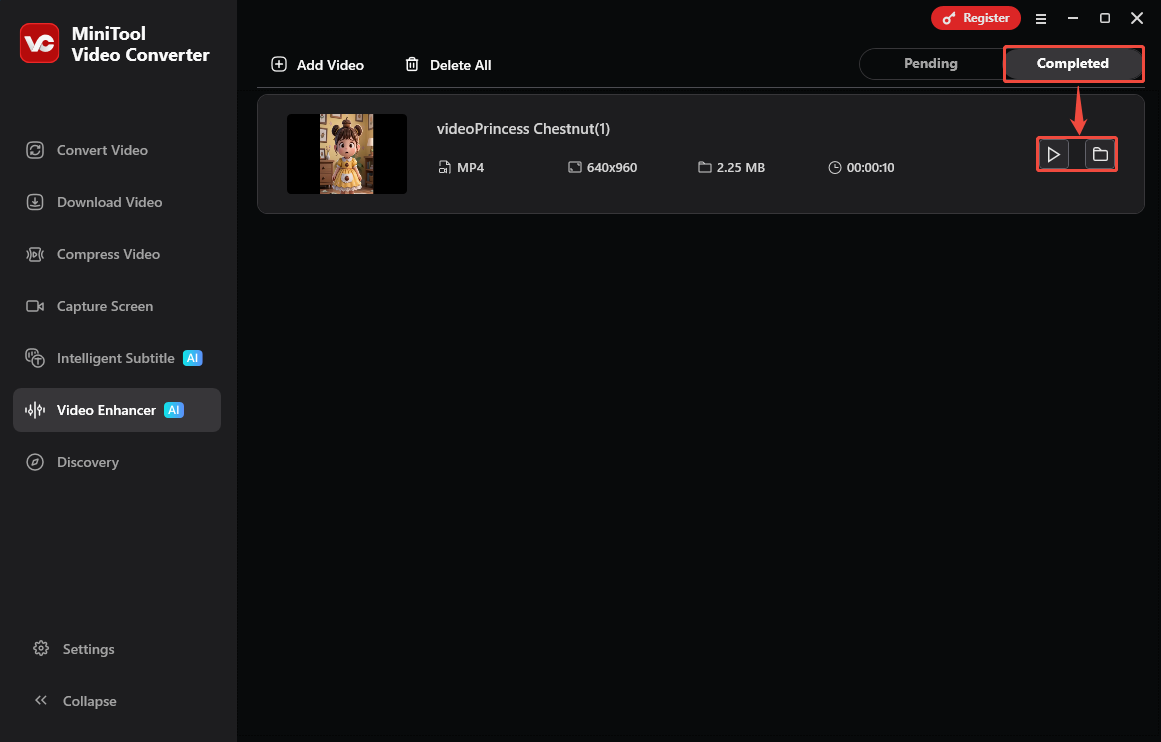
Step 6: Check the Enhanced Video
Once the enhancement task ends, the exported video will land on the Completed tab. There, click on the Play icon to check the enhanced video. Or I can click on the Folder icon to locate it on my computer.
MiniTool Video Converter’s video enhancement makes my video much clearer. Besides, it is free and user-friendly for a wide range of users.
MiniTool Video Converter is a practical multimedia file processing tool that I’ve been using. Recently, it added a video enhancement feature. Initially, I was very skeptical about whether it could truly enhance video, because other enhancers I’d used before hadn’t shown significant results. I used it with a try-it-and-see attitude. To my surprise, it really made my video clearer, with sharper lines and more vibrant colors.
After using it once, I discovered that MiniTool Video Converter supports improving videos to 4K resolution. Furthermore, it allows me to preview the enhanced video before exporting. At keyframes, it also helps me compare the video effects before and after enhancement side-by-side.
MiniTool Video Converter supports importing MP4, MKV, MOV, AVI, 3GP, FLV, and more. In addition, it allows the enhanced video to be exported as MP4, which is compatible with most web pages and applications.

Tips to Obtain a High-quality Native Video
To get a high-quality video, it’s important to consider various aspects, including the parameter settings before recording, lighting conditions, and focus and stability during recording.
- Parameter settings
- Light adjustment
- Focus and stability
1. Parameter Settings
Before recording a video, it’s necessary to set proper parameters on the hardware or the recording software. Parameters affecting recording quality typically include resolution, frame rate, bit rate, and bit depth. Properly adjusting these parameters before recording can improve the native quality of the recordings, avoiding much post-processing and improving work efficiency.
2. Light Adjustment
The light of the recording environment is also essential. Ample, soft, and natural light is the best choice. If natural light is insufficient, consider using artificial light sources. Furthermore, the angle of the light source is crucial. Recording with light on or backlit will result in different video quality.
3. Focus and Stability
Focusing on the target during recording will result in clearer videos with richer visual storytelling. Enabling face tracking on your device ensures every frame is meaningful. Additionally, stability during recording is crucial for improving video quality. Using tools like tripods can help prevent camera shake.
Final Words
This article shows how to enhance video clarity in 6 easy steps with the practical video enhancer: MiniTool Video Converter. The most crucial steps are choosing the enhancement level and starting to export the enhanced video. Additionally, this post also shares how to obtain a high-quality native video before and during recording a video.
If you need any assistance with MiniTool Video Converter, feel free to contact the MiniTool official via email at support@minitool.com for support.
Import your video into the Project panel.
Drag the video into the timeline. Then, go to Window > Lumetri Color to open the Lumetri panel.
In the Basic Corrections tab, adjust exposure, contrast, highlights, and shadows.
In the Creative tab, increase sharpness for a clearer image
Zoom in on the video and apply Unsharp Mask from the Effects menu to increase resolution.
User Comments :