Do you find it inconvenient to share large screen recording files with friends or on social media platforms? In those cases, you’d better compress screen recording to get a smaller file size with some good video compressors, like MiniTool Video Converter.
Why Need to Compress Screen Recording
It is common to use a screen recorder to capture tutorials, online lectures, presentations, video conferences, and other content. You may get a large screen recording file that will consume more storage space, require higher transmission bandwidth, or can’t meet the video requirements of certain platforms.
What can you do to shrink video size? It is a good idea to use a video compressor to reduce file size. Read the following content and you’ll find a suitable way to compress screen recording files.
How to Compress a Screen Recording
In this part, we recommend 2 free and easy-to-use video compressors and show you a detailed tutorial on how to use them for screen recording compression.
#Way 1. Using MiniTool Video Converter
MiniTool Video Converter is a free video converter, but it can also be an excellent video compressor. It is completely free, ad-free, and watermark-free. It also allows you to compress videos in batches and improve compression efficiency. More importantly, MiniTool Video Converter supports exporting the compressed video in MP4, WebM, or MKV. It also supports customizing the compression level according to your needs.
How to Compress Screen Recording with MiniTool Video Converter
Next, I’ll show you how to use MiniTool Video Converter’s video compressor step by step:
Step 1. Download and Install MiniTool Video Converter
Click the download button below to download and install MiniTool Video Converter on your PC.
MiniTool Video ConverterClick to Download100%Clean & Safe
Step 2. Import Your Video
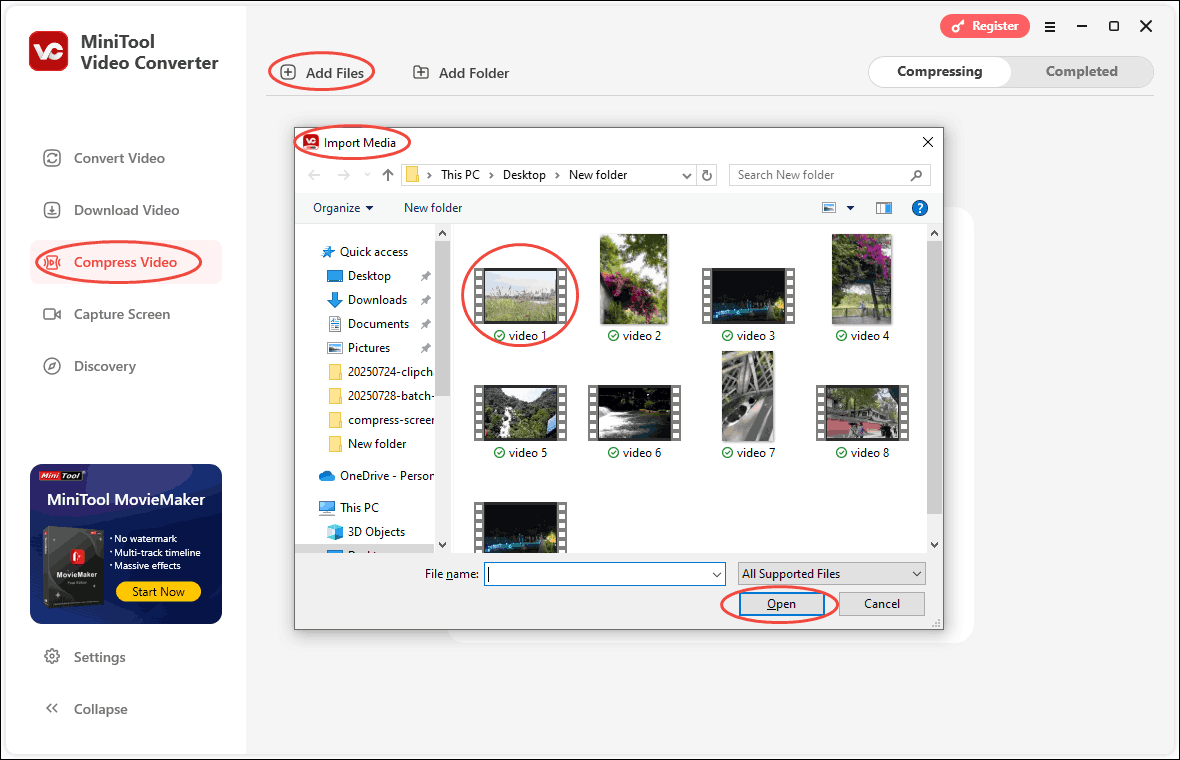
Open MiniTool Video Converter, select Compress Video on the left, and click Add Files in the main interface on the right. Then, the Import Media window will pop up. Just select the video according to your needs and click the Open button.
Step 3. Adjust Video’s Compression Settings
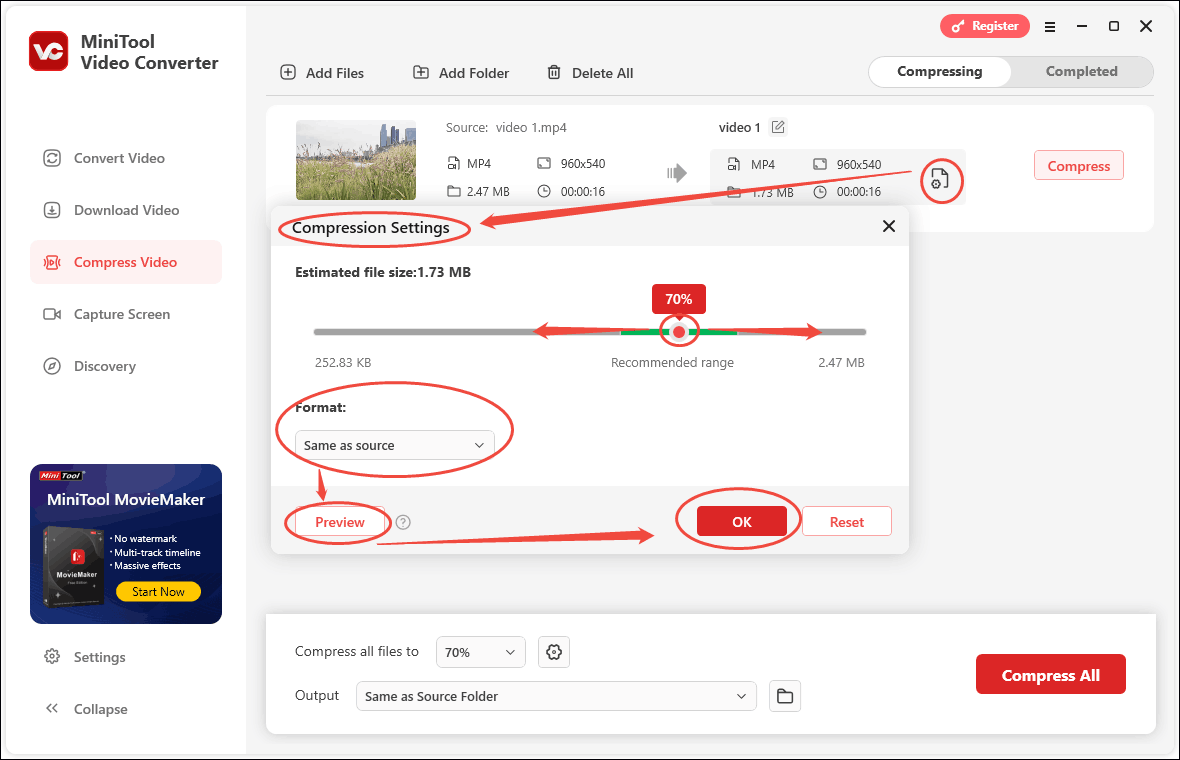
Click the settings icon to open the Compression Settings window. Then, you can:
- Adjust the compression level: Drag the red dot to freely adjust the compressed video’s size from 100%-10% of the original video. You can adjust it to the recommended size range.
- Choose the output format: Click on the option below Format and select the output format from the drop-down menu.
- Preview the compressed video: Click on the Preview button to check the quality of the compressed video.
After all compression settings are completed, click on the OK button and you will return to the main panel. Then, click on the Compress option to start compression.
Step 4. Check Your Compressed Video and Storage Location
After the compression finishes, the completed task will appear in the Completed tab. Click the play icon to play the compressed video and click the folder icon to locate it on your computer.

#Way 2. Using MiniTool MovieMaker
To shrink the video file size, you can also use a video editor to remove the unwanted parts of the video. MiniTool MovieMaker is a good choice. It is a free video maker and video editor without watermarks. You can use its splitting or trimming tool to get rid of the unnecessary parts.
Also, MiniTool MovieMaker has other useful editing features to fine-tune your recordings if you want to share them on social media platforms. What’s more, it offers several popular output formats and allows you to adjust the output parameters like video quality, resolution, frame rate, etc.
Other Key Features of MiniTool MovieMaker:
- It is a photo video maker that can create video from images.
- It offers various royalty-free resources like transitions, songs, sound effects, stickers, etc.
- It can turn a video into a GIF or convert a GIF to a video.
- It enables you to change the video aspect ratio for different social media.
- It allows you to make color correction and color grading.
- It helps you add text to videos, images, and GIFs.
- It allows you to edit audio like fading music and mute audio.
- It has different types of video templates.
- It supports speeding up or slowing down videos.
- …
How to Compress Screen Recording via MiniTool MovieMaker
Step 1. Download and install MiniTool MovieMaker on your computer. Launch this program and close its promotion window.
MiniTool MovieMakerClick to Download100%Clean & Safe
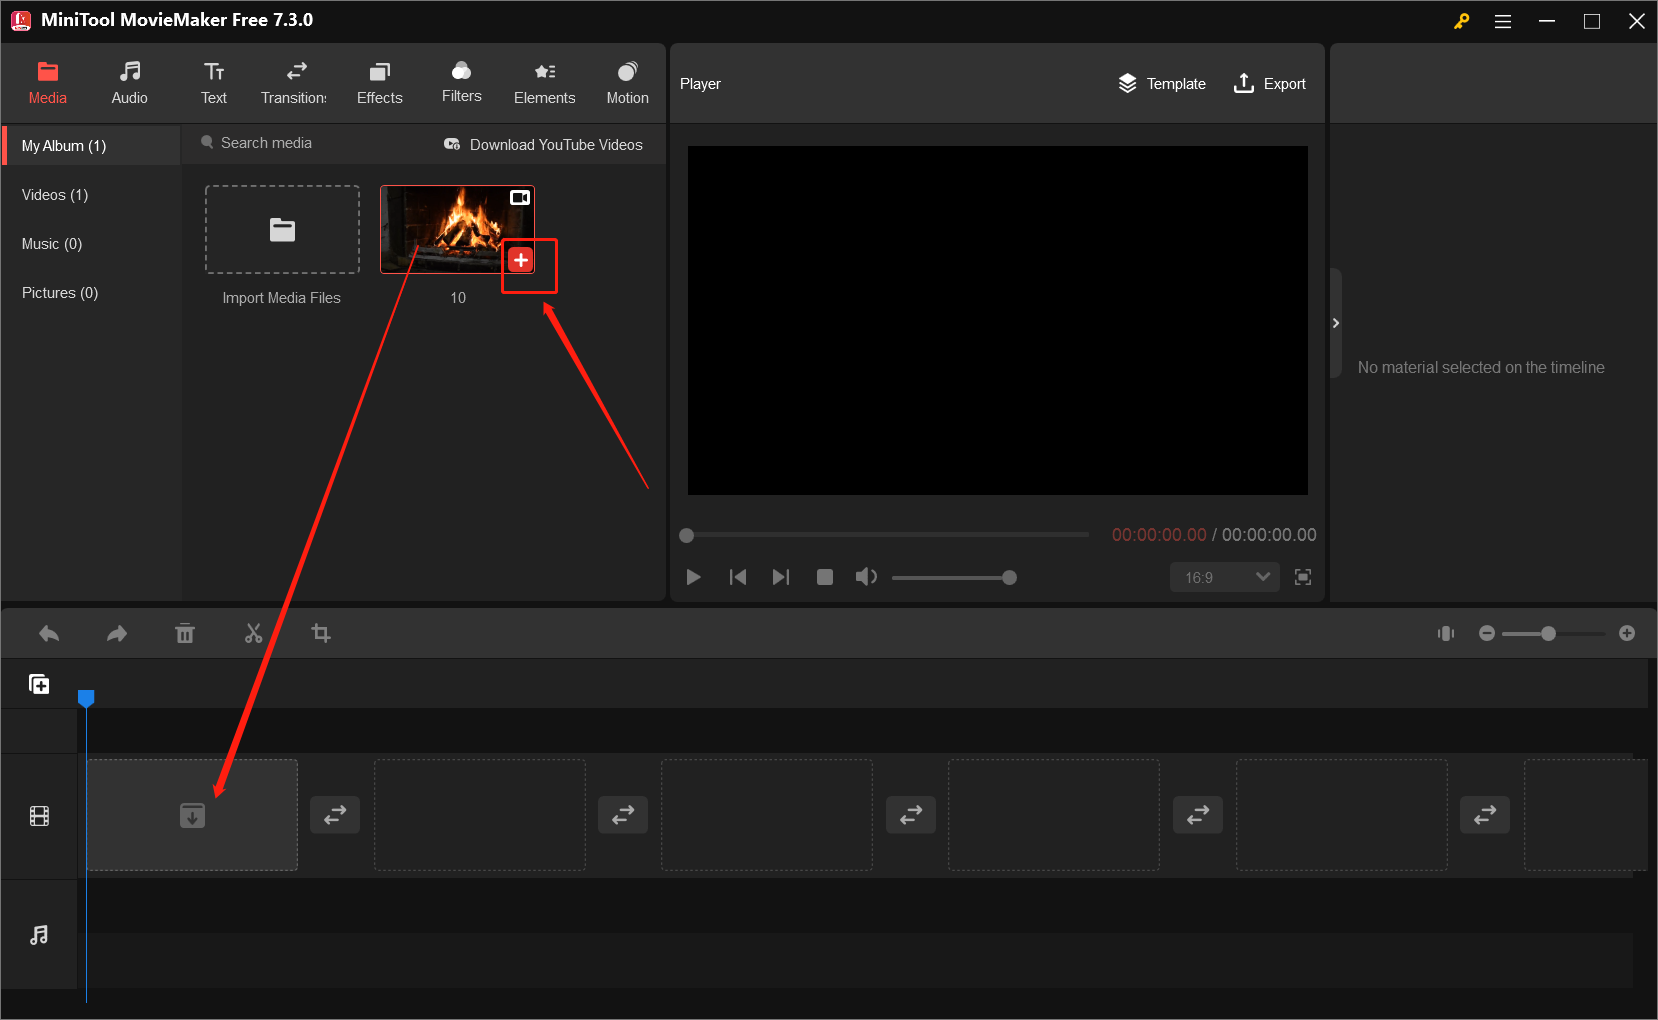
Step 2. Under the Media tab, click the Import Media Files area to find the target recorded file from your computer and click Open to import it to the Media library. Or you can directly drag and drop the target file to the Media library.
Step 3. Click the plus (+) icon on the target video to add it to the timeline or directly drag and drop it onto the timeline.
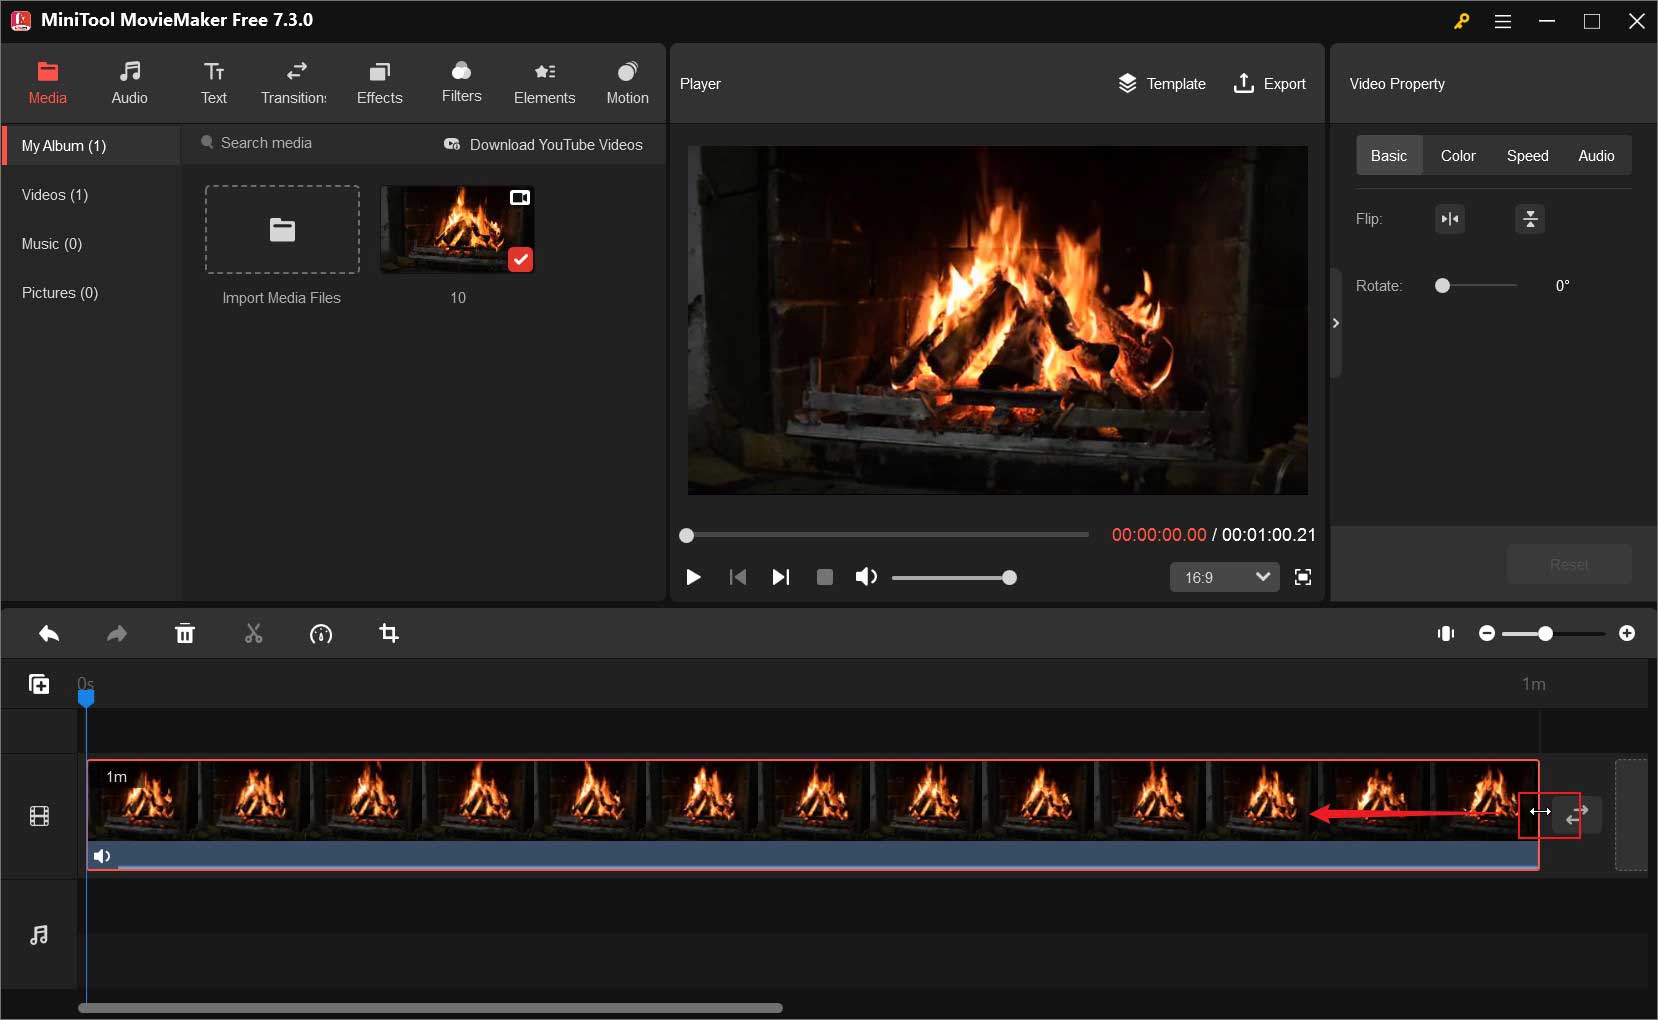
Step 4. You can use its trim tool to remove the unnecessary parts. Hover the mouse cursor over the beginning or end of the video clip until there appears a double-headed arrow. Drag the double-headed arrow rightwards or leftwards to remove the unwanted parts on both ends.
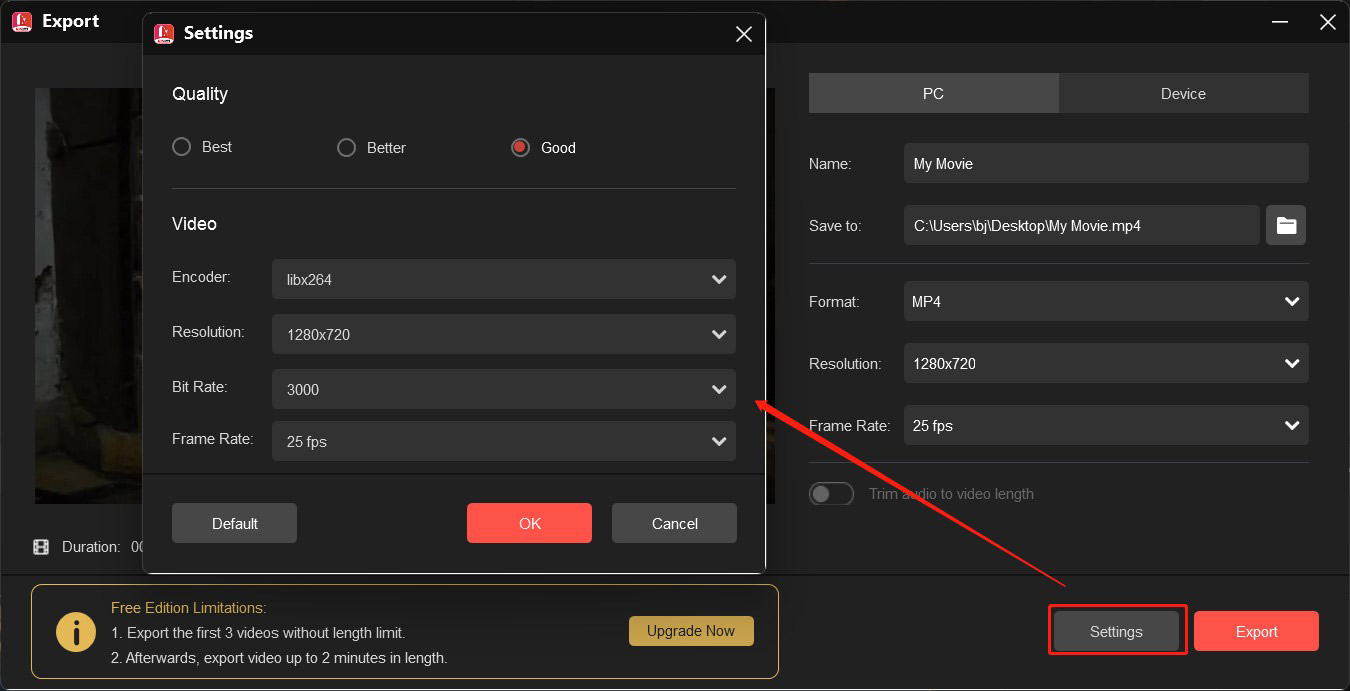
Step 5. After making other edits, click the Export option in the Player section. In the Export window, give a name to the compressed screen recording file and choose its saving path. Expand the Format dropdown and choose a compressed video format like MP4.
To further compress the video, you can click the Settings button to adjust the video quality, resolution, bitrate, and frame rate. Next, click OK and click the Export button to save the video file.
Other Good Tools to Compress Screen Recording
To give you more options, this part also has rounded up 3 good video compressors if you are a Mac user or want to use an online tool.
#1. QuickTime Player
QuickTime Player is a pre-installed application on Mac, which is well-known as a multimedia player. It can also work as a screen recorder that can record any activities happening on the screen. Furthermore, you can use it to shrink screen recording file size.
#2. iMovie
iMovie is a built-in video editor for Mac users with various basic and advanced editing features. you can use it to edit your screen recording. You can also use it as a video compressor since it allows you to shrink video file size when you export it.
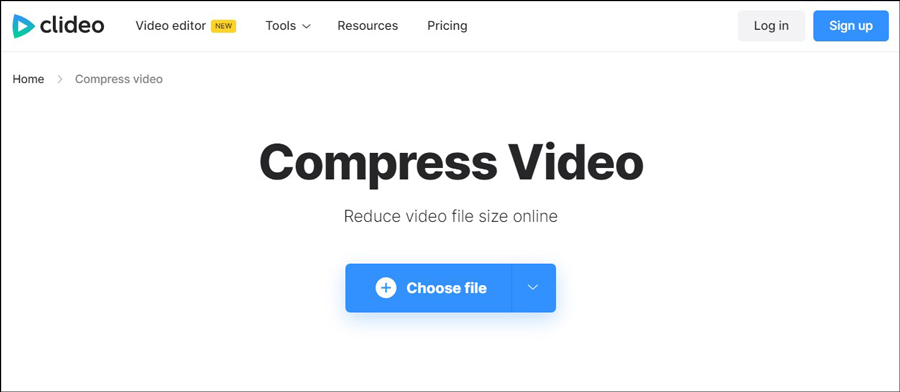
#3. Clideo
If you don’t want to download and install any software, using an online tool is a good choice. Among various online compressors, Clideo is worth trying which enables you to compress screen recording files on your browser. It supports a wide range of formats like MP4, MOV, WMV, VOB, etc. What’s more, it allows you to set the necessary parameters. With its simple and intuitive interface, you can master how to use it easily and quickly.
How to Screen Record with Smaller File Size
MiniTool Video Converter is not only a video compressor that can help you reduce the file size of screen recording but also a screen recorder that can save recordings in smaller file sizes. It supports saving recordings in MP4 format. To save a recording in a smaller file size, you can choose a compressed format or record in a lower frame rate or quality. With MiniTool Video Converter, you can do that work easily. Here’s how:
Step 1. Download and Install MiniTool Video Converter
Download and install MiniTool Video Converter, then start it.
MiniTool Video ConverterClick to Download100%Clean & Safe
Step 2. Open the MiniTool Screen Recorder Window
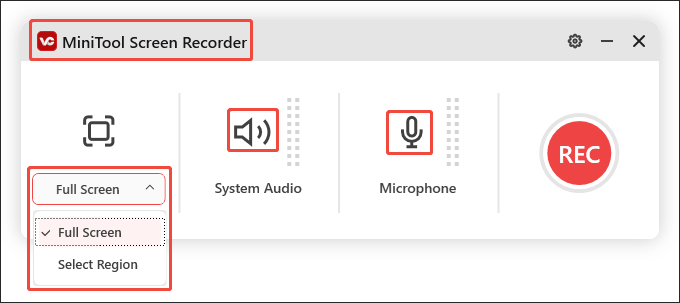
Navigate to the Screen Record tab and click the Full Screen option to access the MiniTool Screen Recorder window.

Step 3. Set Recording Region and Audio
Click the Full screen option. You can keep the default Full screen option to capture the whole screen or choose the Select region to record a specific area. Also, you can decide whether to record the audio from the system or a microphone.
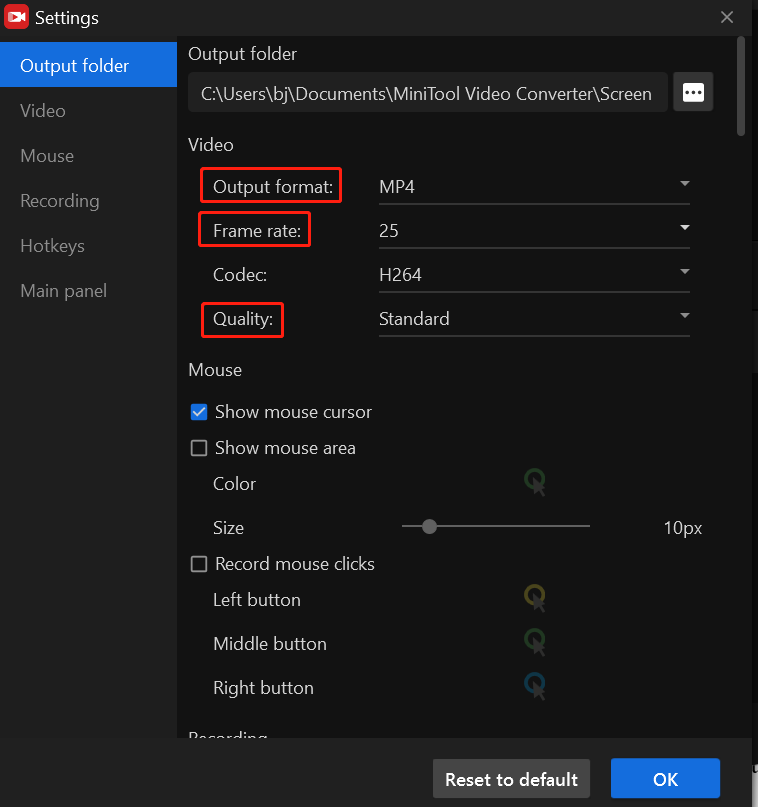
Step 4. Adjust the Output format, Frame Rate, and Quality
Click the gear icon to open the Settings window. On the Settings page, you can change certain settings to get a screen recording in a smaller file size.
- (Option 1) Select Output format with a smaller file size: You can use MP4 format. MP4 has strong compression, which makes it have a smaller file size.
- (Option 2) Lower the frame rate and quality: Expand the Frame rate dropdown and choose from 15fps, 20fps, and 25fps. Or you can choose the Quality as Standard.
You can also make other settings for your screen recording. Then click OK to save the changes.
Step 5. Start Recording Your Screen
Click the red REC button or press the default F6 key on the keyboard to start recording. During the recording process, you can press F9 to pause and resume the recording.
Step 6. View Your Recorded Video
Finally, you can press F6 again to end the recording. Then the recorded video will appear on the right page of the Capture Screen tab. You can preview, delete, rename, or locate the recorded video.
Final Thoughts
In order to share large screen recording files easily, save storage space, or for other reasons, you can use a video compressor to compress screen recording files. This article has shown you some useful compressors and a tutorial on how to use them for video compression. You can follow the above tutorial to reduce the screen recording file size. Hopefully, this article will be helpful to you.
Finally, if you have any questions while using MiniTool Video Converter or MiniTool MovieMaker, please don’t hesitate to contact us via support@minitool.com for help.
User Comments :