Have you ever experienced these situations: videos buffering endlessly despite a good Wi-Fi connection, uploading videos to social media platforms like YouTube taking a long time, and running out of storage space on your phone or computer? If the video files are large and not compressed, they can quickly fill up your device’s storage space. In this free video converter post from MiniTool, I’ll show you four effective ways to reduce MB of video.
Before learning how to reduce MB of video. Let's explore what video compression is and why compress videos.
What Is Video Compression
Video compression is a technique that reduces the MB of video files without sacrificing their essential visual quality. By removing unnecessary information from the video, compression makes it easier to save, send, and play back, especially over the internet. Therefore, nearly every internet video streaming platform uses video compression, including YouTube, TikTok, Netflix, and more.
Compression can be divided into two main categories: lossy compression and lossless compression. Lossy compression prioritizes reducing file size, which can lead to a decline in quality. In contrast, lossless compression achieves compression without sacrificing the quality of the video.
While lossless compression preserves as many details as possible, file sizes tend to be larger. Therefore, it is less common in video streaming. For a variety of multimedia applications, like YouTube, TikTok, etc., lossy compression is often used because it offers a reasonable balance between reducing file size and maintaining playback quality.
Why Reduce MB of Video
Why compress video? Can’t you just keep its original size? There are a bunch of advantages to compressing videos.
- Compression enables efficient transmission: Smaller compressed video files can be uploaded and downloaded faster, saving time and bandwidth.
- Compression can reduce file size: Compression reduces file size, takes up less device storage, making it easier to manage when storing and sharing.
- Compression increased device compatibility: Compressing files by changing video formats will result in smaller file sizes and better compatibility, e.g., convert AVI to MP4.
- Compression empowers efficient editing workflows: Compressed videos are easier to use and need less processing power, resulting in a smoother and more efficient editing process.
- Compression improves video playback: On many devices, like computers, iPads, etc., compressed videos play more smoothly and load more quickly, which makes them perfect for mobile devices with limited processing and storage capacity.
How can you reduce MB of video? Compressing videos is not complicated. Actually, there are many useful methods you can adopt. After trying various methods, I've picked out the five most feasible ones. Read on for more.
![Best 8 Video Compressors No Watermark [Ultimate Guide]](https://images.minitool.com/videoconvert.minitool.com/images/uploads/2025/06/video-compressor-no-watermark-thumbnail.jpg)
Method 1: Compress Video Using MiniTool Video Converter [Offline]
MiniTool Video Converter is a free and professional video compressor that helps you reduce MB of video in a flash. It has a straightforward user interface, which is super friendly to beginners. In addition, MiniTool Video Converter allows for batch compression, allowing you to compress up to 5 files at the same time.
Now, let’s see how to reduce MB of video with MiniTool Video Converter:
1: Download MiniTool Video Converter by clicking the download button below. Then, follow the on-screen instructions to install this program on your PC.
MiniTool Video ConverterClick to Download100%Clean & Safe
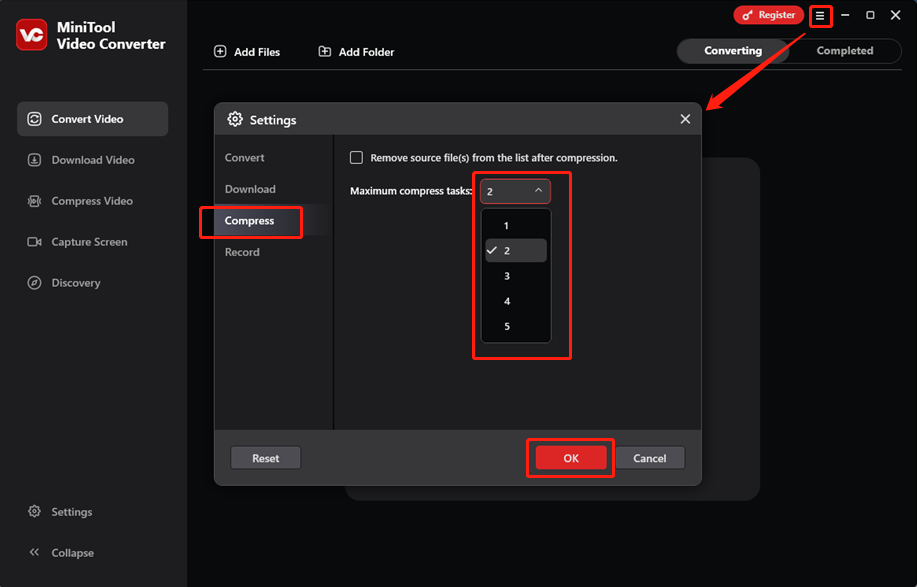
2: Launch MiniTool Video Converter, click the top right hamburger icon, and click Settings to open the Settings window. Then, go to the Compress section, where you can set the maximum simultaneous compression task. After that, click OK to save the changes.
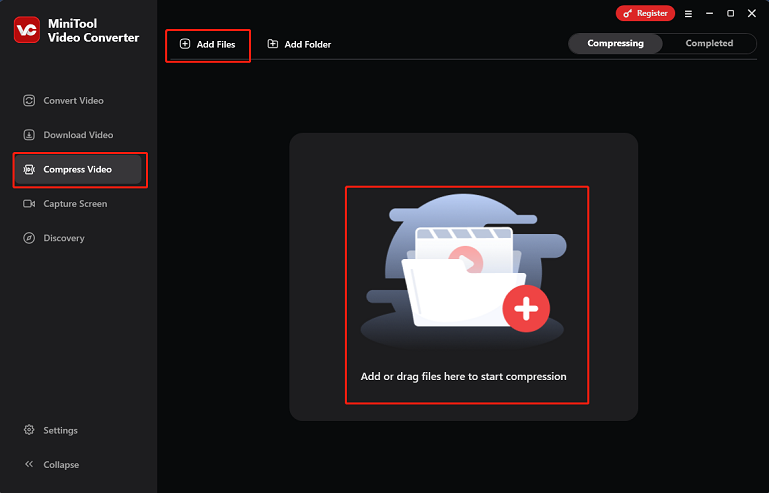
3: Go to the Compress Video section and click the Add Files button to import the video you want to compress. Alternatively, you can drag and drop the video directly to the Add or drag files here to start compression area.
4: Click the Settings icon on the target file to open the Compression Settings window. There, you can drag and move the red dot icon to your desired output file size, compress video to 10MB or whatever. Next, expand the Format option to select a desired output format. After that, click the OK button to save all the modifications.
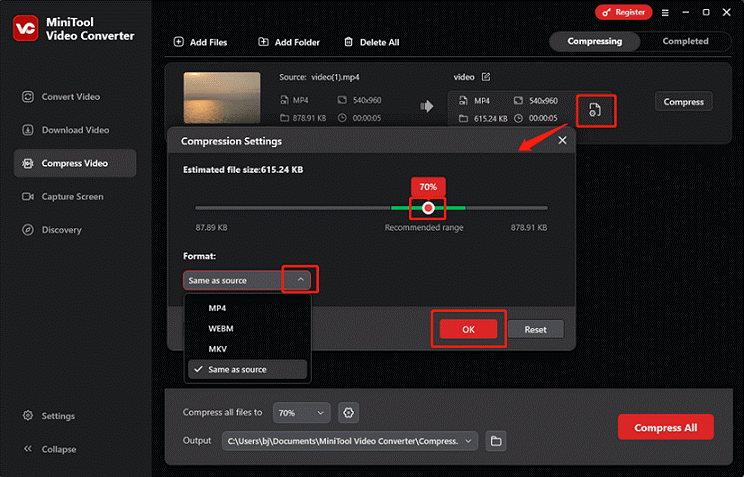
5: Open the Output option at the bottom and choose a save path.

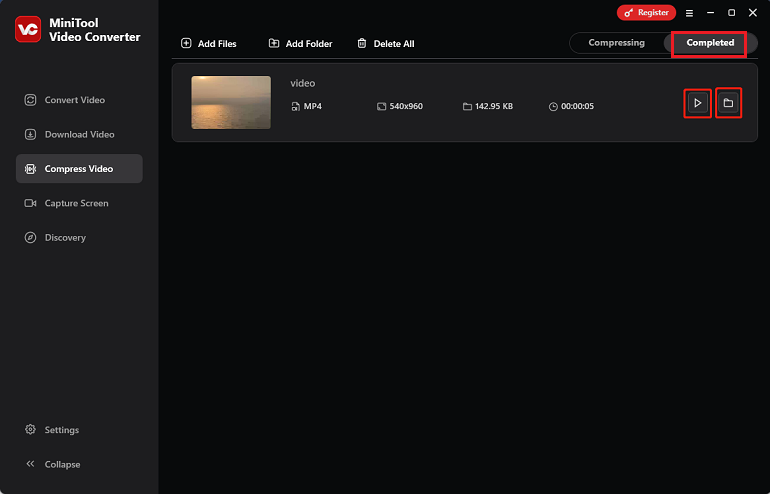
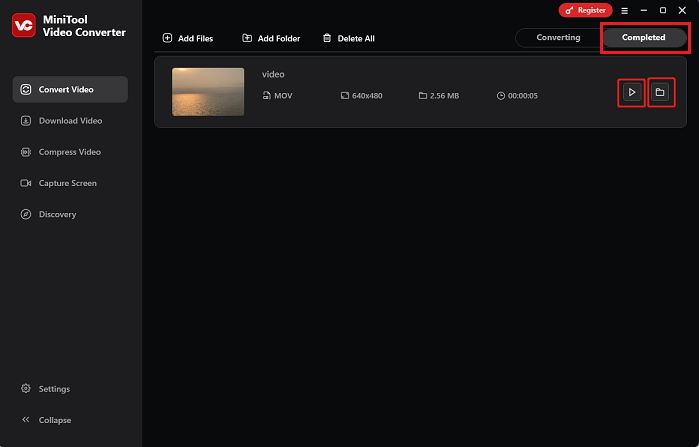
6: When everything is ready, click the Compress button to start compression. Once done, MiniTool Video Converter will switch to the Completed page automatically. Click the Play icon to view the video or click the Folder icon to locate it.
That’s it! MiniTool Video Converter enables you to compress files with no effort!
How to Convert Compressed Videos to Other Formats
The compressed files can only be saved as MP4, MKV, and WebM. None of them is your desired one? Don’t worry. Just go to the Convert Video and convert your compressed video to other formats.
MiniTool Video Converter supports a wide range of video/audio formats, such as MP4, MOV, MKV, DV, MPG, TS, FLV, MP3, OGG, AAC, AIFF, and so on. Also, it offers formats for multiple platforms and devices, like YouTube, Instagram, Facebook, Apple, Samsung, etc.
Moreover, you can customize output parameters, including frame rate, bitrate, resolution, encoder, quality, sample rate, and more. By adjusting these parameters, compression of the video can also be achieved. To speed up the conversion process, you can even convert multiple files in bulk. With MiniTool Video Converter, you can convert between different formats in a flash.
Here’s a specific conversion guide:
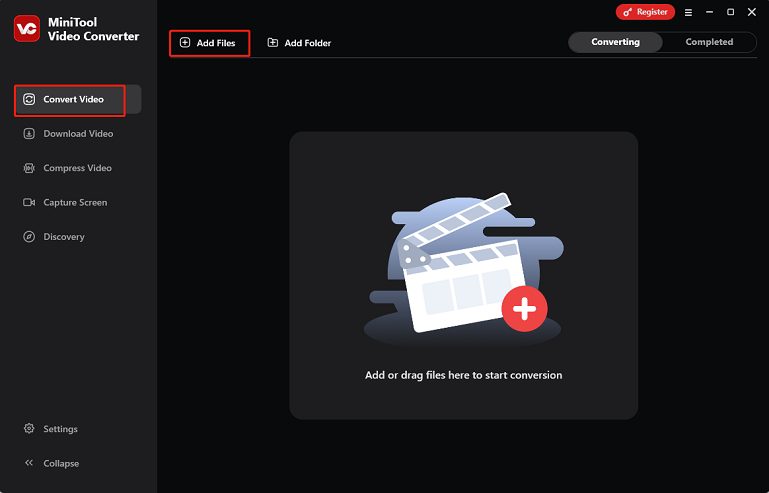
1: Switch to the Convert Video section and click the Add Files button to import the video you just compressed. Alternatively, you can drag and drop the file directly to the Add or drag files here to start conversion area.
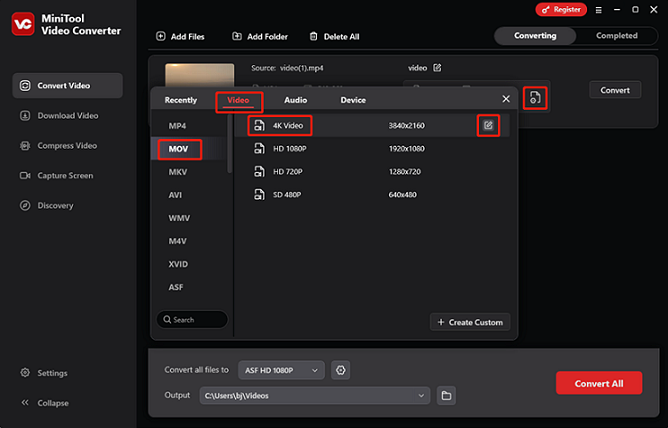
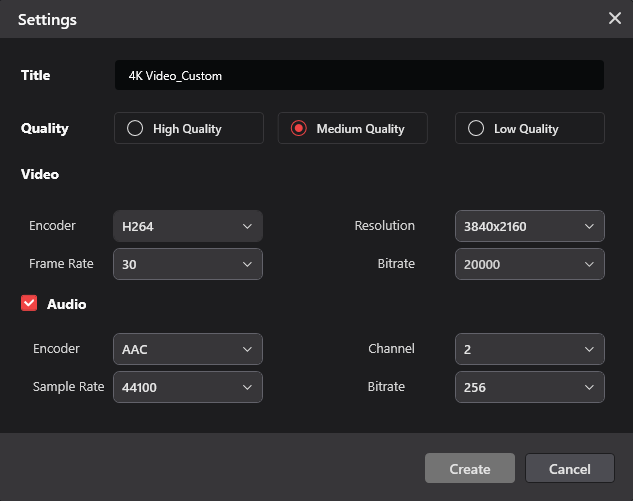
2: Click the Settings icon on the target file to access the output library, select the Video tab, choose an output format, and pick a resolution profile. Here, I take MOV, 4K Video as an example. Also, you can click the Edit icon next to the resolution to open the Settings window.
In the Settings window, you can adjust the output frame rate, bitrate, encoder, and other parameters.
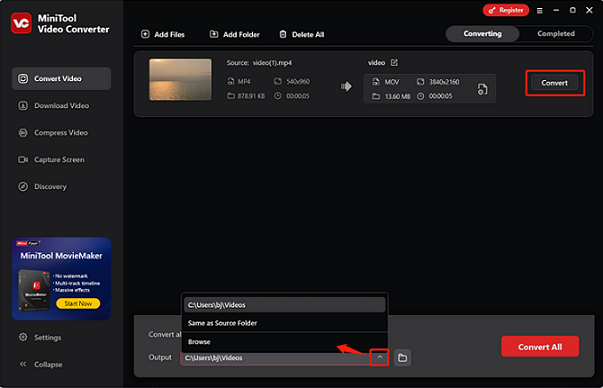
3: Expand the Output option at the bottom to choose the output save path. After that, click the Convert button to start the conversion.
4: When the file conversion ends, this file converter will automatically switch to the Completed section. Click the Play icon to directly view the converted video or click the Folder icon to locate the file.
With MiniTool Video Converter, converting one format to another is just like a breeze.
Method 2: Compress Video Using MiniTool MovieMaker [Offline]
MiniTool MovieMaker is also an ideal video compression tool supported by Windows. It empowers you to reduce MB of video by changing the frame rate, bitrate, resolution, formats, and quality. Now, let’s see how to reduce video file size using MiniTool MovieMaker.
1: Click the download button below to download and install MiniTool MovieMaker on your PC.
MiniTool MovieMakerClick to Download100%Clean & Safe
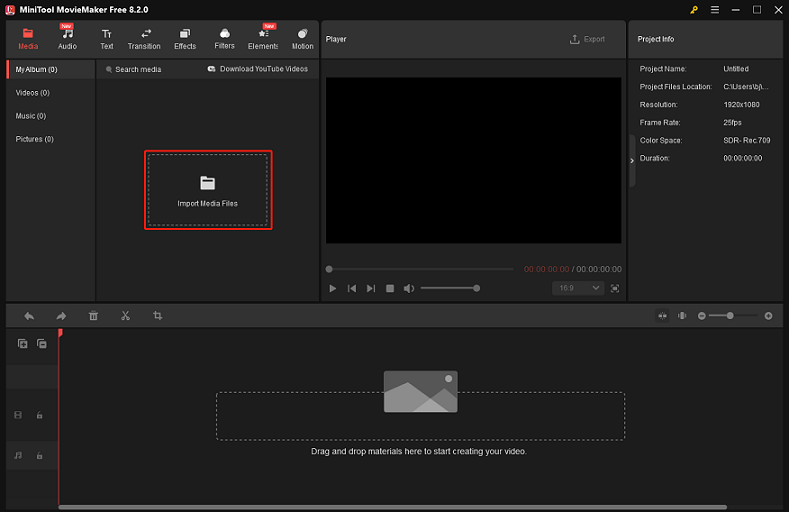
2: Launch MiniTool MovieMaker and close the Promotion window. Then, click the Import Media Files area to add the video you want to compress into this program.
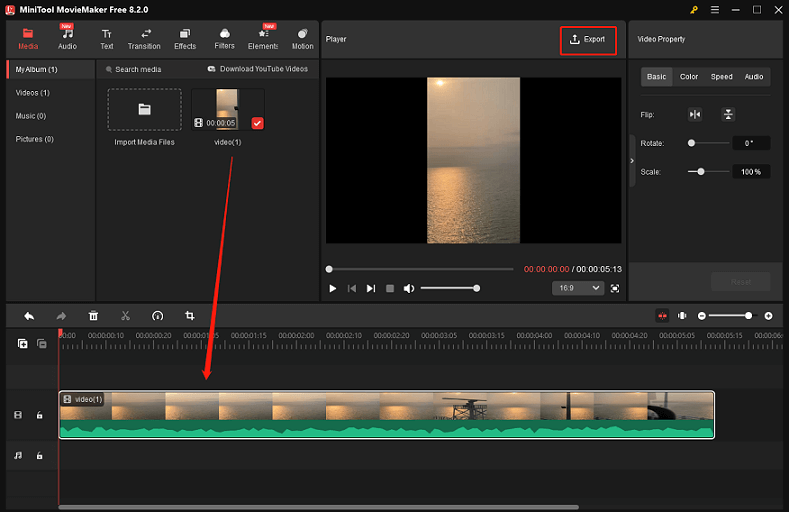
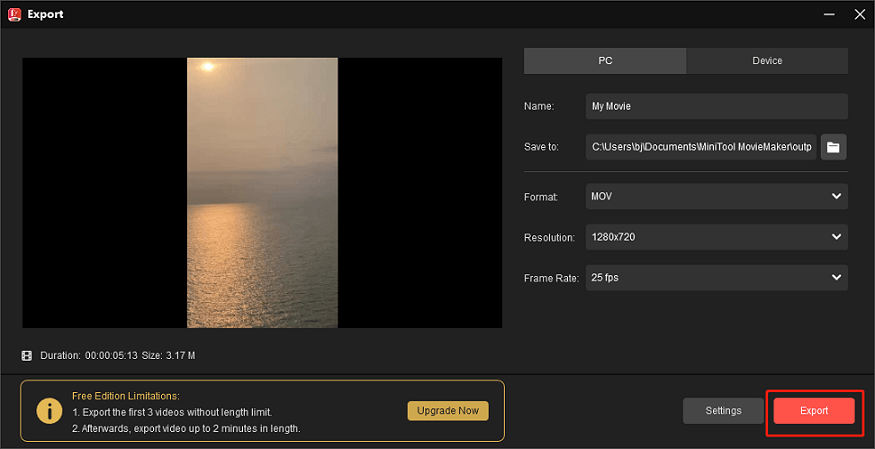
3: Drag the video to the timeline. Then, click the Export option at the top right of the Player window to open the Export window.
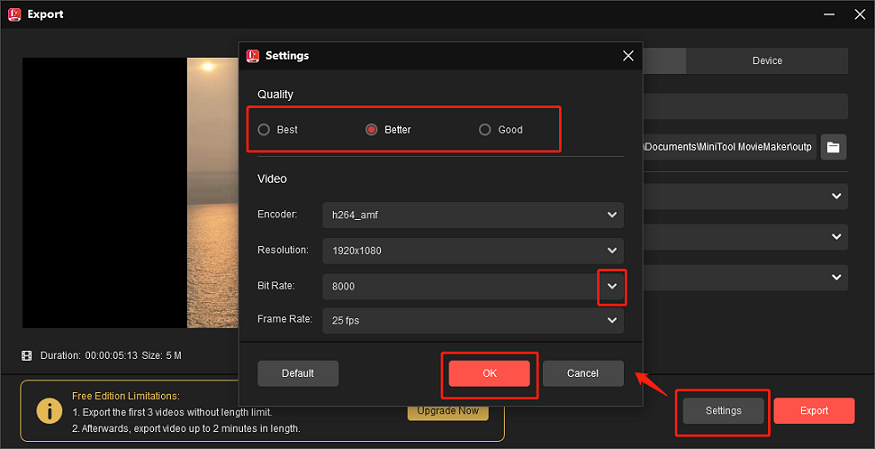
4: In the Export window, reduce MB of video by changing the output format, resolution, and frame rate.
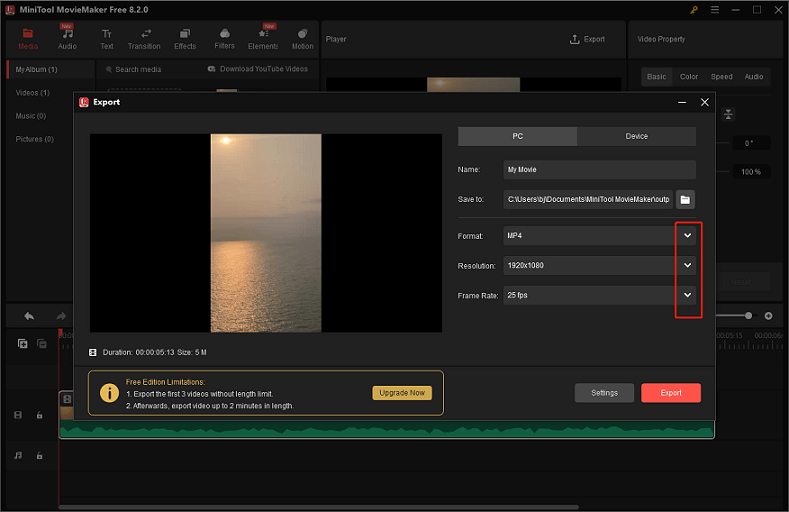
If you want to configure the quality and bitrate settings, click on the Settings button to enter the Settings window. There, you can adjust the output video quality and bitrate to compress the video. Then, click OK to save the changes you just made.
5: Now, click the Export button to start compression.
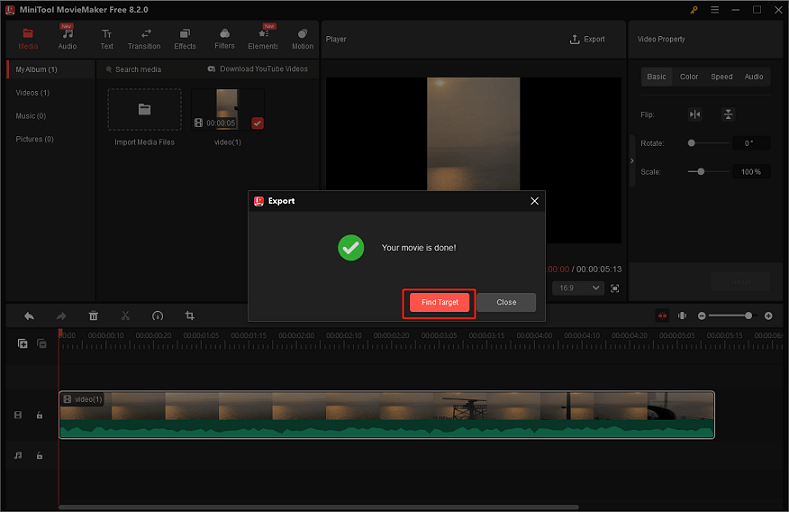
Once done, click the Find Target button to locate the compressed file.
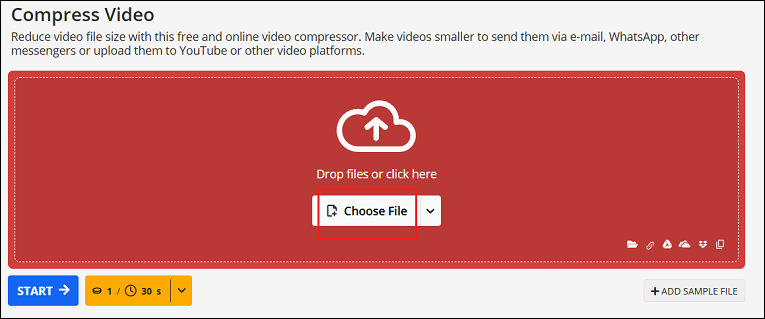
Method 3: Compress Video Using FreeConvert [Online]
FreeConvert is a free online compressor that can be used without extra installation. It has a sophisticated compression technique with various kinds of advanced options. FreeConvert offers multiple compression methods, like target a video quality, target a video resolution, target a max bitrate, and more. You can also select a specific target size.
Now, follow the step-by-step guide below to reduce MB of video using FreeConvert:
1: Open your browser, search for FreeConvert, and enter its main interface.
2: Expand the Compress option from the top menu and choose Video Compressor.
3: Click the Choose Files button to import the video you want to compress into FreeConvert.
4: Open the Output option and choose an output format. For example, avi. Then, click the gear icon next to Output to enter the Advanced Options (Optional) window.
5: In the Advanced Options (Optional) window, you can choose a video codec, a compression method, and a target video size. After that, click the Apply Settings button to save the settings.
6: Click the Compress Now! button to start compression. Once done, click the Download button to save the file to the local folder.
FreeConvert can not only reduce MB of video, compress video under 25MB or similar, but also change the file format. FreeConvert supports various format conversions, such as MP3 to OGG, MOV to MP4, AAC to MP3, AVI to FLV, PNG to SVG, WEBP to JPG, PDF to Word, JPG to PDF, MP4 to GIF, and more.
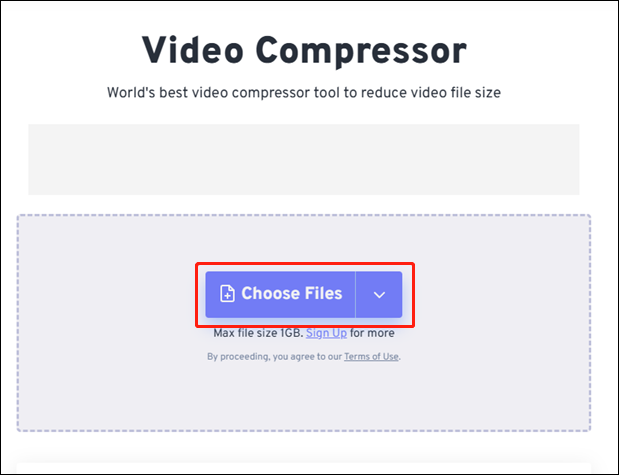
Method 4: Compress Video Using Online File Compressor [Online]
Online File Compressor is a browser-based file compressor that allows you to reduce MB of video with ease. It is free and has an intuitive user interface, enabling even a beginner to compress videos without guessing. Besides being a video compressor, Online File Compressor can also serve as an image compressor and a document compressor.
Here’s a detailed guide:
1: Launch your browser on the computer, search for Online File Compressor, and enter its user interface.
2: Select the Compress video option.
3: Click on Choose File to import the video you wish to compress into Online File Compressor.
4: Input the desired file size into the Set file size box.
5: Then, click the START button to start compression. Once done, click the Download button to save the compressed video in your local folder.
Method 5: ZIP the Video
How to reduce GB of video? You can zip it. This way is quite straightforward. In the following content, I'll show you how to zip videos on Windows.
1: Find the video you want to compress in the File Explorer.
2: Right-click on the video.
3: Click the Send to button and choose Compressed (zipped) folder.
Then, a ZIP folder will be created in the same location as the original video file.

In Summary
How to reduce MB of video easily? How to compress video to 10MB? This post offers 5 effective methods and shows you how to compress video step by step. The first four professional video compressors provide multiple advanced functions to reduce video file size. With them, you can reduce MB of video with no effort. Feel free to select the one you prefer. Hope this article can help you a lot!
You can contact us at support@minitool.com if you have any questions about using MiniTool Video Converter or MiniTool MovieMaker. Alternatively, you can send me messages directly on Twitter, and I’ll help you as soon as possible.
User Comments :