OBS Studio is a free and open-source screen recorder, which is available on Windows, macOS and Linux. You recorded videos with OBS and can’t find where OBS recordings are saved. Where does OBS save recordings? How to change the save path? Check out this post!
Where Does OBS Save Recordings?
OBS Studio is a free and open-source program used for live streaming and screen recording. With OBS, you can stream on Twitch, YouTube and other platforms, and capture your computer screen with internal and external audio (Try MiniTool Video Converter to change video format).After recording videos with OBS, some people said they can’t find the OBS recording location. Where does OBS save recordings?For Windows users, OBS will automatically save your recordings to the Videos folder. If you still can’t find OBS recordings, you can click on File in the top left corner of the screen and choose Show Recordings. Alternatively, you can go to Settings > Output and check the recording path.So how to change the recording path? Here’s how:- Open OBS and click on Settings in the Controls
- Switch to the Output tab and find the recording path in the Recording
- Click Browse and select a folder to store OBS recordings. Then click Select Folder > Apply > OK.
What Are the Best OBS Settings for Recording?
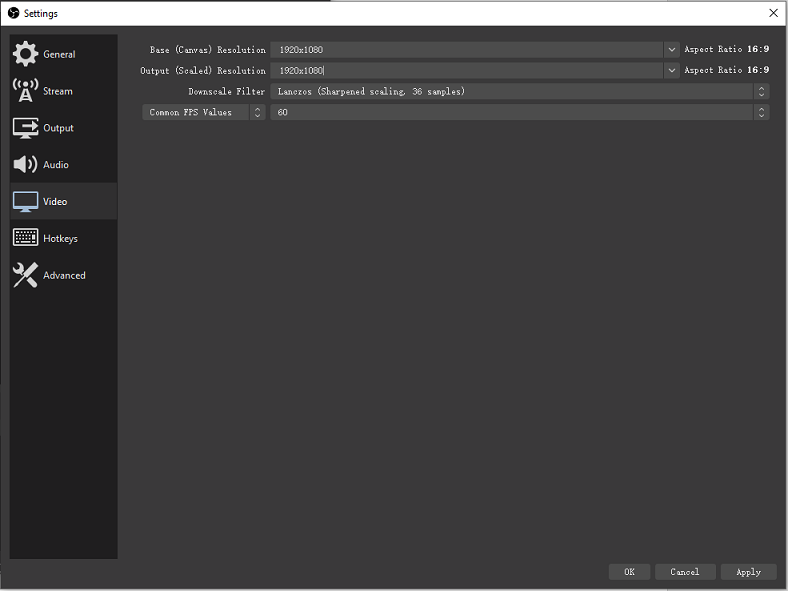
Here are the best OBS recording settings:Video- Base (Canvas) Resolution: 1920 x 1080
- Output (Scaled) Resolution: 1920 x 1080
- Downscale Filter: Lanczos (Sharpened scaling, 36 samples)
- Common FPS Value: 60
 Output
- Output Mode: Simple
- Recording Path: Select a hard drive and create a new folder
- Recording Quality: Indistinguishable Quality, Large File Size
- Recording Format: MP4
How to Record with OBS
After knowing the best OBS settings for recording, let’s take a look at how to record with OBS.Step 1. Download and install OBS Studio on your PC. Then launch it.Step 2. Go to the Sources section and click the +. From the drop-down menu, select Display Capture. Name it and click OK to add the source.Step 3. Then click the Settings button in the Controls section and adjust the settings by following the best OBS recording settings guide. When you are done, click Apply > OK to save changes.Step 4. Tap on Start Recording and minimize the OBS window.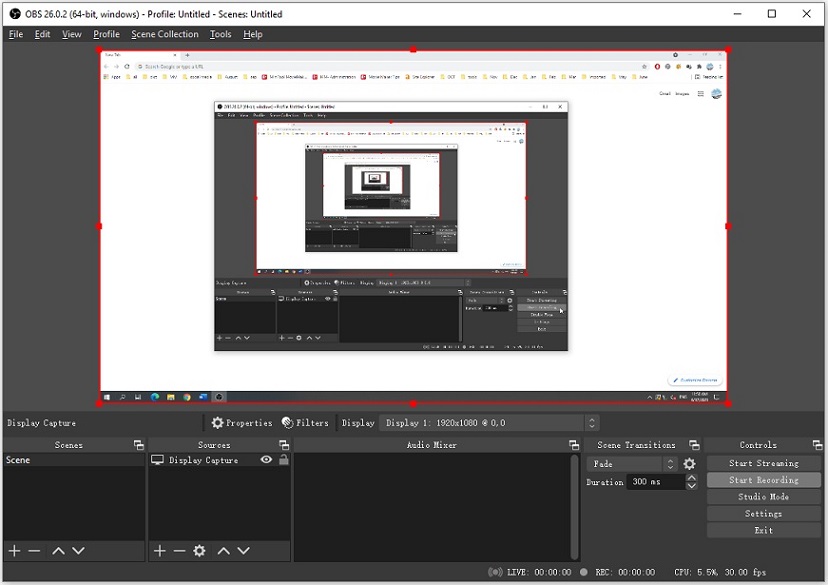 Step 5. To end the recording, go to OBS and tap on Stop Recording.
Best Alternative to OBS – MiniTool Video Converter
MiniTool Video Converter comes with a screen recording feature. It lets you record streaming videos in MP4, WMV, MKV, AVI, MOV, FLV, and TS. If you want to record audio from a computer, you can convert the recording to MP3 or other audio formats.Here’s how to use MiniTool Screen RecorderStep 1. Open MiniTool Video Converter after the installation.Step 2. Click on Screen Record and click the camera icon to continue.Step 3. Tap the settings icon to modify the output settings.Step 4. Turn on System Audio or Microphone and open the Full screen drop-down list to select the recording area.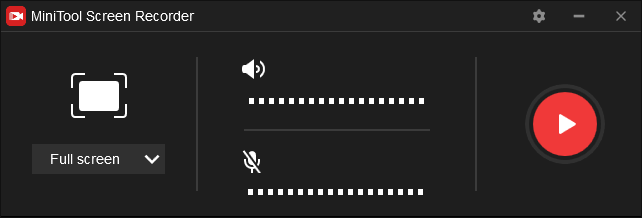 Step 5. Hit the Record button to start recording. To stop the recording, press F6.You may also like: Where Does OBS Save Recordings? Check the Videos Folder First
User Comments :