Streamlabs is an expert and reliable video recording and live streaming software. It can capture computer screens with no lag. But sometimes, many users encounter problems like Streamlabs doesn’t capture audio on their computers. How to fix Streamlabs not recording audio? This free video converter post from MiniTool offers 4 useful methods aimed at solving your problems. Read on!
Method 1: Unmute the Source of the Audio
Streamlabs desktop audio may have been accidentally muted, resulting in the audio not being captured. Therefore, the first method to fix Streamlabs not recording audio issues is to unmute the audio.
Follow the details below:
1: Find the speaker icon in the lower right corner of your computer screen and right-click it. Then, choose the Open Volume mixer option.
2: If the speaker icon under obs64.exe shows off, click on it to unmute the audio source.
3: Launch Streamlabs to see if it records audio. Otherwise, try the next method.
Method 2: Give the Required Permissions
If Streamlabs doesn't have permission, it can't access your audio device. So, you’d better check whether you have given Streamlabs the necessary permission.
Here’s how to grant the microphone permission:
1: Open the Settings window on your computer and navigate to the Privacy section.
2: Next, click the Microphone button and make sure that the Allow desktop apps to access your microphone option is on.
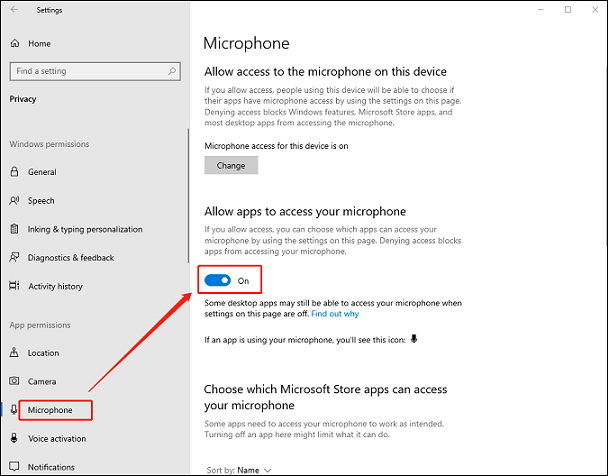
3: After that, scroll to see if Streamlabs is listed.
Method 3: Check the Sound Preferences
Streamlabs may also fail to record audio due to incorrect audio settings. Before recording, make sure the software's audio track settings are correct.
You can follow the steps below to check if the settings are proper:
1: Launch Streamlabs on your device, head to the Mixer option and click the sound icon to open the desktop audio.
2: Click the Settings tab at the lower left to open the Settings window, and then click Audio.
3: Select the Desktop Audio Device and Mic/Auxiliary Device that you’re using.
4: Then, click Done to save the changes. Close Streamlabs and restart it to see if the audio works.
Try the additional fix below if this method doesn’t work.
Method 4: Try Another Screen Recording Tool
After trying all the methods above, if Streamlabs still does not capture audio, I think it’s time to try another screen recording tool. In that case, I’d like to highly recommend a professional and robust screen recorder: MiniTool Video Converter. It can capture any activity on the computer screen, such as games, movies, online meetings, etc. Plus, this application can record screens with microphone sound and system audio simultaneously or separately.
Here’s how to use MiniTool Video Converter to record PC screens with audio:
Step 1: Download and install MiniTool Video Converter on your computer.
Click the download button below to download and install MiniTool Video Converter for free.
MiniTool Video ConverterClick to Download100%Clean & Safe
Step 2: Open the MiniTool Screen Recorder window.
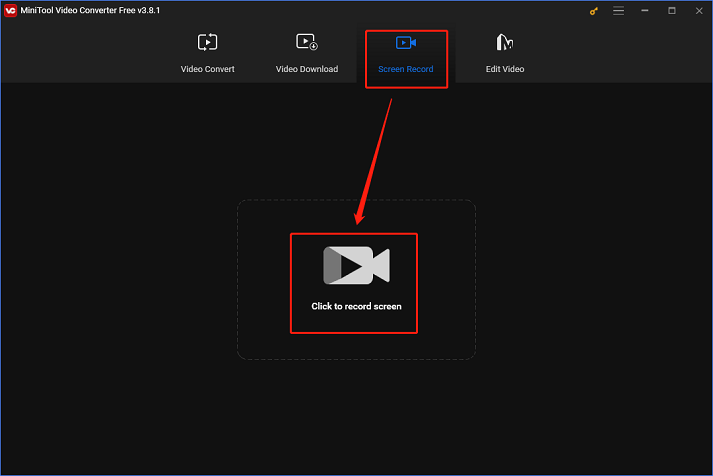
Run MiniTool Video Converter on your computer and head to the Screen Record section. Next, click the Click to record screen area to open the MiniTool Screen Recorder window.
Step 3: Change some settings in the MiniTool Screen Recorder window.
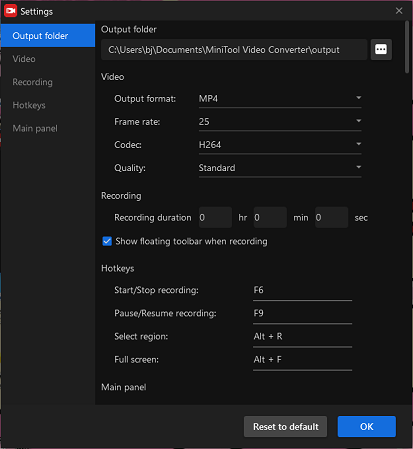
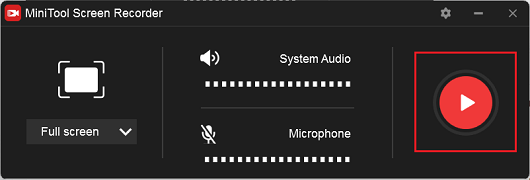
Click the Microphone icon and the System Audio icon to turn them on or off. You can record the full screen by default. If you want to specify a recording area, click the down-arrow icon next to Full screen to open the drop-down menu. Then, click the Select region tab to select a recording area. If you want to access more settings, click the gear icon to open the Settings window.
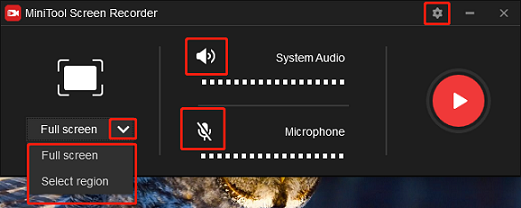
In the Settings window, click the three-dot icon to choose an output folder. Then, you can adjust the quality, frame rate, and other settings. Finally, click the OK button to save the changes.
Step 4: Start screen recording.
Click the Record button to start recording. You will have a three-second buffer time to head to the target screen.
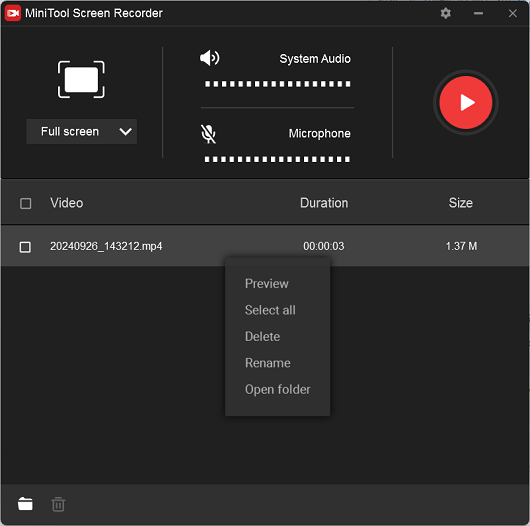
Once the recording is done, press F6 to stop the recording. Next, you can check the recording in the MiniTool Screen Recorder window and right-click the recording to preview, rename, or delete it.
The specific instructions above will guide you to finish the recording with no effort!

Conclusion
How to fix Streamlabs not recording audio? This post offers 4 effective methods and guides you to solve the streamlabs not capturing audio issue step by step. Hope you find this article helpful!
User Comments :