What Is Session?
Session is a messaging application available on iOS, Android, Windows, macOS, and Linux. It uses onion routing to hide the user’s IP address. You can create an anonymous account without providing a phone number or email address. The software supports one-on-one chat and group chats of up to 100 people.
Session supports sending various files, including media files such as videos, images, and audio recordings, as well as documents such as PDFs and PPTs.
What Is Session Video Size Limit?
File transfers on the Session are limited by its onion request protocol. While this protocol protects user privacy, it cannot support the transfer of large files. Session maximum video upload size is 10MB. If you want to send a large video, you’ll need to find a way to reduce the video file size. How can you do that? You can refer to the methods in the next section.

How to Bypass Session Video Size Limit?
This section will recommend 2 video compressors. Either of these two methods can be used to quickly compress video.
1. Use MiniTool Video Converter
Session limits the size of sent videos to less than 10MB, so please make sure to check the size of the video first. Any video file larger than this size must be compressed before sending.
MiniTool Video Converter is a desktop application that can shrink any video on your computer, no matter how large the video is. It never adds watermarks to the video you want to compress. Many common formats, including MP4, MKV, AVI, WMV, MOV, VOB, and more, are supported by this software.
Furthermore, MiniTool Video Converter supports compressing videos in bulk. You can upload multiple videos at once and compress up to 5 videos simultaneously. How to use MiniTool Video Converter to compress a video? The following is a step-by-step guide:
Step 1: Download and Install MiniTool Video Converter
Click the download button below to download and install MiniTool Video Converter on your Windows PC.
MiniTool Video ConverterClick to Download100%Clean & Safe
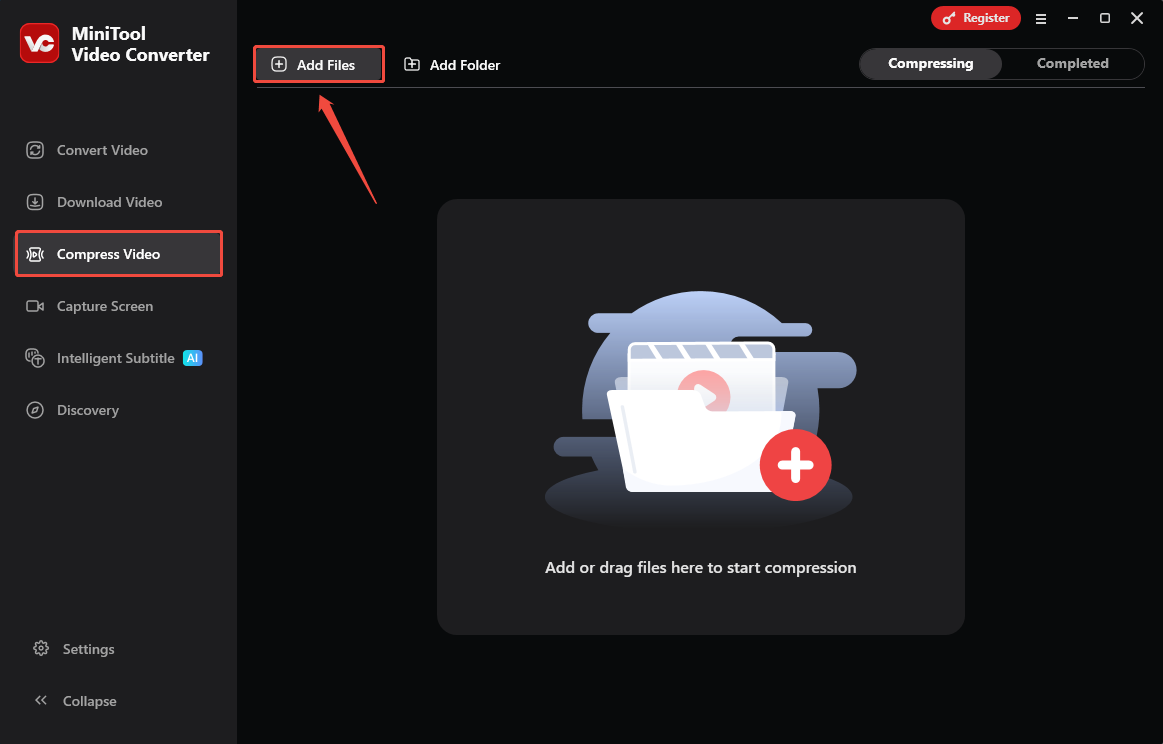
Step 2: Import Your Video
Launch this free video compressor. Choose the Compress Video tab and click Add Files to upload the video you want to compress.
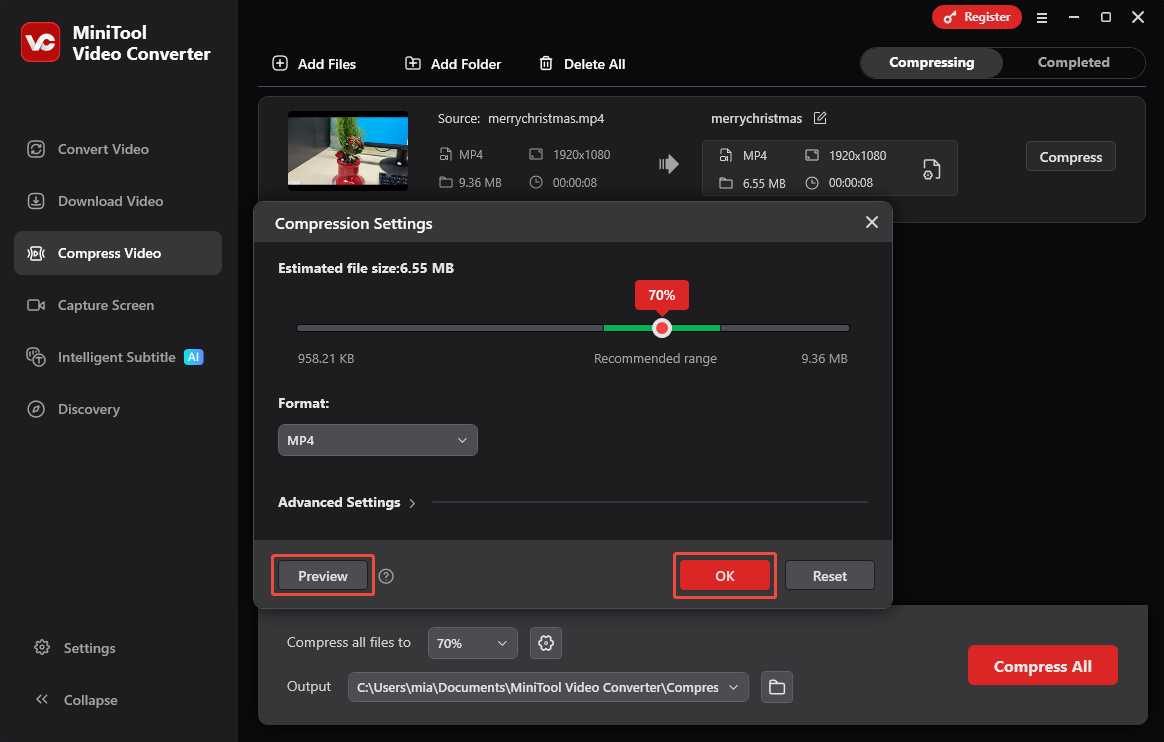
Step 3: Set the Compression Percentage
Click the settings icon. In the pop-up Compression Settings window, drag the red dot left or right to select a compression percentage that you find suitable.
Step 4: Select the Output Format
Expand the Format option and select the output format (MP4, WebM, or MKV).

Step 5: Preview the Video
Click the Preview button to check the video quality. This step is primarily to check if the video is clear at your set compression level. If the video is not clear enough, you can increase the compression percentage. Once you’ve made the adjustments, click OK.
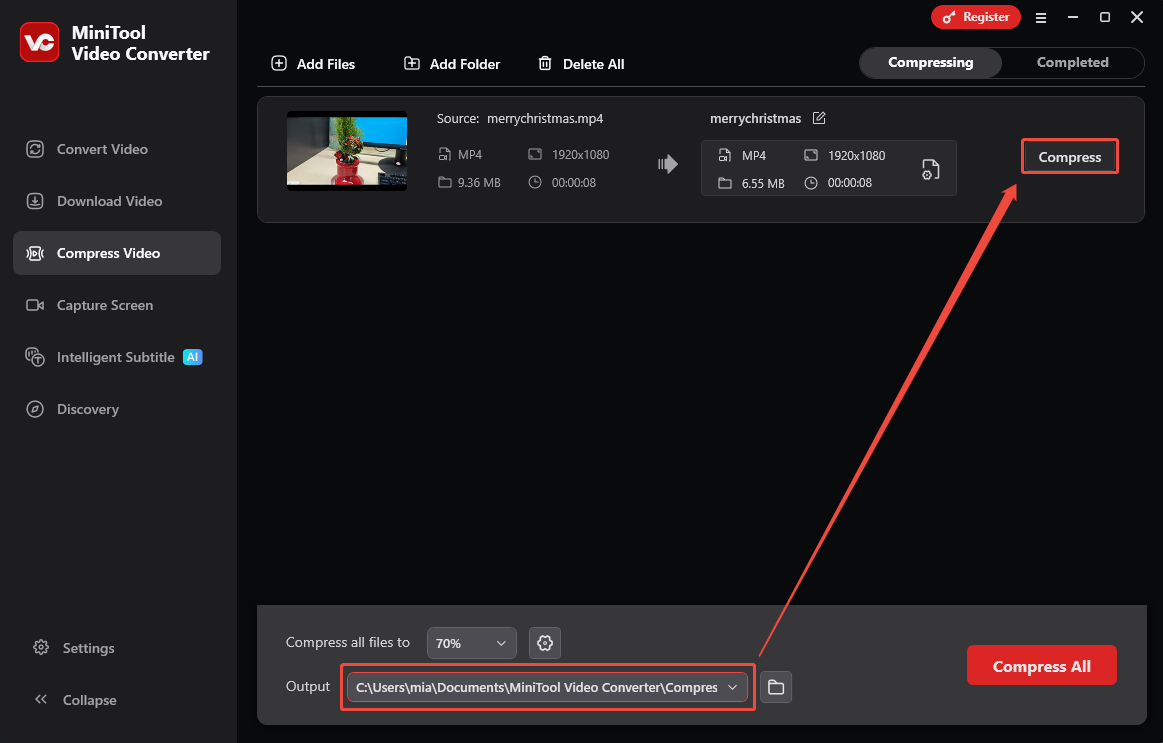
Step 6: Choose Save Folder
Click the Output option, select any folder you like, and the compressed video will be saved there.
Step 7: Start Compression
Click the Compress button to initiate the compression process.
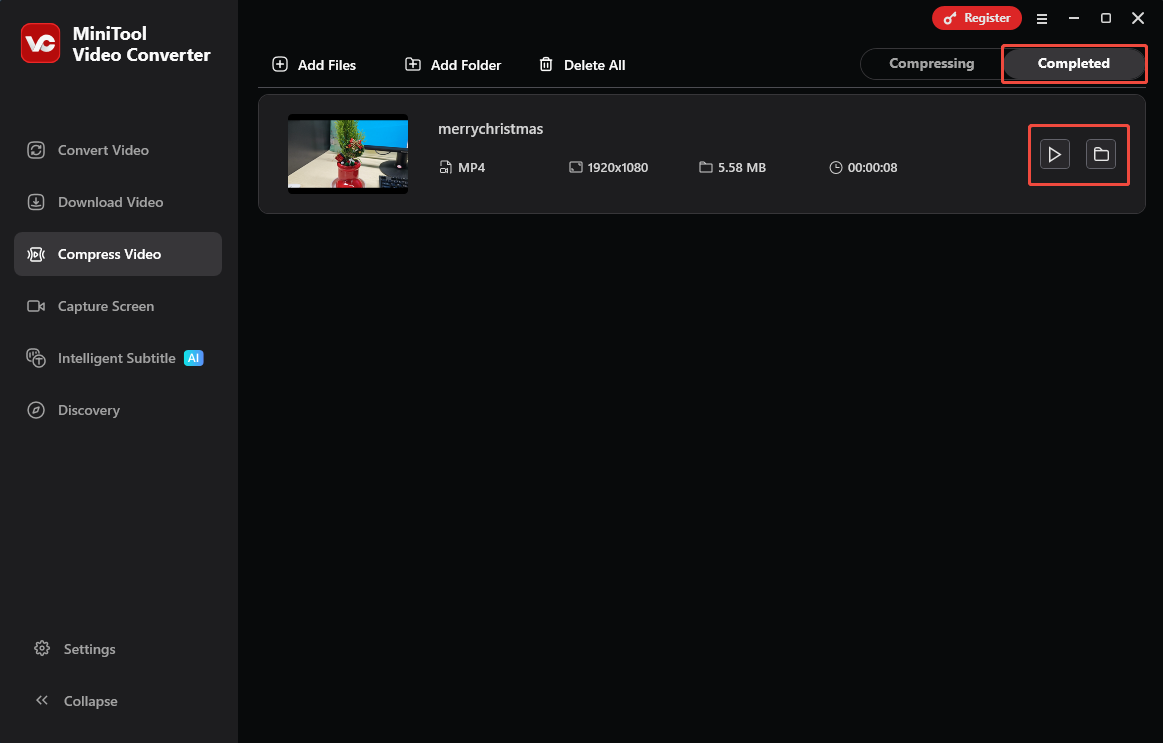
Step 8: Locate the Compressed Video
Once the compression task is complete, the Completed tab will open automatically. Click the play icon to preview the video, or click the folder icon to jump directly to the save location.
MiniTool Video Converter offers a simple, fast compression process. It can reduce the size of videos by up to 90%. In addition to compression, the software supports free file format conversion and audio to text conversion.
2. Use Clideo
Clideo is a platform that offers many video-based tools, including a video compressor. This tool is free to use but you need to pay for watermark removal. You can import video files from your device, Google Drive, or Dropbox. How to use this tool to compress a video? Below is a guide.
Step 1: Upload Your Video
Go to https://clideo.com/compress-video and click Choose file to import your video.
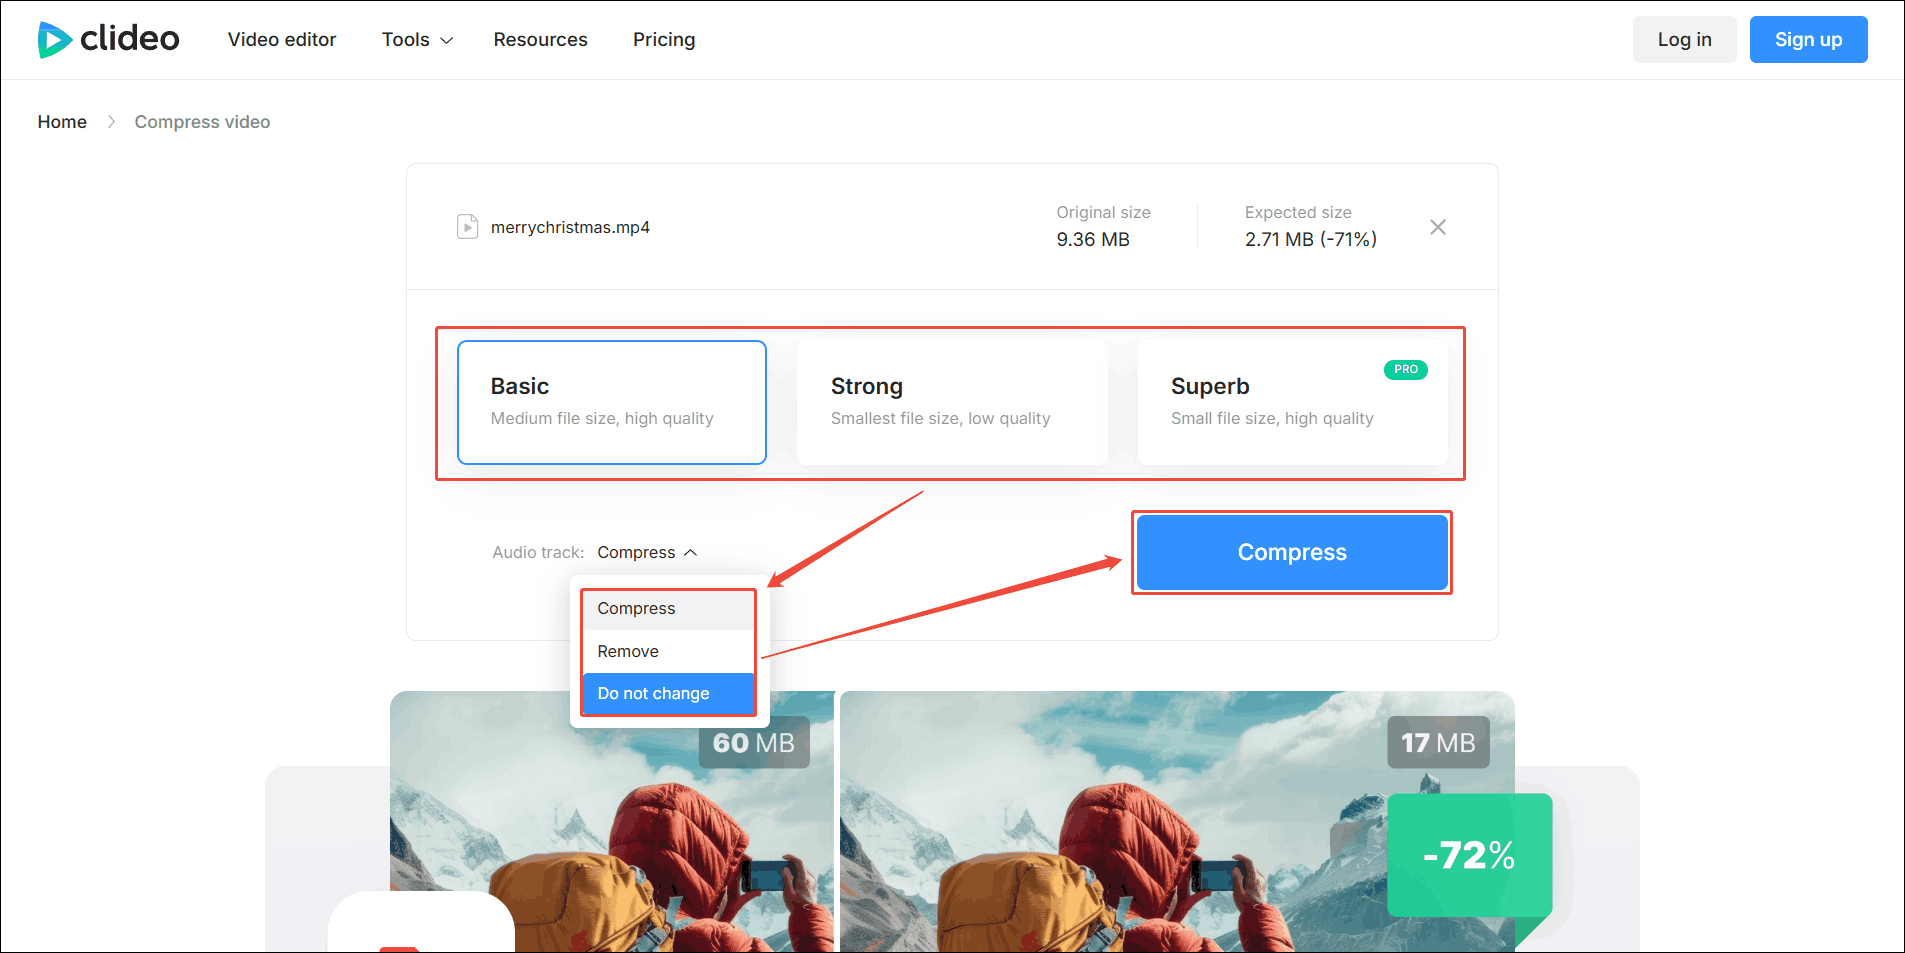
Step 2: Choose a Compression Level
Select the compression level you want (Basic, Strong, or Superb).
Step 3: Choose Whether to Compress the Audio
You can also expand the Audio track option and select whether to compress the audio of the video or not.
Step 4: Start Compression
Click the Compress button to start compression.
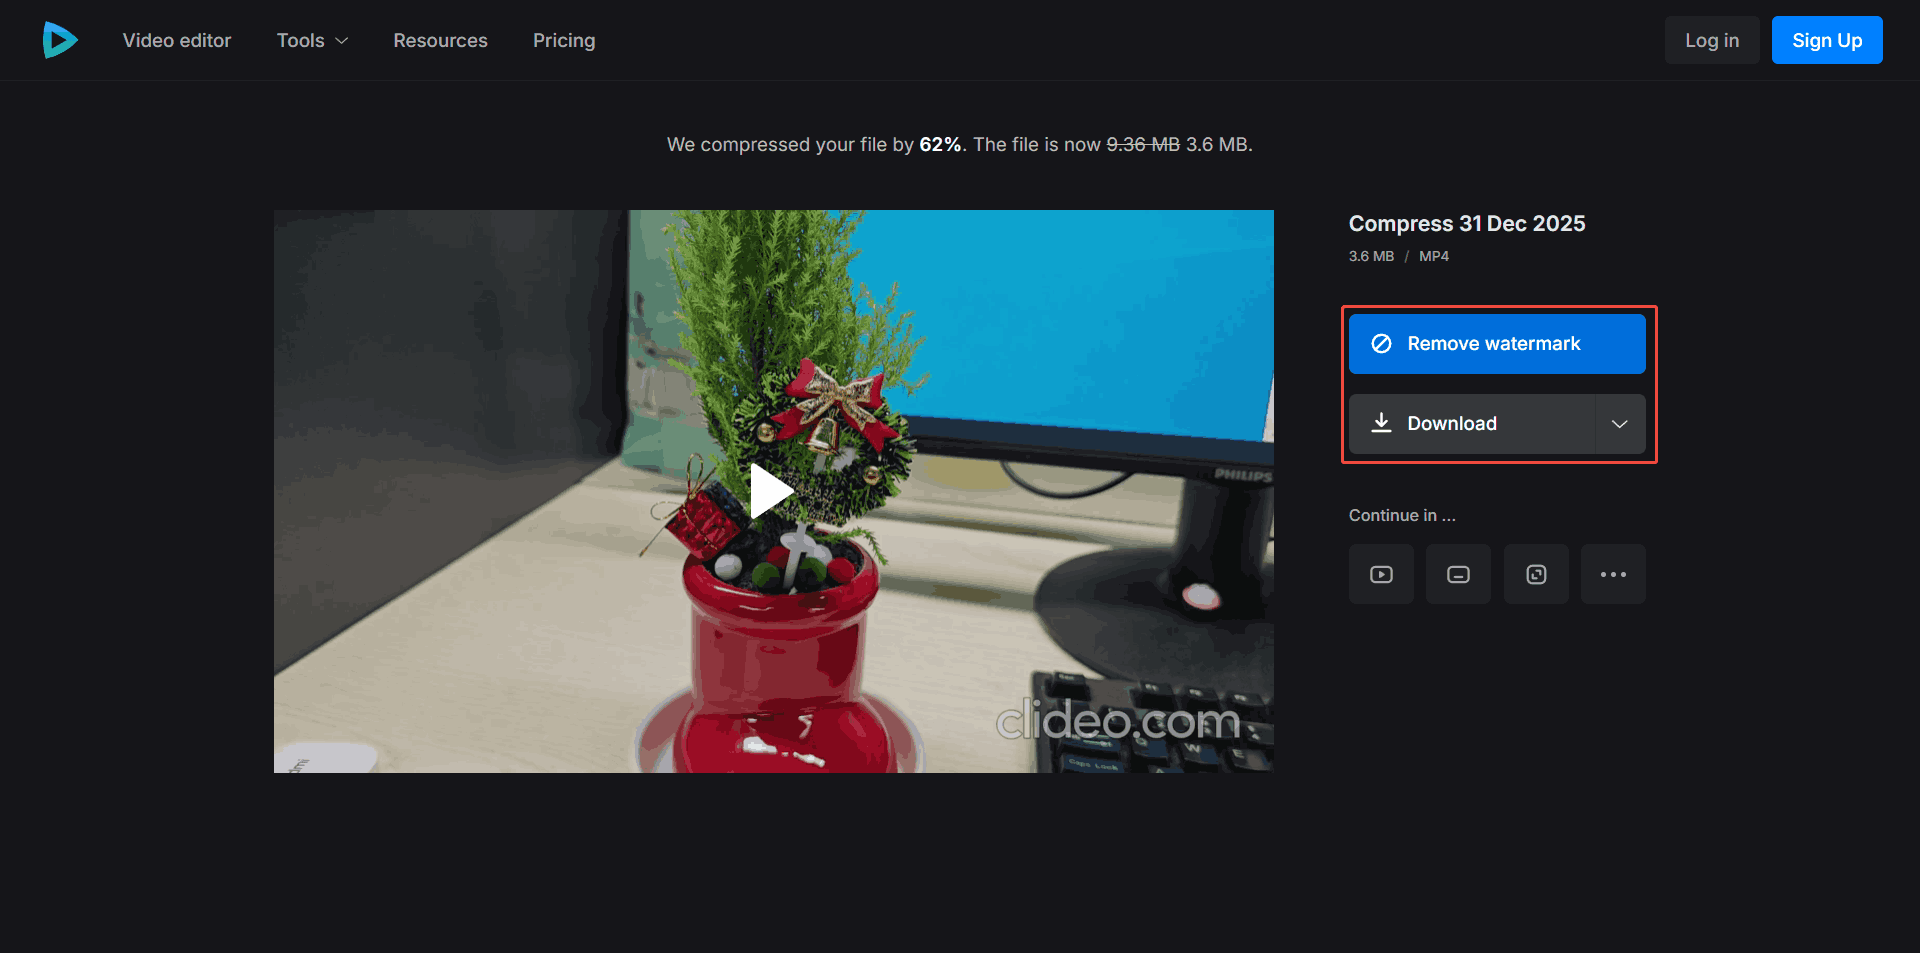
Step 5: Pay to Remove the Watermark or Download Directly
Once the video is compressed, you will be redirected to the download page. Clicking the Remove watermark option on the right will remove the watermark from the bottom right corner of the video, but this costs extra. Clicking the Download button will download the video with the watermark.
Clideo is suitable for users who don’t mind a small watermark on the final video clip.
Conclusion
If you can’t send a video on Session, your video may exceed the session video size limit. Use MiniTool Video Converter or Clideo to reduce the video size, and you can send it successfully.
User Comments :