Resolution affects video size due to its pixels. This article spotlights why resolution affects video size. It also shows how to change resolutions to reduce the video size with MiniTool Video Converter or CloudConvert.
Understanding Resolution
Resolution refers to the number of pixels in each frame of a video, which is usually expressed as the product of the horizontal and vertical pixels. Typically, the more the pixels, the higher the resolution. Common resolutions include 720p, 1080p, 4K, 8K, and more.
Why Resolution Affects Video Size
A video file’s size can be regarded as the space for saving the pixels. The more pixels a video can hold, the more information it can carry. Accordingly, the file size will be much larger. In daily use, we often reduce video size to save storage space, speed up file transfer. If you want to make the videos smaller, you can lower the video resolution.
How to Change Video Size via Resolution
Want to control the video size via resolution? I recommend the best 2 tools: MiniTool Video Converter and CloudConvert.
#1. Use MiniTool Video Converter
As a senior user of MiniTool Video Converter, I think it is convenient to adjust the resolution using MiniTool Video Converter.
MiniTool Video Converter is a 100% clean and free video converter. It supports customizing output resolution, frame rate, bitrate, and more parameters for free. What’s more, MiniTool Video Converter doesn’t have watermarks, ads, or bundles. Additionally, MiniTool Video Converter offers output formats compatible with Apple, Samsung, Huawei, etc.
Below is how to lower the resolution of your video file with MiniTool Video Converter.
Step 1. Download and Install MiniTool Video Converter
Click on the download button below to download and install MiniTool Video Converter. Then, launch it.
MiniTool Video ConverterClick to Download100%Clean & Safe
Step 2. Import the Target File
Click on the Add Files option to import the target file.

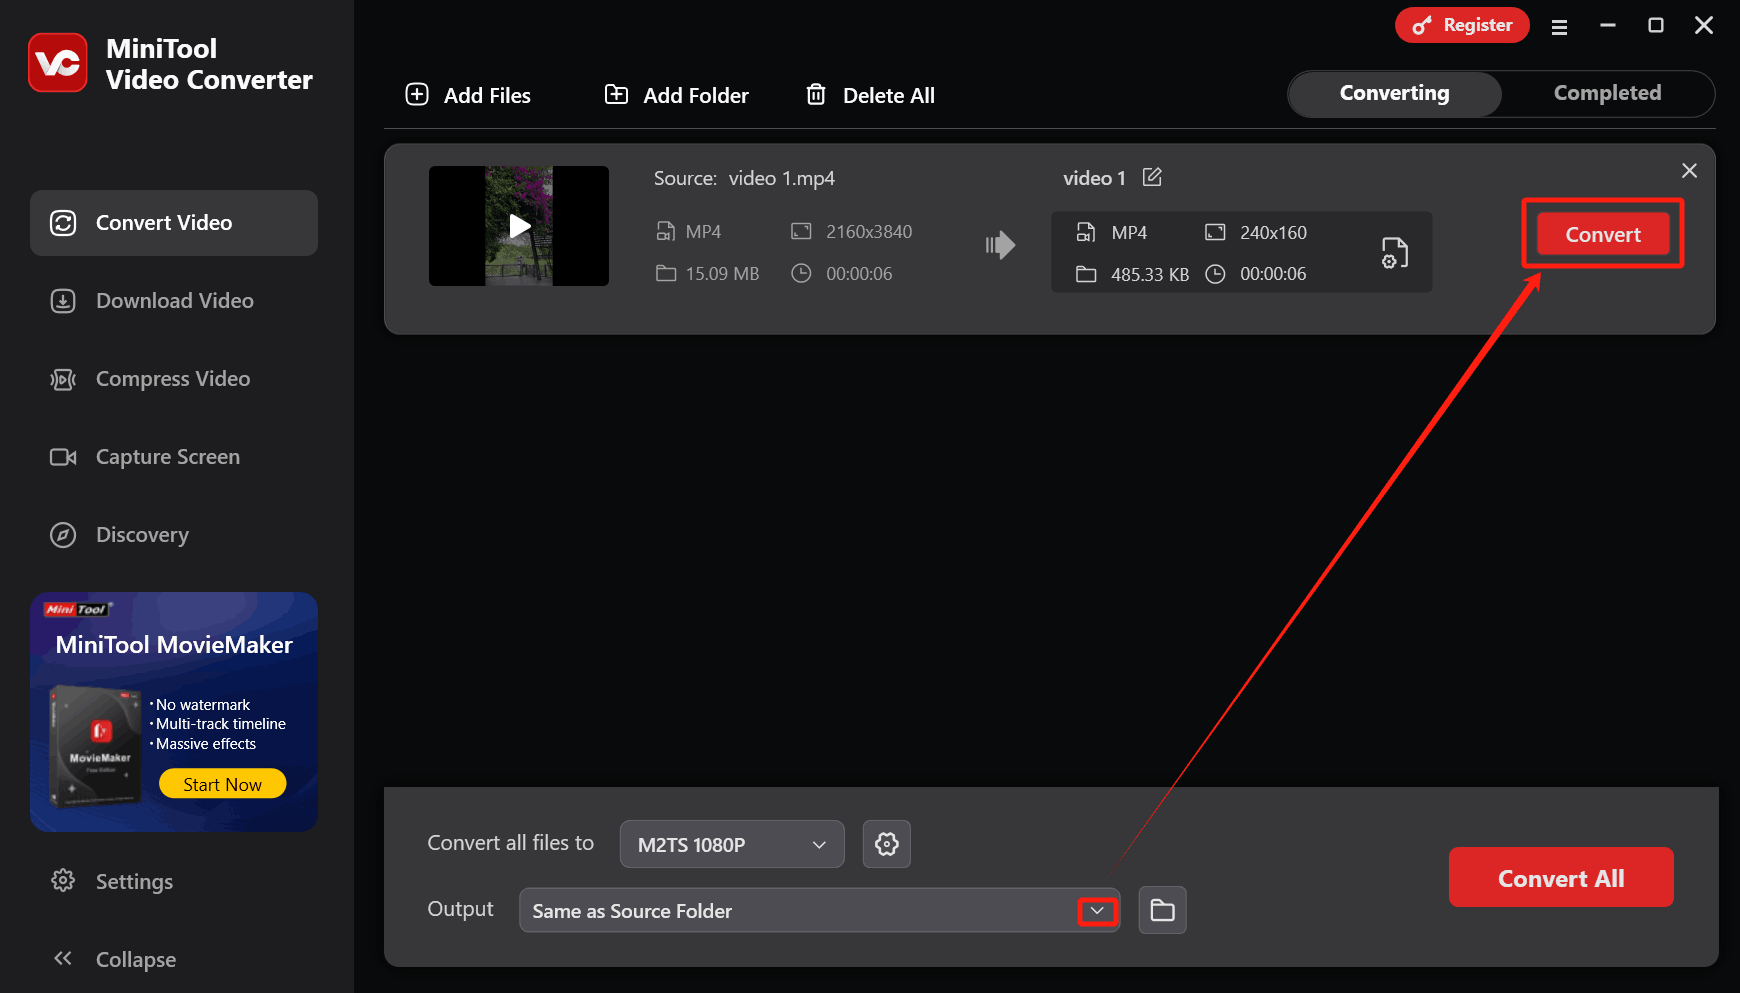
Step 3. Lower the Output Resolution
Click on the Settings icon to trigger the output format window. There, switch to the Video tab and choose a format. Here, I select MP4. Then, click on the + Create Custom option to enter the Settings window.
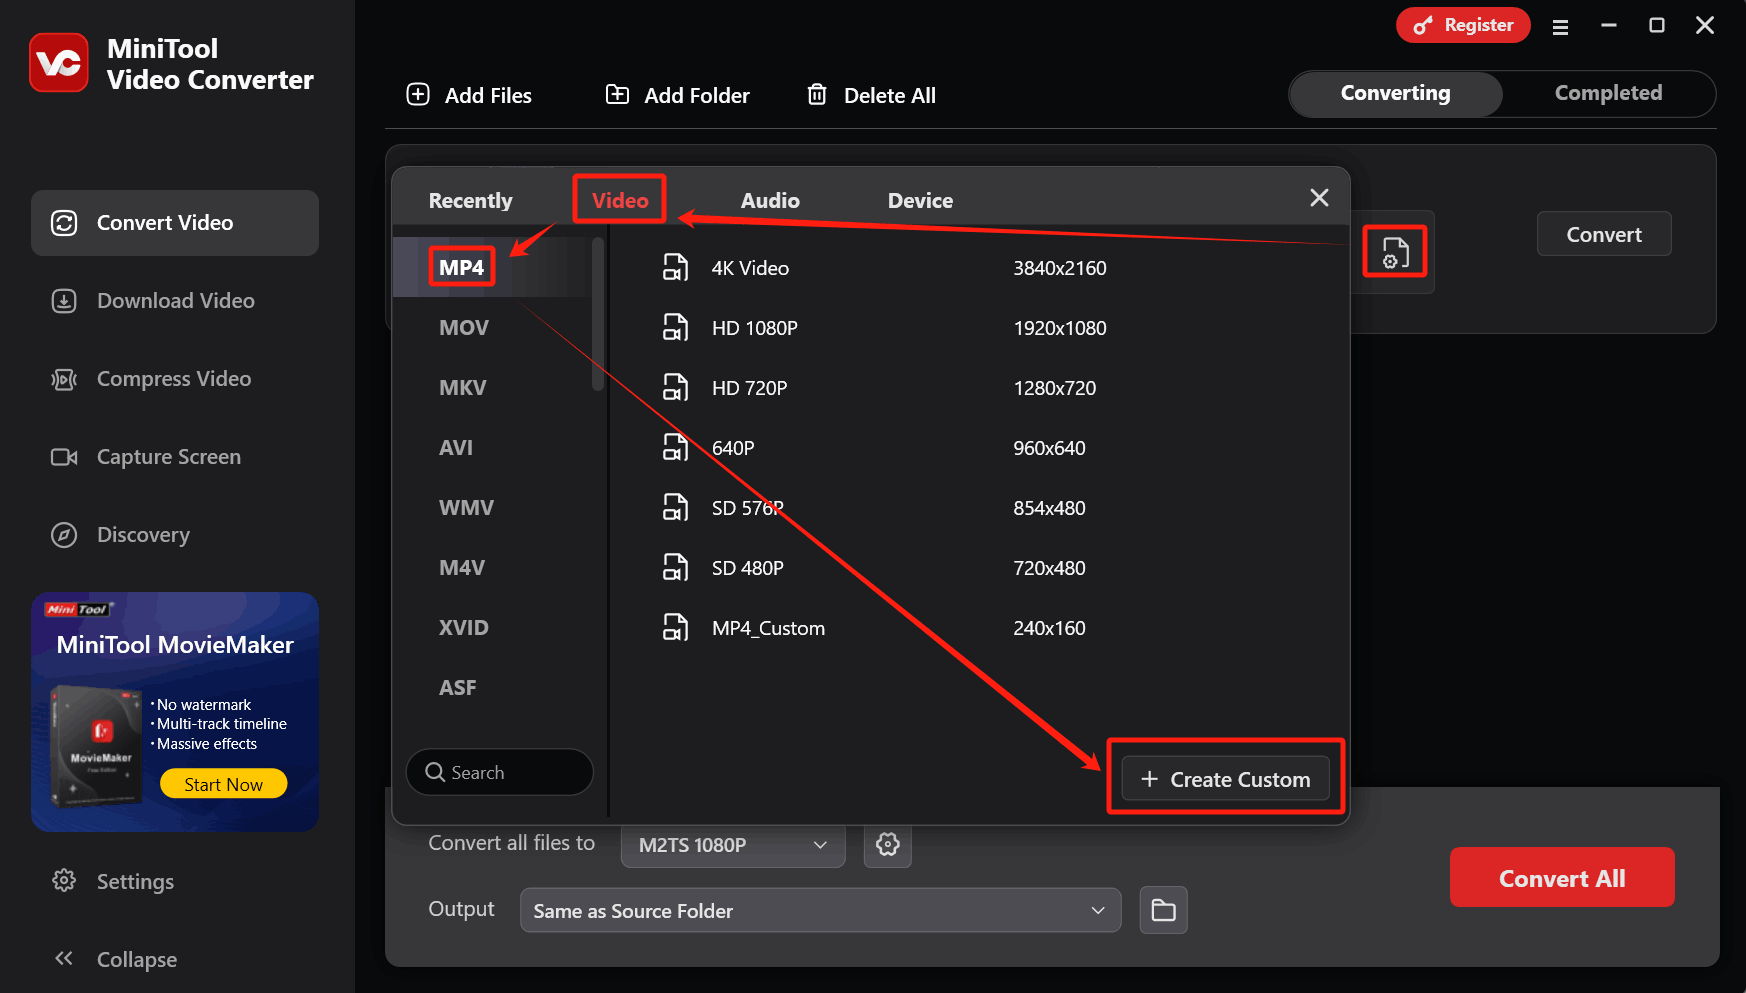
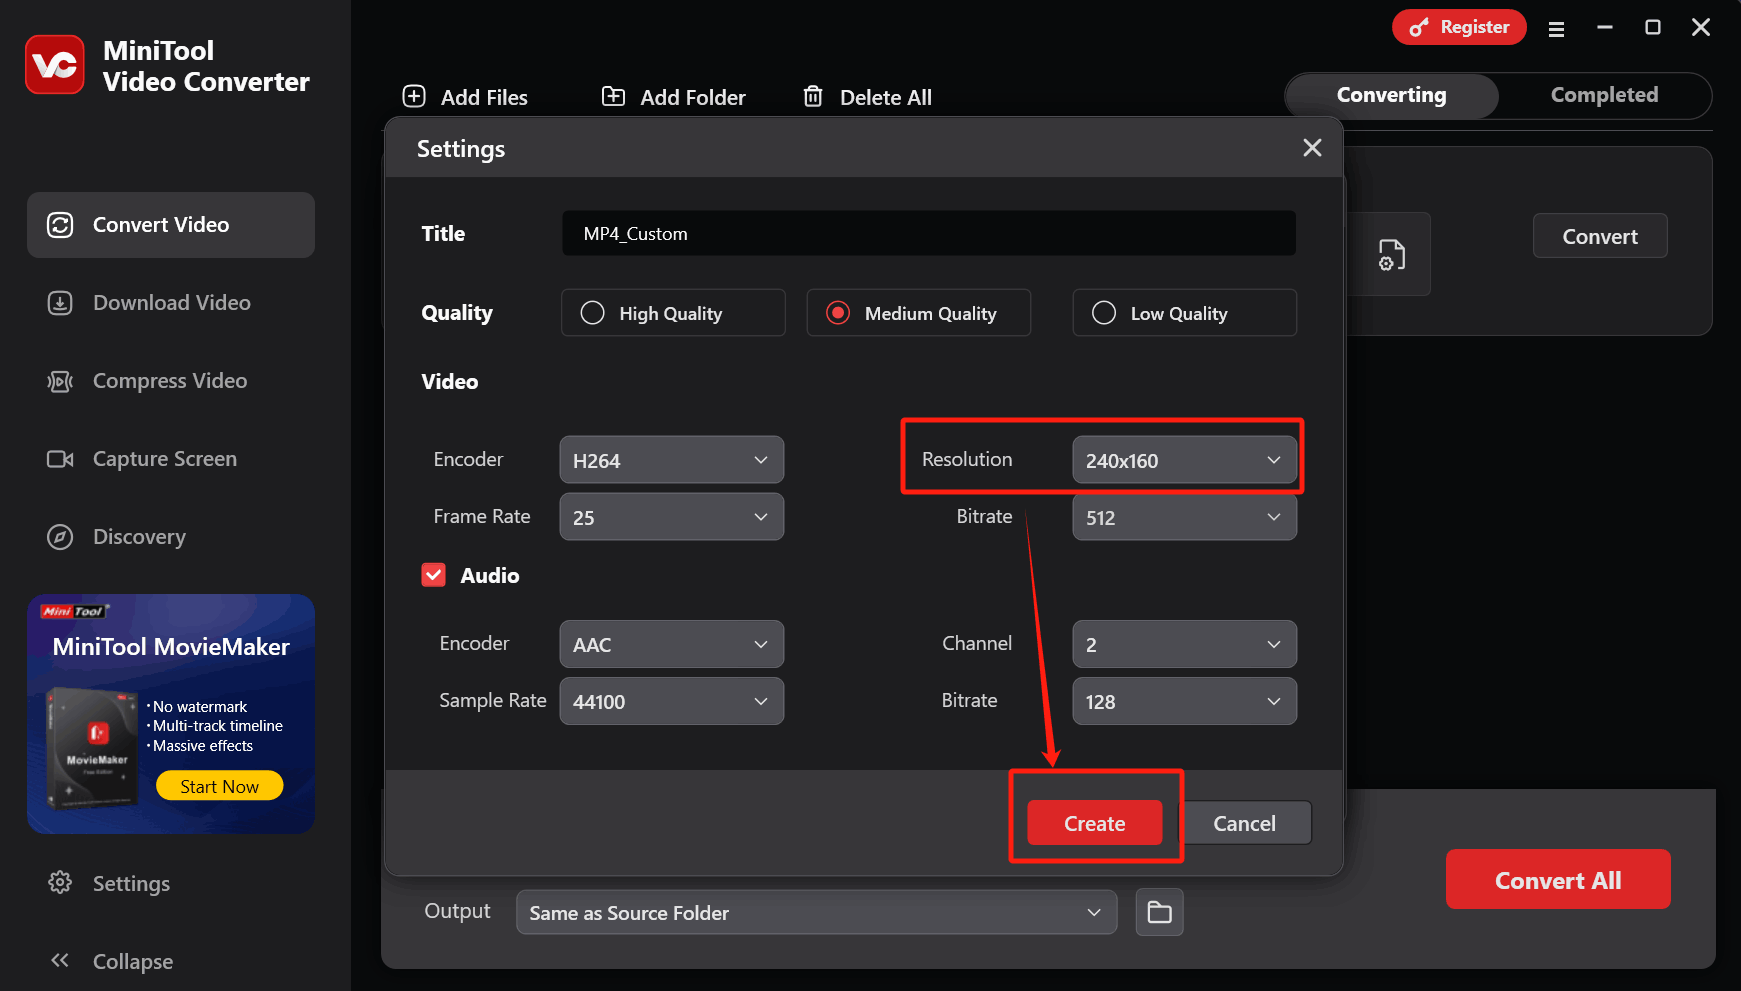
In the pop-up Settings window, expand the Resolution drop-down menu to choose a lower resolution. Here, I select 240 X 160. Then, click on the Create button to save the change.
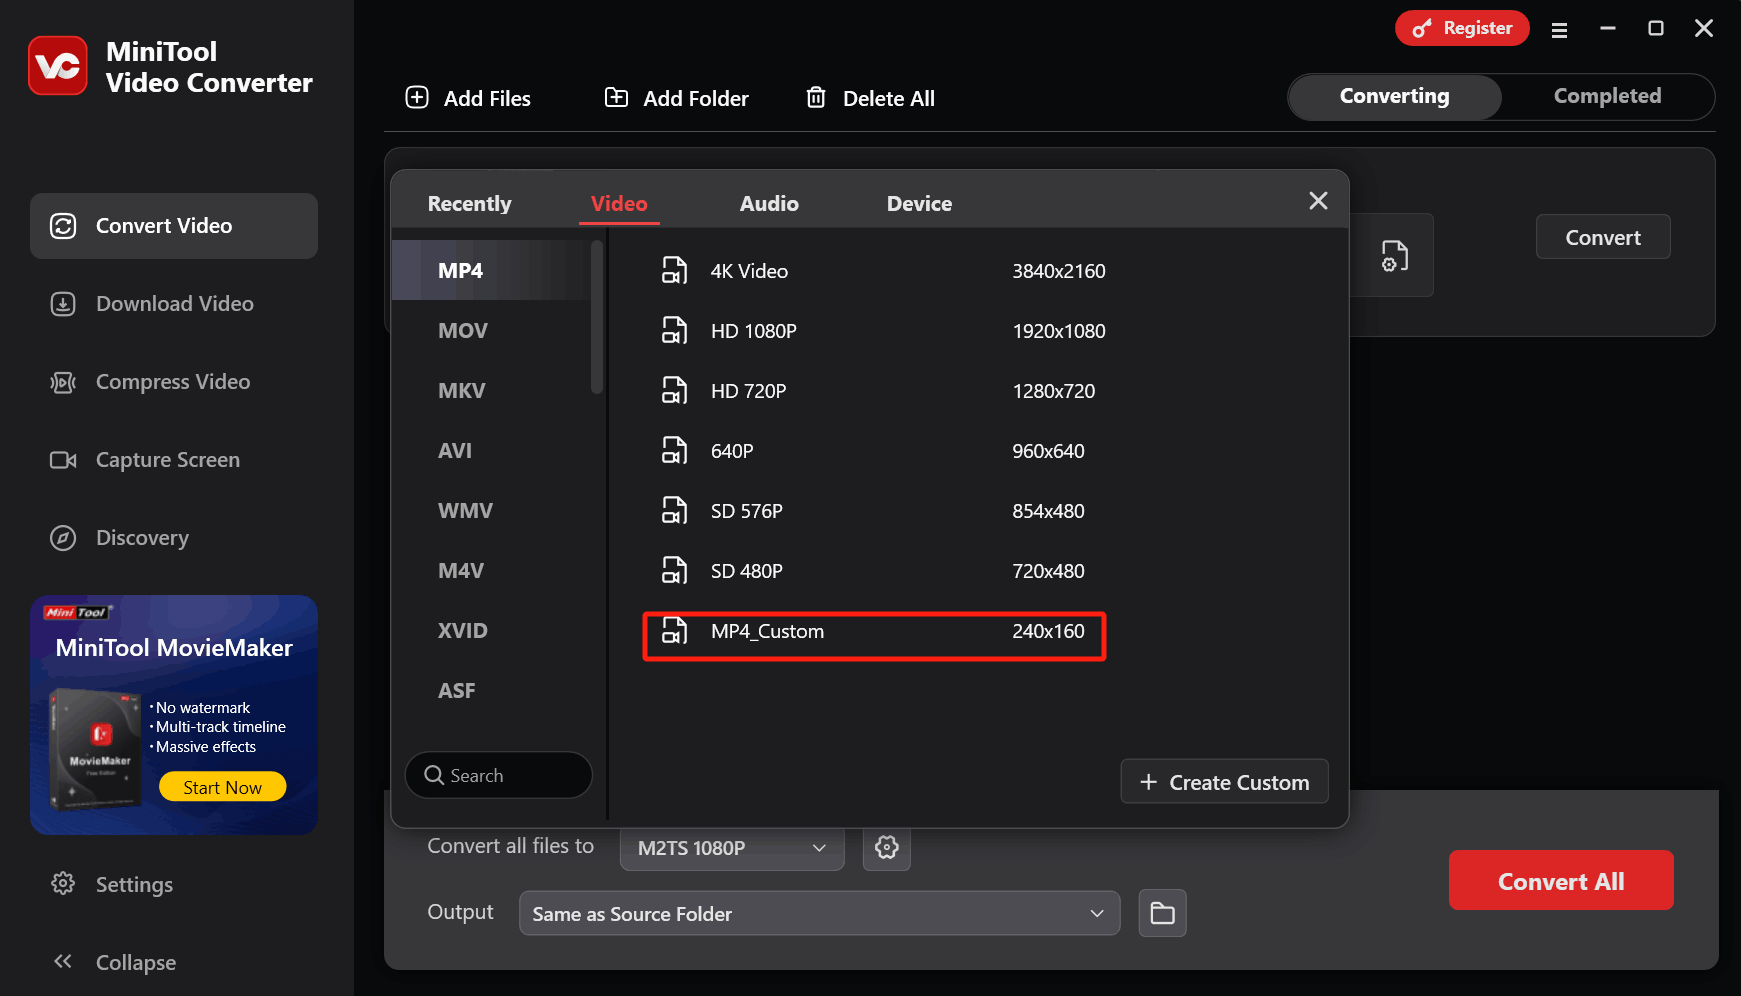
Choose MP4_Custom as the output format.
Step 4. Start the Conversion Process
Expand the bottom Output option to choose a saving location. Then, click on the Convert button to start the conversion.
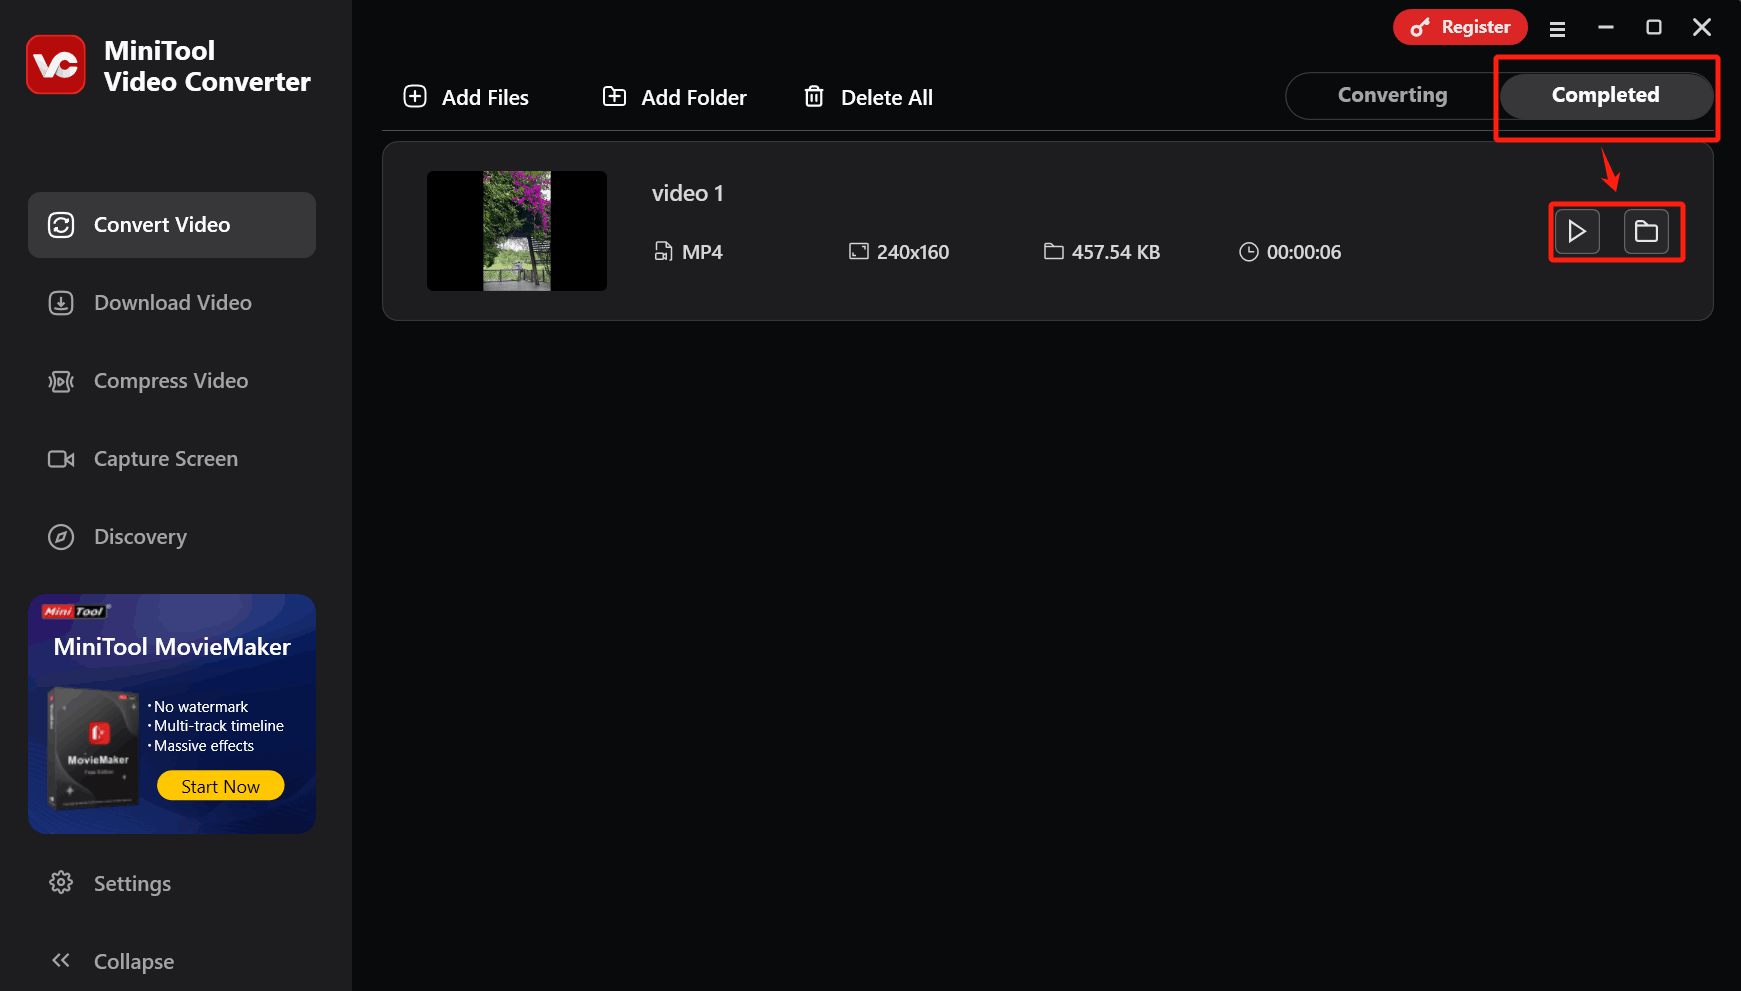
Step 5. Check the Converted File
When the conversion ends, this video converter will switch to the Completed tab. There, click on the Play icon or Folder icon to check or locate the converted file.
Using MiniTool Video Converter to reduce video size is efficient.
#2. CloudConvert
CloudConvert is an excellent online converter. It supports customizing the resolution for the output videos. What’s more, CloudConvert supports various conversion tasks among 200+ formats, including AVI to FLV, MP4 to MXF, and more. Plus, it also allows adjusting codecs, aspect ratio, constant quality, etc.
Next, I will demonstrate the detailed instructions on how to adjust the resolution to reduce the video size via CloudConvert.
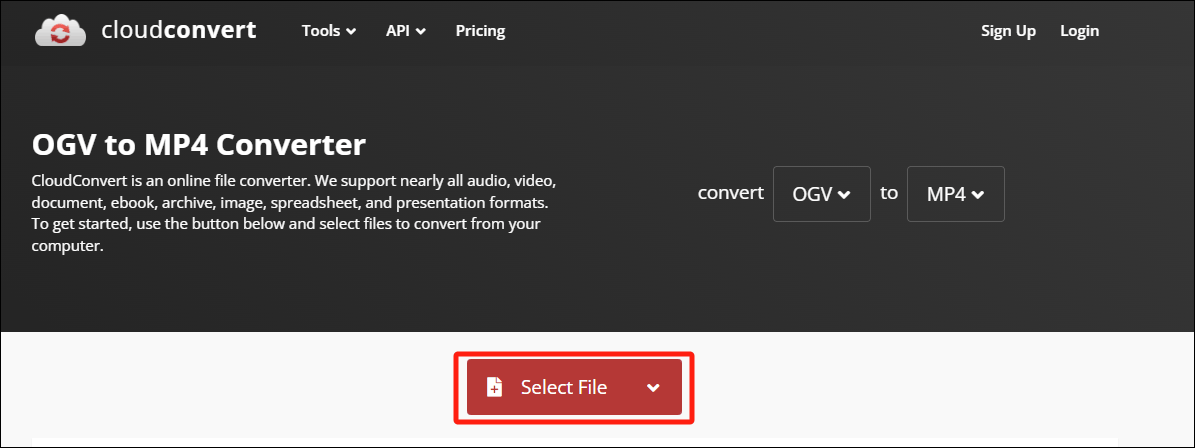
Step 1. Navigate to CloudConvert’s Homepage
Visit https://cloudconvert.com/ogv-to-mp4.
Step 2. Upload the Target Video
Click on the Select File button to import the target file.
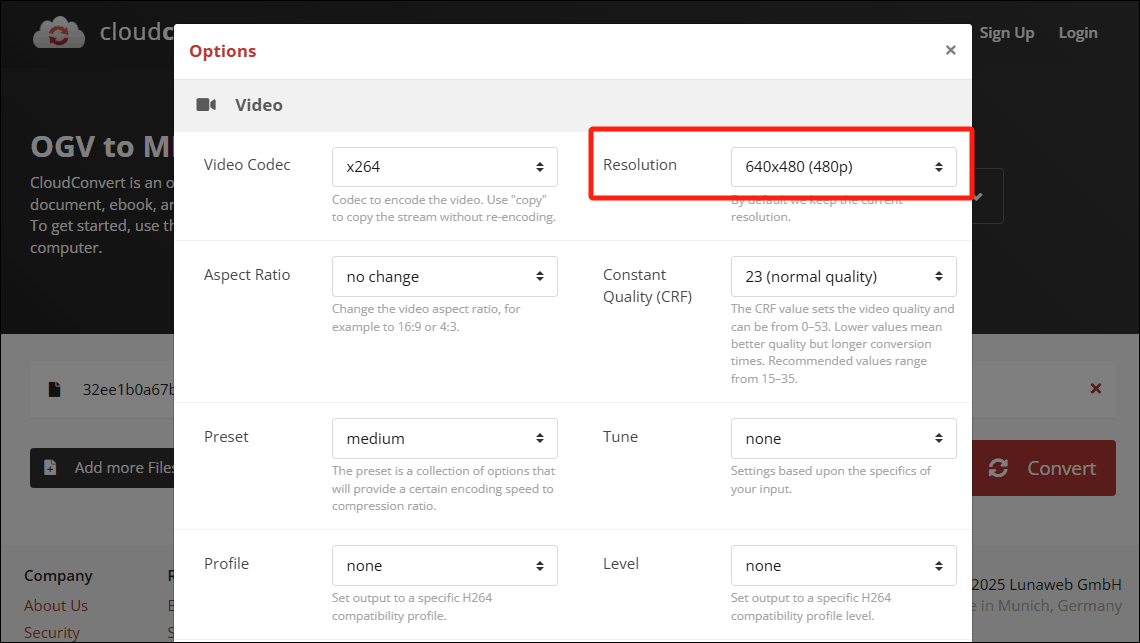
Step 3. Customize the Resolution for the Output Video
Click on the Wrench icon to open the Options window.
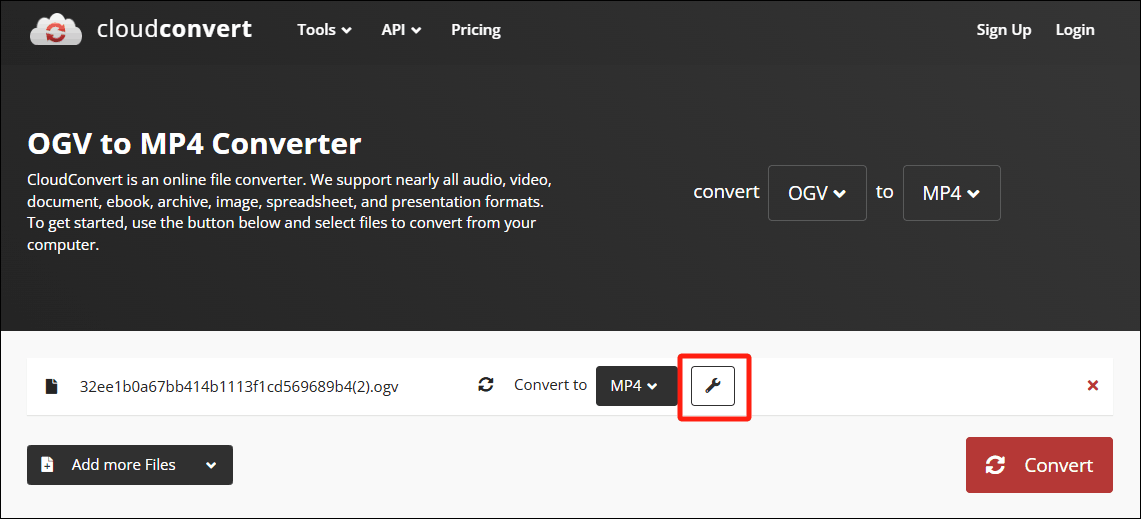
Expand the Resolution option in the Video section to choose a resolution. Here, I choose 640 X480 (480p).
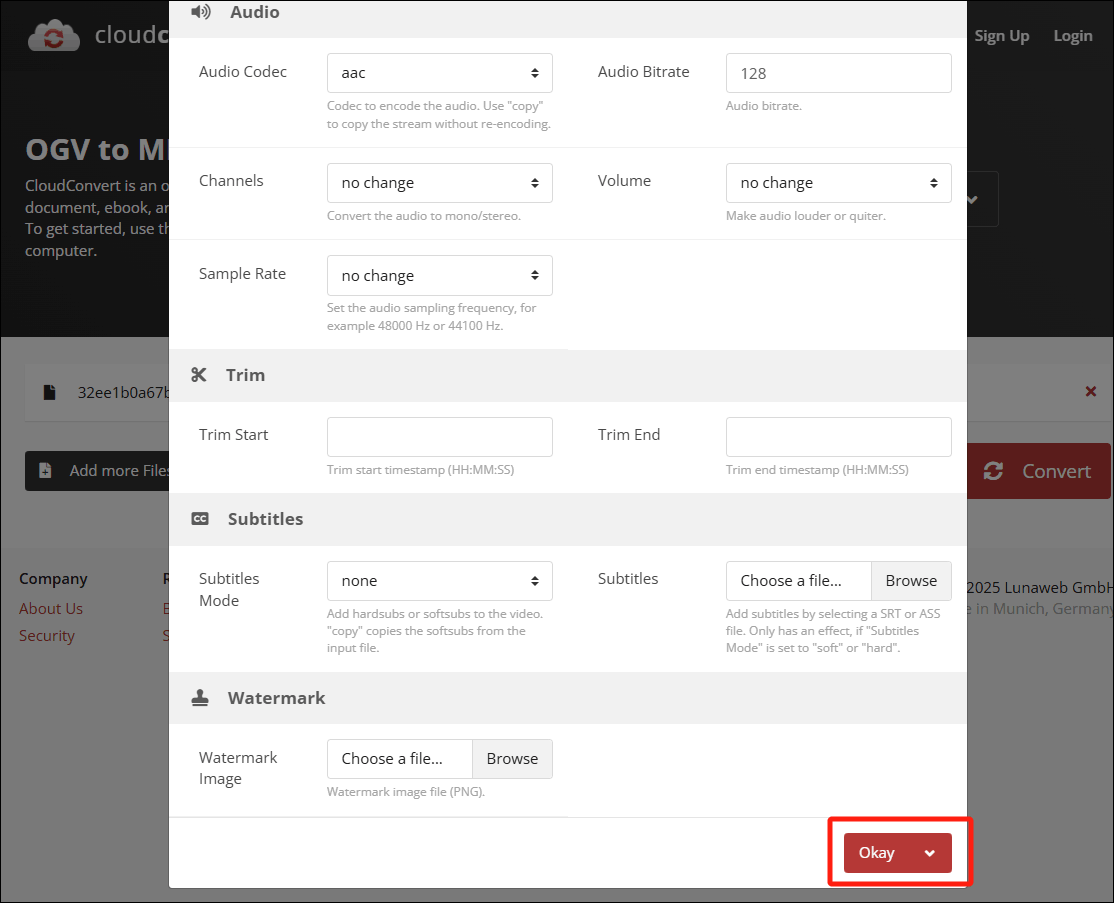
Scroll down to the bottom of the Options window. There, click on the Okay button to save the changes.
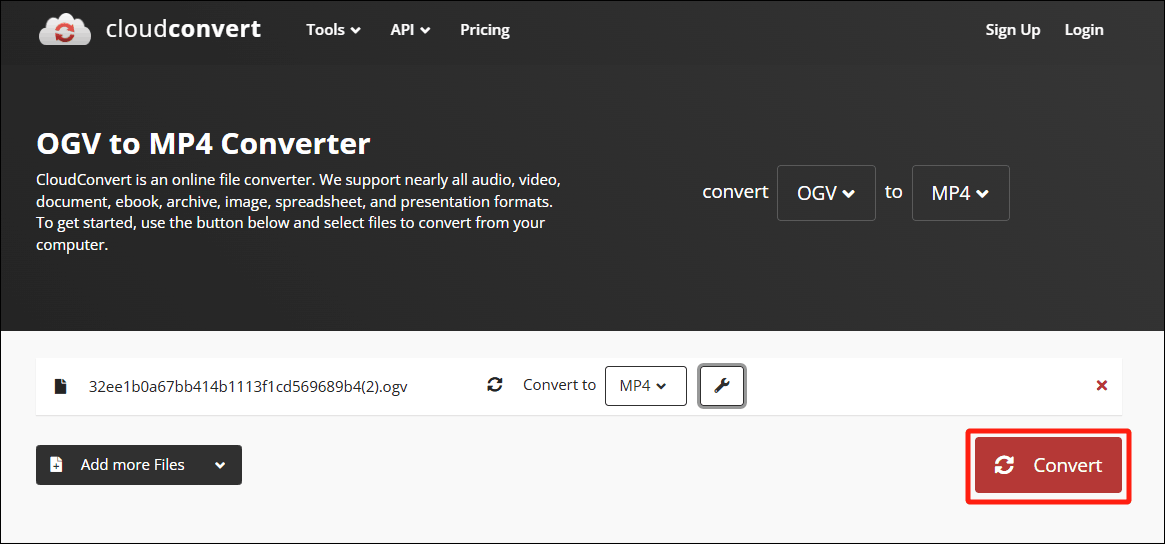
Step 4. Start the Conversion
Click on the Convert button to start the conversion.
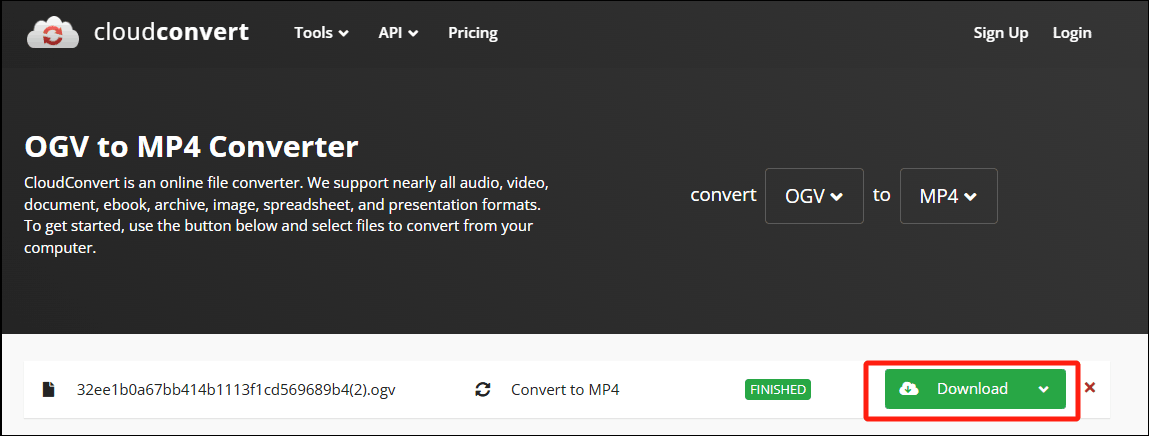
Step 5. Download the Converted File
Click on the Download button to save the converted video.
The above are the steps to adjust the resolution to change the video size using CloudConvert.
Conclusion
Resolution affects video size. This article focuses on how to reduce video size via resolution with 2 tools: MiniTool Video Converter (Offline) and CloudConvert (Online).
User Comments :