Whether it's for faster uploads, lower storage requirements, or compatibility with older devices, knowing how to record and optimize low-resolution video can be incredibly useful. This essay written by the video converter from MiniTool will discuss this topic in detail.
In a world where high-definition (HD) and 4K videos dominate the digital landscape, recording low-resolution video might seem counterintuitive. However, there are numerous scenarios where low-resolution video is not only sufficient but preferable.
Why Record Low Resolution Video?
There are several reasons for users to record low-resolution videos.
#1 Reduced File Size
Low-resolution videos consume significantly less storage space, making them ideal for situations where storage capacity is limited.
#2 Faster Uploads
Smaller file sizes mean quicker upload times, which is beneficial when sharing videos over the Internet with slow or limited bandwidth.
#3 Compatibility
Some older devices and software may not support high-resolution videos, making low-resolution a better option for compatibility.
#4 Resource Efficiency
Recording in low resolution requires less processing power and battery life, which can be crucial for mobile devices or prolonged recording sessions.
How to Record Low Resolution Video?
Recording low-resolution video involves configuring your recording device or software to capture video at a lower pixel count. Here's a step-by-step guide for various devices and platforms:
Using Screen Recording Software
When recording your screen, you can adjust the resolution settings within the software:
- Open Software: Launch your screen recording software. (e.g., OBS Studio, Camtasia, MiniTool Video Converter, etc.)
- Settings Menu: Go to the settings or preferences menu.
- Video Settings: Find the video output settings.
- Adjust Resolution: Look for a video resolution option. Common choices include 480p (standard definition), 720p (HD), and 1080p (Full HD). Select 480p or 720p for low resolution.
- Start Recording: Record your screen with the adjusted settings.
Using a Smartphone
Most smartphones allow you to adjust video resolution in the camera settings:
- Open Camera App: Launch the camera app on your smartphone.
- Access Settings: Tap the settings icon (usually a gear or three dots).
- Select Video Resolution: Select a lower resolution such as 640x480 or 1280x720.
- Record: Start recording as usual.
Your video will now be recorded in the chosen low resolution.
Using a Digital Camera
Digital cameras also offer settings to change video resolution:
- Access Settings: Navigate to the menu on your camera.
- Select Video Settings: Find the video resolution or quality setting.
- Choose Resolution: Select a lower resolution option such as 640x480 (VGA) or 1280x720 (720p).
- Record: Begin recording with the new settings.
Zoom Recording Low-Resolution Video
Zoom, a popular video conferencing tool, allows users to adjust recording settings to manage resolution. Here's how you can ensure your Zoom recordings are in low resolution:
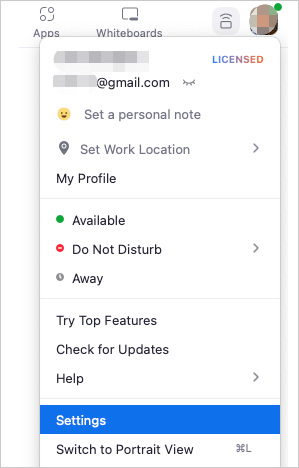
Step 1. Open Zoom Settings
Click on your profile picture in the Zoom client and select Settings.
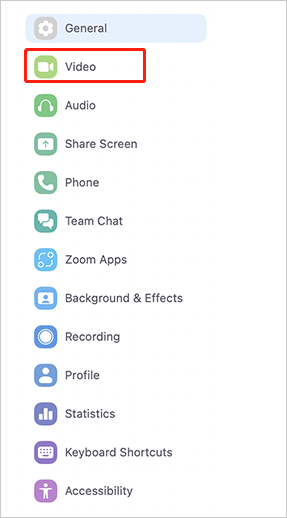
Step 2. Optimize for Low Resolution
While Zoom doesn't allow direct setting of resolution for recordings, you can influence it by adjusting the overall video quality settings in the Video tab. Go to Advanced video settings and disable Use hardware acceleration for > Video processing.
Step 3. Record Meeting
Start your Zoom meeting and record as usual. The recording will adhere to the settings you've configured.
Applications of Low Resolution Video
Low-resolution videos are particularly useful in several fields:
- Education: Quick video tutorials and online classes where high resolution isn't necessary.
- Surveillance: Security cameras often use low resolution to save bandwidth and storage.
- Online Content: Social media platforms and websites where rapid upload and playback are priorities.
- Archival Footage: When preserving older content that originally exists in lower resolutions.
Convert High Resolution Video to Low Resolution
If you really need a low-resolution video but only have high-resolution videos at hand, don’t worry, you can easily convert these high-res videos into low-resolution with MiniTool Video Converter.
MiniTool Video ConverterClick to Download100%Clean & Safe
Step 1. Download, install, and launch MiniTool Video Converter on Windows.
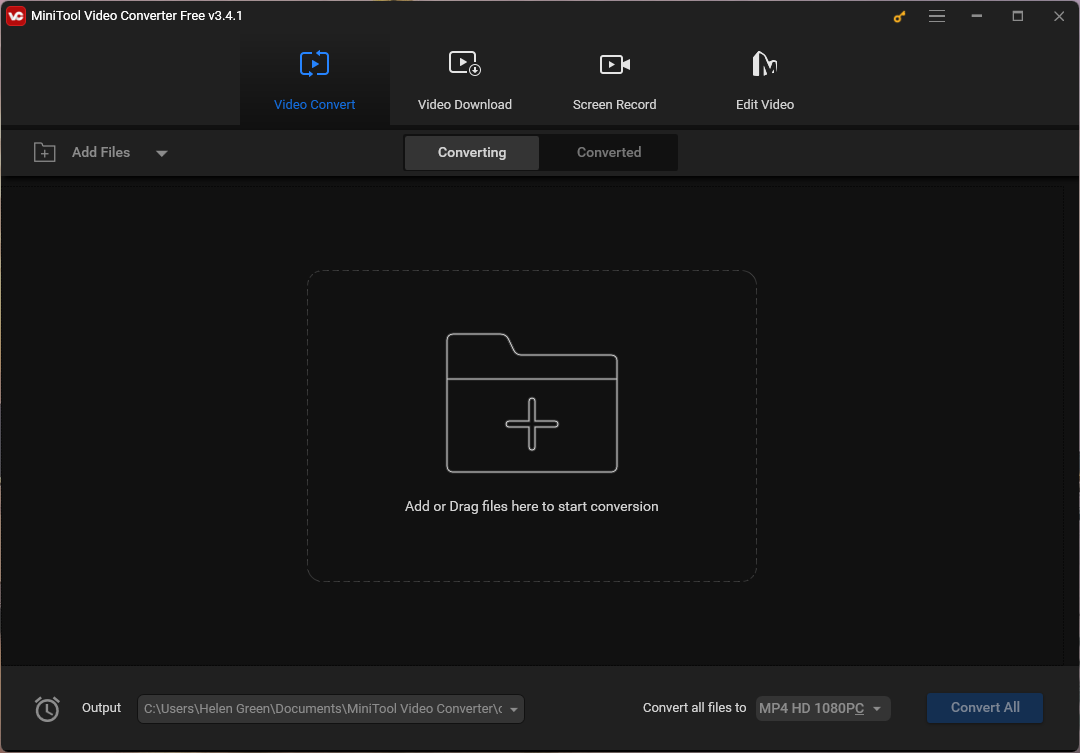
Step 2. On the default Video Convert screen, click the Add or Drag files here to start conversion option under the Converting tab to upload the target high-resolution video.
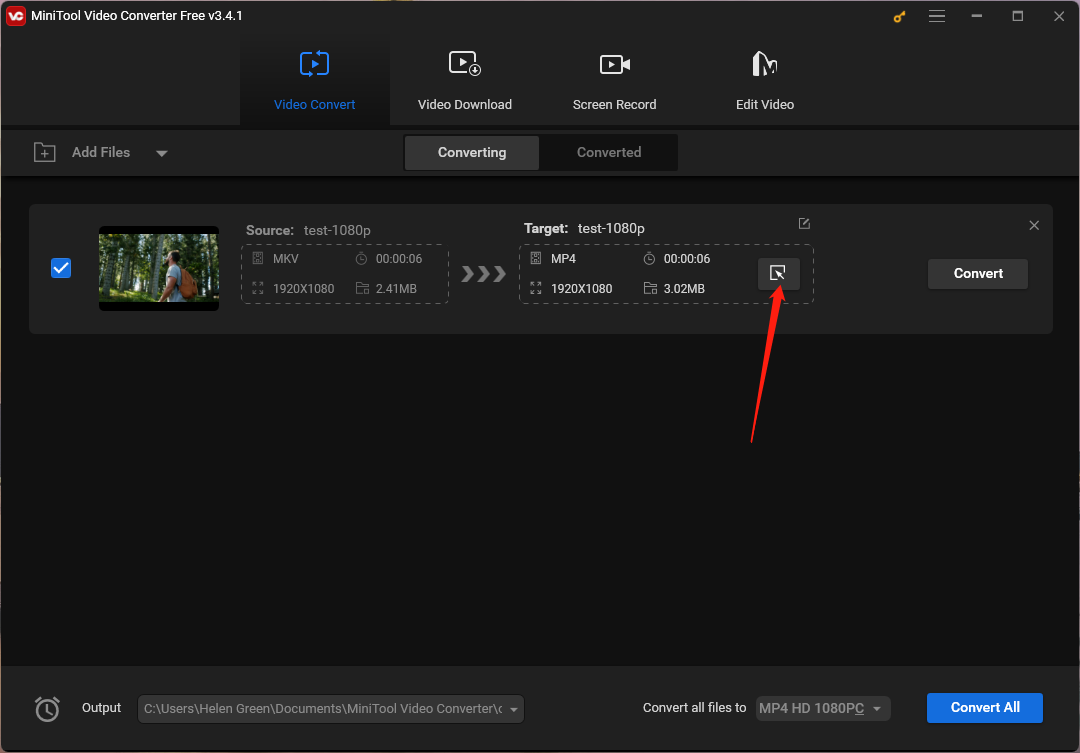
Step 3. It will automatically create a conversion task. Click the settings icon under Target.
Step 4. In the popup, navigate to the Video tab from the top menu. Choose a new video format or keep the video’s original format from the left panel. Then, pick up a video resolution from the list in the right area.
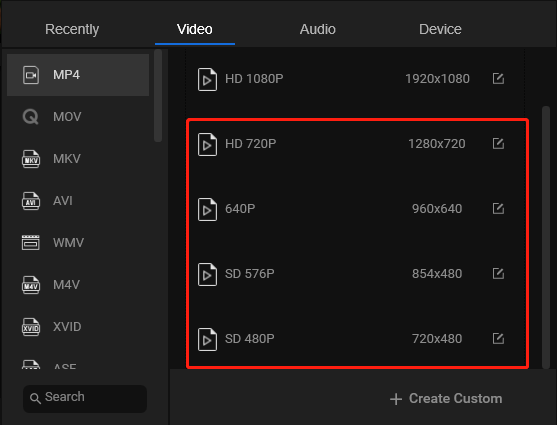
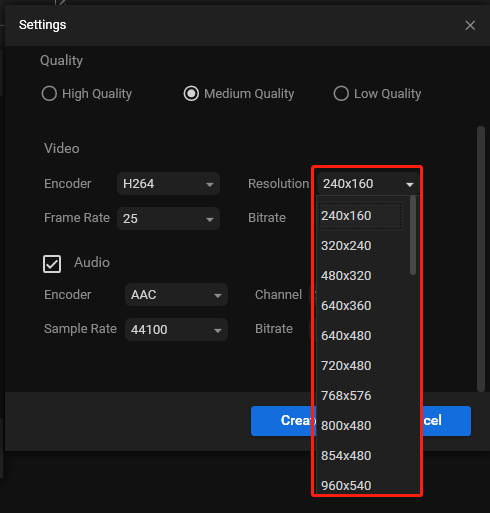
Or you can click the Create Custom option at the bottom right and customize your desired resolution in the next window.
Step 5. Go back to the main interface. There, preview the conversion task and click the Convert button to start converting.
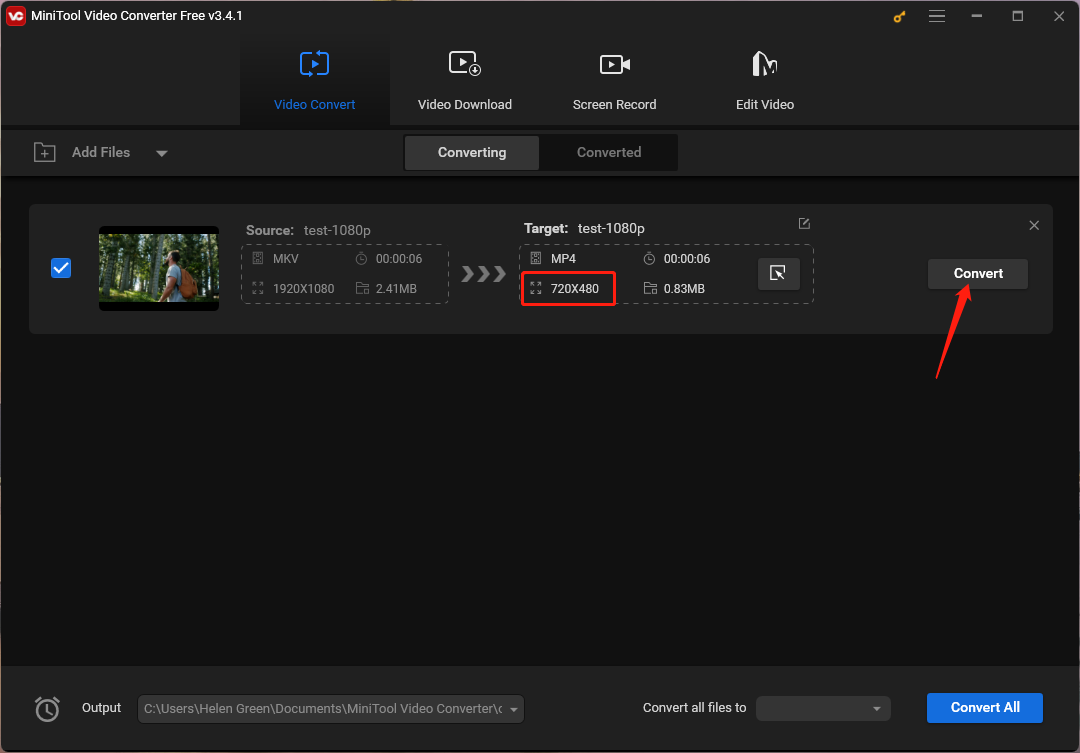
It will downscale the resolution of the target video and turn it into your set low resolution.
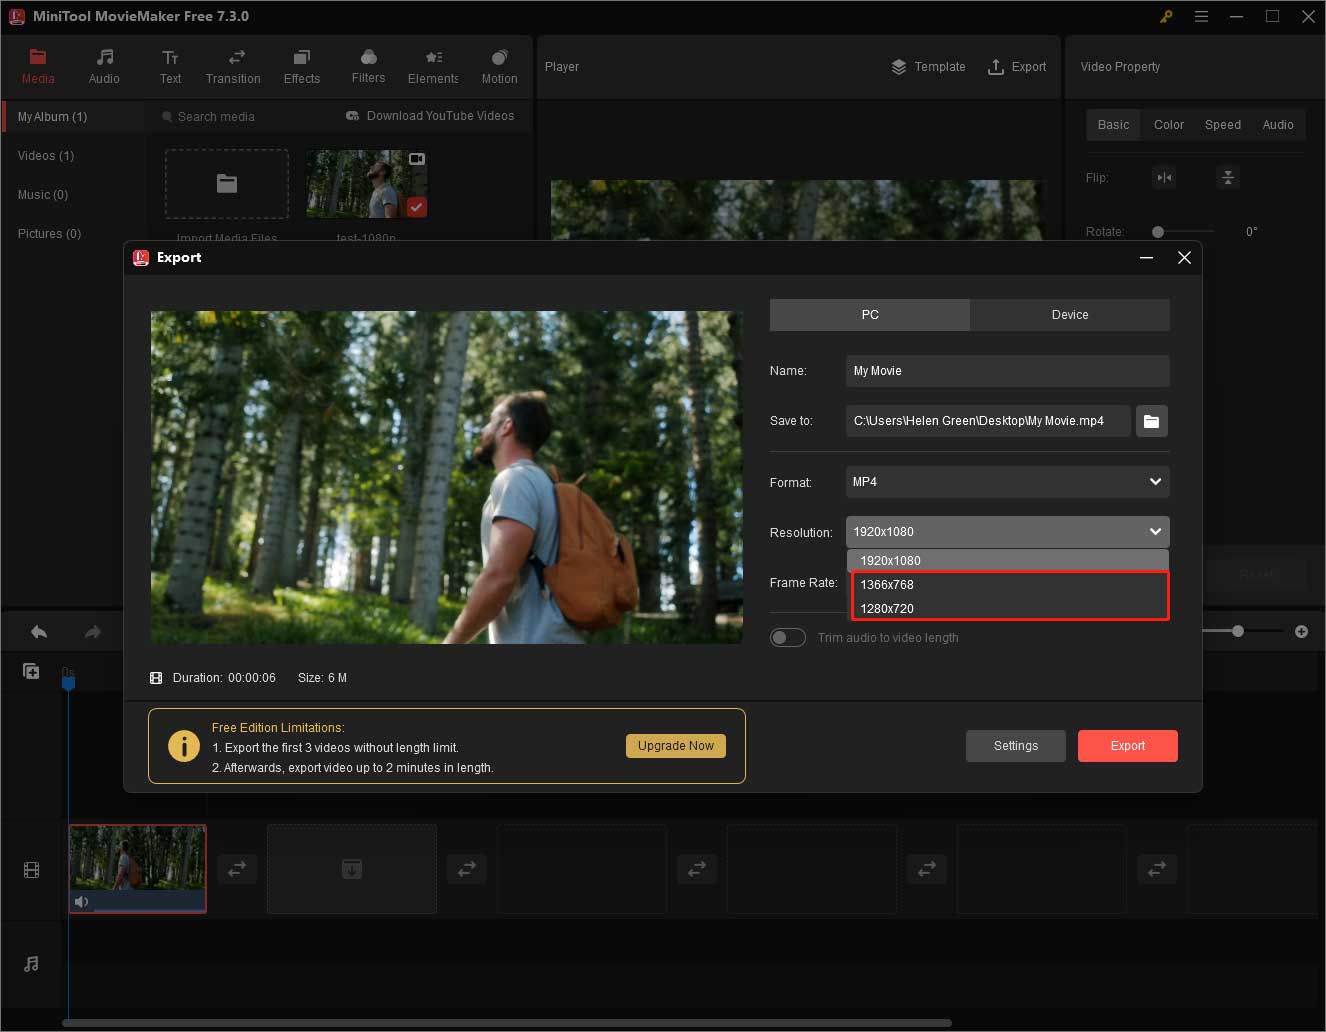
MiniTool Software Limited provides another program that can help you change your video resolution – MiniTool MovieMaker. Just upload the target video into the software, put the video onto the timeline, click the Export option, and select a low resolution to export the video.
MiniTool MovieMakerClick to Download100%Clean & Safe
Conclusion
While high-resolution video is desirable for many applications, low-resolution video has its own set of advantages that make it a valuable option in various scenarios. Understanding how to record low resolution video effectively can help optimize storage, enhance compatibility, and ensure quicker sharing. Whether you're using a smartphone, digital camera, or software like Zoom, adjusting settings to capture low-resolution video is straightforward and beneficial for many practical purposes.
About The Author

Position: Columnist
Helen is a tech writer with over 10 years of experience. She specializes in creating easy-to-follow guides for video editing, media file conversion, and computer performance. Helen doesn't just write—she tests every software herself and listens to feedback from users and experts. Her goal is to make complex programs simple so that everyone can solve their tech problems with confidence.
User Comments :