OneDrive is a popular application that is widely used for file transfer. With it, you can enjoy a great deal of media files effortlessly. However, recently, some users have been bothered by the problem of OneDrive upload slow. To solve that problem, this post is written here.
The Reasons for OneDrive Slow Upload Speed
Why is OneDrive upload so slow? After reading this part, you will find the answer to this question.
Reason 1. The Internet Connection Issue
As an influential factor, the internet connection can easily affect your file uploading in OneDrive. If you want to upload files to OneDrive quickly, great Internet speed is indispensable. However, an unstable internet connection never brings that to you, which finally leads to the problem of OneDrive slow upload.
Reason 2. Large Files to Upload
Generally speaking, as the size of the files that you want to upload is larger, it will take you longer to accomplish the uploading process. In other words, the file size is also a driver of OneDrive upload slow.
Reason 3. A Problematic Server
A normal OneDrive server ensures that users can upload their files to the cloud service provider efficiently, which also means that the server issues are also a contributor to the problem of OneDrive upload slow. For example, either regular maintenance activities or high server loads can cause OneDrive slow upload speed.

Way 1. Enhance Your Internet Connection
One of the easiest methods to fix the issue of OneDrive upload slow is to enhance your internet connection. Before doing that, you need to follow the steps below to check your internet speed.
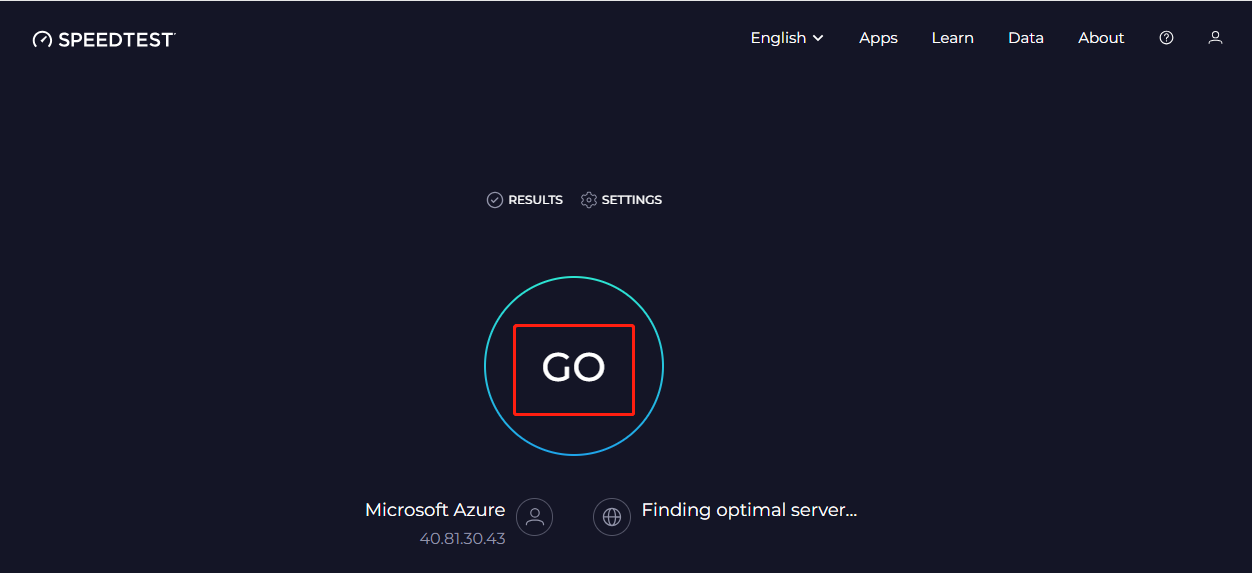
Step 1. Go to https://www.speedtest.net to access the online internet speed testing tool.
Step 2. Click on the GO button to begin testing your internet connection.
Step 3. Wait for some seconds. Then, you will see the test result that pops up automatically, as below.
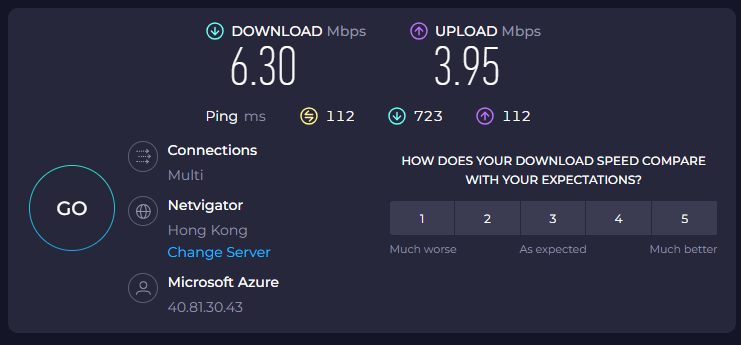
With the above-detailed steps, you can know the internet speed of your device well. If the result shows that your internet connection is OK, it means that the internet speed is not a contributor to the problem of OneDrive upload slow. If not, restart the router or connect your device to another Wi-Fi network. Next, do another internet test until the internet connection is not bad anymore.
Way 2. Adjust the Upload Speed of OneDrive
Another way to fix the issue of OneDrive upload slow is to adjust the upload speed manually. Below is a detailed guide on how to do that on a Windows PC.
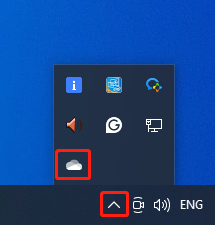
Step 1. Expand the bottom-right Hide option menu and tap the OneDrive icon to access the OneDrive – Personal window.
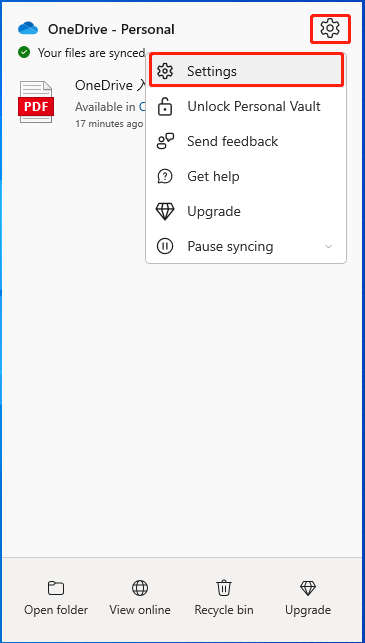
Step 2. Click on the gear icon to expand the option menu and choose Settings to enter the OneDrive Settings interface.
Step 3. In the Sync and backup section, expand the Advanced settings option. Next, enable the Limit upload rate option and set a high limit for the upload speed.
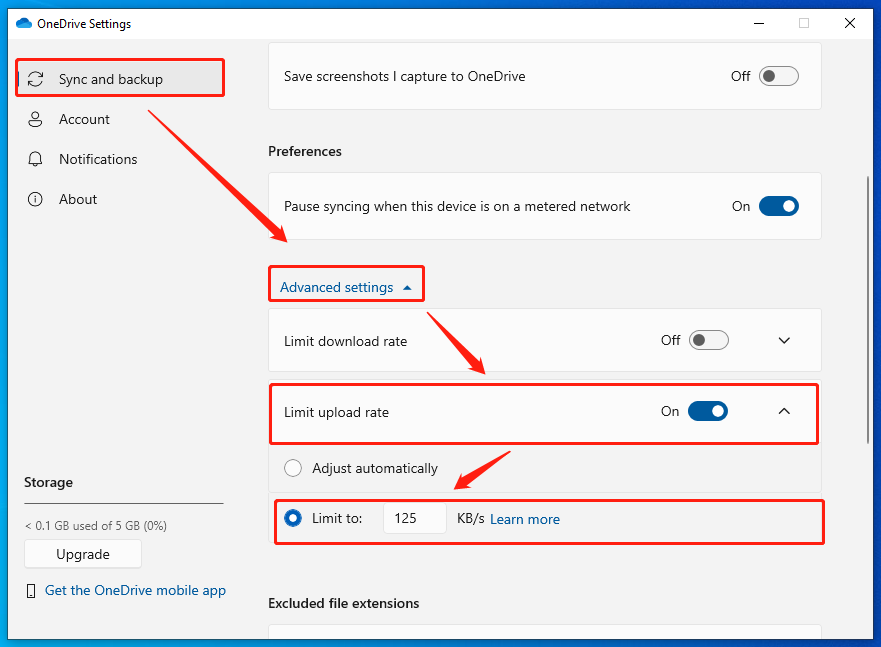
Step 4. Re-upload files to OneDrive to check whether the problem has been solved or not. If the upload speed is still slow, disable the limit upload rate option and try to upload your files again.
If this method doesn’t help you handle the OneDrive upload slow issue, please read on for other approaches.
Way 3. Compress Your Large Files
The second method to cope with the issue of OneDrive upload slow lies in file compression. To facilitate your compression tasks, I will introduce a marvelous file compressor to you and provide a detailed guide on how to use this tool.
About MiniTool Video Converter
MiniTool Video Converter allows you to compress a multitude of audio/video files, such as MP4, WAV, AVI, MP3, VOB, AIFF, and so on. In addition, this application enables you to compress files for free without a file size limit. In other words, MiniTool Video Converter can be an ideal choice for you to solve the problem of OneDrive upload slow.
More than that, MiniTool Video Converter empowers you to compress files by adjusting numerous parameters, such as encoder, audio channel, frame rate, resolution, sample rate, and bitrate. Plus, this file compressor has an intuitive interface, which makes it easy-to-use for newbies.
How to Compress Large Files with MiniTool Video Converter
Below are the detailed steps to compress files using MiniTool Video Converter.
MiniTool Video ConverterClick to Download100%Clean & Safe
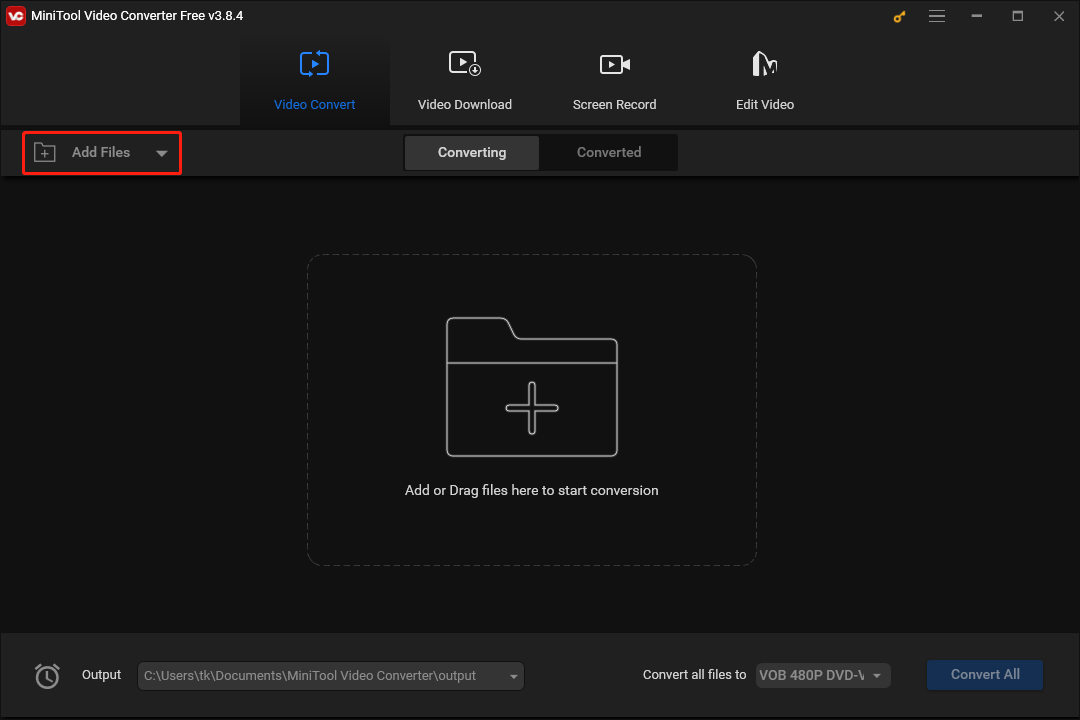
Step 1. Click on the download button above to download and install MiniTool Video Converter on your PC. Then run it.
Step 2. Click on the upper-left Add Files button to import your files into this program.
Step 3. Expand the bottom-right Convert all files to option to access the output format window. Then, choose according to your needs. Here, I will show you how to compress MP4 files. Click on the Video tab and select MP4. Next, you will see a profile list with different resolutions. Here, I take MP4 640P as an example.
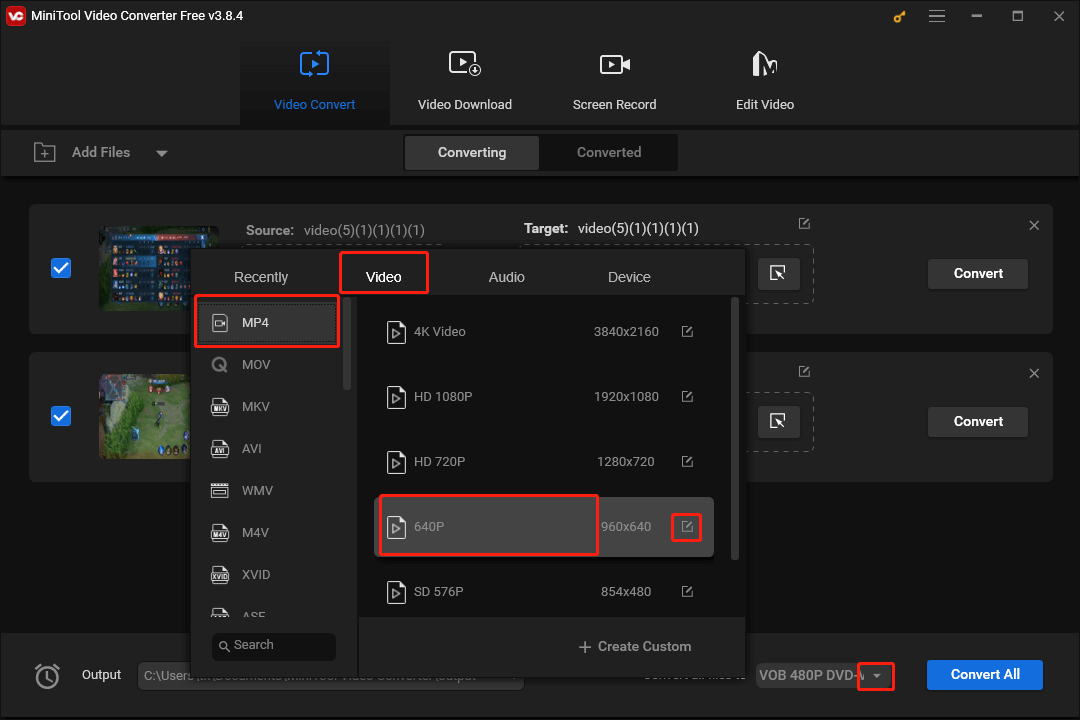
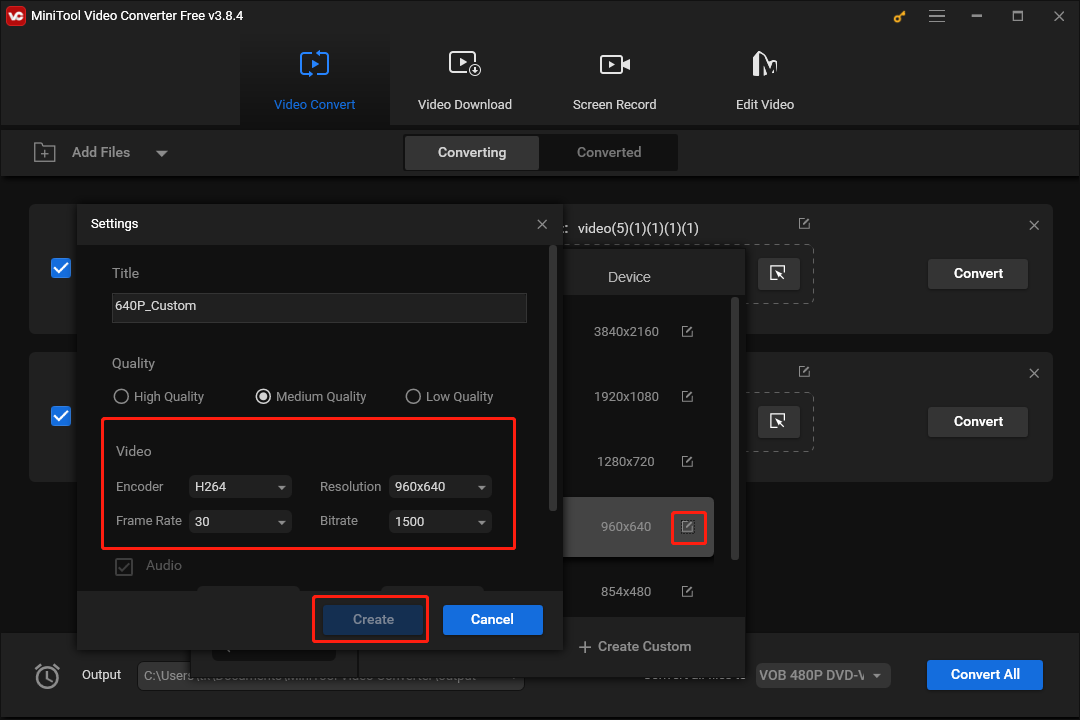
If you want to adjust other parameters to compress your files, click on the pen icon to access the Settings window, where you can customize your file compression. Once the customization is over, confirm the change by clicking on the Create button. Next, choose the custom profile as the output format.
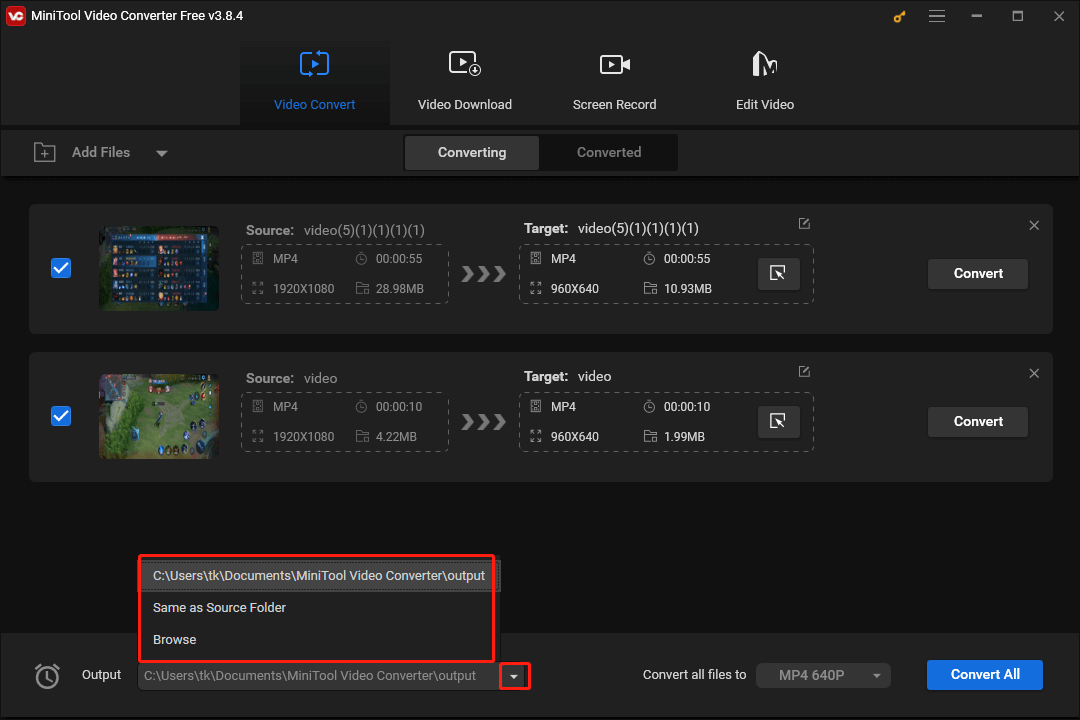
Step 4. Expand the bottom-left Output option to choose a saving path for your compressed files.
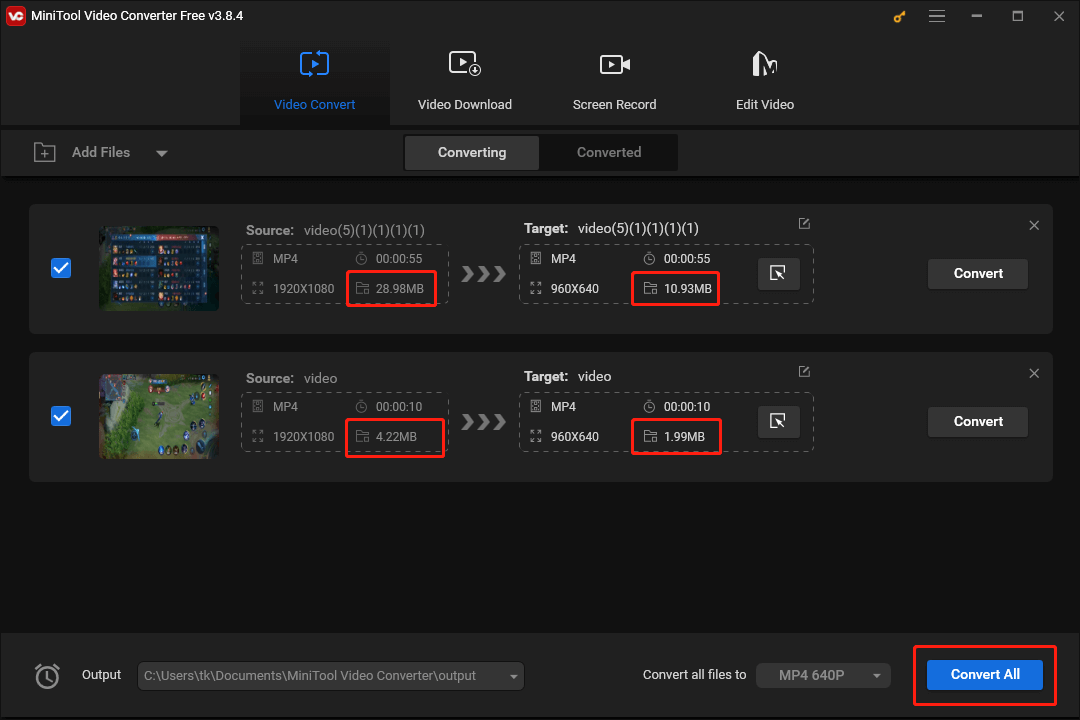
Step 5. Commence the file compression by clicking on the bottom-right Convert All button.
Step 6. Once the file compression is over, switch to the Converted tab and click on Show in folder to locate and check your compressed files.
As you can see, with MiniTool Video Converter, you can tackle the OneDrive upload slow issue effortlessly.
Way 4. Try OneDrive Alternative
If the problem of OneDrive upload slow is caused by the server, you can try a OneDrive alternative to solve it. Here, I highly recommend Google Drive. As another robust cloud service provider, Google Drive, which is similar to OneDrive, enables you to share or transfer your files easily and quickly.

Bottom Line
This article has summarized four feasible methods to help you solve the problem of OneDrive upload slow. Just choose a solution based on your needs.
About The Author

Position: Columnist
With over 6 years of experience as a tech writer, Eien specializes in creating clear, simple guides for video conversion, transcription, screen recording, etc. He stays connected with the tech community and its readers to understand the real-world problems users face. By combining their feedback with his own hands-on testing, Eien always provides proven solutions to complex software problems in time.
User Comments :