This post from the free file converter presents you with the methods to compress video with Avidemux and the alternative.
Compression refers to reducing file size, which ensures smooth storage and sharing.
Avidemux is a free open-source video editor for cutting, filtering, and encoding tasks. It can run on many operating systems, including Windows, Mac OS X, and Linux. This tool supports many file types, such as MP4, AVI, and ASF. It’s also can help you reduce video size while maintaining high visual quality.
How to Compress Video with Avidemux
How to reduce video with Avidemux? Here are the steps.
Step 1. Download and install Avidemux. Then open this software.
Step 2. Click File on the top menu bar, and select Open... on the down-drop list to load your video.
Step 3. Click Copy on the Video Output category and select Mpeg-4 AVC (x264) as the video codec. You can also choose another codec.
Step 4. Click Configure on the left, go to Encoding Mode in the popup, and select Video Size (Two Pass) on the drop-down list.
Step 5. Type the size you want to compress the video in the Target Video Size box. Click OK to save the change.
Step 6. Click File again and select Save on its down-drop list to download the compressed video to your desired folder.
Compress Video with Avidemux Alternative
Avidemux is an excellent tool for compressing video, but it might be difficult for beginners. In addition, the compression process may take you long. Thus, you can use MiniTool Video Converter to help you accomplish this task.
MiniTool Video Converter is a simple-to-use free video compressor. This tool has no size limits and doesn’t add watermarks to the compressed files. It supports all popular media file formats, so you can compress AVI, MP4, MOV, MKV, etc.
MiniTool Video Converter enables you to customize the compression level and output format to meet your specific needs. If you have multiple videos to compress, you can use its batch compression feature to handle them simultaneously. As a high-quality and fast video compressor, MiniTool Video Converter can compress your video quickly without losing quality.
Now, let’s walk through the whole procedure for compressing a video with MiniTool Video Converter.
Step 1. Download and install MiniTool Video Converter
Hit the button below to download and install MiniTool Video Converter on your computer.
MiniTool Video ConverterClick to Download100%Clean & Safe
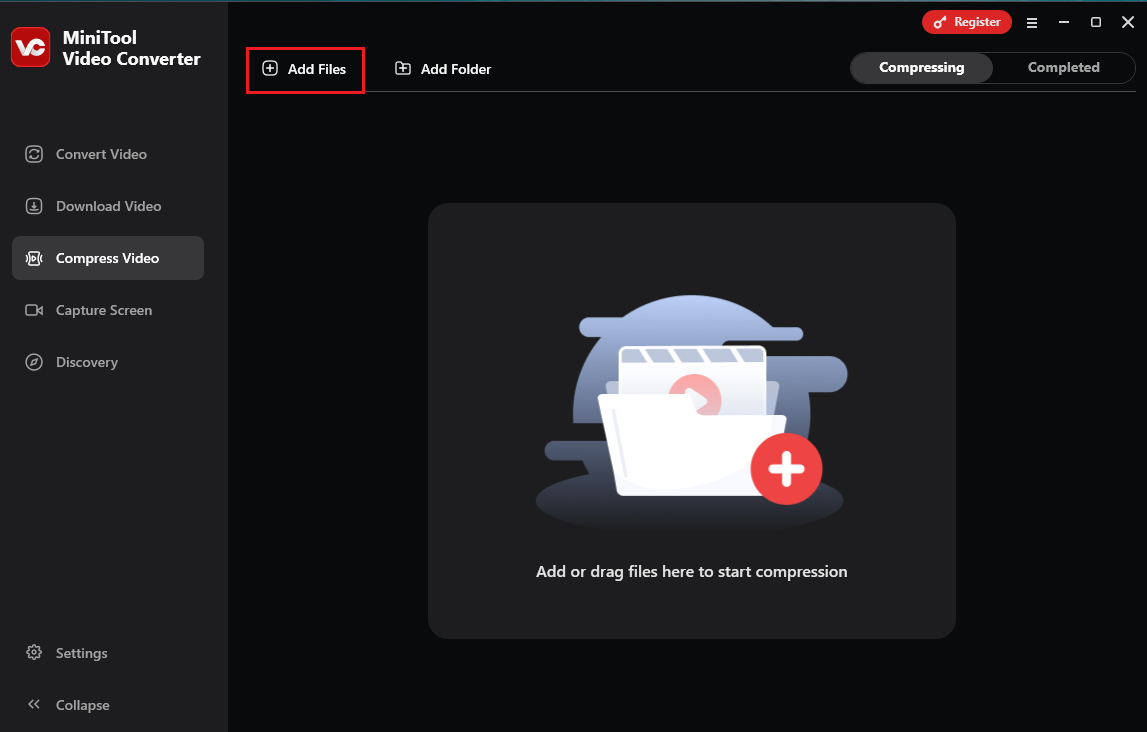
Step 2. Import the target video
Launch MiniTool Video Converter, go to the Compress Video section, and click the Add Files button to add the video you want to compress.
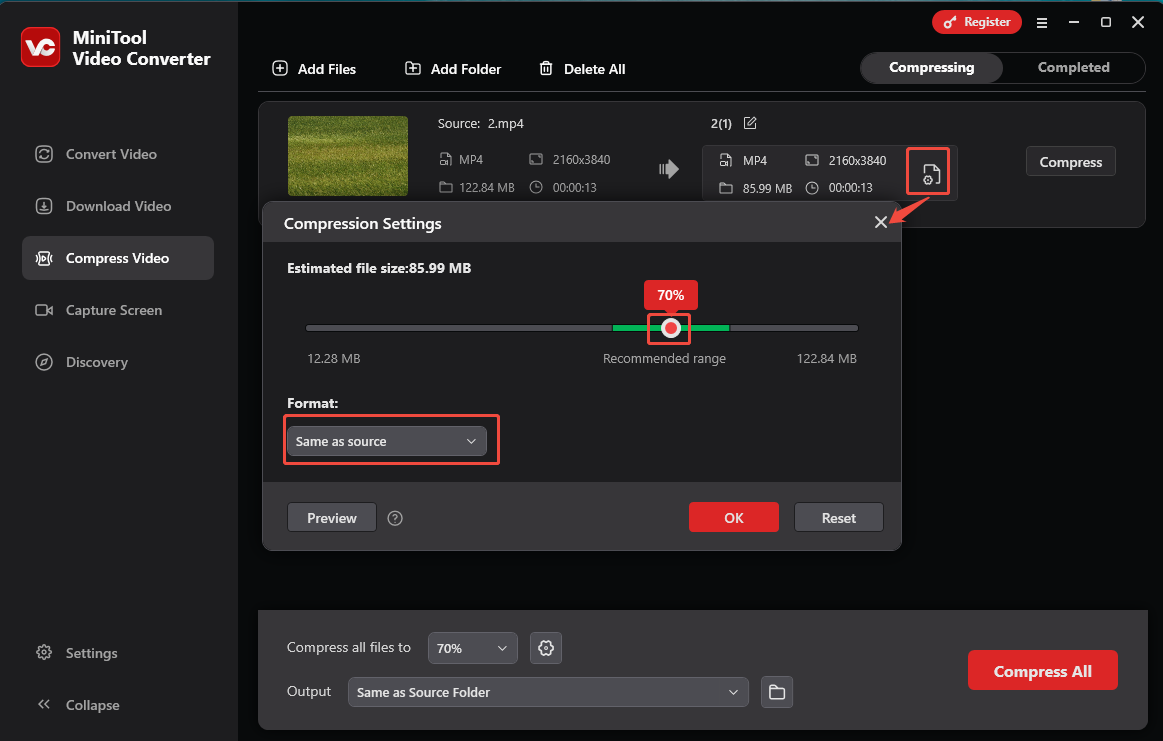
Step 3. Adjust the compression settings
Click the Settings icon to open the Compression Settings window. Next, drag the slider to modify the compression level. Expand the Format option and choose your desired format from the dropdown. Now, you can click Preview to check the video quality. If you are satisfied, click OK to continue.
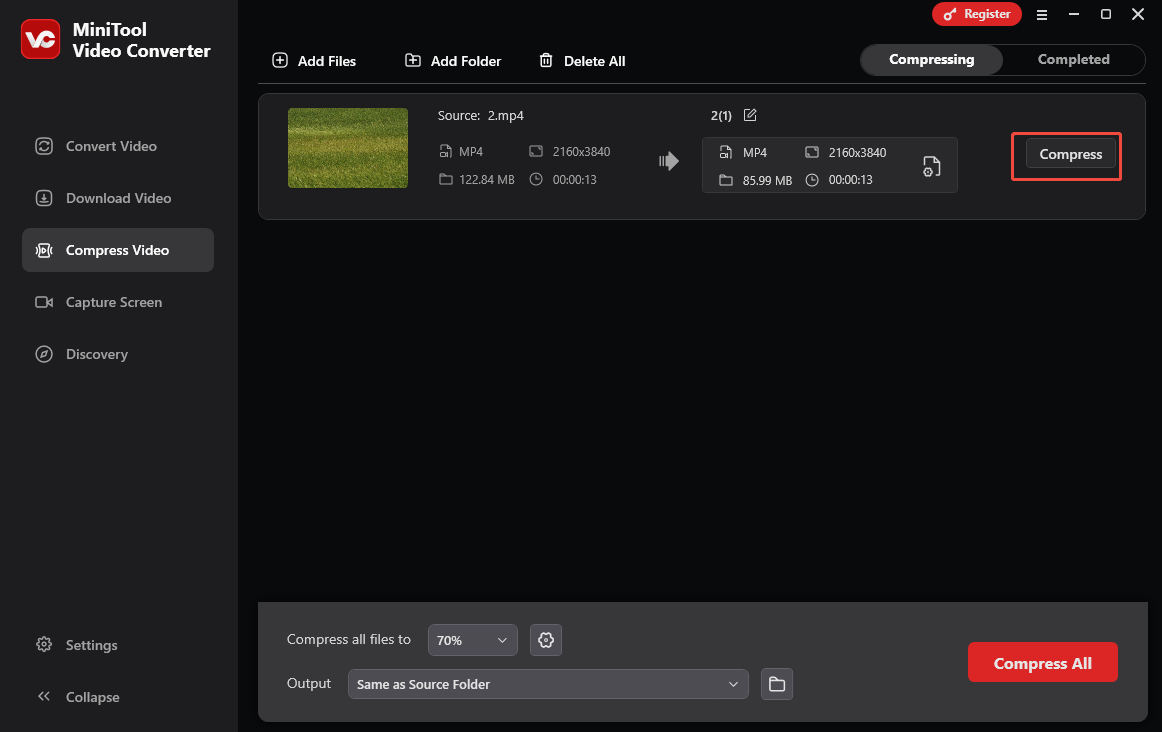
Step 4. Start the compression process
Click the Compress button to start compression.
Once finished, the compressed video will appear in the Completed section. You can click the Play icon to view the video or click the Folder icon to locate it.
Conclusion
It’s necessary to compress video because it reduces its size, making it easy to store and share. After reading this post, it’s safe to say you already know how to compress video with Avidemux and MiniTool Video Converter. Pick one you like and start compressing your video.
User Comments :