This post will show you how to compress video for Canva using two tools. The first is MiniTool Video Converter, which can compress your video without adding a watermark. The other is Video Candy, which quickly reduces video file size.
Why Compress Video for Canva?
Canva is an online graphic design platform. It can also be used to create videos. However, before uploading videos to Canva, you should learn about the upload requirements. Canva allows you to import videos in MOV, GIF, MKV, MP4, MPEG, or WebM formats. Importantly, your video should not be larger than 1GB.
If your video is larger than 1GB, you must reduce the file size before uploading. How can you bypass the 1GB Canva video file size limit? Below are two solutions.
How to Compress Video for Canva?
When it comes to compressing videos, the easiest way is to use a compressor, especially one that lets you customize the compression ratio. Below are two video compressors that can reduce your video quickly.
1. MiniTool Video Converter
MiniTool Video Converter reduces file size without sacrificing quality. It also doesn’t add watermarks to your videos. This app allows you to resize videos from 10% to 100% of their original size.
Nearly all popular formats can be imported into MiniTool Video Converter for compression, including MP4, MOV, MKV, AVI, WMV, M4V, Xvid, ASF, and more. It also offers three export formats: MP4, WebM, and MKV.
Even if you have multiple video files, you can quickly compress them using MiniTool Video Converter because it supports batch compression. You can compress up to five files simultaneously. If your video is over 1GB, I recommend using MiniTool Video Converter to compress it to break Canva video file size limit. Below is an example of how to use this application to compress a video file.
Step 1: Download and Install MiniTool Video Converter
First, click the download button below to download and install MiniTool Video Converter on your PC.
MiniTool Video ConverterClick to Download100%Clean & Safe
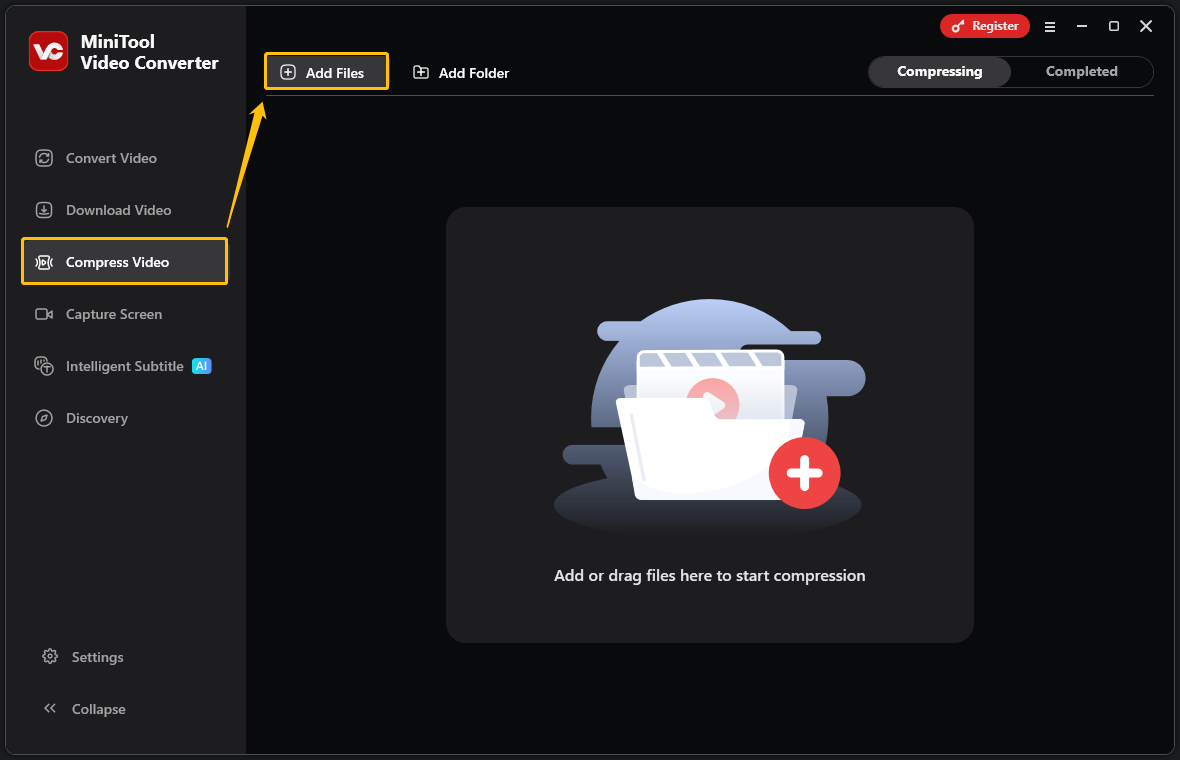
Step 2: Import Your Video
Launch MiniTool Video Converter. Then, switch to the Compress Video tab and click Add Files to import the video you want to compress.
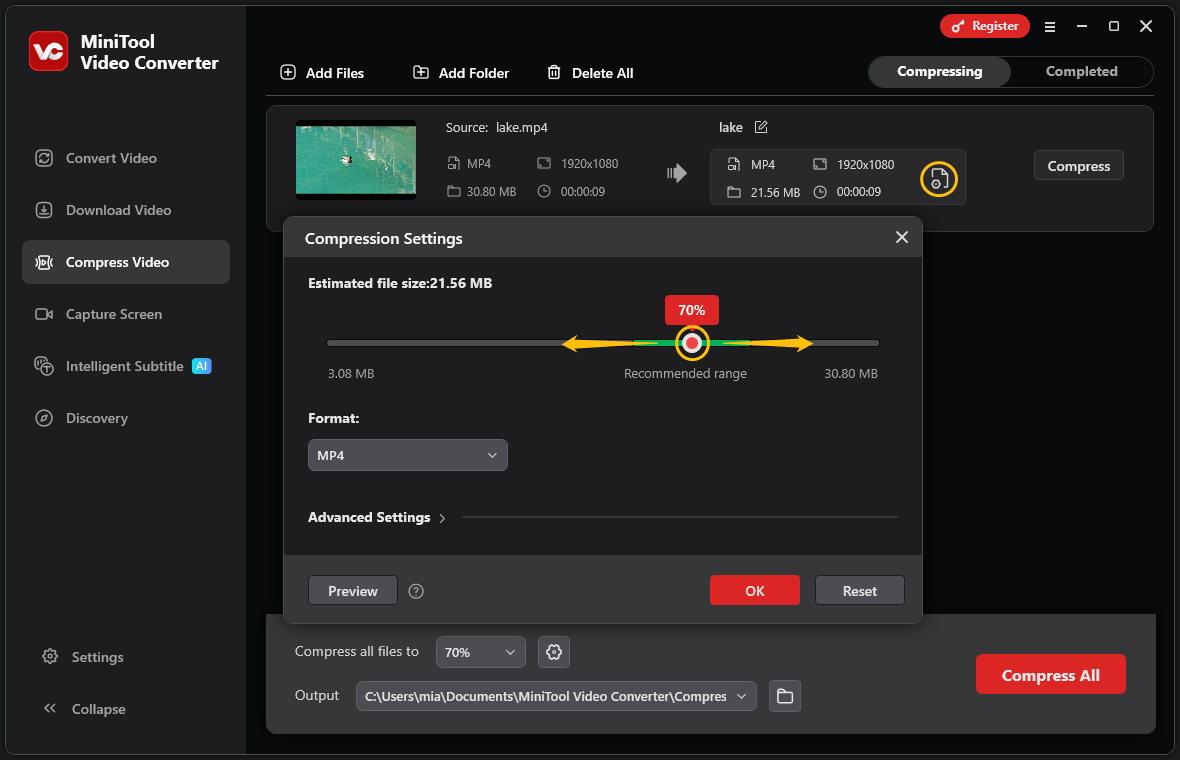
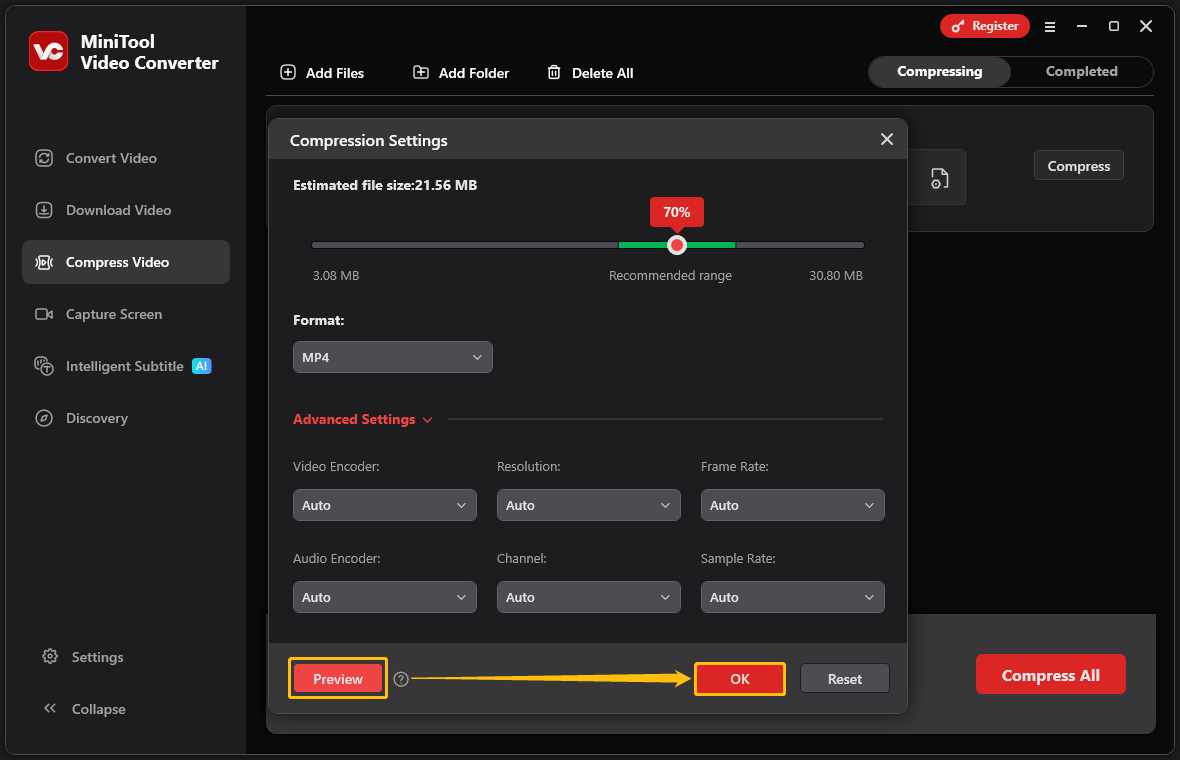
Step 3: Adjust the Compression Level
To adjust the compression level, first click the settings icon to access the Compression Settings window. Then, move the red dot on the slider until you reach the desired compression percentage. You can refer to the estimated file size to adjust the compression level.
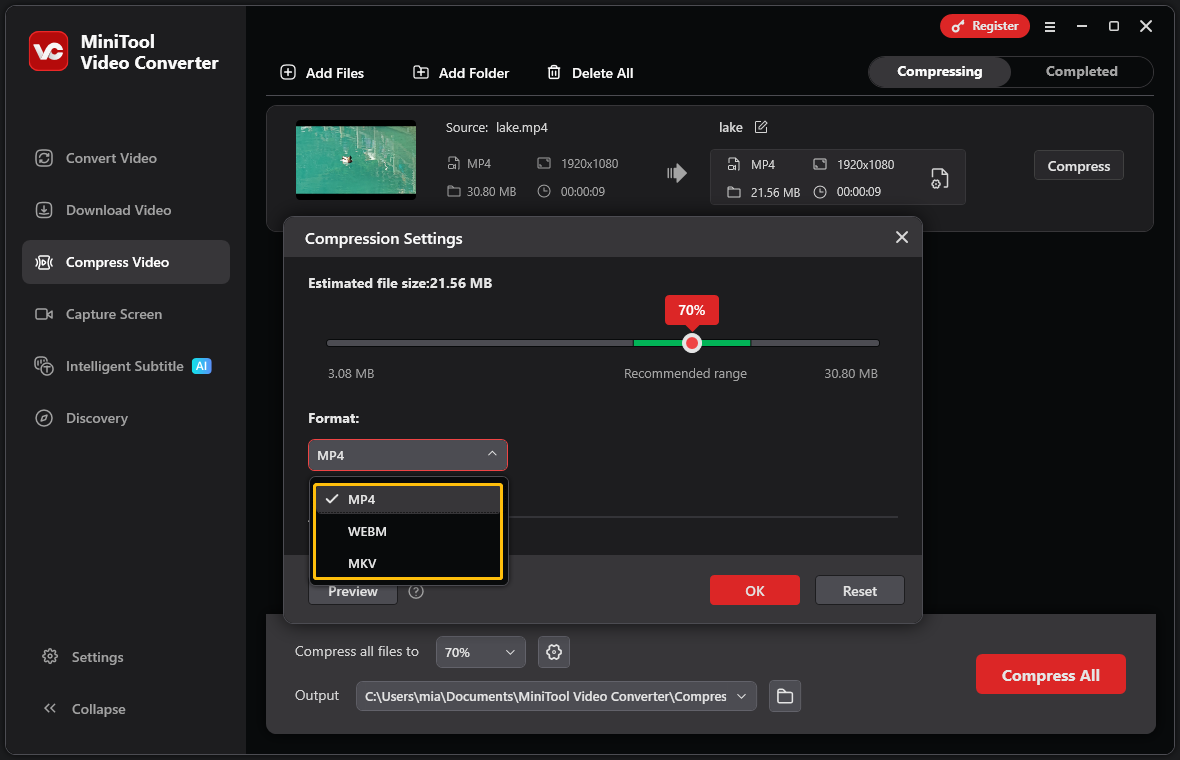
Step 4: Choose the Output Format
Now, expand the Format option to select the output format you want.
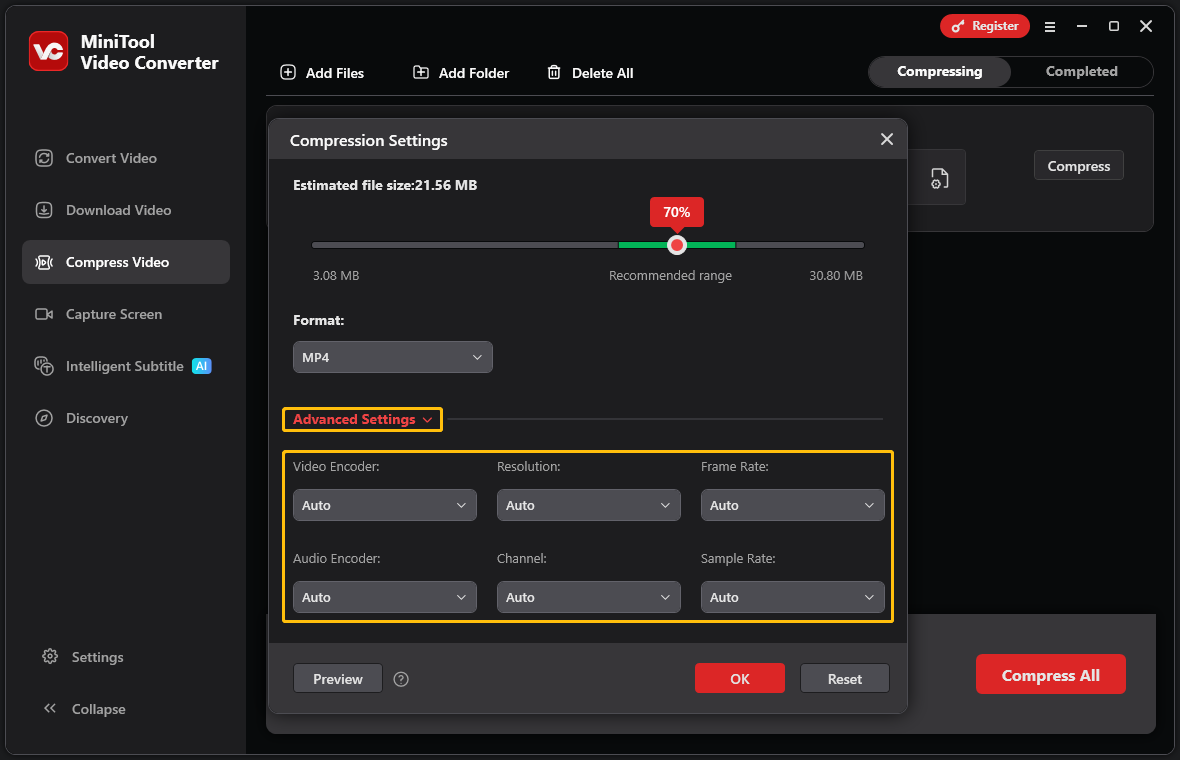
Step 5: Adjust the Video Parameters (Optional)
If you want to change the video parameters, you can expand the Advanced Settings option, and adjust the video encoder, resolution, frame rate, audio encoder, audio channel, and sample rate.
Step 6: Check the Video
You can click the Preview button to view the video quality at the compression ratio you selected. If you are satisfied with the quality of the compressed video, click OK to confirm and save the compression settings.
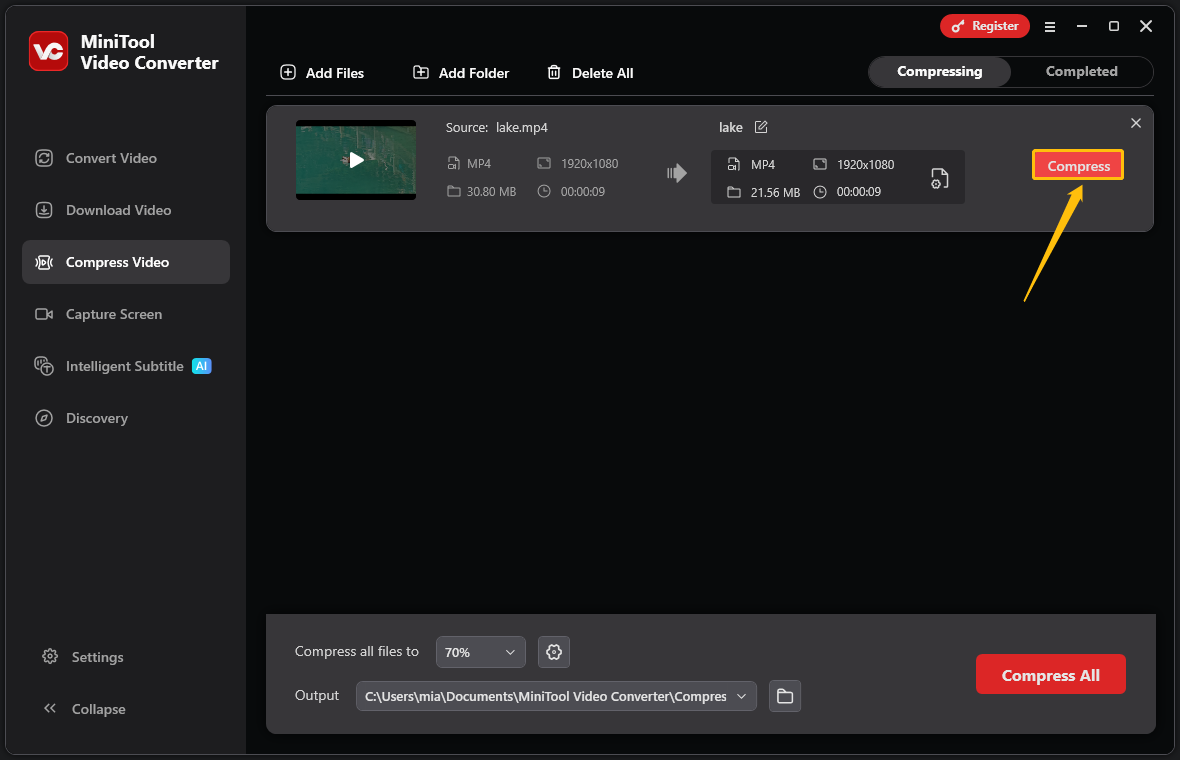
Step 7: Start Compressing
Click the Compress button to start compressing.
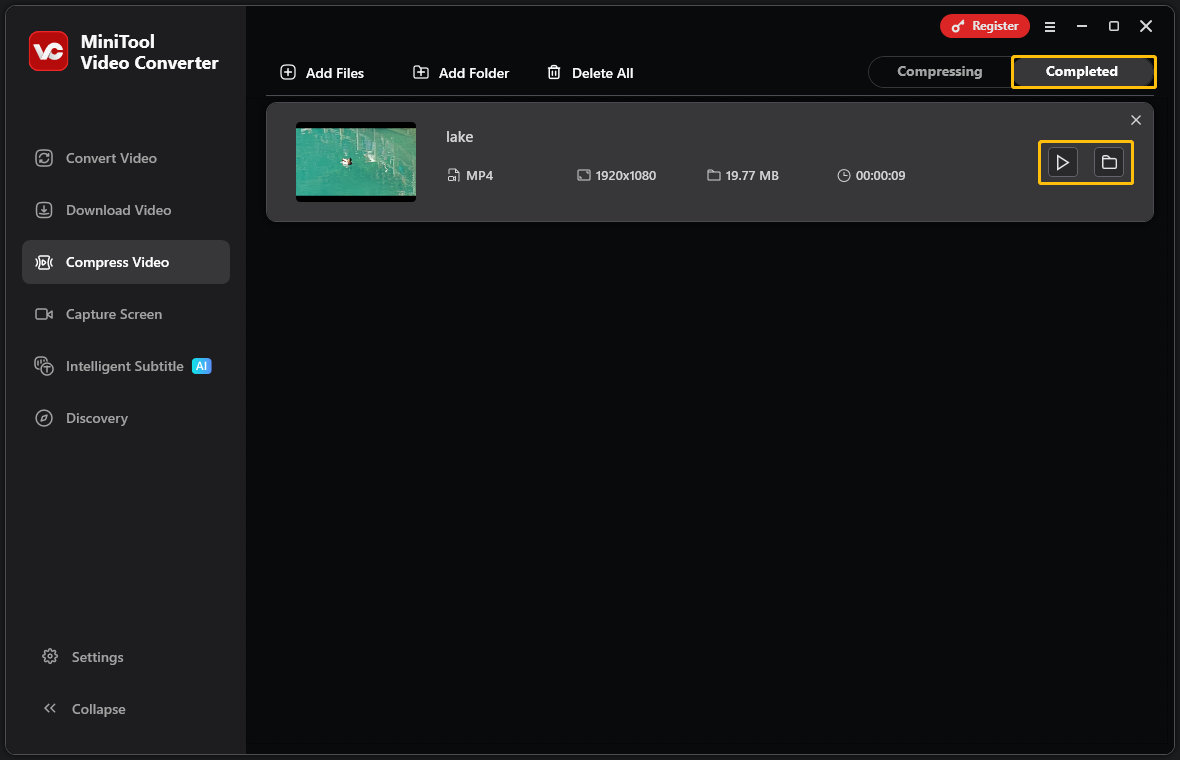
Step 8: Play and Locate the Compressed Video
Locate the compressed video in the Completed section. You can either click the play icon to watch the video or click the folder icon to find its storage location.
MiniTool Video Converter doesn’t limit the size of imported files. You can easily compress videos to the file size you want. And the video compression feature is completely free for use.
2. Video Candy
Video Candy is an online platform that offers many practical mini tools. It includes an online video compressor that can reduce your video files instantly. This tool supports a variety of video formats, including MP4, AVI, WMV, and WebM. Note that videos compressed with Video Candy will have a watermark. If you want to remove the watermark, you’ll need to purchase their plan.
Here is a guide on how to use Video Candy to compress a video:
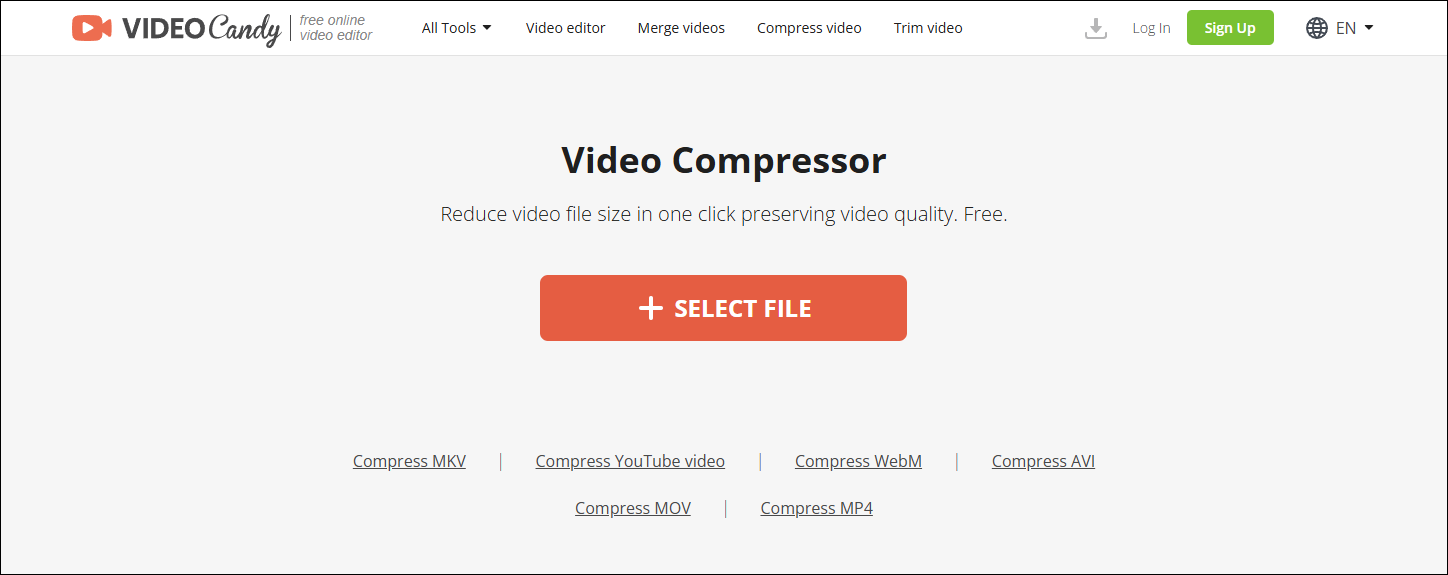
Step 1: Visit the Video Candy Website
Go to https://videocandy.com/.
Step 2: Import Your Video
Click the SELECT FILE button and select the video you want to compress in the file explorer.
Step 3: Select and Download Option
The compressed video includes a watermark. If you’d like to save the video without the watermark, click REMOVE WATERMARK, pay to remove the watermark, and save. If you don’t mind the watermark, simply click DOWNLOAD.
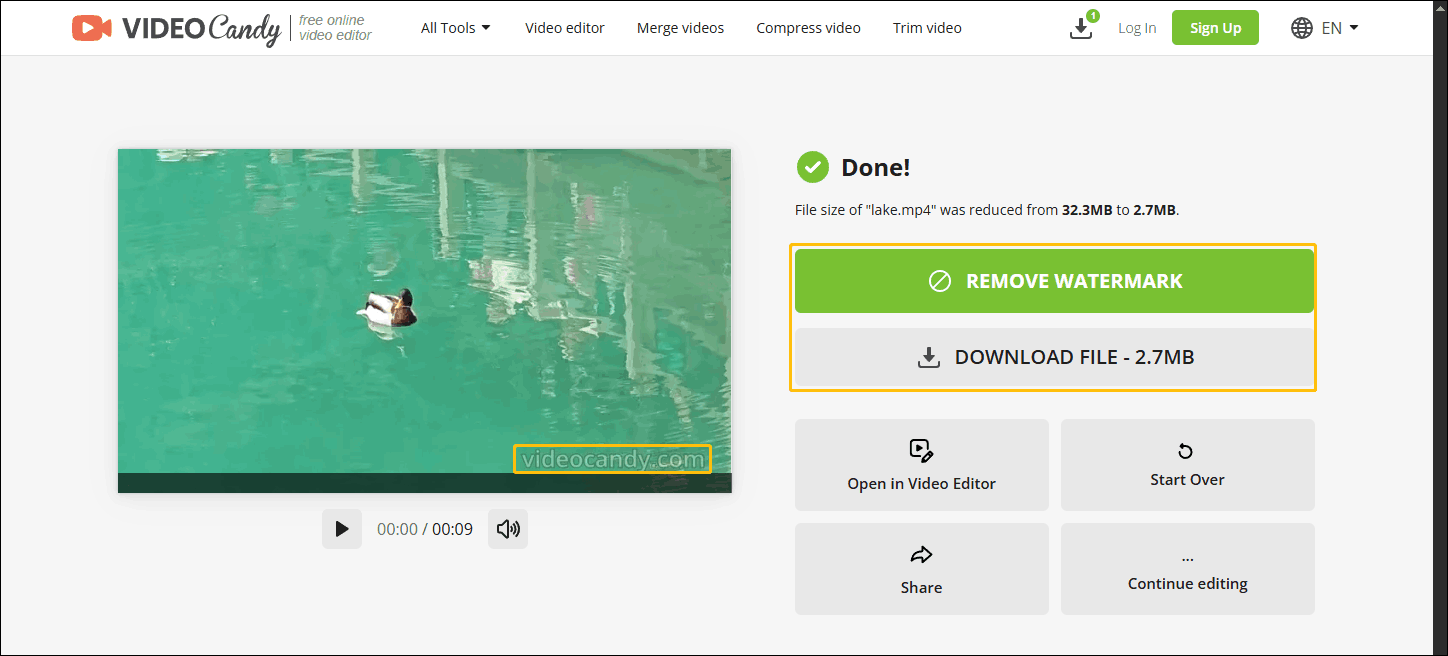
Video Candy compresses videos quickly, but you have to pay to remove the watermark. However, if you don’t care about the watermark, Video Candy is also a good choice.
Conclusion
This article shows you how to compress video for Canva with MiniTool Video Converter and Video Candy. Both tools are good choices. If you want to compress videos without watermarks, then MiniTool Video Converter is more suitable for you!
User Comments :