Considering that more and more players want to record Slay the Spire, this article, which is published by the best free video converter, aims to introduce Slay the Spire to you. At the same time, it will provide you with a detailed tutorial on how to record Slay the Spire on Windows, Mac, and Linux.
Overview of Slay the Spire
Released first in 2017, Slay the Spire, which refers to a rogue-like game that focuses on deck-building. Meanwhile, it was published by Humbel Bundle and is available on a wide range of platforms such as Windows, Mac, Linux, PlayStation 4, iOS, Android, and more. In recent years, Slay the Spire has won great commercial success.
The Slay the Spire Recorder on Windows
For Windows users who want to record Slay the Spire, a powerful screen recorder is never unimportant. In the following content, you will have a good understanding of an application called MiniTool Video Converter. Plus, there is a step-by-step tutorial on your Slay the Spire recording.
What Is MiniTool Video Converter
MiniTool Video Converter is a can’t-miss screen recording program for you. With it, you are capable of enjoying a no-watermark recording experience. Meanwhile, no matter how long you record Slay the Spire, you will never be limited by the recording duration. In addition, MiniTool Video Converter allows for a high-quality screen recording, which also makes a 4K screen recording accessible to you.
A Detailed Tutorial on Your Recording
Below is the step-by-step guidance on how to record Slay the Spire.
MiniTool Video ConverterClick to Download100%Clean & Safe
Step 1. Download MiniTool Video Converter by clicking on the above button. After its installation, launch MiniTool Video Converter to enter its main interface.
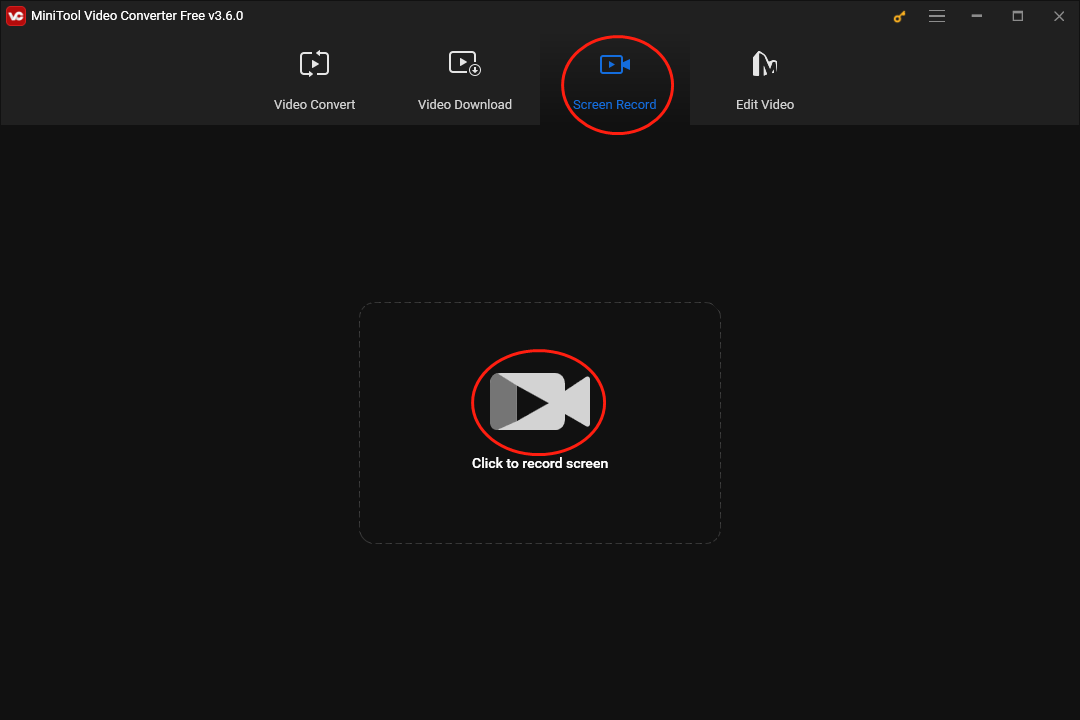
Step 2. Move to the Screen Record section and click on the big recording icon to enter the MiniTool Screen Recorder panel.
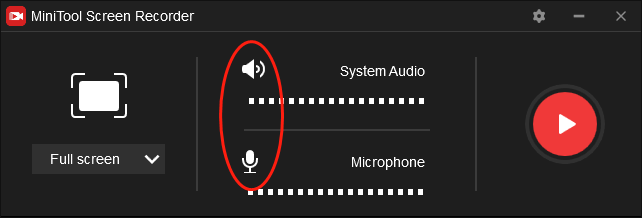
Step 3. Turn on/off the system sound and microphone sound by clicking on the two audio icons. Since you plan to record Slay the Spire gameplay, please turn on the system audio.
Step 4. Select the recording area by pressing the Alt+R key. On condition that you want a full-screen mode, please skip this step.
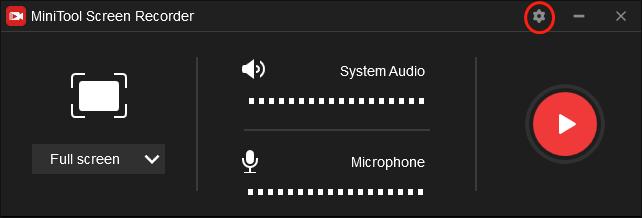
Step 5. Click on the gear icon to access the interface of the screen recording settings.
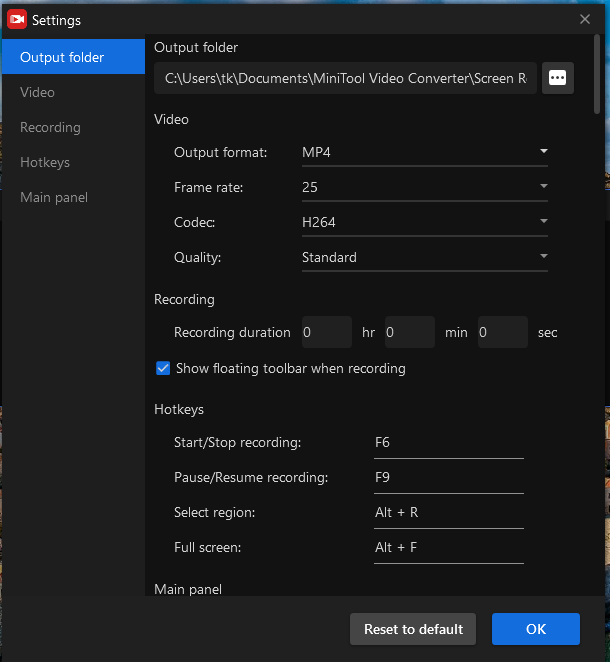
In the interface, you can alter the hotkeys based on your needs. Meanwhile, you are capable of changing the quality of your recording. Specifically, you can make a choice among high quality, original quality, and standard quality. In addition, you are free to set the frame rate of your Slay the Spire recording. In the end, click on OK to save the changes that you have made.
Step 6. Click on the Record button or press the F6 key to start your recording. Then run Slay the Spire after a 3-second countdown.
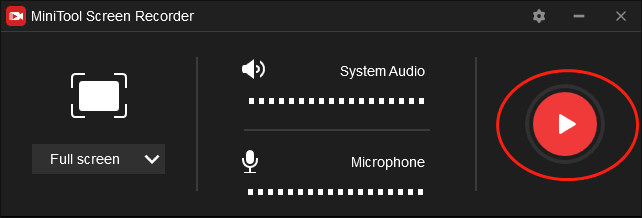
Step 7. Once your recording of Slay the Spire is over, press the F6 key to end your recording.
Step 8. Go to the location that saves your recording file and check whether your recording of Slay the Spire can be played or not.
With the above instructions, can you record Slay the Spire? Of course, you can!
More Details About MiniTool Video Converter
MiniTool Video Converter is also integral to converting your audio/video files. Specifically, it allows you to transform audio files into video ones and vice versa. There are numerous input formats that are supported by MiniTool Video Converter, which include MP3, DV, MP4, AAC, ASF, MKV, and more. Plus, MiniTool Video Converter also enables you to download a mass of YouTube videos that you desire.
The Slay the Spire Recorder on Mac
To record Slay the Spire on Mac, Movavi Screen Recorder is highly recommended. Below is the detailed guidance on your recording.
Step 1. Download and install Movavi Screen Recorder on your computer. Then launch it to enter the main interface of Movavi Screen Recorder.
Step 2. Find the camera icon on the control panel and press it.
Step 3. Select the recording area.
Step 4. Based on your needs, determine whether the microphone and audio sound will be recorded or not.
Step 5. Click on the Start recording button to begin your Slay the Spire recording. Then run Slay the Spire.
Step 6. Once your recording is done, finish your recording of Slay the Spire by clicking on the Stop button or pressing the F10 key.
Step 7. Go to check whether your recording file can be played successfully or not.
With the above-detailed steps, Mac users can record Slay the Spire with ease and efficiency.
The Slay the Spire Recorder on Linux
For Linux users who want to record Slay the Spire, OBS Studio is highly recommended. Its full name is Open Broadcaster Software. As an open-source screen recording tool, OBS Studio enables Linux users to enjoy a real-time recording of Slay the Spire gameplay videos. In addition, it allows you to stream videos to a wide range of RTMP-supported destinations like Facebook, YouTube, Twitch, and more.
Bonus: How to Edit Your Slay the Spire Videos
Sometimes, some of you want to edit your Slay the Spire recordings. However, the selection of video editing programs will put you in a dilemma. Given this, a powerful video editing tool named MiniTool MovieMaker is highly recommended.
First of all, MiniTool MovieMaker, which boasts many advanced editing features, allows you to add effects, motions, transitions, subtitles, and more to your recorded videos. Secondly, it can also help you change the speed of your recordings. In short, with MiniTool MovieMaker, editing Slay the Spire recordings will never be problematic for you.
MiniTool MovieMakerClick to Download100%Clean & Safe
Final Words
All the above Slay the Spire recorders have much to offer in helping you record Slay the Spire. Whether you are a Windows, Mac, or Linux user, you can accomplish the recording of Slay the Spire easily with the aid of this article. Finally, on condition that you have encountered any problems in the process of using MiniTool Video Converter or MiniTool MovieMaker, please contact us via [email protected]. We will give you a hand as quickly as possible.


User Comments :