Camtasia is a screen recorder and video editor for users to record and edit videos on Windows and Mac. Have you ever tried recording your screens with this software? How to save Camtasia video as MP4? Where does Camtasia save recordings? This post will offer a complete guide on how to record and save Camtasia recordings.
Camtasia isn’t a free program, but it offers a free trial version. The following operations are based on the free trial version of Camtasia. Let’s get started. (If you need a free screen recorder, MiniTool Video Converter is recommended here.)
How to Record with Camtasia
Step 1. Open Camtasia after installation, and sign in to start a trial.
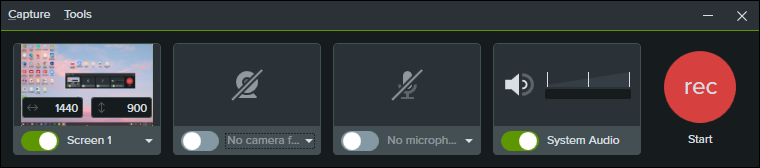
Step 2. Click the Record button at the top of the tool panel to open the Camtasia recorder.
Step 3. Click Scene 1 to customize the recording area, and choose whether to record screens with microphone audio and system audio, etc.
Step 4. Tap the Start Recording button to begin.
Step 5. Press F10 to stop a recording and F9 to pause/resume a recording (Windows). Press CMD+OPTION+2 to stop a recording and CMD+SHIFT+2 to pause/resume a recording (Mac).
Related article: Here Are the Best Camtasia Alternatives for You
How to Save Camtasia Video as MP4
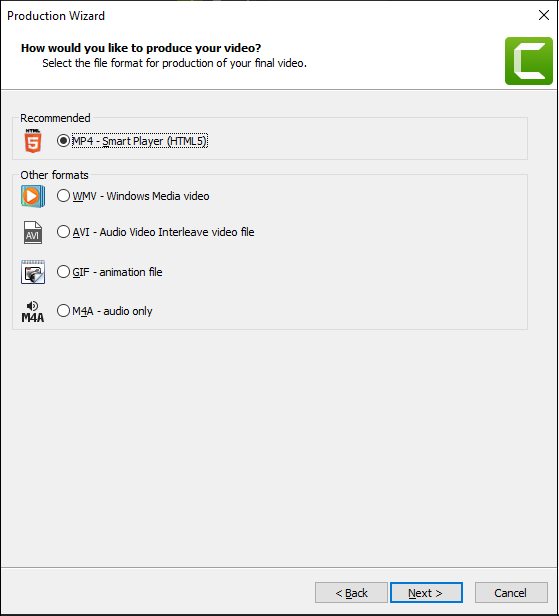
Once you stop the recording, you can see the recorded video in Camtasia. Then you can edit this recording by trimming, adding titles/annotations, and more. After that, click the Export button in the upper right corner, then choose Local File… > Produce with watermark > Next, choose the recommended format MP4, click the Next > Next to choose an output folder, and click the Finish to export the recording as MP4.
After you import a video and complete editing, you can also follow the above steps to save MP4.
If you purchase a full license of Camtasia, you can export videos without a watermark.
Also read: Zoom Failed Conversion: How to Convert Zoom Recording to MP4
However, if you just directly close the Camtasia and save the recording or edited video as a TSCPROJ or TREC file on the desktop or another folder, you’ll find this file cannot be played directly on other players.
TREC file is a recording file that stores audio, video, and metadata. TSCPROJ file is a project file.
The two files can only be opened in Camtasia. You need to convert Camtasia to MP4 for better accessibility. How to convert Camtasia files to MP4? Check the following steps.
Step 1. Open Camtasia, and click the File and choose the Batch Production from the dropdown list.
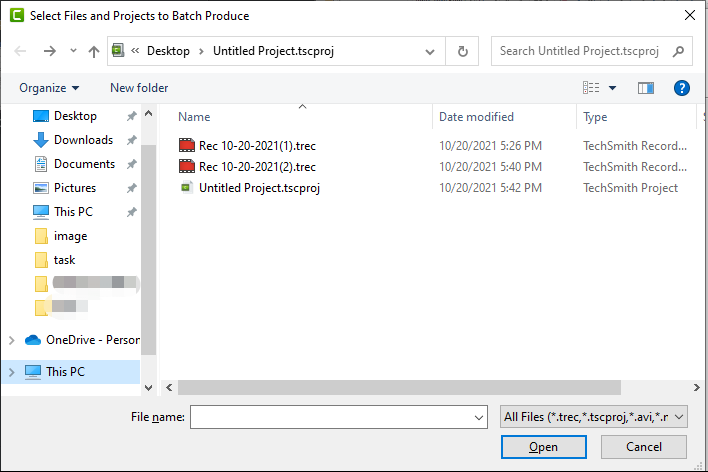
Step 2. Click the Produce with watermark, tap the Add files/projects… button to add your Camtasia files, and click the Next.
Step 3. Choose an MP4 type, click the Next, choose an output folder, and tap the Finish to start converting Camtasia to MP4. Once done, you can find the MP4 file in the folder.
Also read: VEG to MP4: What Is a VEG File & How to Convert It to MP4
Where Does Camtasia Save Recordings
Where does Camtasia save recordings? Where are the recordings created by Camtasia on Windows and macOS saved by default?
Default save location for recordings:
Windows: C:UsersusernameDocumentsCamtasia
Mac: ~/Movies
If you want to manually choose the file location and name for each recording, follow these steps to set Camtasia Recorder to open a Save dialog after recording.
- After enabling the Camtasia Recorder, tap the Tools > Options.
- Choose the File options.
- Tap the Ask for file name option, and click the OK.

Conclusion
Now, you’ve learned how to record with Camtasia, how to save Camtasia video as MP4, and how to find Camtasia recordings. Open Camtasia and convert your TREC or TSCPROJ files to MP4.
About The Author

Position: Columnist
Cora is a tech writer specializing in digital media workflows, with over six years of hands-on experience in video post-production, media transcoding, and screen capture. Her writing is always clear and practical. Cora also produces in-depth software reviews for users across skill levels to help them find the right tool and enjoy video editing.
User Comments :