In this detailed guide offered by the free video converter from MiniTool, we'll delve into various methods on how to record gameplay, VR experiences, and stop recording on the Oculus Quest 2, both with and without a PC.
The Oculus Quest 2 is a remarkable virtual reality (VR) headset that offers immersive experiences and gaming adventures. Whether you're eager to share your gameplay highlights, capture moments in VRChat, or record your virtual reality experiences, the Oculus Quest 2 provides built-in features and external options for seamless recording.
How to Record on Oculus Quest 2 without PC?
How to screen record on Oculus Quest 2 with built-in recording features? Just follow the guide below!
On the Oculus Quest 2 headset, utilize the built-in recording feature by enabling Record Video in the sharing menu:
Step 1. Press the Home button (Meta) on the right controller to access the universal menu.
Step 2. Then, select Camera > Record Video.
Step 3. Toggle on Include Mic Audio if you would like to record the microphone sound.
Step 4. Finally, choose Start Recording.
When it is recording, a red dot will appear in VR. The red dot indicator can be controlled from Settings.
How to Stop Recording on Oculus Quest 2?
Ending a recording session is just a piece of cake.
Step 1. Press the Home button to pull up the universal menu.
Step 2. Press Camera and then choose Stop Recording.
How to Record Oculus Quest 2 Gameplay on PC?
To capture gameplay on Oculus Quest 2 on a computer, you need to first make use of one of the following methods to connect your Oculus Quest 2 to your PC.
#1 Using Oculus Link Connection
Connect your Oculus Quest 2 to a PC using an Oculus Link cable or other high-bandwidth USB3 cable to access your headset's content on the PC, allowing you to use PC-based recording software like OBS Studio, Nvidia ShadowPlay, or MiniTool Video Converter.
#2 Using Air Link (Wireless)
With Air Link enabled, wirelessly connect your Quest 2 to your PC and use the software mentioned above to capture gameplay or VR experiences.
How to Record Video on Oculus Quest 2 by MiniTool Video Converter?
Here, let’s take MiniTool Video Converter, a free video converter and recorder, for example to show you how to record VRChat on Oculus Quest 2 after connecting the device to a PC.
MiniTool Video ConverterClick to Download100%Clean & Safe
Step 1. Download and install MiniTool Video Converter on the computer that is connected with your Oculus Quest 2 device.
Step 2. Launch MiniTool Video Converter to enter its main user interface (UI).
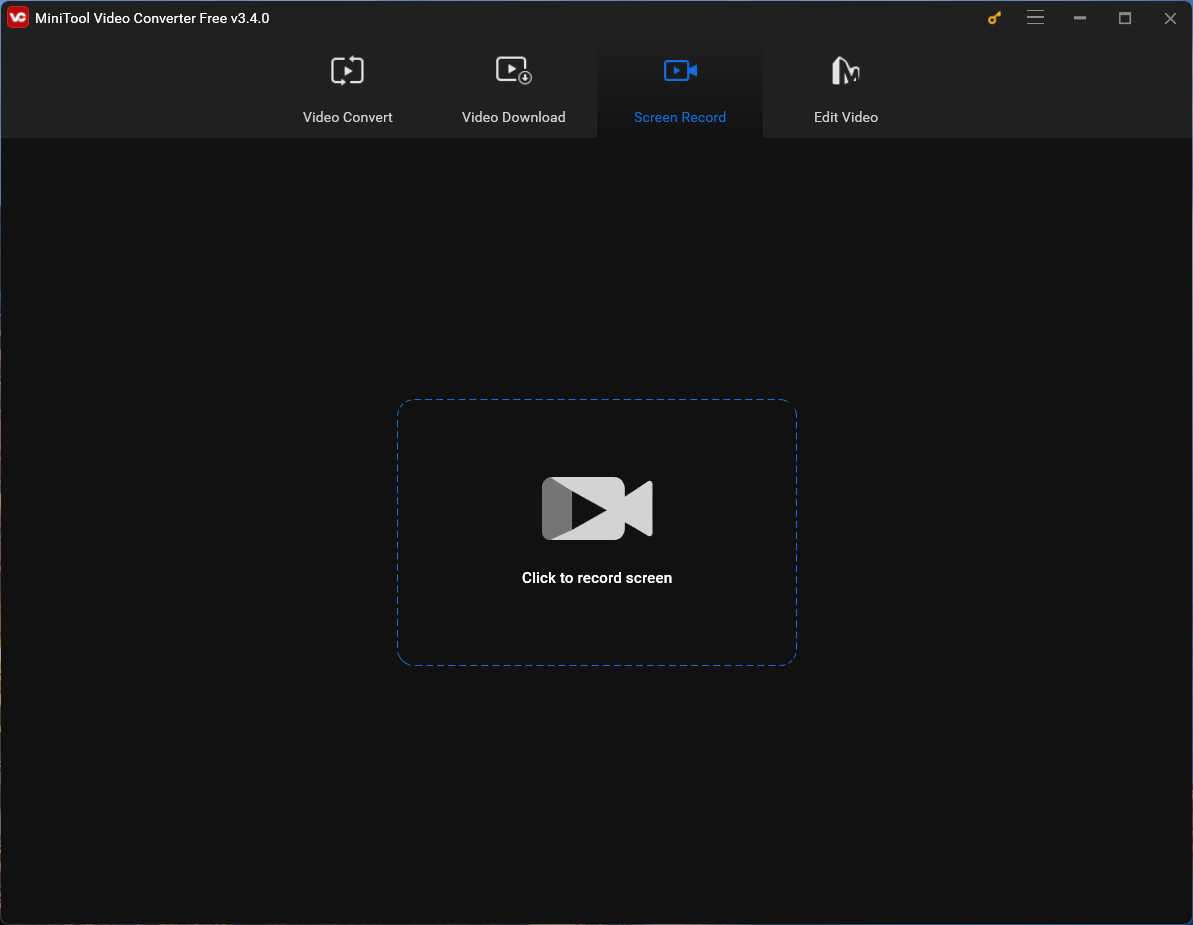
Step 3. On the main UI, go to the Screen Record tab from the top menu.
Step 4. Click the Click to record screen option to open the MiniTool Screen Recorder tool.
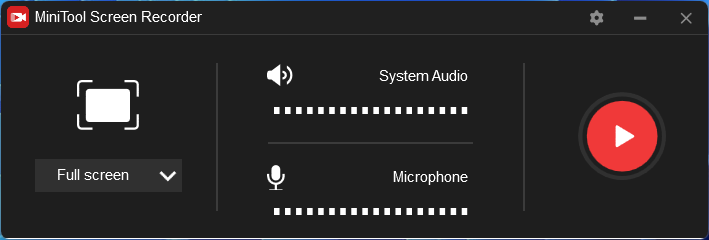
Step 5. Within the MiniTool Screen Recorder window, you are able to specify the recording area as well as whether to record system audio and microphone or not.
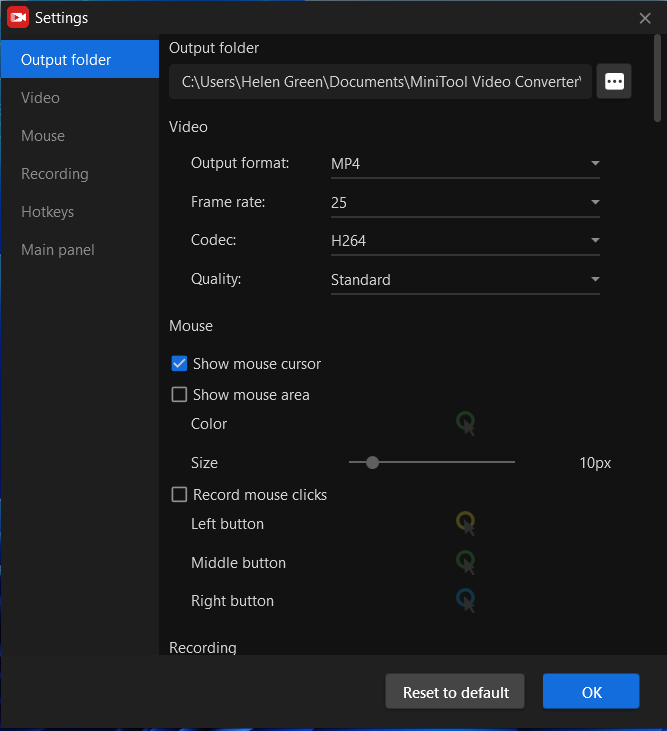
Step 6. Click the Settings icon (gear) on the upper right to trigger the Settings window.
Step 7. In the Settings window, you can further set up the output location, output video format/frame rate/encoder/quality, mouse type, recording duration, recording shortcuts, and so on.
Step 8. After setting up the recording, now you can click the red Record button to start recording the VRChat game activities on your Oculus Quest 2. (You need to start your gameplay immediately after clicking the Record icon.)
Step 9. When you finish playing VRChat on Oculus Quest 2, just press F6 (or your specified stop recording hotkey) to stop recording.
Finally, find your recorded video in the output folder. If you would like to do some editing to the recording like cutting off the unnecessary beginning part of the video, you can take advantage of MiniTool MovieMaker, a professional and easy-to-use video editing software.
MiniTool MovieMakerClick to Download100%Clean & Safe
How to Record Oculus Quest 2 Gameplay with OBS?
When successfully connected Oculus Quest 2 to a computer where OBS Studio is installed on, configure OBS to capture Oculus Quest 2 gameplay by adding a display capture source. Make sure the Oculus Quest 2 display is selected for recording. Then you can record VR gameplay Oculus Quest 2 with OBS just like recording other computer activities.
Conclusion
The Oculus Quest 2 offers a versatile range of options for recording gameplay, VR experiences, and moments within the headset. Whether you prefer to record directly on the device or utilize a PC for advanced recording capabilities using Oculus Link, Air Link, or third-party software like MiniTool Video Converter or OBS Studio, there are multiple avenues to capture and share your virtual reality adventures.
Remember to explore different recording methods to find the most suitable one for your preferences, whether it's for gaming highlights, VR experiences, or sharing your adventures with the world. With its user-friendly interface and multiple recording options, the Oculus Quest 2 empowers users to document and relive their immersive virtual reality moments effortlessly.
About The Author

Position: Columnist
Helen is a tech writer with over 10 years of experience. She specializes in creating easy-to-follow guides for video editing, media file conversion, and computer performance. Helen doesn't just write—she tests every software herself and listens to feedback from users and experts. Her goal is to make complex programs simple so that everyone can solve their tech problems with confidence.
User Comments :