VLC is well known for media playback. It can play videos, audio files, streaming protocols, CDs, DVDs, and Blu-ray discs. This media player can also record your desktop screen or a video that is being played. This post discusses how to record desktop with VLC media player.
You can use VLC to record screens. Here’s how to do it.If VLC fails to record your screen, you can use a VLC alternative – MiniTool Video Converter, a 100% free video converter, and a screen recorder for Windows.MiniTool Video ConverterClick to Download100%Clean & Safe
How to Record Desktop with VLC
Let’s see how to record desktop with VLC media player.Step 1. Launch the VLC media player.Step 2. Click on Media at the top left corner of the VLC media player window.Step 3. From the drop-down menu, choose Open Capture Device… or press Ctrl + C.Step 4. In the Capture Device tab, you need to choose the desktop capture mode in order to record your desktop. Expand the Capture mode drop-down list and select Desktop. Step 5. Then set the desired frame rate for the capture. Click the down arrow icon next to Play and choose Stream.
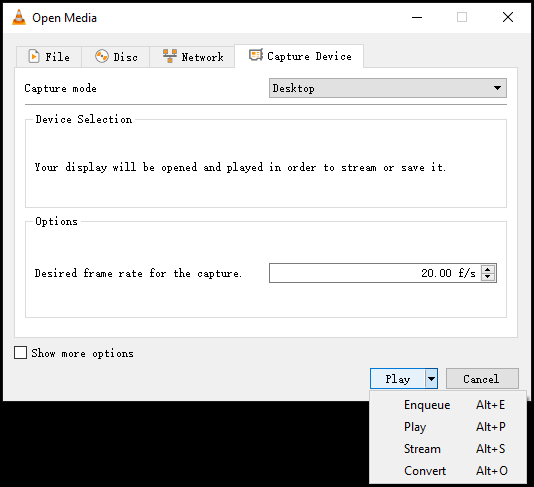 Step 6. Click the Next to proceed to the next step.Step 7. In the Destination Setup tab, select File and click the Add button. Then you will need to specify a destination folder to save the recording.
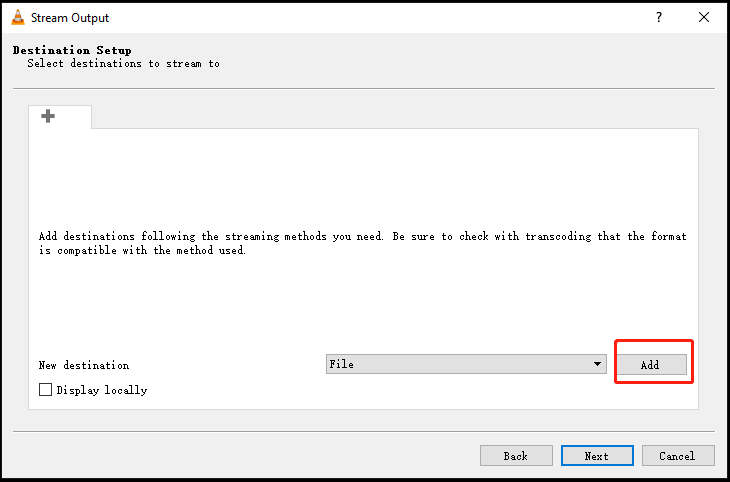 Step 8. Click Next to choose a profile for your recording. Click Next to continue.Step 9. Hit the Stream button and VLC will start recording. Minimize the VLC media player window to let VLC capture your whole desktop.
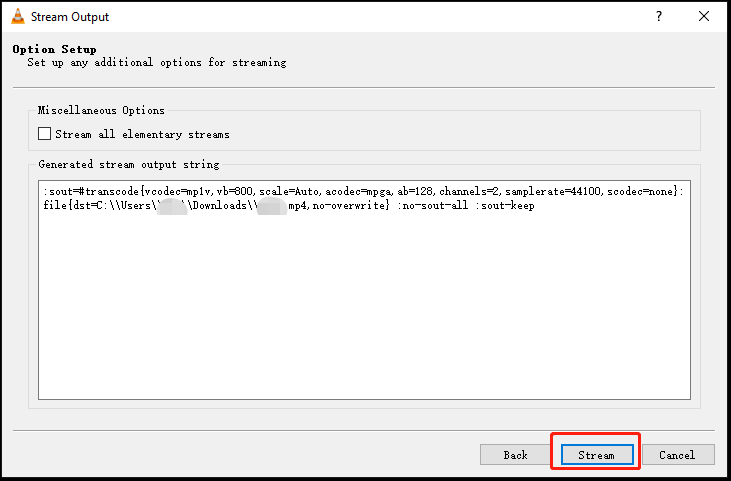 Step 10. When you want to stop recording, open the VLC media player window and click the Stop playback button. After that, check the recorded file.Also read: How to Use VLC to Record Streams and Its Alternatives
How to Record Video with VLC
Here’s how to record a video you’re playing in VLC.Step 1. Open VLC.Step 2. Add the video you want to record to VLC and pause it.Step 3. In the top menu bar, click View and check the Advanced Controls option.Step 4. Above the Playback button, you will see a Record button. Play the video and click the Record button to start recording.Step 5. To end the recording, click the Record button.Step 6. By default, the recording will be saved in the Videos folder. Go to This PC > Videos and find the recorded video.
How to Record Desktop with MiniTool Video Converter
The quality of VLC recordings is poor? To fix it, you can use MiniTool Video Converter. It’s free to use and lets you record screens in high quality.Here’s a quick guide.Step 1. Download and install MiniTool Video Converter.MiniTool Video ConverterClick to Download100%Clean & Safe
Step 2. Launch the program and click on Screen Record.Step 3. Click the camera icon to open MiniTool Screen Recorder.Step 4. Enable the microphone and system audio. Then select a screen recording mode.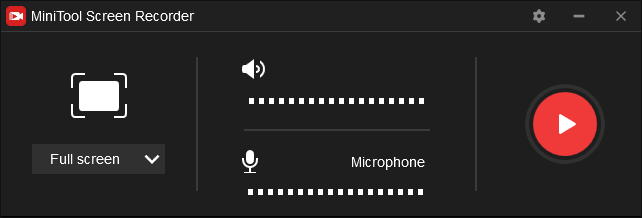 Step 5. Press the Record button to record your computer screen.
User Comments :