How to reduce video size for Wistia. This article will help you understand why you need to compress videos for Wistia. It also introduces 2 top-grade compressors to compress video for Wistia.
What Is Wistia
Wistia is a video platform for businesses and marketing professionals. Users can create, edit, and host videos. In addition, it supports real-time meetings and allows users to update, save, and share meeting content.
Wistia also supports the analysis of video data, enabling businesses to understand user behavior and optimize their video strategies. Therefore, it's also a tool for businesses to understand their customers.
Why Compress Video for Wistia
There are size restrictions for uploading videos to Wistia. Typically, each video uploaded to Wistia is limited to 26GB. So, if your target video exceeds this limit, you need to compress it.
Additionally, Wistia recommends that uploaded videos be no larger than 8GB. If your video is between 8 and 26GB, you can also compress it to speed up the upload process and improve the viewing experience.
How to Reduce Video Size for Wistia
How to compress video for Wistia. Here are 2 efficient compressors. We can easily learn about them and figure out how to use them.
1. MiniTool Video Converter (Offline)
To easily reduce video size to under 8GB, MiniTool Video Converter is worth a try. It is completely free without size limitations, ads, or annoying watermarks. In addition, MiniTool Video Converter supports multiple video formats that can be compressed for uploading to Wistia, such as MP4, MKV, MOV, AVI, F4V, M4V, WMV, VOB, and 3GP.
MiniTool Video Converter also empowers you to compress videos in batches. Can it adjust video parameters? Of course! MiniTool Video Converter can reduce video size for Wistia by lowering the resolution, frame rate, sample rate, number of channels, and bitrate.
Let's compress video for Wistia using simple steps with MiniTool Video Converter.
Step 1. Download and Install MiniTool Video Converter
Click on the download button below to download MiniTool Video Converter. Then, install and launch it.
MiniTool Video ConverterClick to Download100%Clean & Safe
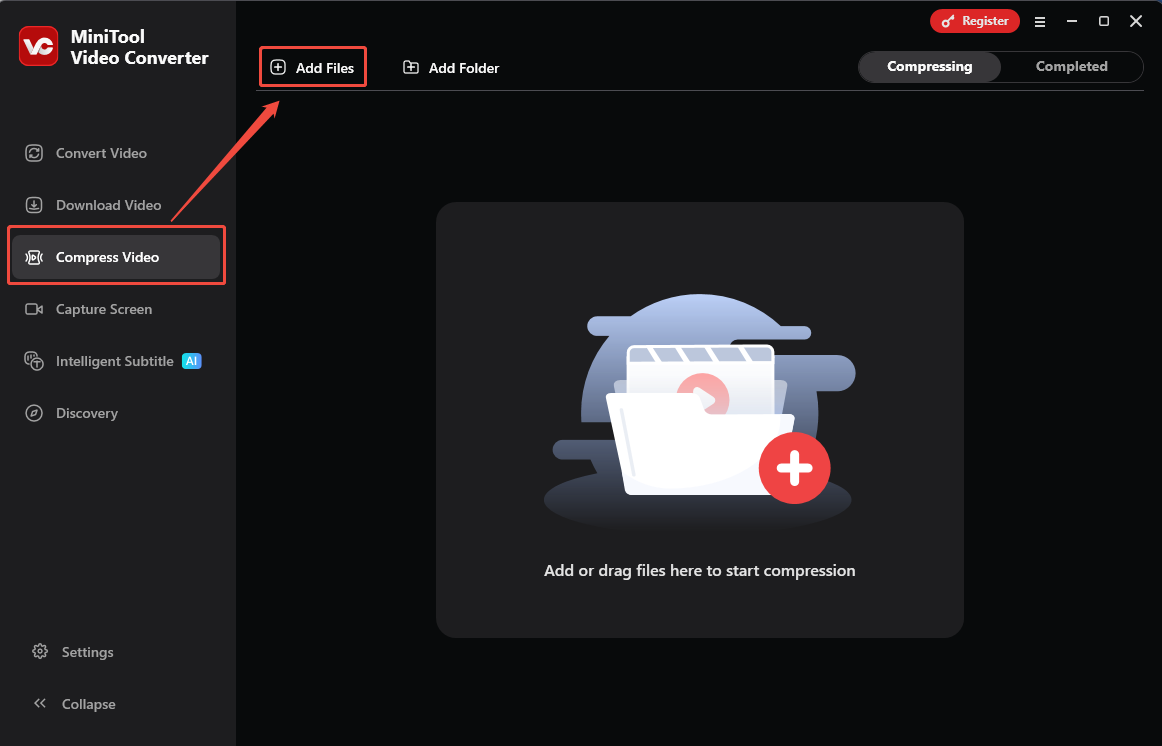
Step 2. Import Your Video
Go to the Compress Video module. There, click on the Add Files option to import your video.
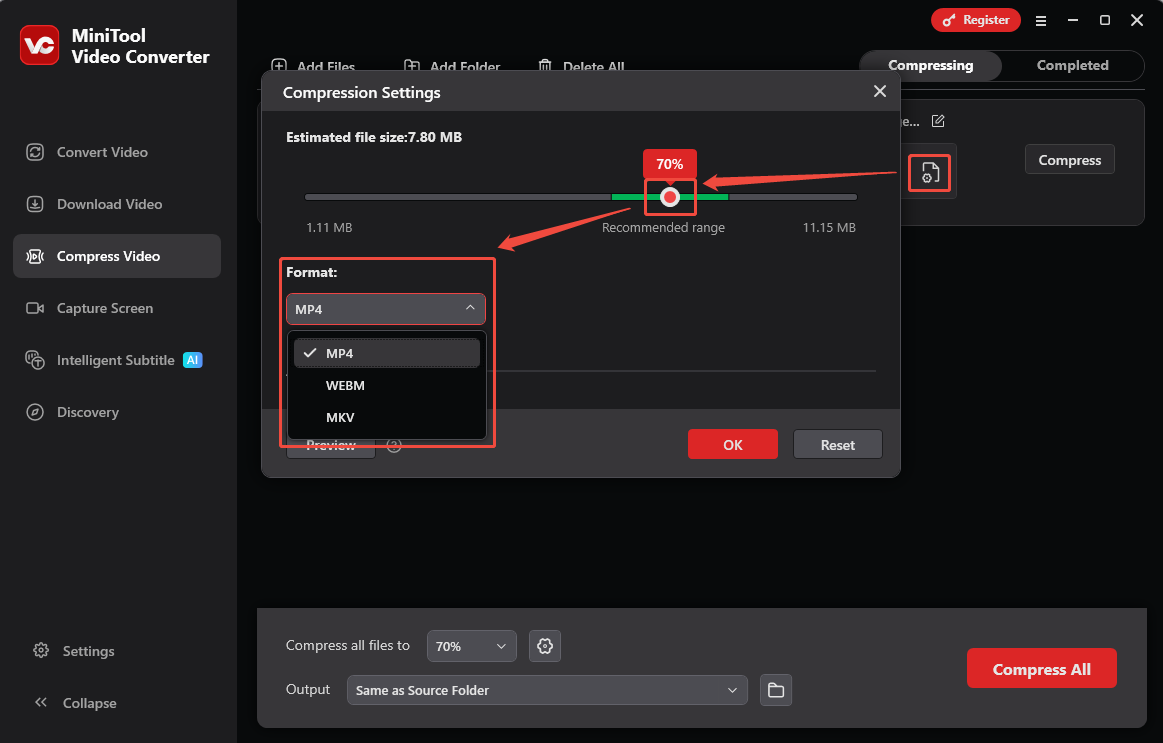
Step 3. Fine-tune the Compression Options
Click on the Settings icon to trigger the Compression Settings window. There, drag the red slider to adjust the compression percentage. Then, expand the Format option to specify an output format for the compressed video.
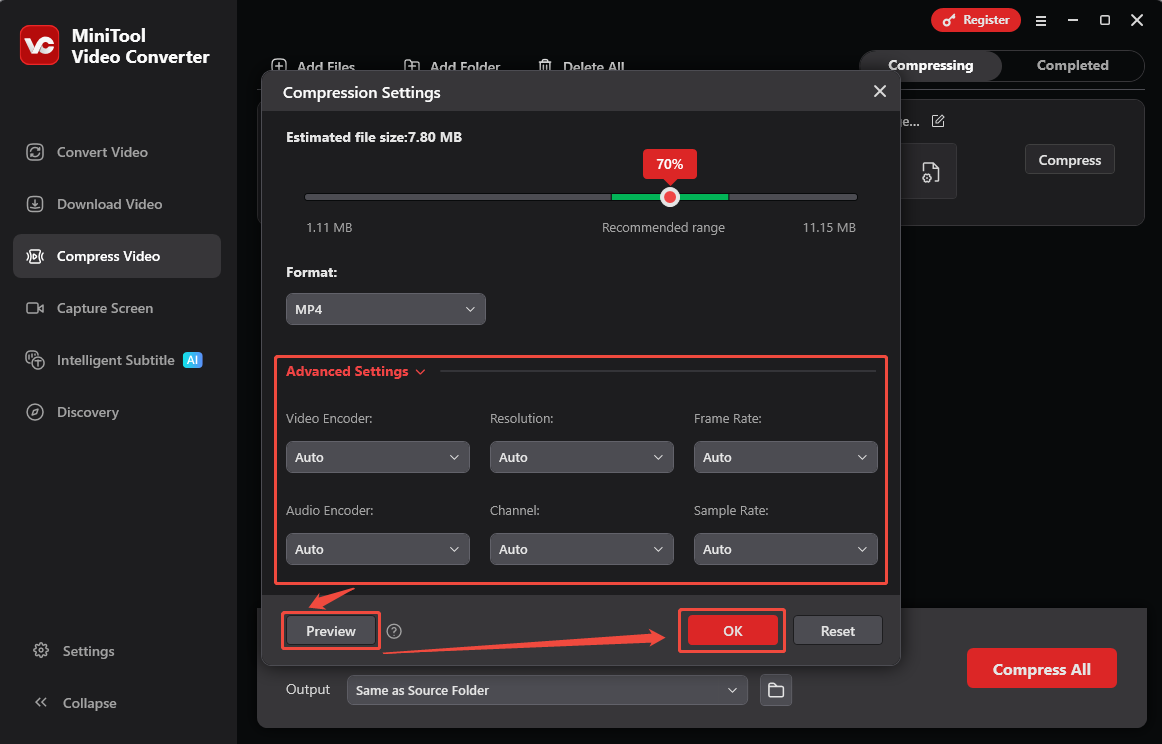
Expand the Advanced Settings option to lower the frame rate, resolution, sample rate, and channel quantities. Plus, click on the Preview option to preview the compressed video. Then, click on the OK button to apply the compression options.
Step 4. Start the Compression
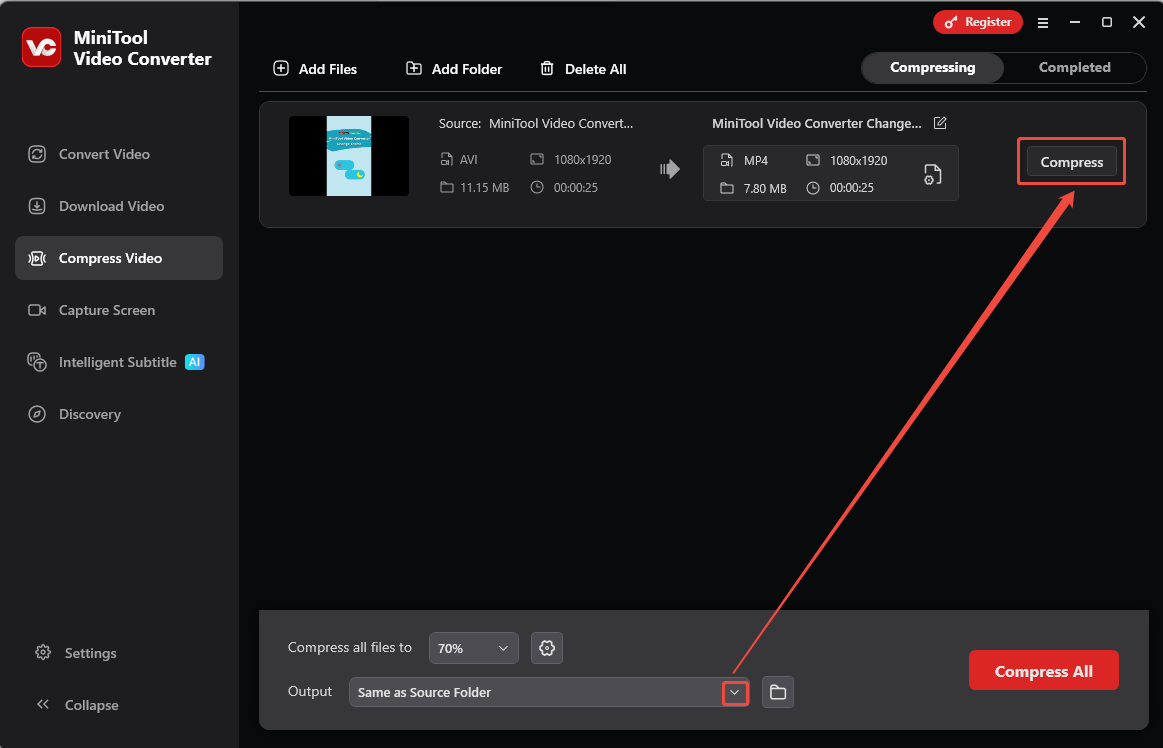
Expand the Output option at the bottom to select a storage location. Then, click on the Compress button to start the compression.
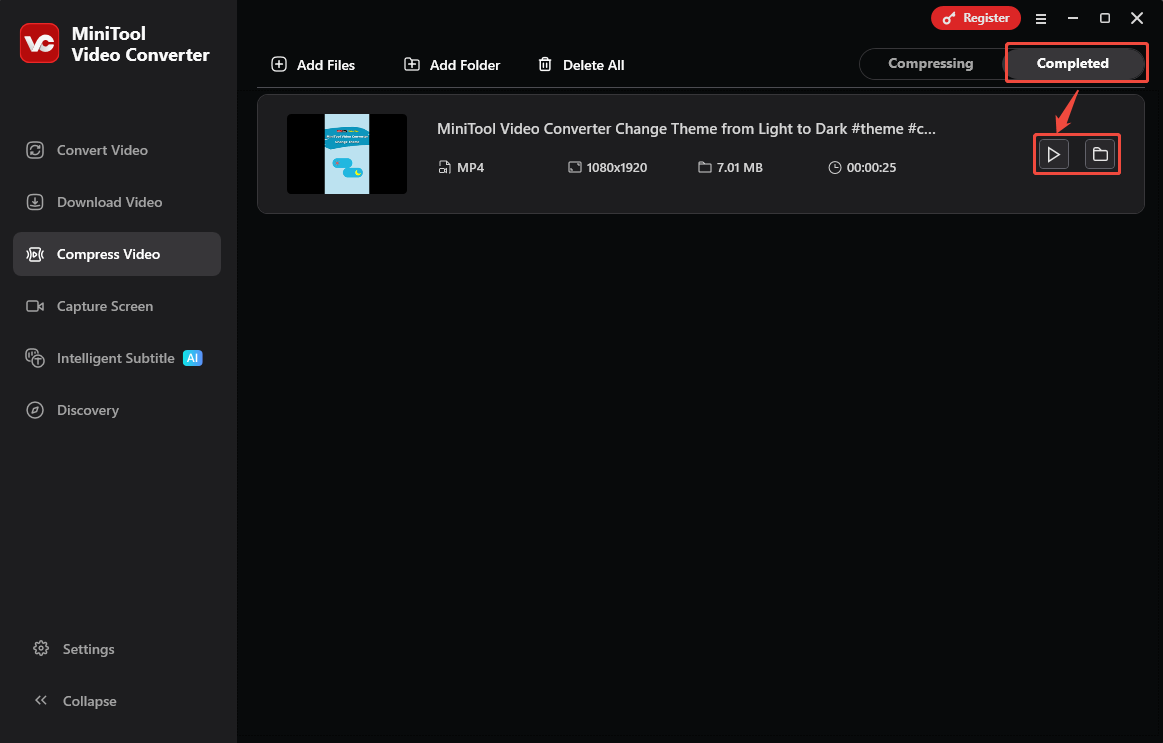
Step 5. Check the Compressed Video
When the compression process is completed, click on the Play icon under the Completed tab to check the compressed video. Or click on the Folder icon to locate it.
To reduce video size for Wistia, MiniTool Video Converter is an intuitive and handy tool.
2. Online File Compressor (Online)
Online File Compressor is a browser-based compressor that allows you to customize compression parameters between 1 and 65536. What’s more, it enables you to import videos from OneDrive, Dropbox, Google Drive, URL, and Clipboard.
Below is a detailed tutorial on how to compress video for Wistia with Online File Compressor.
Step 1. Go to the Online File Compressor’s Webpage
Visit https://www.compress2go.com/compress-video to enter the Online File Compressor’s webpage.
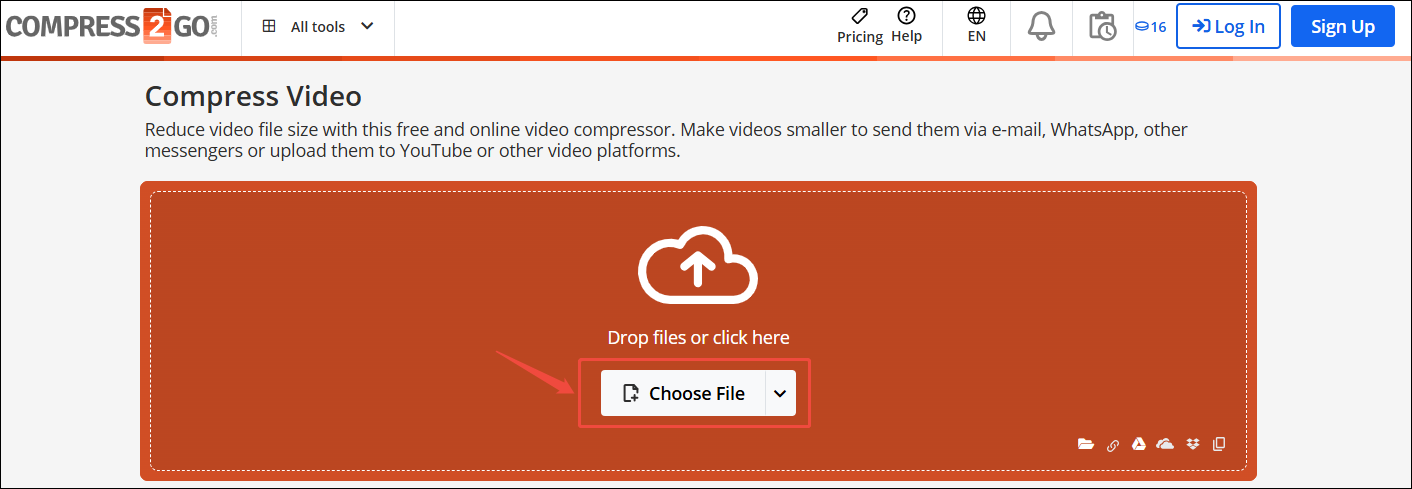
Step 2. Upload Your Target Video
Click on the Choose File option to upload the target video.
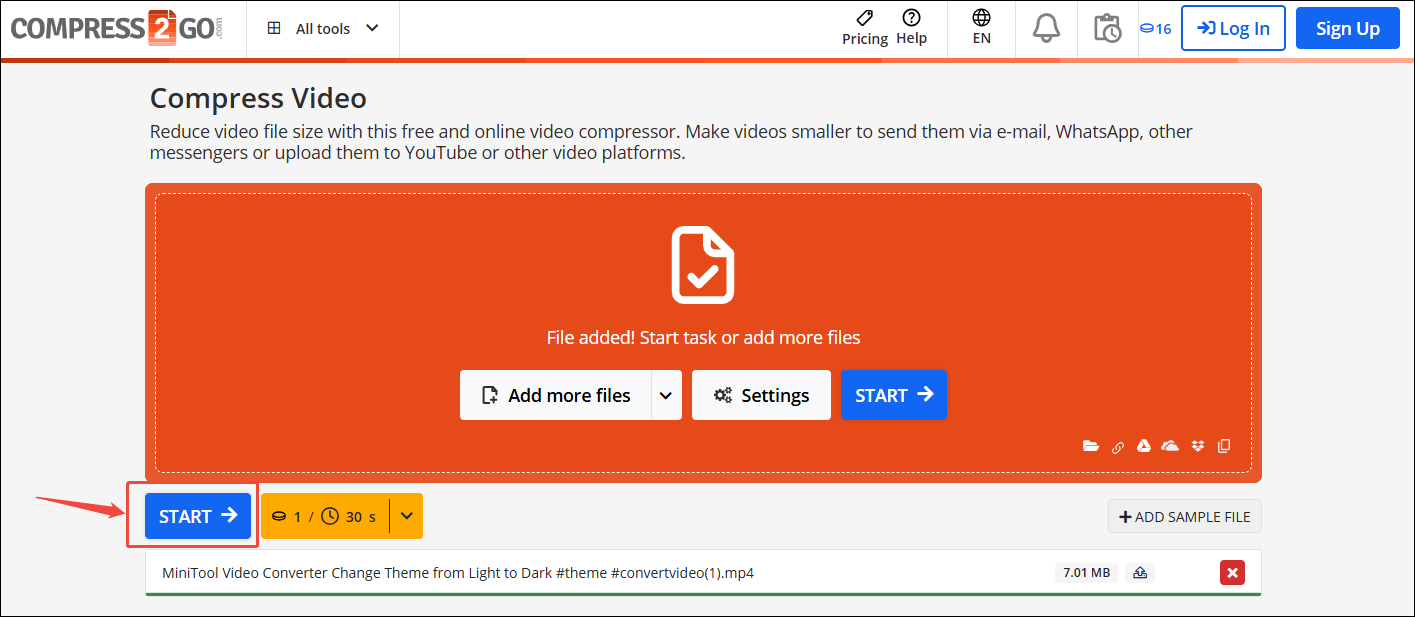
Step 3. Begin the Compression
Click on the START button to begin the compression.
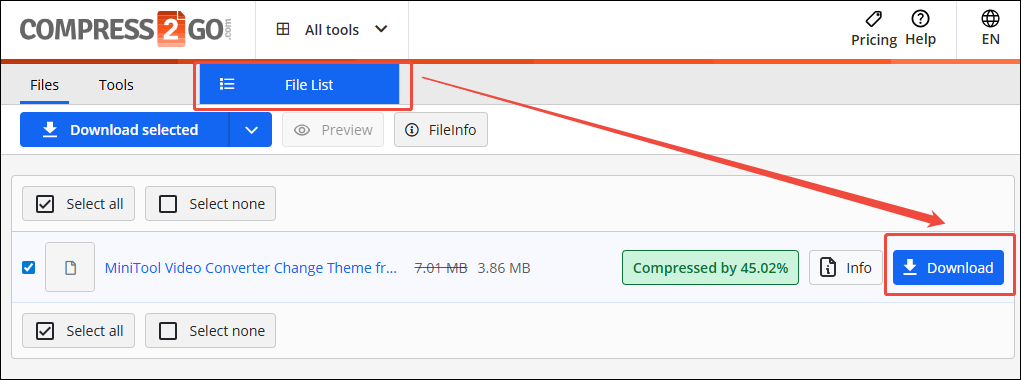
Step 4. Download the Compressed Video
Click on the Download button to save the compressed video.
Although Online File Compressor can compress videos quickly, it offers relatively few adjustable options for the compressed video.
Bottom Line
MiniTool Video Converter and Online File Compressor can easily reduce video size for Wistia. If you want to customize the compressed videos with more advanced options, don’t hesitate and choose MiniTool Video Converter.
User Comments :