Recording a remote desktop session refers to capturing a visual or audio recording of a user's interaction with a remote desktop interface. This is typically used for training, troubleshooting purposes, etc. The recording shows all the actions and events performed by the user on the remote system. The recording can be saved for future reference or shared with other users who need to review the session. How to record remote desktop session? This post from the free MP3 converter will offer you 3 methods to accomplish it.
Joyoshare VidiKit (Screen Recorder)
Joyoshare VidiKit (Screen Recorder) is a powerful recorder and can capture videos at any length with no watermark and time limit. It can be used to record screen, gameplay, and webcam. It’s a handy remote desktop session recorder.
The following are the steps to record a remote desktop session with Joyoshare VidiKit (Screen Recorder).
Step 1. Download, install, and launch Joyoshare VidiKit.
Step 2. Connect to the remote computer.
Step 3. Click Record and hit Screen Recorder to access its recording function.
Step 4. You can record the full screen or click select area to record to record your desired region. If you don’t want to record the system audio, click System Audio to disable it. You can also click Microphone Audio to disable it if needed. Click Preferences to customize the setting of the recording.
Step 5. Click REC to begin the recording process.
Step 6. Click the Stop button to stop the process. You can preview the recorded files in the History window.
iTop Screen Recorder
iTop Screen Recorder is a user-friendly and free screen recorder for Windows. It allows users to capture the computer screen in a few simple steps. It’s no doubt a good method to record the remote desktop session.
Here is the whole procedure.
Step 1. Download and install iTop Screen Recorder. Then connect to the remote computer.
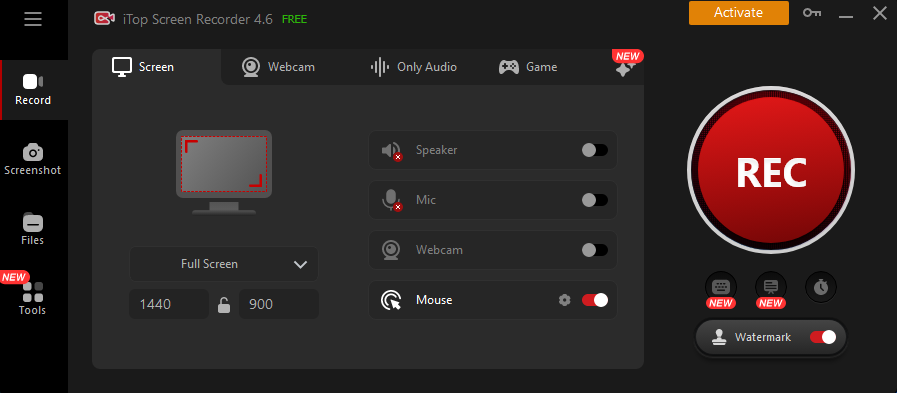
Step 2. Launch it. Click Screen and change the screen recording settings if needed. Click REC to start recording.
Step 3. To finish the process, click the Stop button. Finally, you can click the Files tab to check the recorded video.
TeamViewer
TeamViewer is a robust remote access that allows users to control different devices remotely. Users can use it to hold remote meetings, and transfer files. In addition, it also enables users to record a remote desktop session.
The following are the steps.
Step 1. Launching TeamViewer after downloading and installing it.
Step 2. Go to Settings, click Meeting, and check Auto Record Meeting and Record Participant’s Video.
Step 3. Connect to your partner’s computer. It will automatically start recording once connected.
Step 4. Press Stop when finished and click Save to choose the destination for the recorded video.
MiniTool Video ConverterClick to Download100%Clean & Safe
Conclusion
Recording a remote desktop session can serve various purposes, such as training, troubleshooting, and creating an audit trail. This post provides 3 simple methods to help you record a remote session. Choose the one that suits you the best and start recording now.
User Comments :