GoToWebinar is an online webinar platform. When you participate in a GoToWebinar, you may want to record some important points for future review or to share the valuable content with those who couldn’t attend. Well, you’re in luck! In this article from the free file converter, I will show you how to easily record on GoToWebinar on different devices.
GoToWebinar is an incredibly popular online webinar platform. It offers a seamless experience for hosts to conduct webinars, training sessions, product demos, and more. With features like real-time interaction, screen sharing, and Q&A functionality, it has become a go-to choice for businesses, educators, and professionals. It allows for easy scheduling, inviting participants, and managing the flow of the event during the live session.
How to Record on GoToWebinar with MiniTool Video Converter [Windows]
MiniTool Video Converter is a versatile and user-friendly tool that comes in handy when recording your GoToWebinar sessions.
Screen Recording Features of MiniTool Video Converter
First off, MiniTool Video Converter has a simple and intuitive interface. You’ll find it easy to navigate, even if you are new to screen recording. It allows you to record the full screen or a specific area. You can also choose the record the system audio, microphone, or both. What’s more, you can adjust the recording quality, frame rate, and more.
How to Record GoToWebinar on PC with MiniTool Video Converter
Step 1. Download and install MiniTool Video Converter on your Windows PC.
MiniTool Video ConverterClick to Download100%Clean & Safe
Step 2. Choose the Screen Record option and click the Capture everything you want on your PC screen region to activate the screen recording tool.
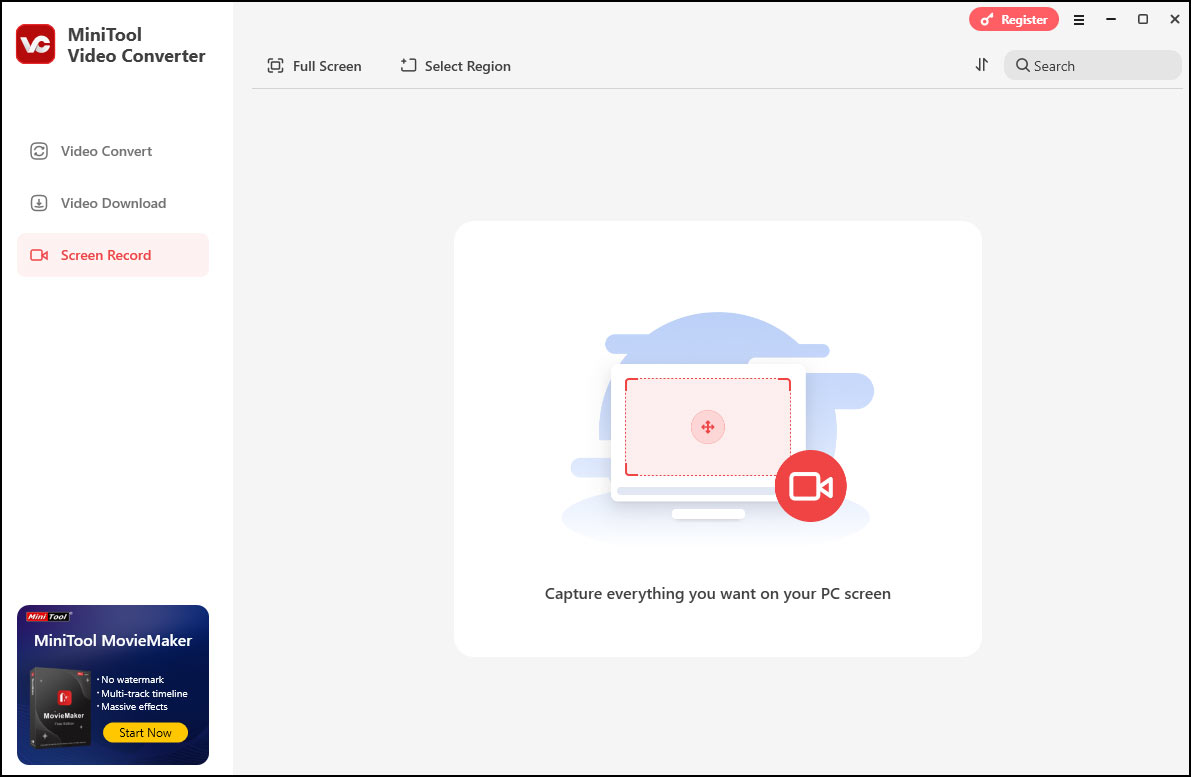
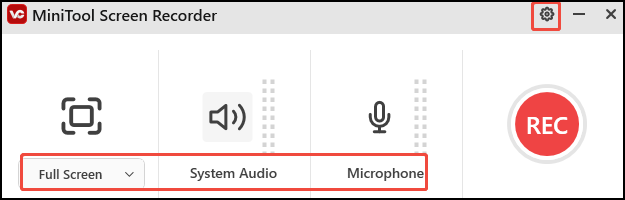
Step 3. Click Full Screen. In the pop-up MiniTool Screen Record panel, choose Select region from the dropdown, and move your cursor to choose your desired recording area.
To record the system audio and the microphone, just click the corresponding icons.
If you want to change more settings, click the gear icon in the top-right corner of the panel.
Step 4. Go to the webinar and click the Record button on the panel or press F6 on your keyboard. After a 3-second countdown, the tool will start recording.
Step 5. During the recording, you can press F9 to pause and resume the process whenever you want.
Step 6. To end the recording, press F6 again. Then, the Screen Record panel will reappear on your screen with the recorded video listed on it. Click the play icon beside it to watch or the file icon to locate it.
How to Record on GoToWebinar with QuickTime Player [Mac]
For Mac users, you can use QuickTime Player to record on GoToWebinar. QuickTime Player is a preinstalled tool on Mac, so you don’t have to go through the hassle of downloading and installing. It allows you to customize the recording area. You can also record the screen with a microphone. However, if you want to capture the system audio, you need a third-party tool like Soundflower.
Here’s how to:
Step 1. Open QuickTime Player on your Mac.
Step 2. Click File in the top menu bar. From the drop-down menu, choose the New Screen Recording option.
Step 3. Click Options to choose the microphone audio input.
Step 4. Click the Record button and click anywhere on your screen if you want to record the full screen. Alternatively, drag your mouse to select a recording area and click Start Recording.
Step 5. To end it, click the Stop button or press Command + Control + Escape.
How to Record on GoToWebinar with Koala Screen Recorder [Android]
If you participate in a GoToWebinar with your Android phone, you can use Koala Screen Recorder to record it. Although an Android phone normally has a built-in recorder, Koala Screen Recorder offers more advanced features and gives you many controls over the recording.
This tool has an intuitive interface, making it easy to navigate. You can choose to record the screen with or without audio. You can also adjust the recording resolution, frame rate, bitrate, and screen orientation.
Here are the steps.
Step 1. Download and install Koala Screen Recorder.
Step 2. Open it and adjust the recording audio source, resolution, storage, etc. before recording.
Step 3. Click the Rec button to start recording.
Step 4. When you want to stop the recording, click the stop button.
Conclusion
There you are. Now you know how to record a webinar on GoToWebinar on Windows, Mac, and Android. Pick one tool that best suits your needs and let the fun begin.
User Comments :