How to Record on Gigabyte Laptop Using Built-in Tool
First off, let’s talk about the tools that come right with your Windows operating system on your Gigabyte laptop – X Game Bar. The Game Bar in Windows 10 and 11 is the most direct method for recording activities on your computer screen, not just for gaming recordings. With it, you don’t have to download and install extra software on your device.
Here are the steps.
Step 1. To access X Game Bar, simply press Windows + G on your keyboard. A small window will pop up. If it’s your first time using it, you might see a prompt asking if you want to open the Game Bar. Click Yes.
Step 2. Once the Game Bar is open, you’ll see a row of icons. Click the Start recording icon (grey circle-shaped icon) in the Capture window or press Windows + Alt + R to start recording.
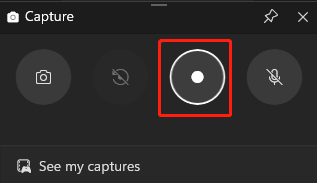
Step 3. To end the process, click the Stop recording icon (a white square icon) or press the Windows + Alt + R keys.
How to Record on Gigabyte Laptop Using Third-Party Software
Although X Game Bar is convenient, it has some limitations. For example, you can’t adjust the recording area. What if you want to record a specific area of your screen? Then you can resort to third-party screen recording software. According to my experience, I have listed 3 free tools for this tool. Let’s have a look.
1. MiniTool Video Converter
MiniTool Video Converter is my go-to choice for recording Windows PC. It’s free, easy, and feature-rich. It has a clear interface, making it easy to navigate. It allows you to adjust the recording area, source, quality, and others. Whether you want to capture streaming videos, gameplay, etc., it has you covered. Additionally, MiniTool Video Converter doesn’t have time limitations or watermarks
Step 1. Hit the button to download and install MiniTool Video Converter on your PC. Then, run it.
MiniTool Video ConverterClick to Download100%Clean & Safe
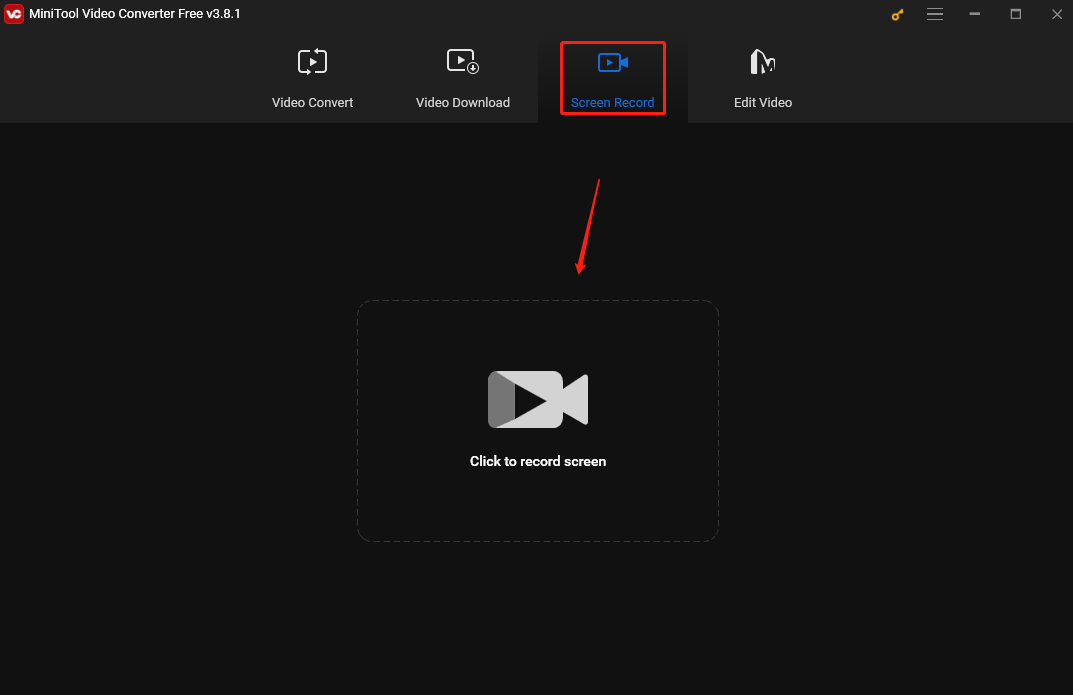
Step 2. Click Screen Record and hit the Click to record screen region to access MiniTool Screen Recorder.
Step 3. To customize a recording area, click Full screen in the MiniTool Screen Record panel, choose Select region from the dropdown, and then move your cursor to choose the area. You can also stick with the default settings to capture the whole screen. To choose the recording audio source, click the System Audio and Microphone icons to turn them on/off.
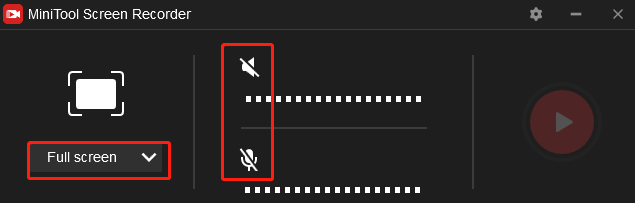
Step 4. To begin recording, press the F6 key or click the Record button.
Step 5. Press F6 to stop it. Then MiniTool Screen Recorder panel will appear and you can see the recordings here. Right-click the recording on the panel to preview, rename, delete, or locate it.
2. OBS Studio
OBS Studio is a free and open-source software that’s popular among content creators. It’s designed for recording and streaming. This tool can run on Windows, Mac, and Linux. Like MiniTool Video Converter, it allows you to pick which part of your screen you want to record. You can also change the recording frame rate, resolution, and codec.
Step 1. Download and Install OBS Studio on your computer. Then open it.
Step 2. If you want to record gameplay, go to the Source section, click the + icon at the bottom-left corner, and choose Game Capture from the list. If not, you can skip ahead to Step 3.

Step 3. Click Start Recording on the right of OBS to begin the process.
Step 4. To end the recording process, click Stop Recording.
3. iTop Screen Recorder
iTop Screen Recorder is also a good option to record on Gigabyte laptop. It has an intuitive interface and simplifies the process of capturing your PC screen. It allows you to record your screen with audio, and capture the full screen, part of the screen, or a specific window.
Step 1. Download and install iTop Screen Recorder, then open it.
Step 2. Go to Record > Screen. Select the recording area. You can also turn on Mic, and Webcam to record yourself and your voice.
Step 3. Click REC or press F9 to Start Recording.
Step 4. Click the red Stop button to record the process.
Conclusion
Whether wanting to use the built-in Windows tool for simple recordings or opt for third-party software for more professional-grade results, there’s an option for you in this post. Hope you have a happy recording experience!
User Comments :