This article focuses on how frame rate affects video and audio sync. It also details 3 tools with step-by-step guides to adjust frame rate, including MiniTool Video Converter, MiniTool MovieMaker, and CloudConvert.
About Frame Rate
Frame rate refers to the number of images that appear in one second continuously. It enables these images to switch quickly to form a dynamic effect. A high frame rate makes the playback of videos, movies, and TV shows smooth.
Frame rate uses fps as its measured unit. If a video includes 24 continuous images per second to form a dynamic effect, the frame rate of the video is 24 fps.
About Audio-to-Video Sync
Audio and video sync means that the audio content and the video content in the video must be aligned without a time difference. The sync error can be measured as a numerical value. A positive number means that the audio precedes the video, while a negative number means that the video precedes the audio.
Why Frame Rate Affects Video and Audio Sync
Do you know how frame rate affects video and audio sync? If a video lags, it causes the frame rate to drop. The video playback will slow down, which will cause a time difference with the normal audio playback.
To solve the problem of frame rate affects video and audio sync, we can increase the frame rate to make the video and audio sync.
3 Solutions to Fix Video and Audio Sync by Frame Rate
Want to adjust the frame rate to synchronize video and audio? There are 3 excellent tools you should know: MiniTool Video Converter (Offline), MiniTool MovieMaker (Offline), and CloudConvert (Online).
Method 1. MiniTool Video Converter (Offline)
MiniTool Video Converter is what I want to recommend most.
What Is MiniTool Video Converter
MiniTool Video Converter is a comprehensive media file processing tool. It is a completely free video converter and has no ads, bundles, or watermarks. In addition, MiniTool Video Converter supports adjusting video and audio parameters randomly, including frame rate, bitrate, resolution, sampling rate, etc.
MiniTool Video Converter also provides a variety of formats, such as MP4, MOV, DivX, WebM, MP3, OGG, and AIFF, and more.
How to Adjust Frame Rate to Synchronize Video and Audio
Now, I will guide you to adjust the frame rate to make audio and video sync with MiniTool Video Converter.
Step 1. Download and Install MiniTool Video Converter
Click on the download button below to download and install MiniTool Video Converter for free. Then, launch it.
MiniTool Video ConverterClick to Download100%Clean & Safe
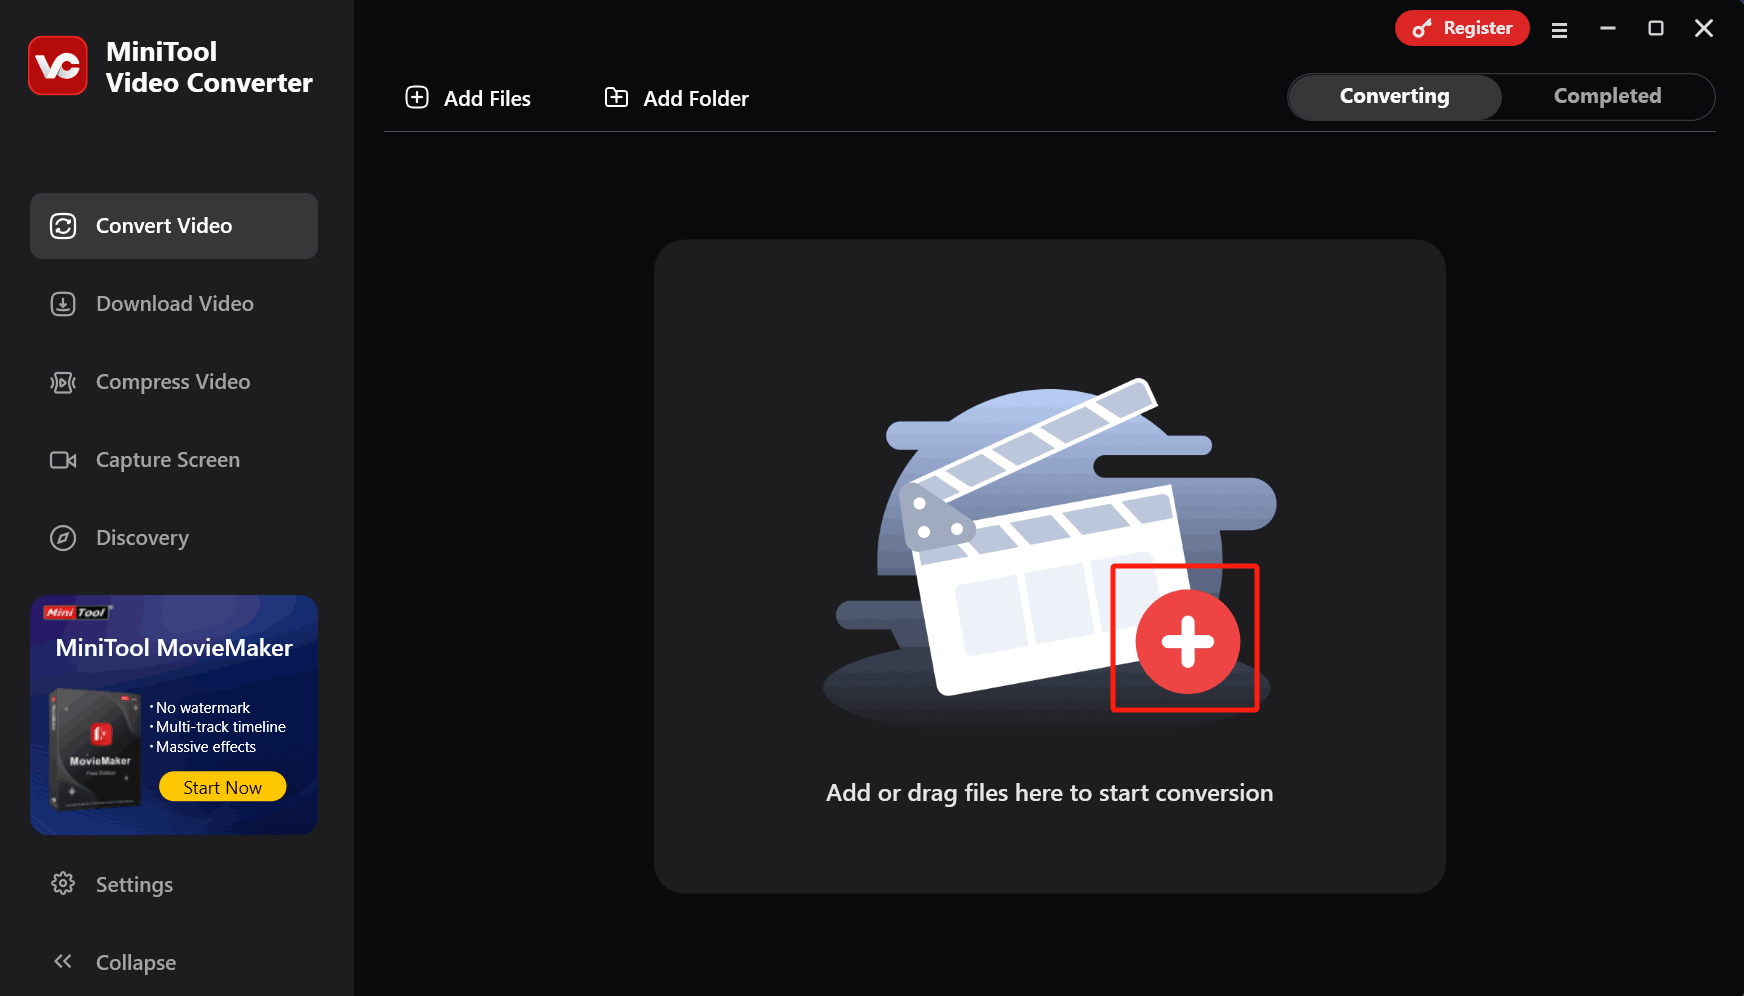
Step 2. Upload the Target Video
After launching MiniTool Video Converter, click on the plus icon to upload the target video.
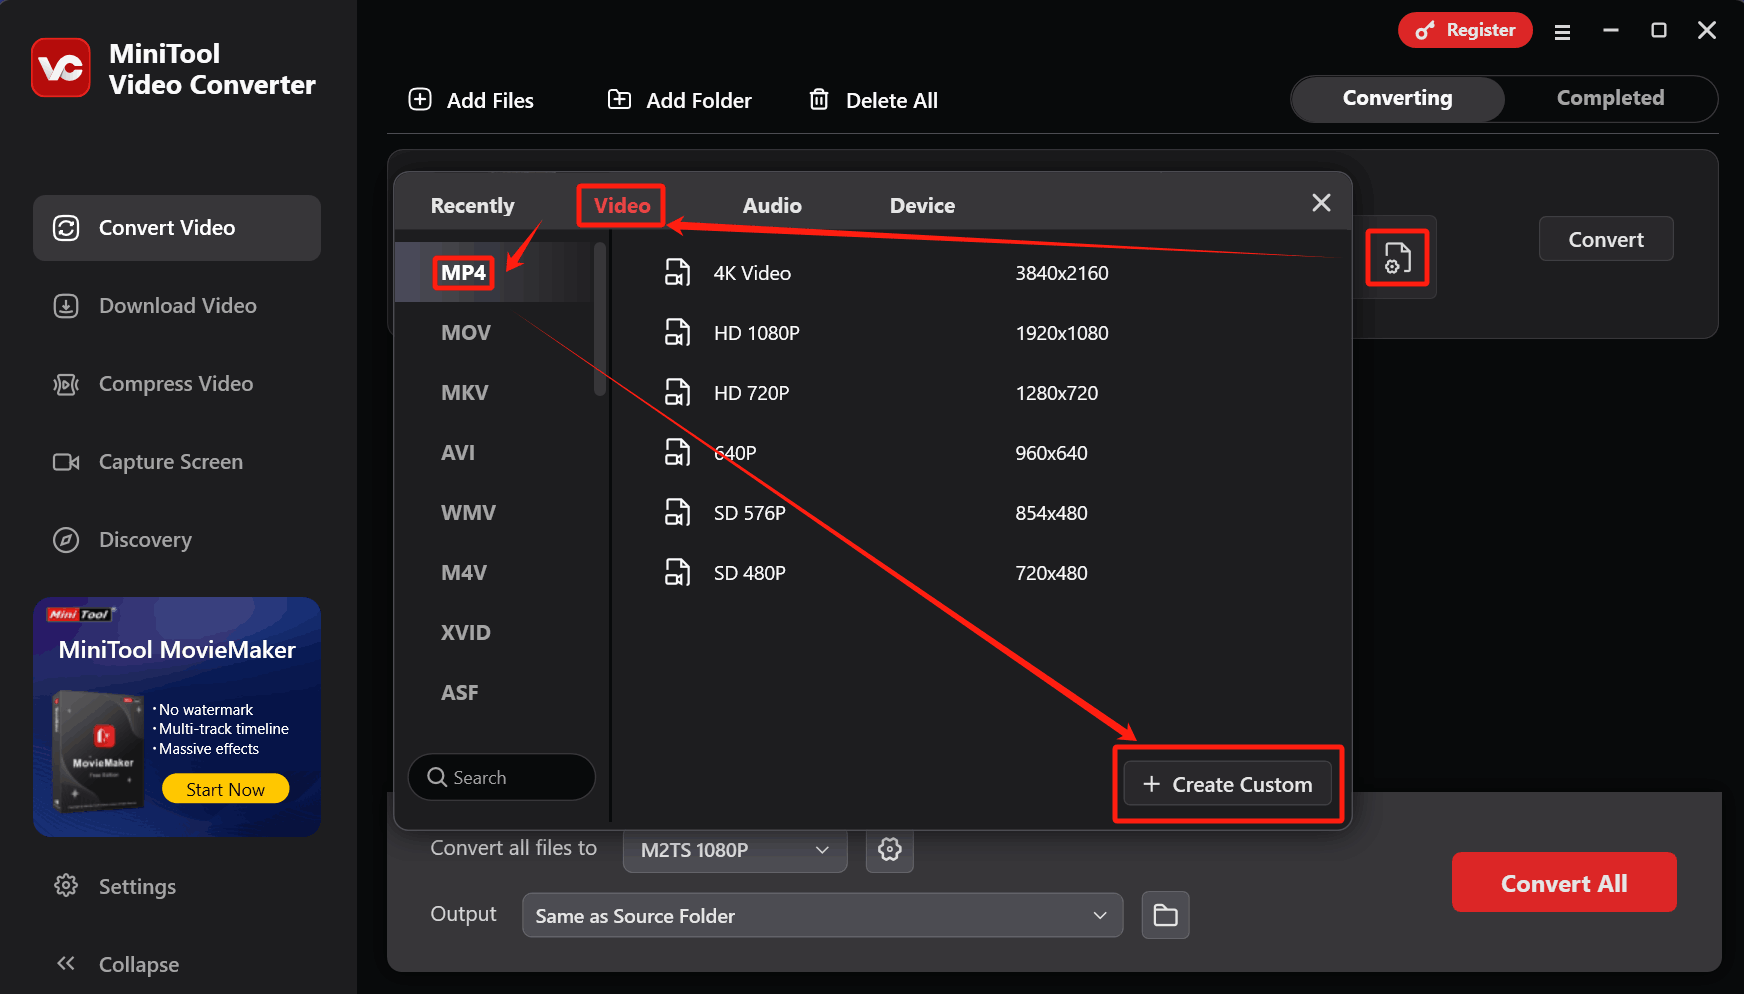
Step 3. Customize the Bitrate
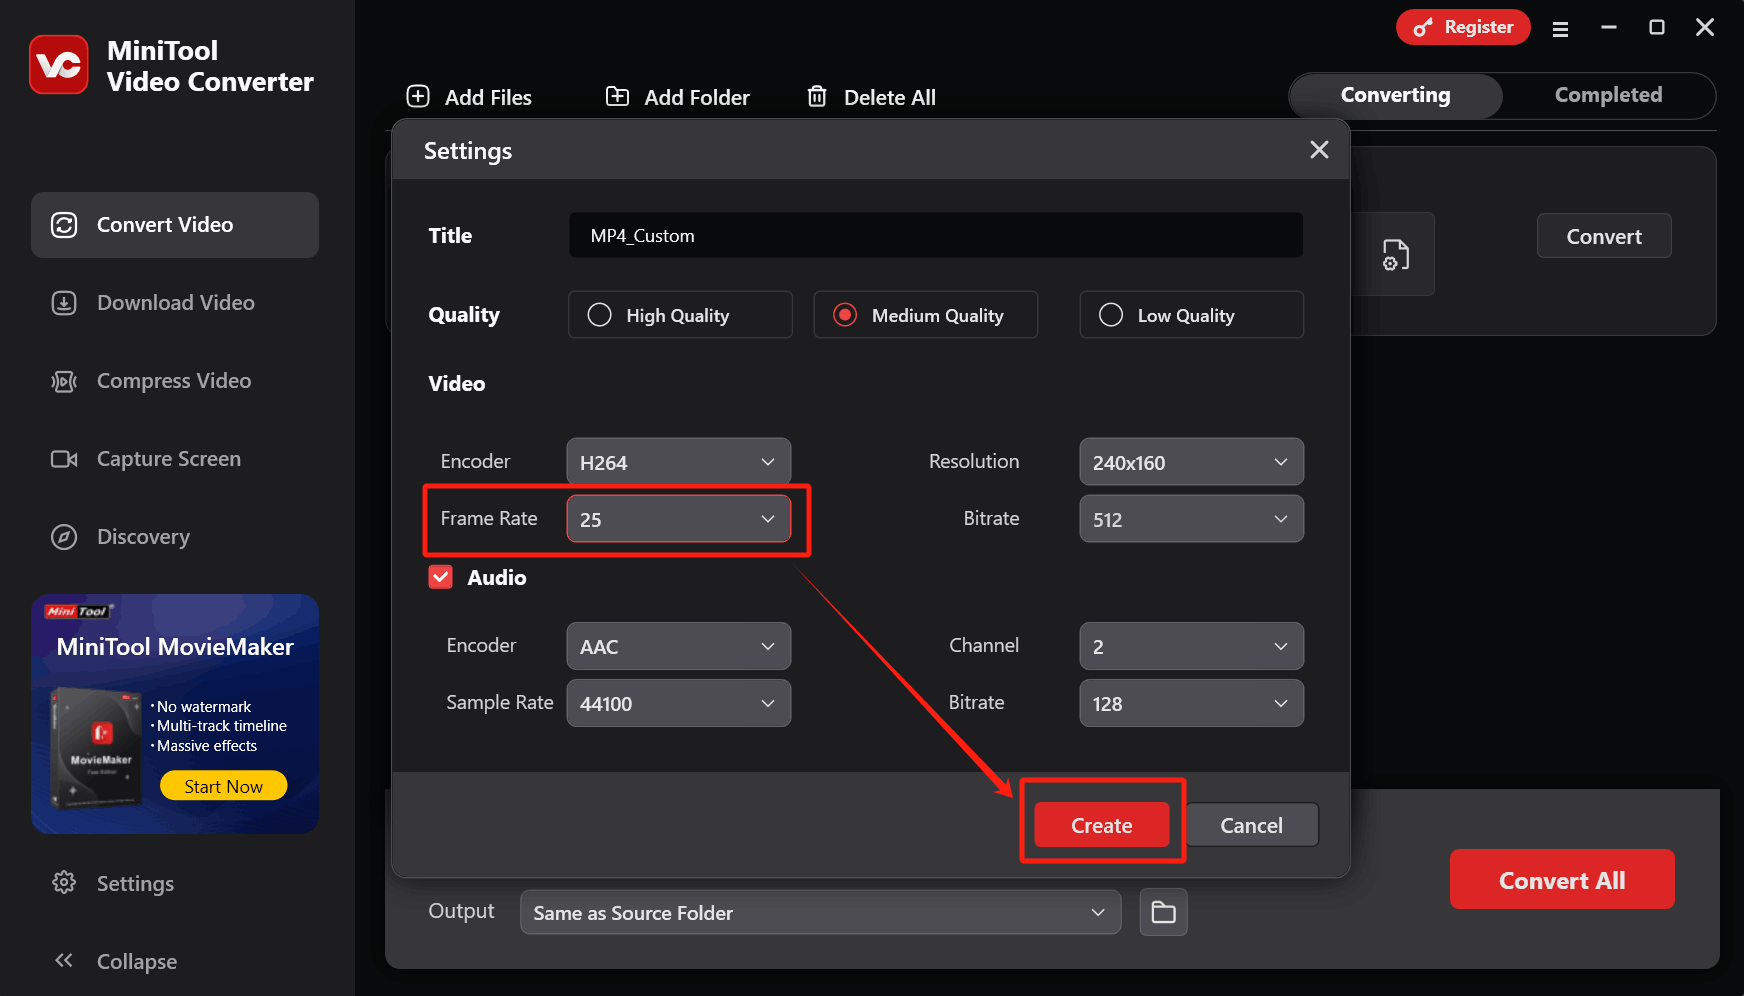
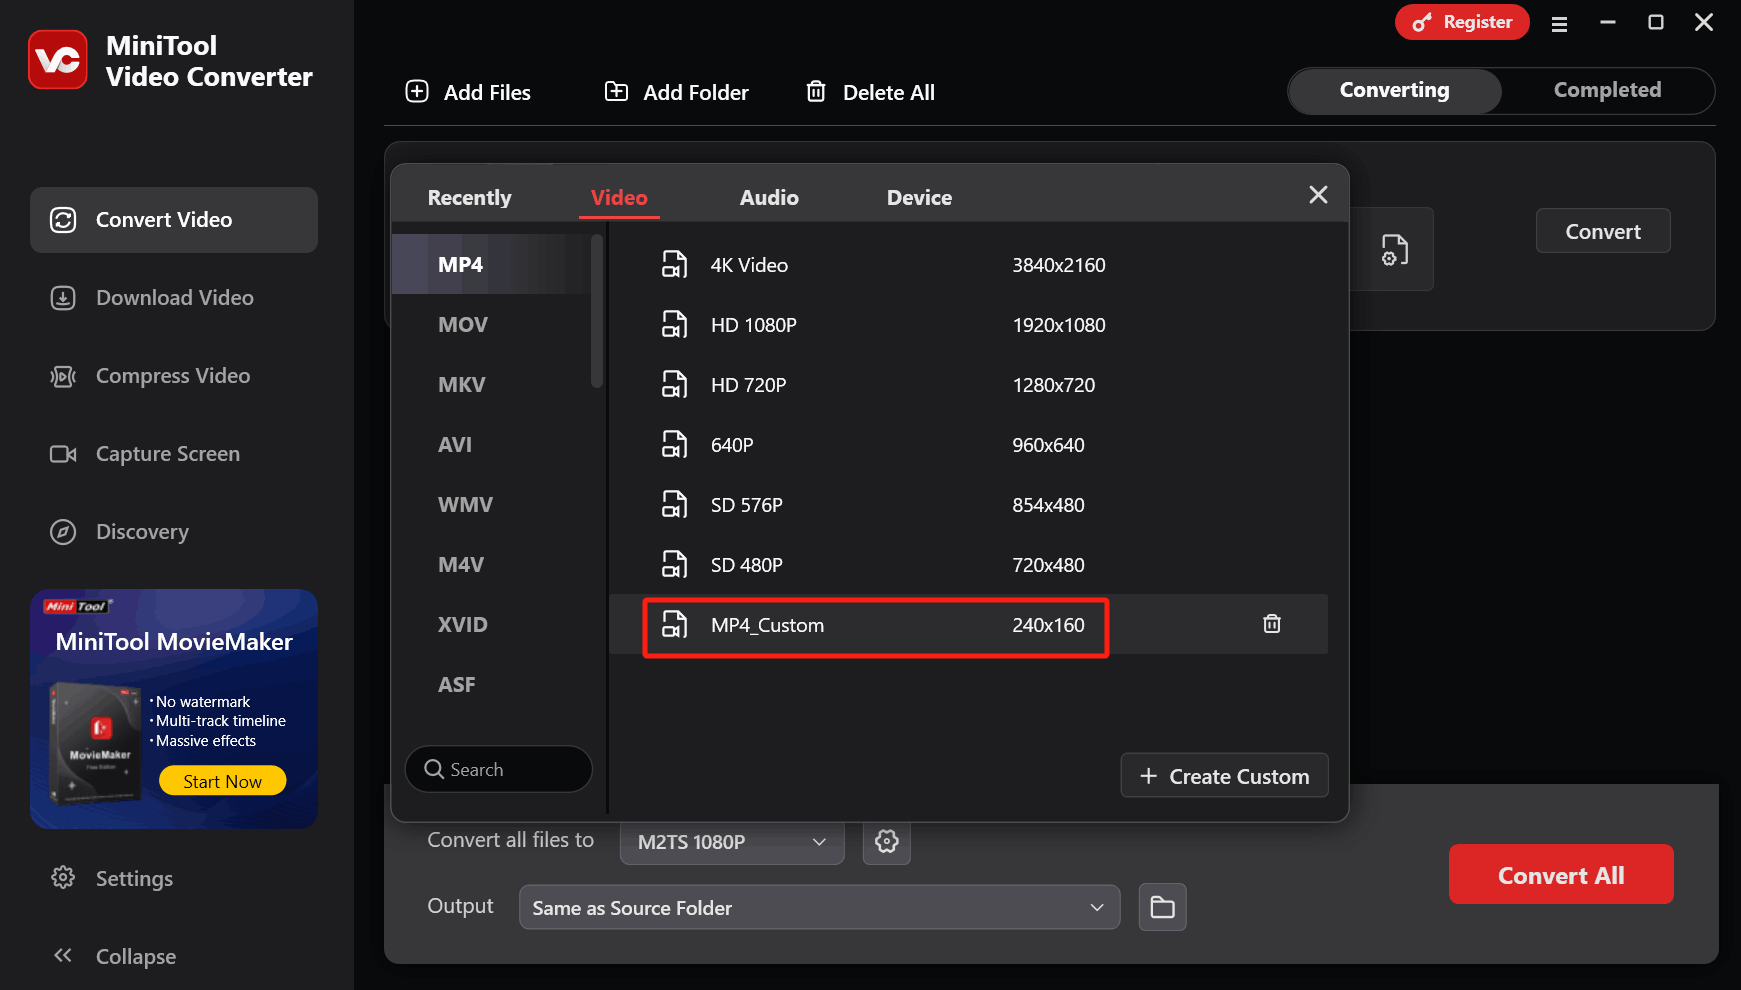
Click on the Settings icon in MiniTool Video Converter to trigger the output format window. There, switch to the Video tab and click on MP4. Then, click on the + Create Custom option in the lower right corner.
In the Settings window, expand the Frame Rate drop-down menu and customize the frame rate according to your needs. Then, click on the Create button to store the changes.
Select the MP4_Custom to set it as the converted format.
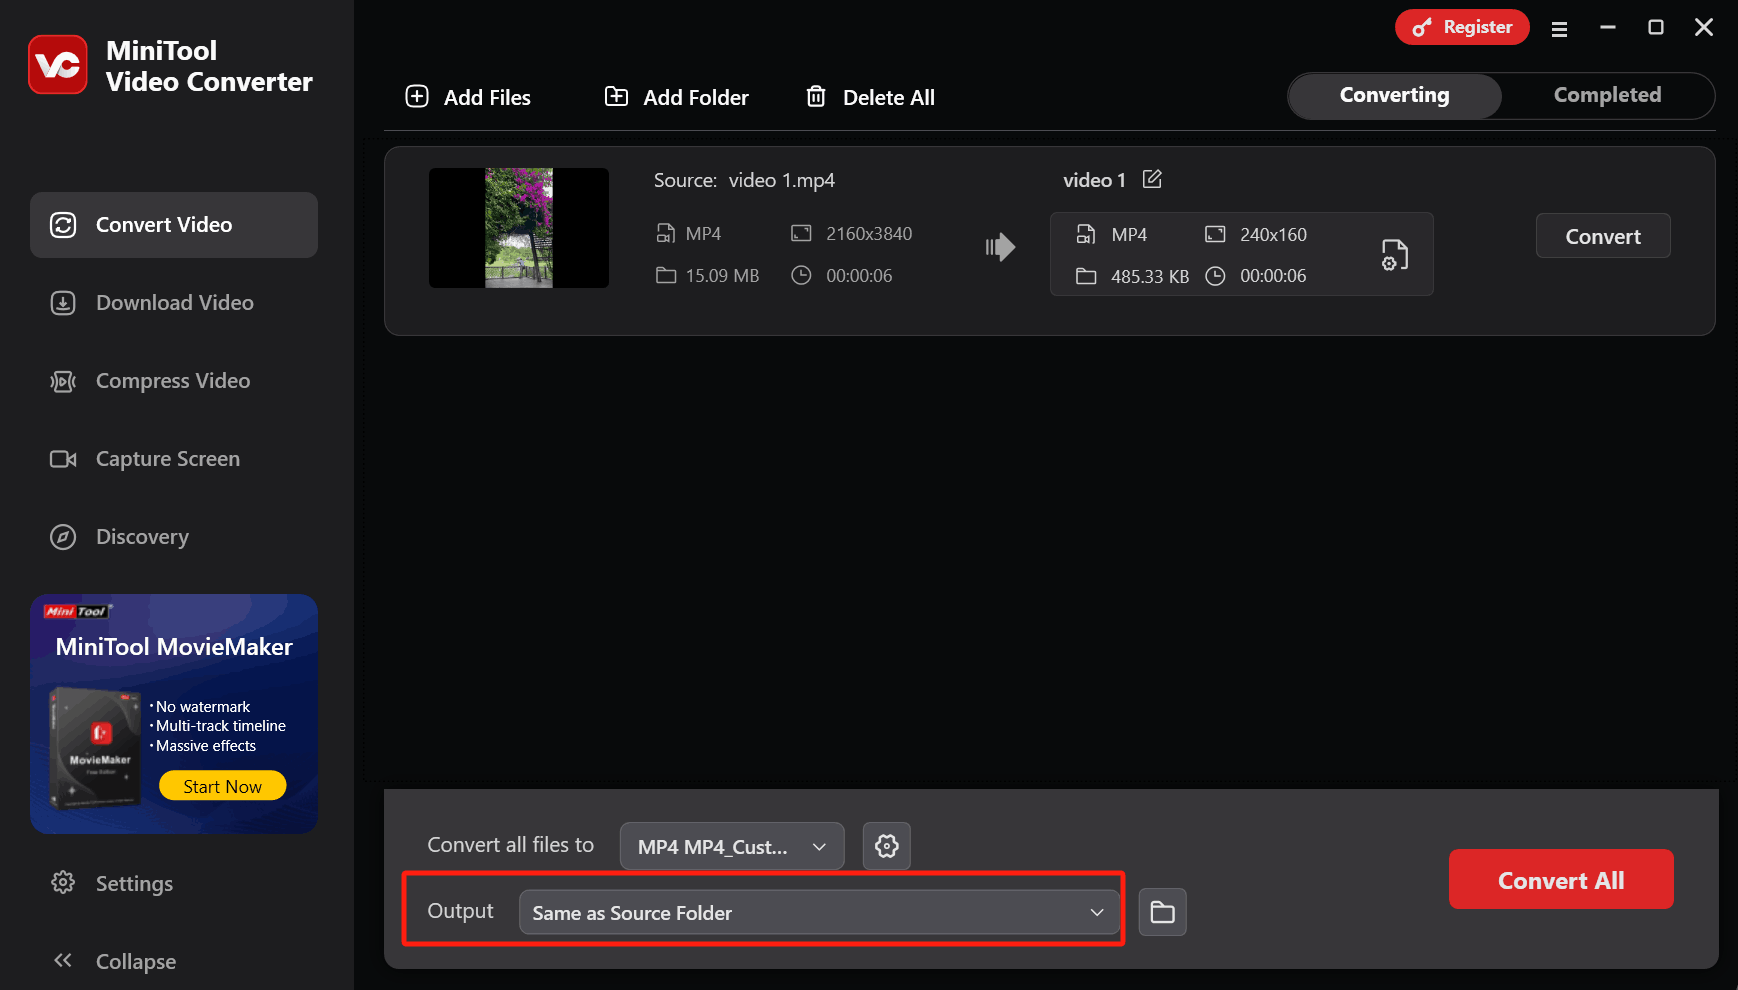
Step 4. Select a Storage Location
Expand the bottom Output option to choose a storage path for the converted video.
Step 5. Start the Conversion Process
Click on the Convert button to start the conversion process.

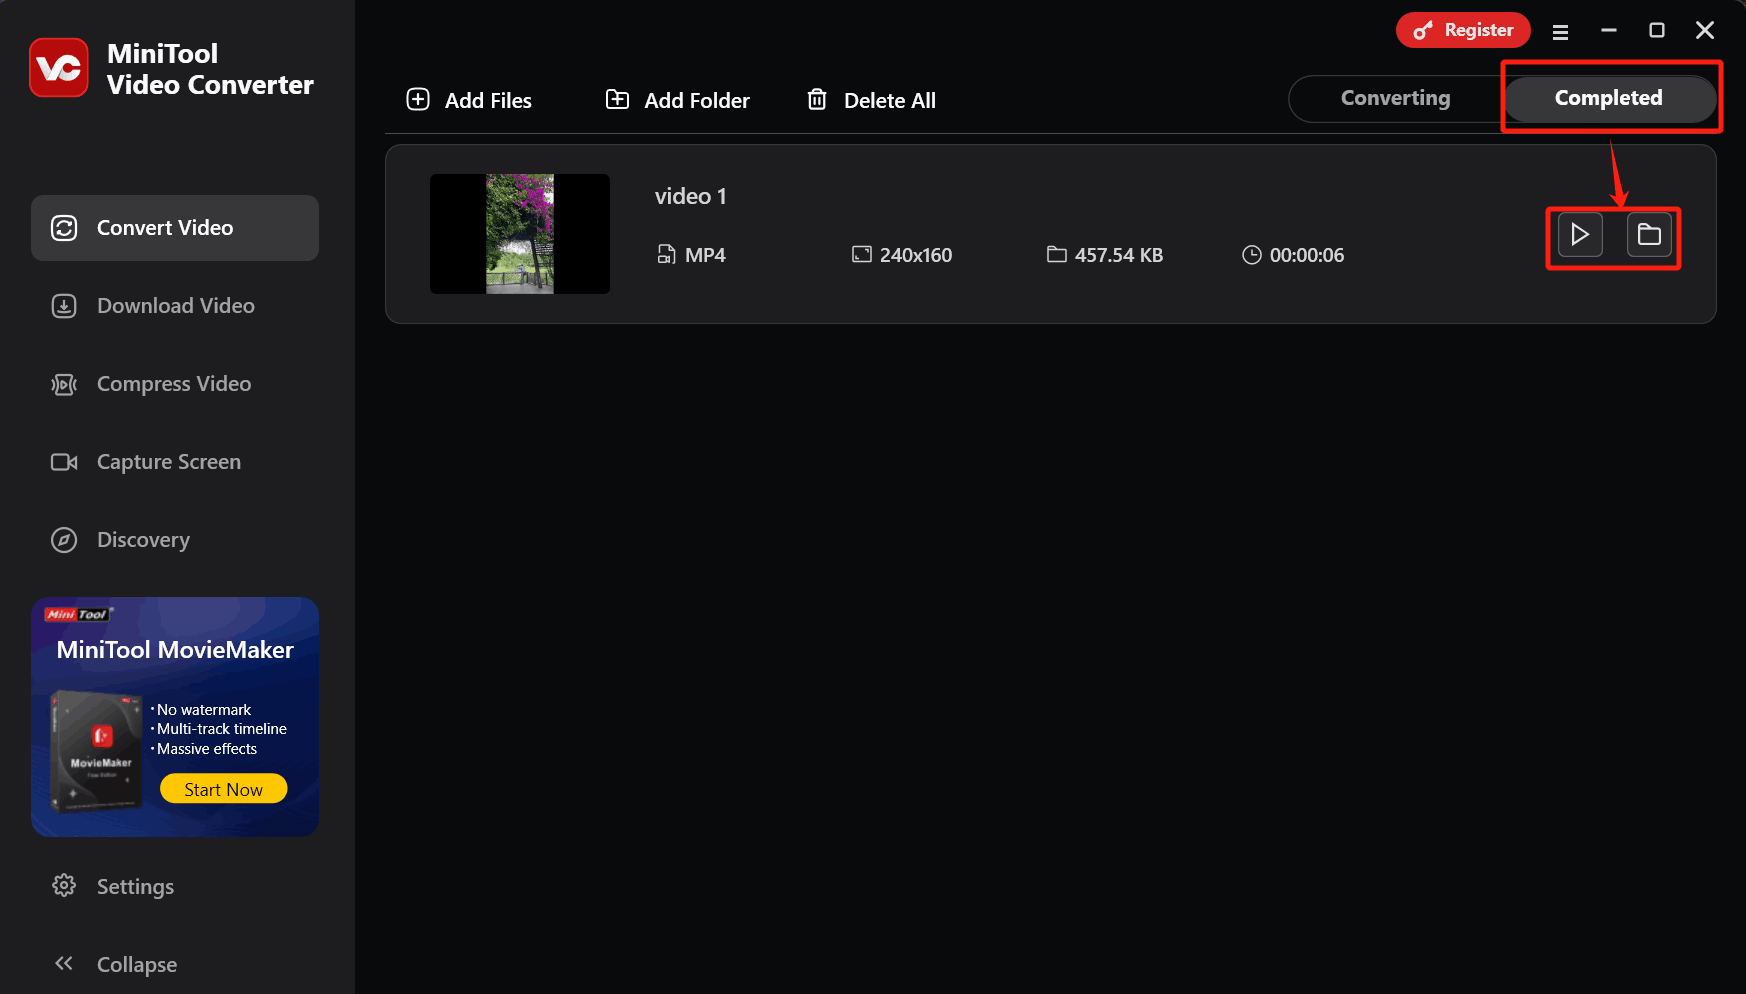
Step 6. Check the Converted File
When the video conversion finishes, the file converter will automatically switch to the Completed tab. There, click on the Play icon to check whether the video and audio are synchronized. Or click on the Folder icon to locate the converted video.
As you can see, MiniTool Video Converter is a can't-miss frame rate changer.
Method 2. MiniTool MovieMaker (Offline)
To adjust the frame rate to synchronize video and audio, I want to recommend another desktop tool: MiniTool MovieMaker.
What Is MiniTool MovieMaker
MiniTool MovieMaker is a professional video editor. It allows for easy adjustment of frame rate, quality, resolution, and more. Additionally, MiniTool MovieMaker supports exporting videos, audio, and pictures to various formats, including MP4 to MKV, MOV to MP3, WEBM to AVI, and more.
Customize the Frame Fate to Synchronize Video and Audio via MiniTool MovieMaker
Below is a detailed guide on how to adjust the frame rate with MiniTool MovieMaker.
Step 1. Download and install MiniTool MovieMaker.
Download MiniTool MovieMaker by clicking on the download button below. Then, install and run it.
MiniTool MovieMakerClick to Download100%Clean & Safe
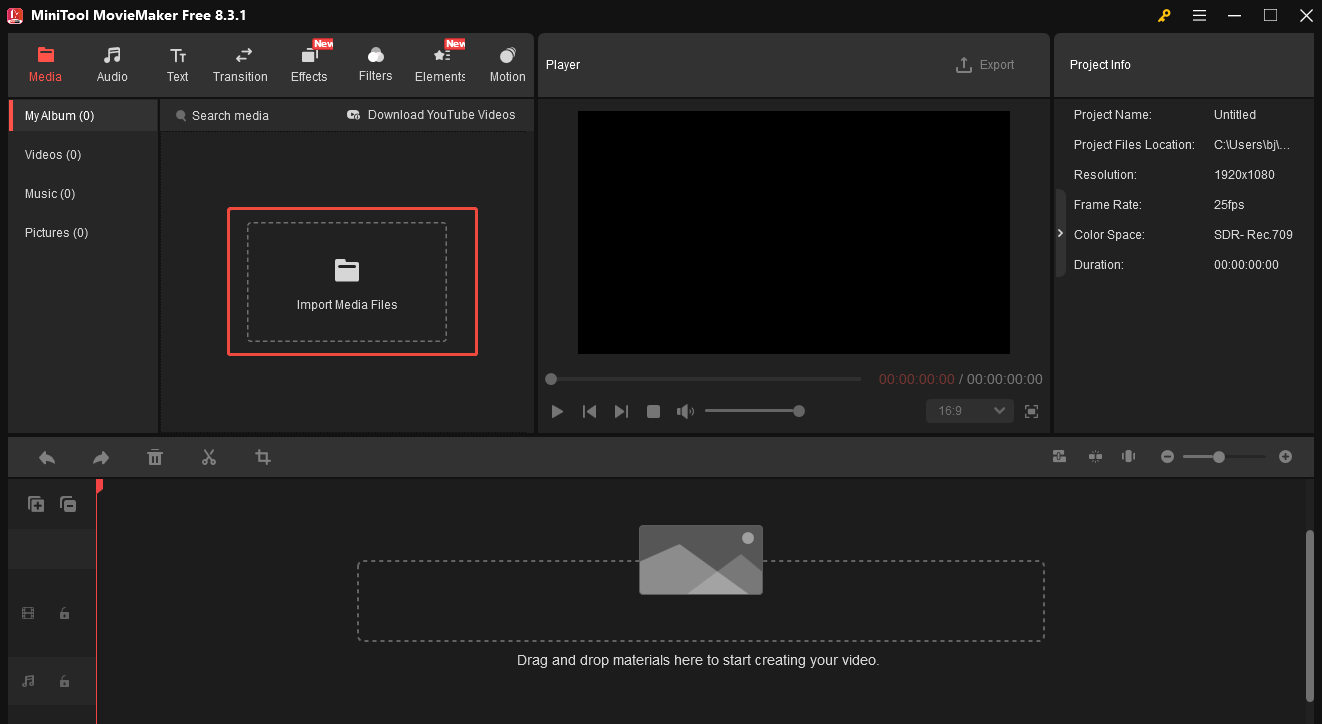
Step 2. Import the target file.
After launching MiniTool MovieMaker, close the promotion Window and enter the main interface. There, click on the Import Media Files area to import the target file.
Step 3. Add the file to the timeline.
Drag the imported file onto the timeline below. Here, you can also customize your video by trimming, flipping, cropping, and splitting it.

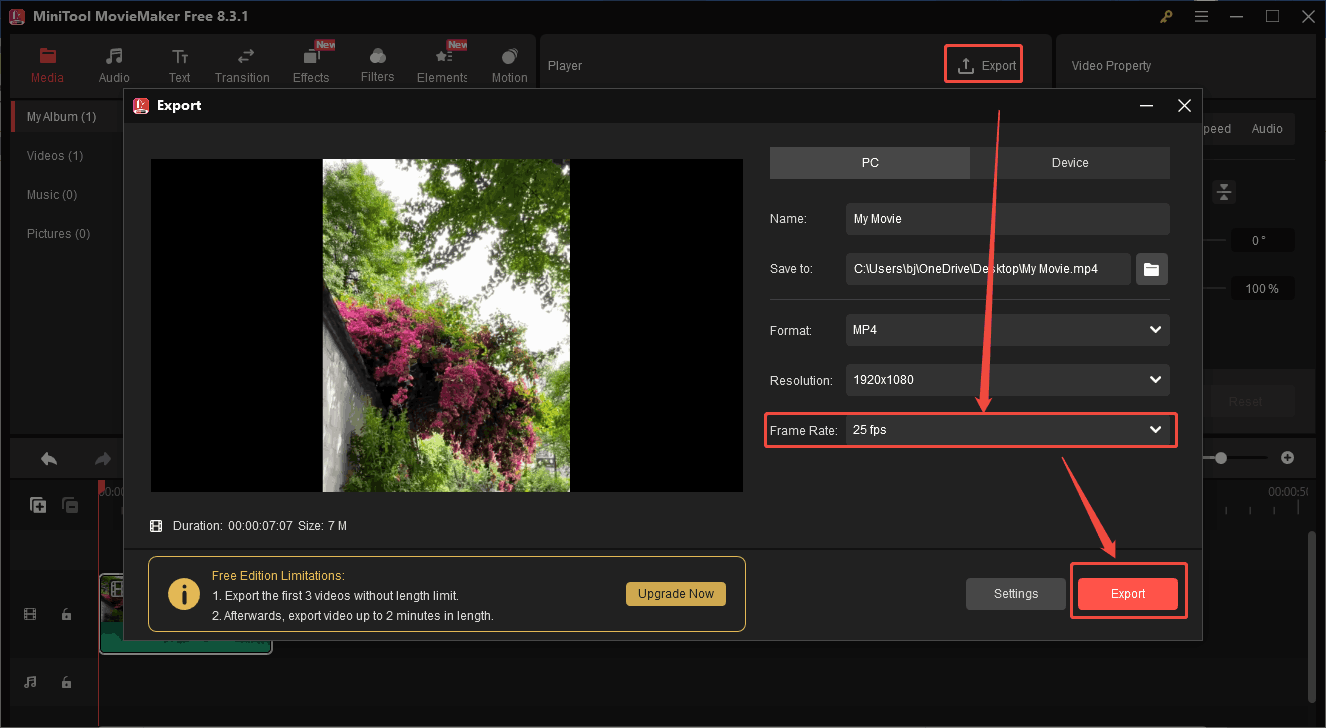
Step 4. Adjust the output settings and start the export process.
Click on the Export icon at the upper right of the Player window to enter the Export window. There, expand the Frame Rate option and choose the frame rate you want. Then, click on the bottom-right Export button to start saving the output video.
Step 5. Check the output video.
When the export process ends, click on the Find Target button to check the exported video.
As you can see, MiniTool MovieMaker is an amazing tool.
Method 3. CloudConvert (Online)
If you want an online method, never miss CloudConvert.
What Is CloudConvert
CloudConvert is an online file converter. It supports adjusting the frame rate with simple clicks. CloudConvert supports over 200 formats for conversion. It is easy to use and makes a safe and quick conversion process.
How to Change Frame Rate to Make Video and Audio Sync with CloudConvert
Next, I will show you how to adjust the frame rate using CloudConvert.
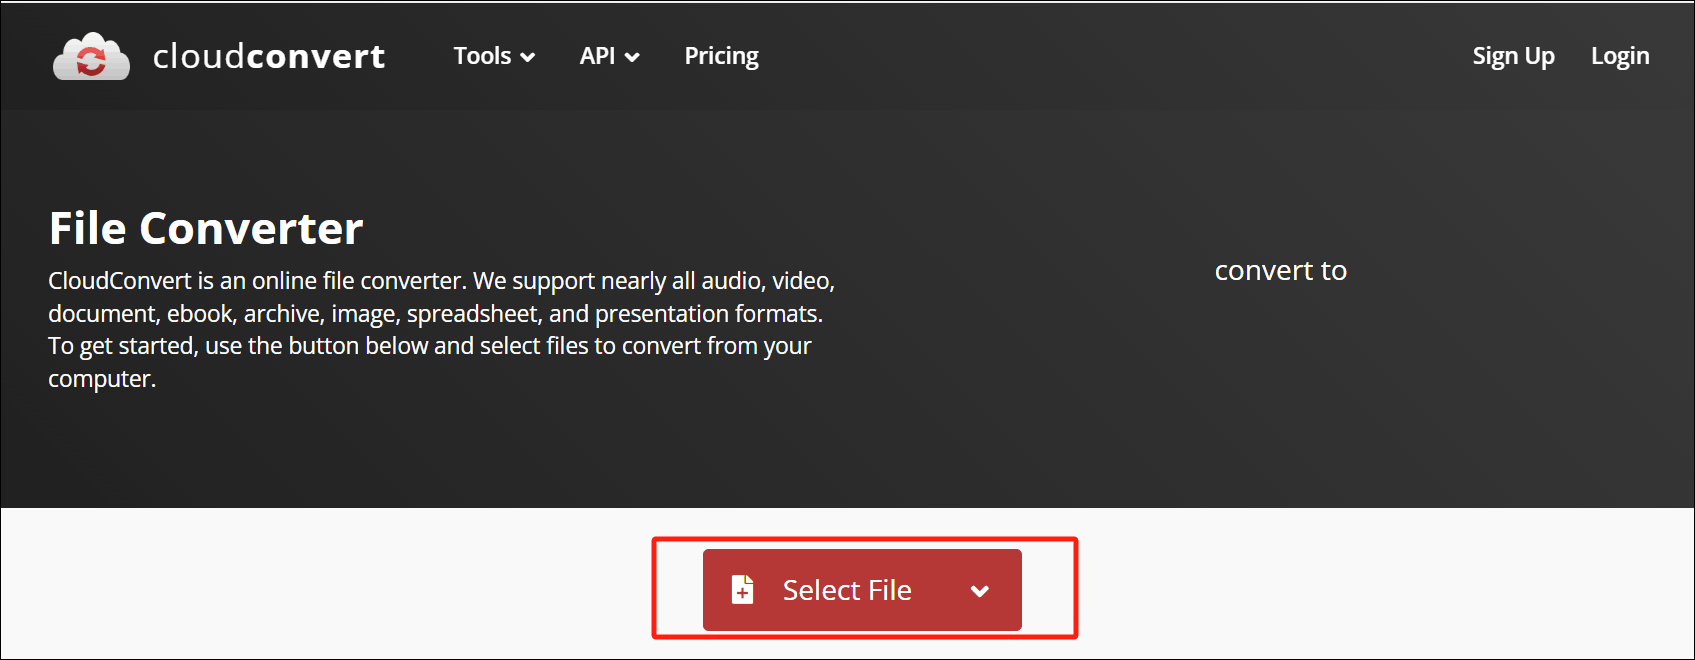
Step 1. Go to the interface of CloudConvert.
Go to https://cloudconvert.com/.
Step 2. Upload the target file.
Click on the Select File option to upload the target file.
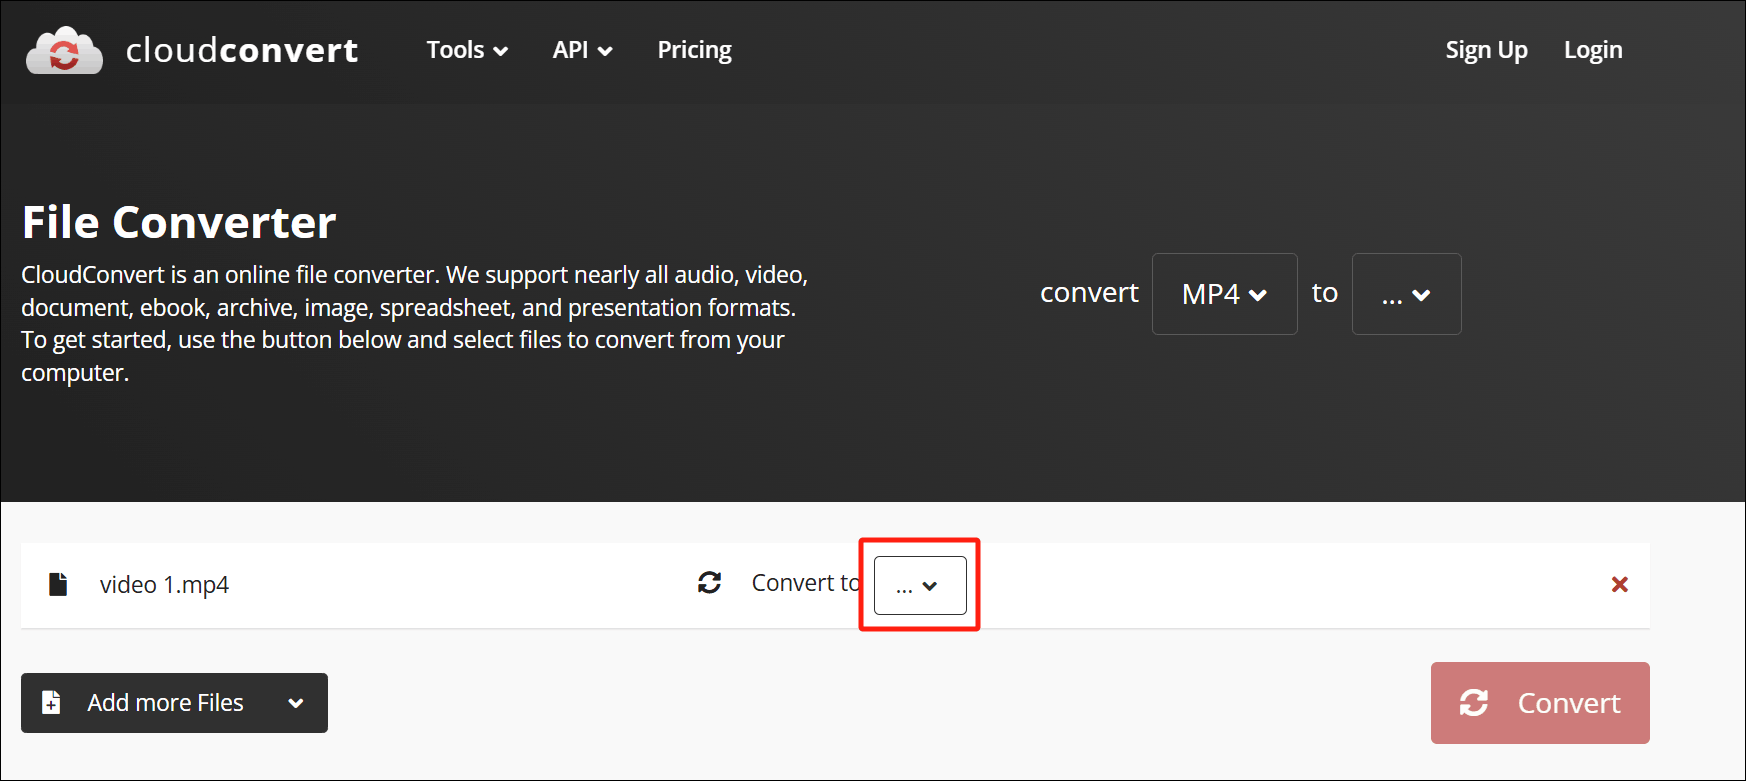
Step 3. Choose an output format.
Expand the Convert to option to choose an output format. Here, I select MP4.
Step 4. Customize the frame rate.
Click on the wrench icon to open the Options window.

Input the frame rate into the Fps option according to your needs.
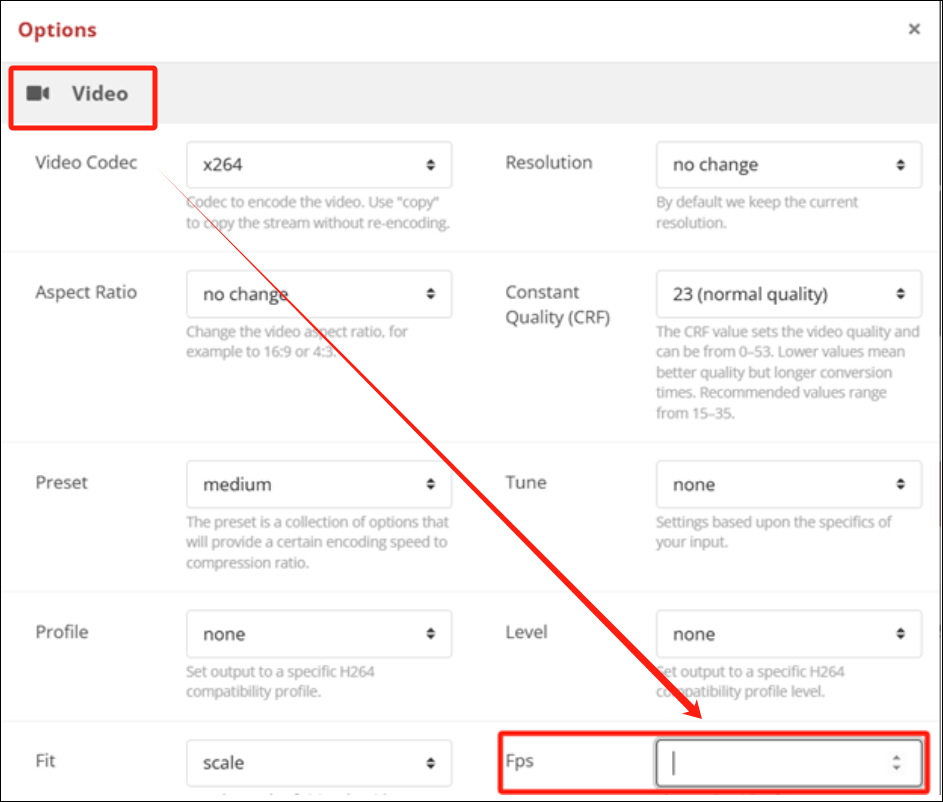
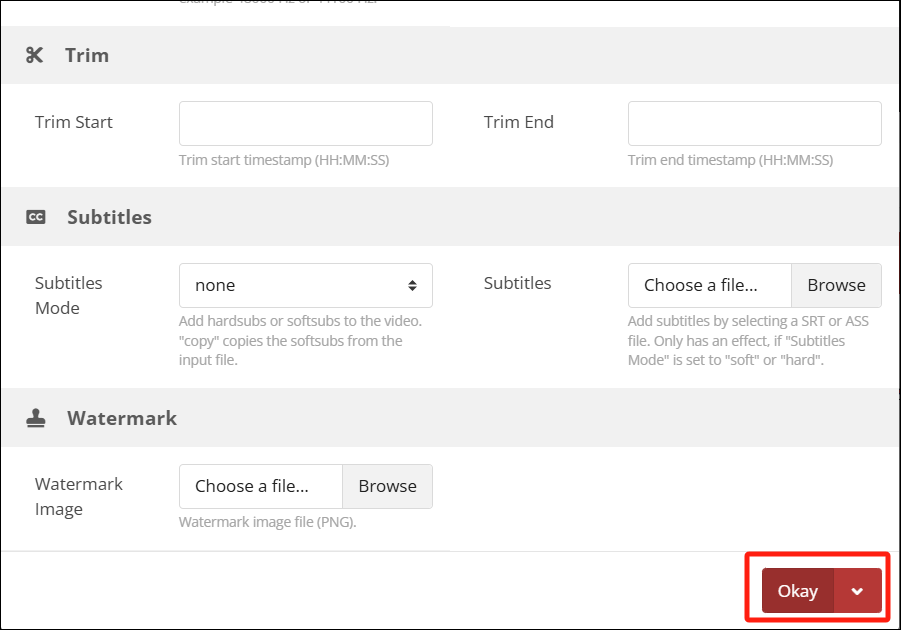
Click on the Okay button to save the changes.
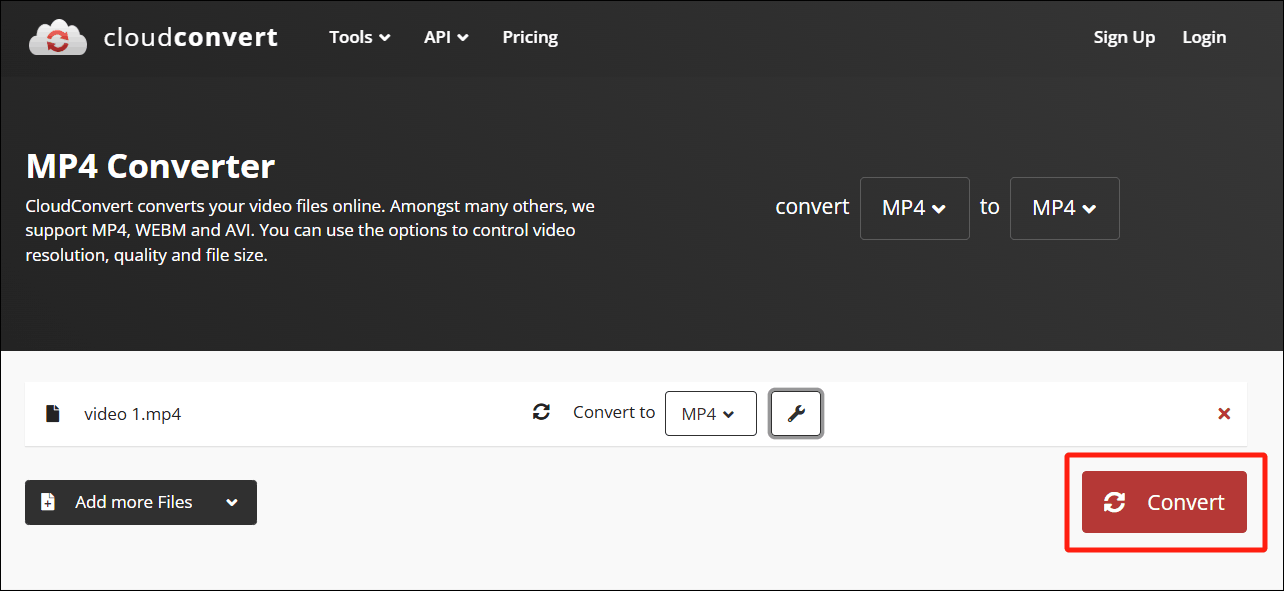
Step 5. Begin the conversion.
Click on the Convert button to begin the conversion.
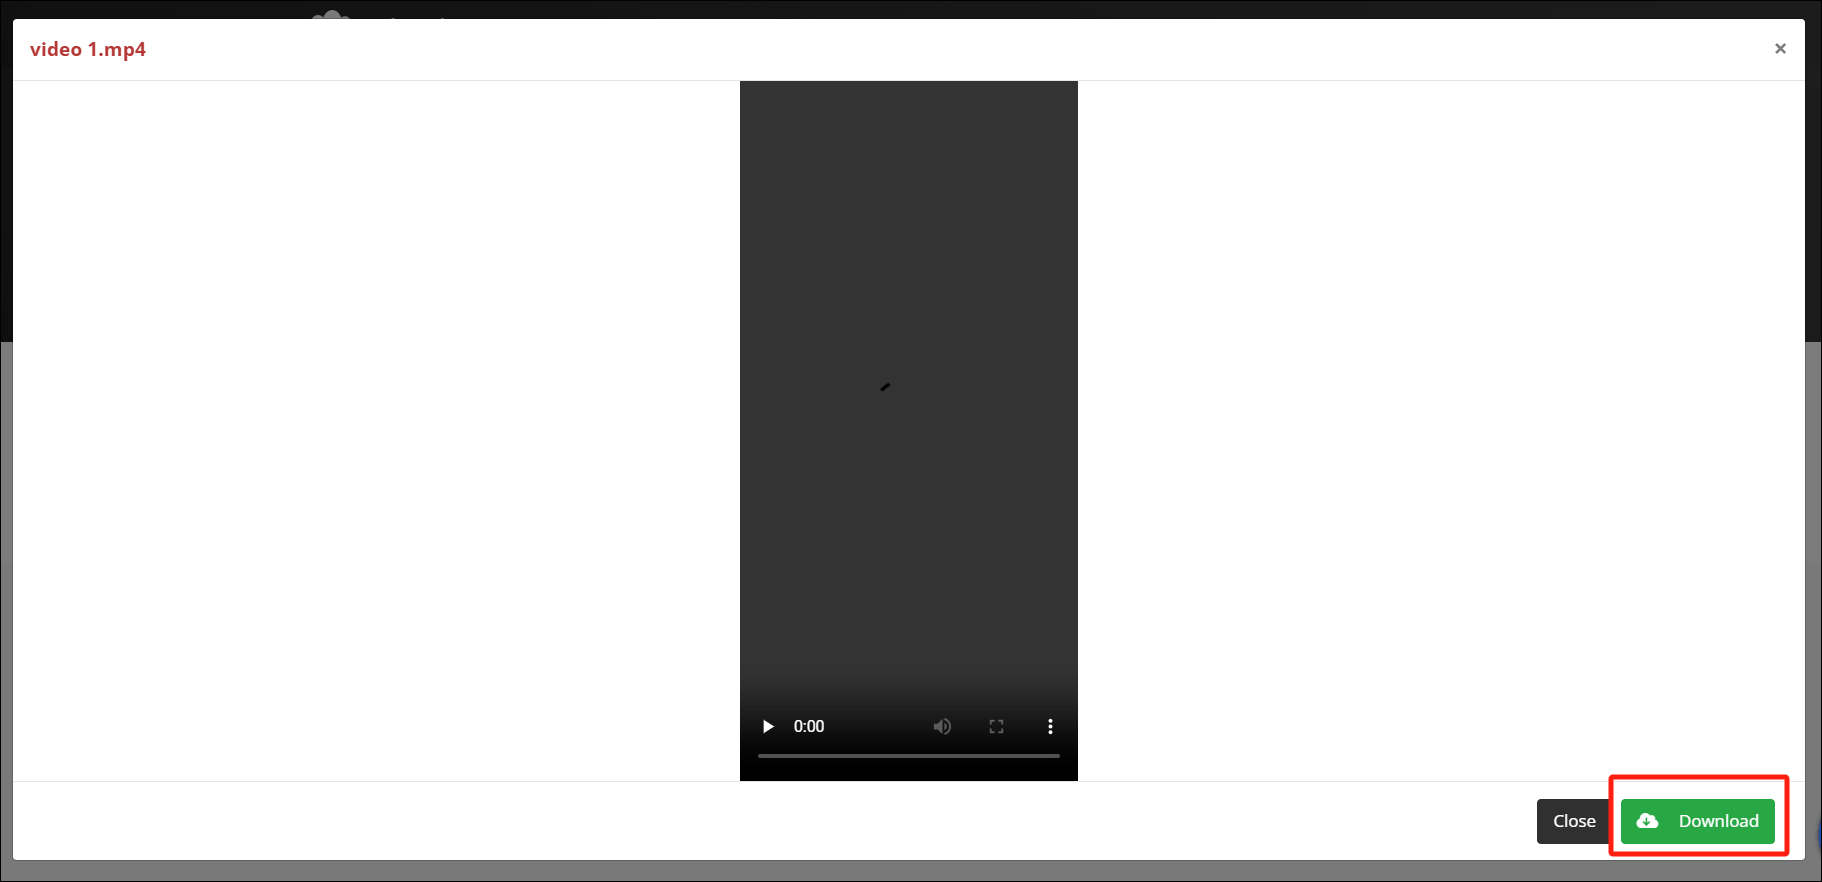
Step 6. Check the converted file.
When the file conversion process ends, click on the Download button to save the converted file.
With the above-detailed steps, it will never be difficult for you to make the audio and videos sync online.
In Summary
Frame rate affects video and audio sync. This post analyzes how video lags can reduce frame rates. It also recommends 3 practical tools for adjusting frame rates, including MiniTool Video Converter (Offline), MiniTool MovieMaker (Offline), and CloudConvert (Online).
User Comments :