DaVinci Resolve is a professional video editor for Windows, macOS, Linux, and iPadOS. Can DaVinci Resolve compress video? In this useful post, I will show you how to easily reduce the size of videos by using DaVinci Resolve, MiniTool Video Converter, and MiniTool MovieMaker.
As a video editor, can DaVinci Resolve reduce file size? Yes! DaVinci Resolve can compress video to reduce file size. How to compress video in DaVinci Resolve? The following content will give you a detailed tutorial. Additionally, I will show you free and easy ways to compress videos.
How to Compress Video in DaVinci Resolve
DaVinci Resolve compress video can save more storage space for users. You can use DaVinci Resolve to reduce video size by removing unnecessary parts or changing certain format parameters, like encoder, resolution, and frame rate. Now, let us delve into how to use DaVinci Resolve.
Step 1. Create a New Project and Import the Target Video
Launch DaVinci Resolve on your PC. In the Project Manager section, choose the New Project option and click Create. Then click the File tab from the top menu, choose& Import, and select Media to import the target video.
Step 2. Remove Unwanted Parts
Removing unnecessary parts is one of the ways to reduce video size. If you want to cut and remove certain video clips in DaVinci Resolve, switch to the Edit page, click the Blade icon on the toolbar to activate the Cut tool. Next, move the playhead on the timeline to where you want to cut. Choose the clip you want to remove and press the Delete key on the keyboard.
Step 3. Customize Output Settings
If you don’t want to remove any parts of your video, you can compress video in DaVinci Resolve by customizing output settings. Click the Deliver icon in the lower right corner to access the Deliver page. Under the Custom Export tab, you can open the Codec list and choose an efficient codec, like H.265 or H.264. You can also open the Format list to choose a compressed video format. In addition, open the Resolution and Frame Rate lists to lower their values.
Step 4. Render Your Video
Click the Add to Render Queue button. Then choose the output folder and click the Save button. Next, click the Render all button to export your compressed video.
DaVinci Resolve compress video can be finished after all the steps.
![Master the iMessage Video Size Limit [Detailed Information]](https://images.minitool.com/videoconvert.minitool.com/images/uploads/2025/07/imessage-video-size-limit-thumbnail.png)
Alternative Way to Edit and Compress Video for Free
While DaVinci Resolve reduce file size is possible, it still carries a steep learning curve. Is there an easy way to edit and compress videos? Of course, there is! MiniTool MovieMaker is worth a try. It is a free video editor that provides a variety of editing features and royalty-free resources. It is an easy-to-use& alternative to DaVinci Resolve. You can read on to learn how to reduce video size in MiniTool MovieMaker.
Step 1. Download, install, and launch MiniTool MovieMaker.
MiniTool MovieMakerClick to Download100%Clean & Safe
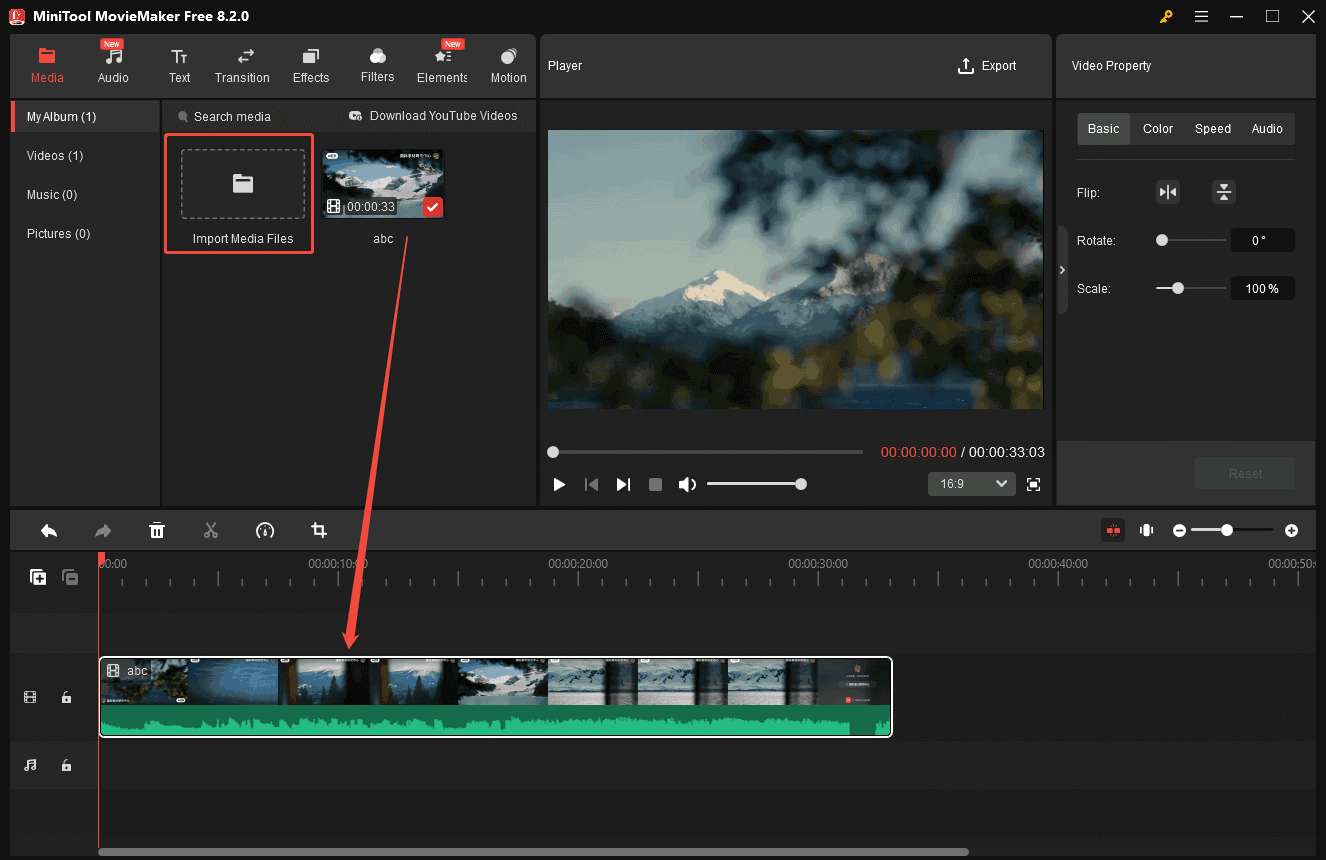
Step 2. Click the New Project button and click Import Media Files& to import the video you want to compress. Then, directly drag and drop it onto the timeline.
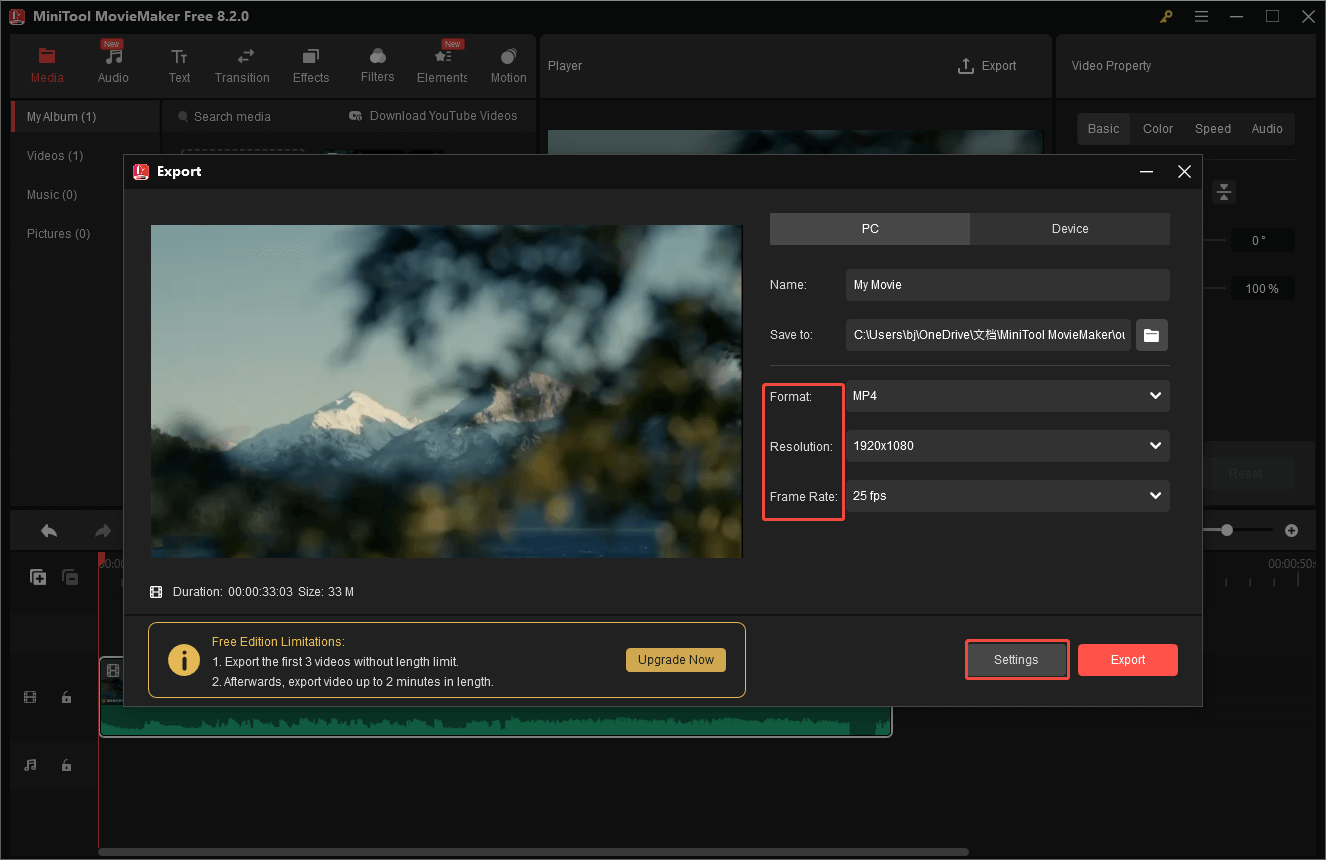
Step 3. Optionally, you can edit the video as you like. Once you are satisfied, click the Export option in the Player window.
Step 4. Expand the Format dropdown to choose the needed output format. Open the Resolution list and choose a lower resolution, like 1280×720. Meanwhile, you can lower the frame rate. Additionally, you can click the& Settings button to customize bitrate and other parameters. Finally, click the Export button to begin the compression process.
How to Reduce Video Size with Ease
If you don’t have the need to edit video apart from changing its size, you can try MiniTool Video Converter. It is a completely free video compressor that supports compressing video files in various formats. The compressor of MiniTool Video Converter can help you compress videos according to your needs. You can also choose multiple output formats for compressed videos.
Moreover, MiniTool Video Converter is free and user-friendly. It has no watermark, ads, or bundles. Here are some specific steps to show you how to use MiniTool Video Converter to compress video:
Step 1. Install and Launch MiniTool Video Converter.
Download and install MiniTool Video Converter by clicking the button below.
MiniTool Video ConverterClick to Download100%Clean & Safe
Step 2. Import Your Video File
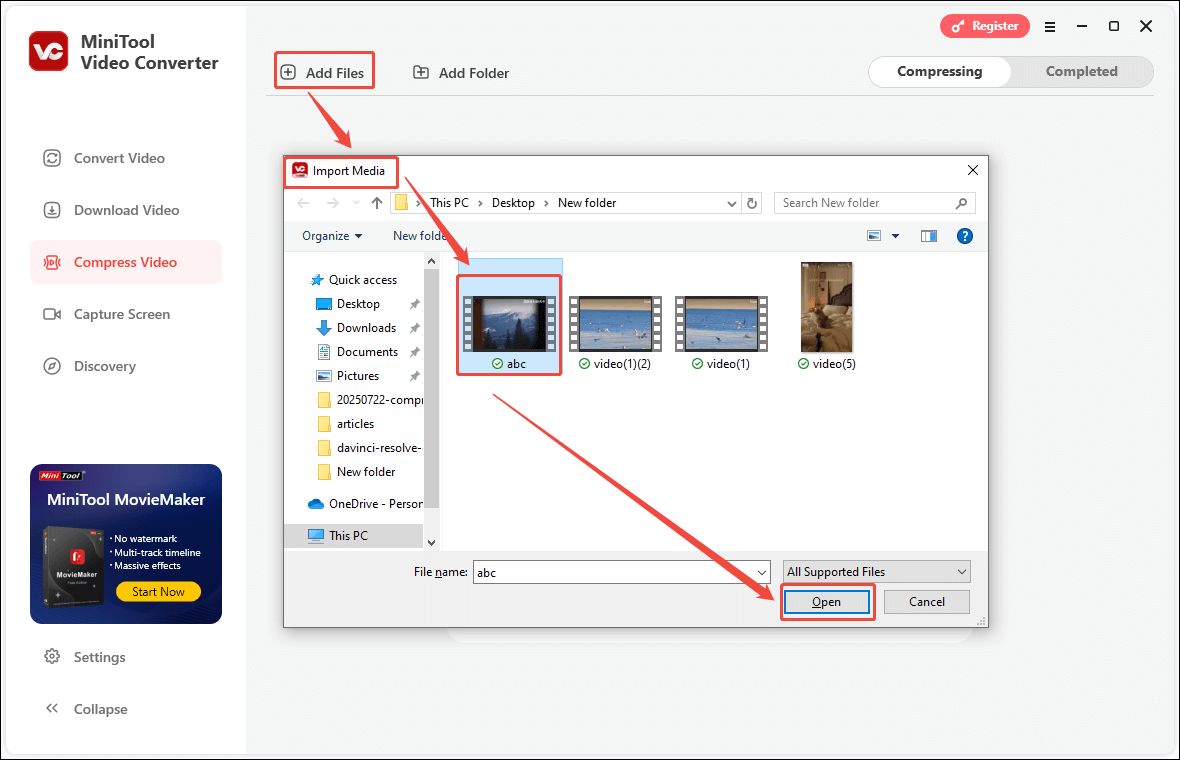
Click the Compress Video tab on the left menu. Then, click Add Files, select one or more files you want to compress in the Import Media window, and click the Open button.
Step 3. Adjust Compression Percentage
Click the gear icon on a video file to open the Compression Settings window. Then, drag the red dot to adjust the video compression percentage. If you have a specific size you want to compress, you can adjust the compression percentage according to the Estimated file size.

Step 4. Adjust Output Format and Preview
After adjusting the video compression percentage, click the Format option to select an export format. Then, you can click the Preview button to check the compressed video quality. Finally, click the OK button to save your changes.

Step 5. Compress the Video File
Click the Compress button to start compressing the video file.

Step 6. View and Locate Video File
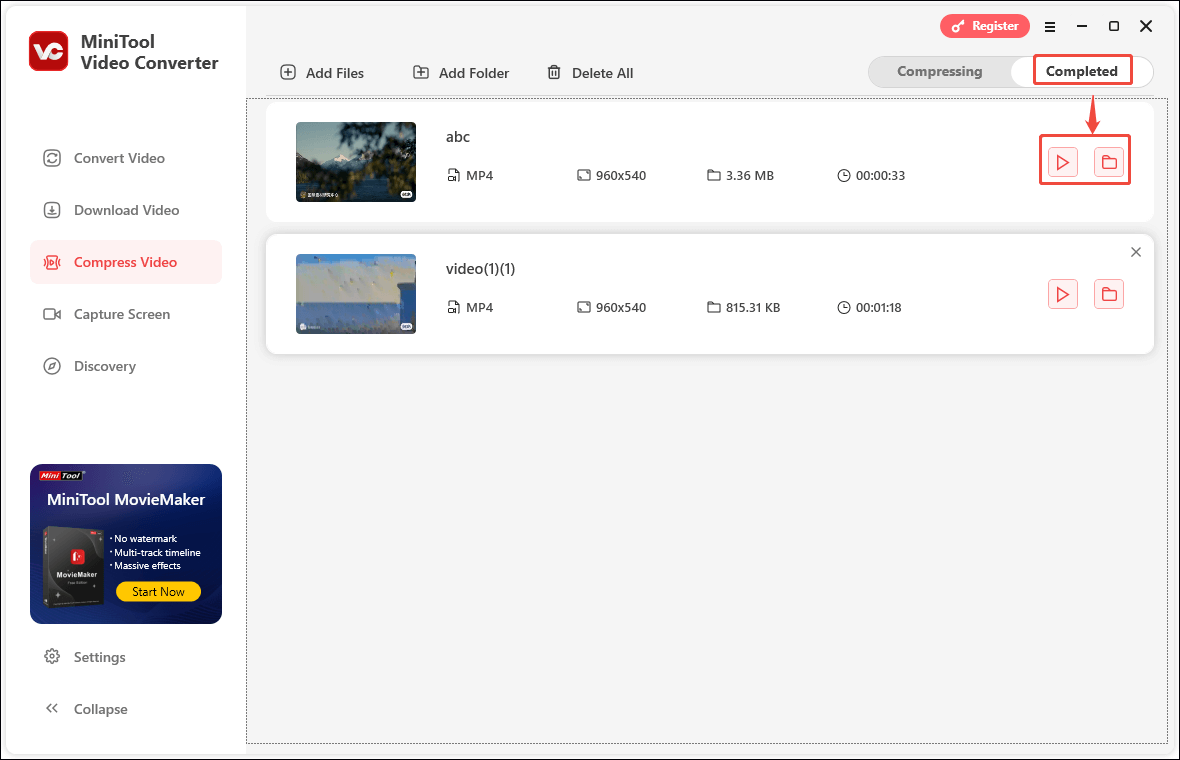
Once video compression is completed, the interface will automatically switch to the Completed tab. You can click the play icon to play the compressed video directly. You can also click the folder icon to check it in the storage location.

Conclusion
Can DaVinci Resolve compress video? Yes, it can compress video. The above content shows you detailed instructions on how to compress video in DaVinci Resolve. If you are a beginner and want to use an easy way for video compression, just try MiniTool MovieMaker and MiniTool Video Converter.
User Comments :