The WordPress video size limit varies from 2MB to 500MB. How to break the video size limit? This post shows you how to compress video for WordPress with MiniTool Video Converter. In addition, you can edit the compressed WordPress videos with MiniTool MovieMaker.
As a robust platform, WordPress has much to offer to sustain your website creation. Admittedly, some videos embedded in your websites will attract more audiences. However, large video files will bring some limitations. In this context, website owners need to compress video for WordPress, which helps them gain more views.
Is WordPress Video Compression Necessary
Before learning how to compress videos for WordPress, I will elaborate on whether it is necessary to implement WordPress video compression.
A Faster Loading Time
As your WordPress video files are larger, it will take audiences more time to wait for the video to load. In this background, although the content of your website is fantastic, too much loading time will bring viewers a headache, which will eventually have a negative influence on website performance. Therefore, to get a faster loading time, you must compress video for WordPress.
Optimized Bandwidth
Bandwidth has a significant impact on video playback. Generally speaking, after you compress videos for WordPress, the bandwidth can be optimized to some extent, which brings more convenience to those who are restricted by an unstable internet connection. In other words, with WordPress video compression, you are more likely to see smoother video playing.
Video Compatibility Improvement
Undoubtedly, different users will visit your websites via various devices. Hence, suppose that there is a compatibility issue brought about by your WordPress videos, you will lose some audiences. To solve that problem, you make your videos more compatible by compressing the WordPress videos.
How to Compress Video for WordPress
As you can see, it is very necessary for you to compress video for WordPress. In this section, I will recommend a fabulous file compressor and offer you a step-by-step tutorial on how to compress your Shopify videos.
Why Recommend MiniTool Video Converter
MiniTool Video Converter, as a free video converter, allows you to compress countless video/audio files for free without a file size limit. In addition, it supports numerous formats, such as MP4, MKV, WEBM, MP3, WAV, AIFF, and so on.
More than that, MiniTool Video Converter has many customization options, enabling you to change the resolution, frame rate, bitrate, audio channel, and sample rate of your files Plus, it gives support for diverse conversion tasks, including audio to audio, audio to videos, videos to audio, and videos to videos.
Furthermore, MiniTool Video Converter has an intuitive interface, which makes MiniTool Video Converter usable for all users. Apart from that, MiniTool Video Converter supports batch compression, allowing you to compress up to five files simultaneously.
How to Compress WordPress Videos with MiniTool Video Converter
Below are the detailed steps to compress video for WordPress using MiniTool Video Converter.
Step 1. Download and install MiniTool Video Converter.
Click on the download button below to download and install MiniTool Video Converter on your PC.
MiniTool Video ConverterClick to Download100%Clean & Safe
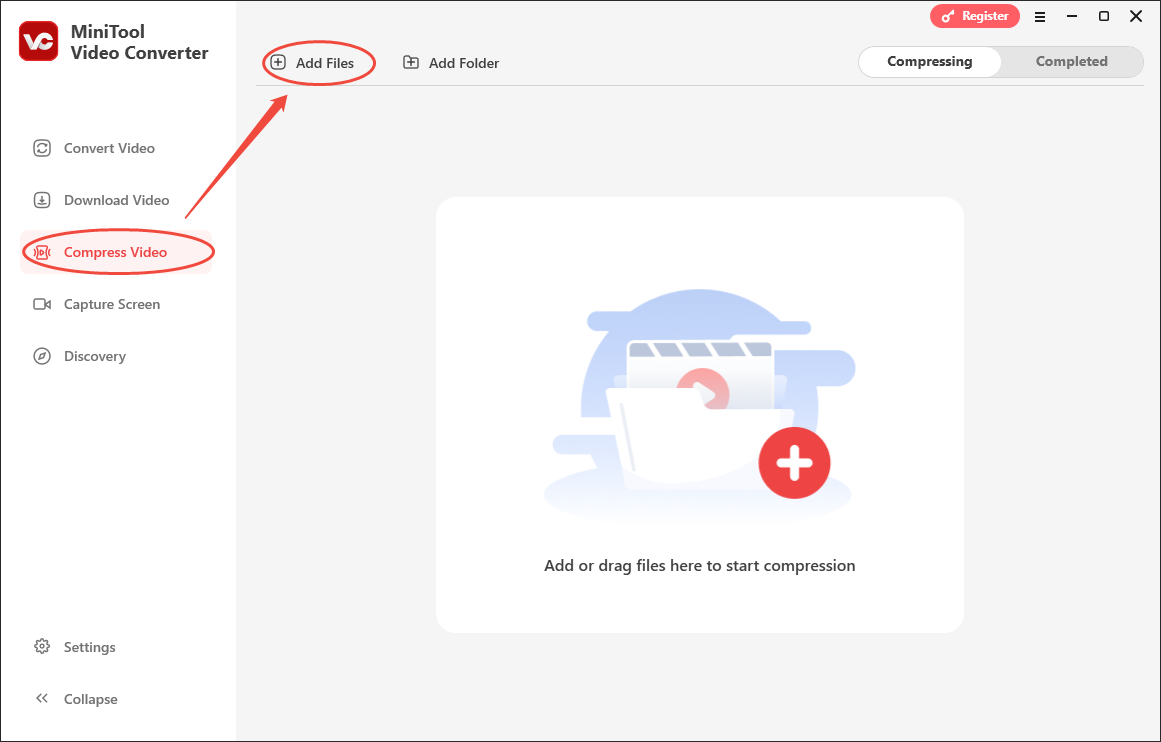
Step 2. Import WordPress videos.
After launching MiniTool Video Converter, switch to the Compress Video tab and click on the Add Files option to upload the videos that you want to compress.
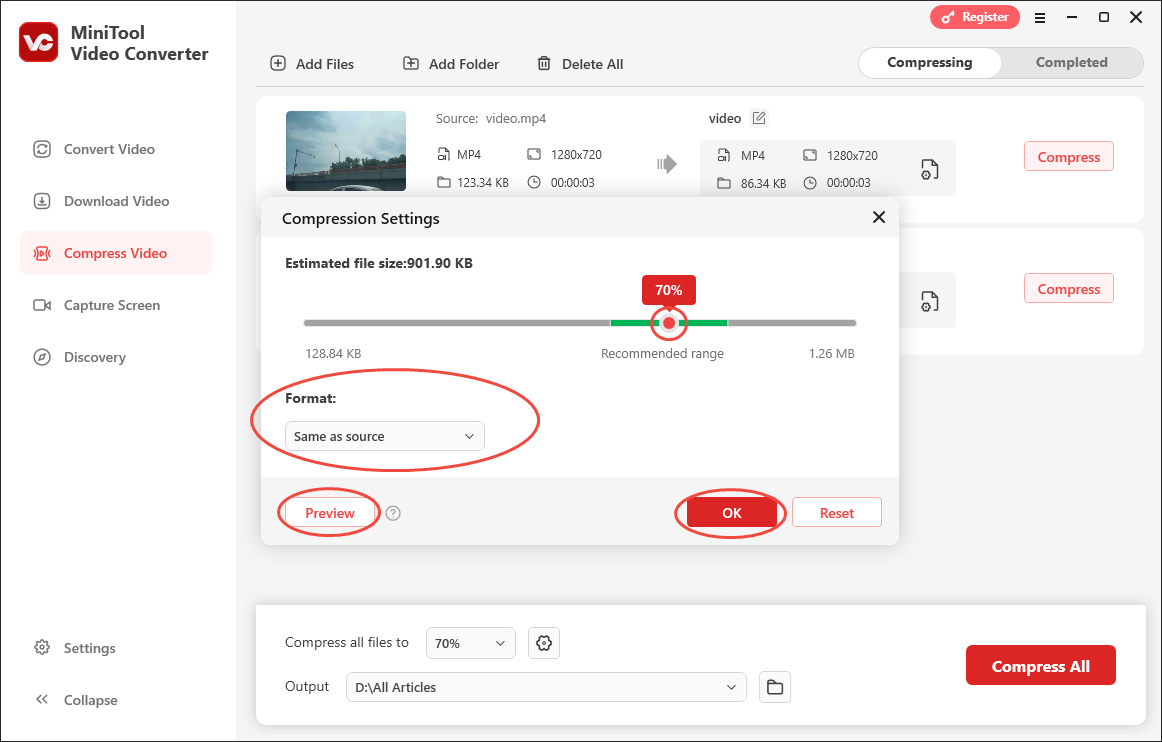
Step 3. Specify compression settings.
Click on the Settings icon to enter the Compression Settings window.

In the pop-up window, you can adjust the output file size by moving the red slider. To choose an output format, expand the Format option. Click on the Preview button to preview the compressed videos. To apply the settings, click on OK.
Step 4. Choose an output location.
Expand the bottom Output option to choose a saving path for your compressed files.

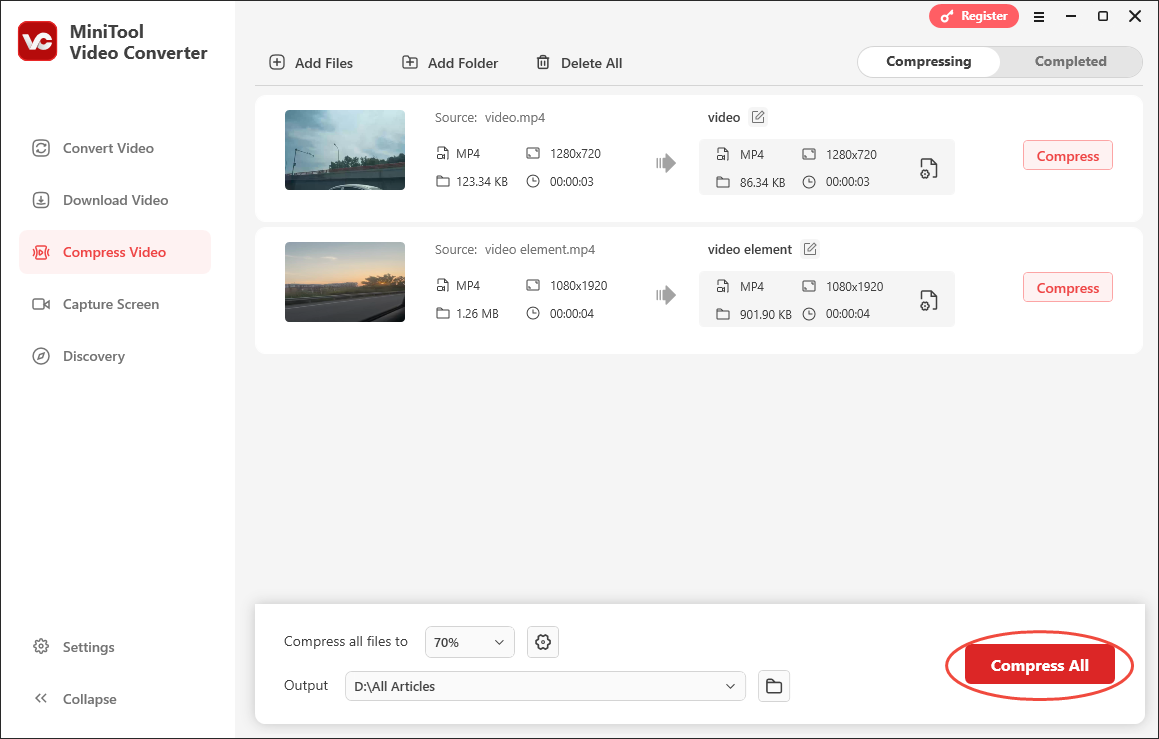
Step 5. Start compression.
Begin to compress video for WordPress by clicking on the bottom-right Compress All button.
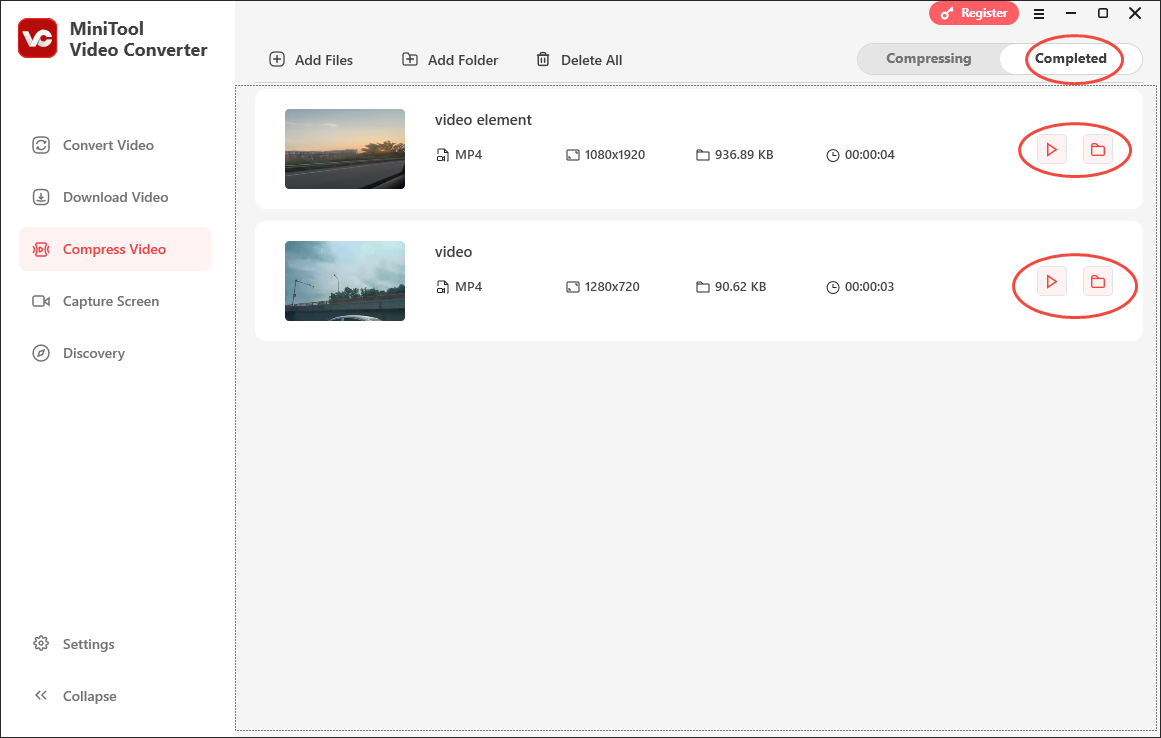
Step 6. Check compressed videos.
Once the compression is over, this file compressor will switch to the Completed section. There, click on the Folder icon to locate the output videos. To view them, click on the Play icon.
With the above-detailed steps, it will never be difficult for you to compress video for WordPress.
MiniTool Video ConverterClick to Download100%Clean & Safe
Bonus: How to Edit Your WordPress Videos
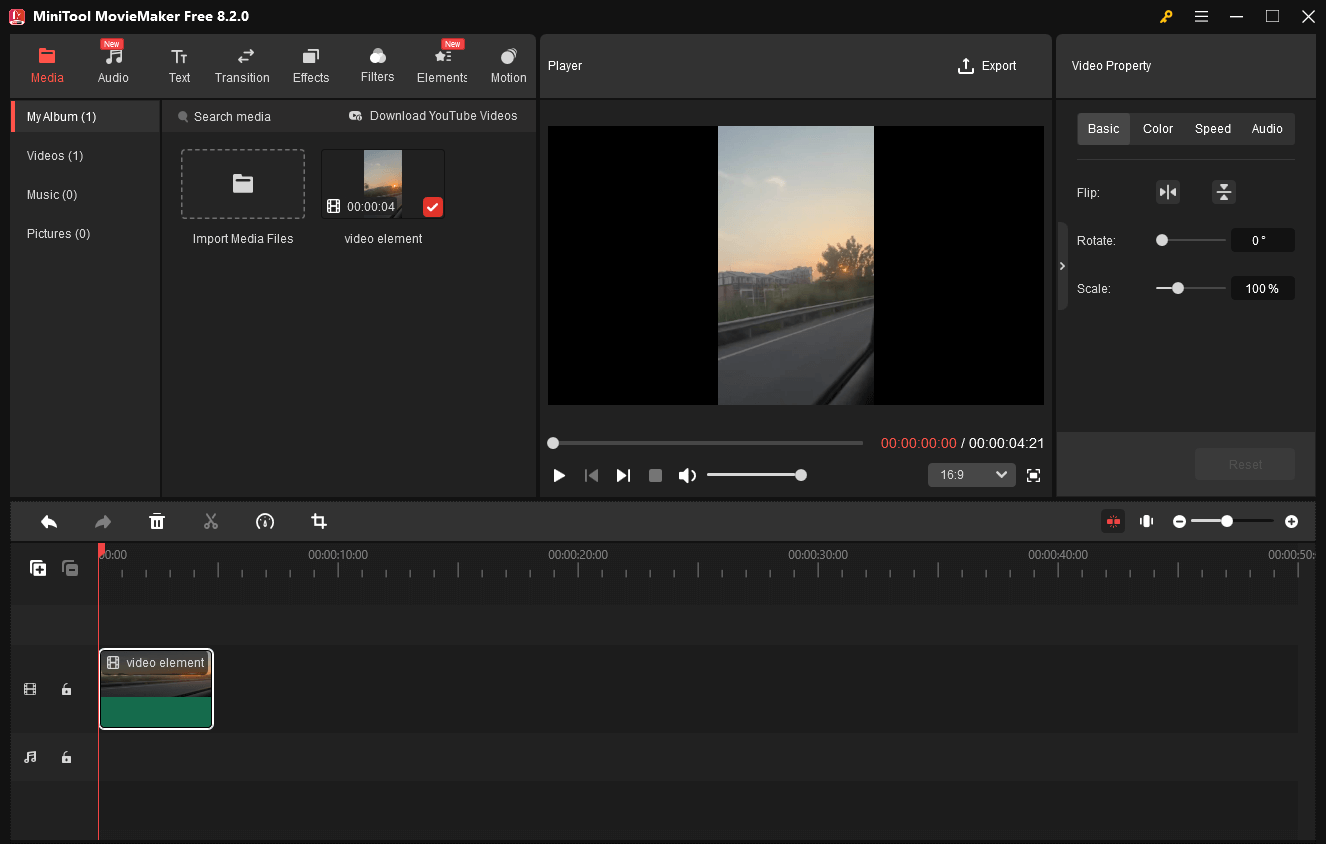
Presently, you have grasped how to compress video for WordPress. On the other hand, can you edit your WordPress videos for optimization? Of course, you can! Here, I highly recommend MiniTool MovieMaker.
MiniTool MovieMaker, which is a professional and easy-to-use video editor, allows you to edit your videos frame by frame. In addition, it is a fabulous elements provider, which enables you to add motions, transitions, filters, effects, credits, and more elements to your videos. Moreover, MiniTool MovieMaker is capable of changing the speed and volume of your videos.
Also serving as a file converter, MiniTool MovieMaker allows you to save your audio/video/image files in multiple formats, like MP4, MKV, and more. Besides, it is incredible at adjusting the resolution and frame rate of your exported videos.
MiniTool MovieMakerClick to Download100%Clean & Safe
In Summary
To compress video for WordPress, never miss MiniTool Video Converter. On condition that you want to optimize WordPress videos effortlessly, try MiniTool MovieMaker.
About The Author

Position: Columnist
With over 6 years of experience as a tech writer, Eien specializes in creating clear, simple guides for video conversion, transcription, screen recording, etc. He stays connected with the tech community and its readers to understand the real-world problems users face. By combining their feedback with his own hands-on testing, Eien always provides proven solutions to complex software problems in time.
User Comments :