How to handle the large file size of MPEG videos? What you need is MPEG video compressors. This post shows you how to compress MPEG files with MiniTool Video Converter, QuickTime Player, and InVideo.
Before learning how to compress MPEG files, let’s understand this format first.
What Is MPEG
MPEG, which was created by the Moving Picture Experts Group, refers to a video format. By the way, it shows outstanding compatibility. If you want to open MPEG files, tools such as QuickTime Player and Windows Media Player can give you a hand.
How to Compress MPEG Files on Windows
To compress MPEG files on Windows, a fantastic video compressor is indispensable. Consequently, the following content will recommend a fabulous compression tool called MiniTool Video Converter. Below is a step-by-step guide on how to do that with MiniTool Video Converter.
Step 1. Download and install MiniTool Video Converter.
MiniTool Video ConverterClick to Download100%Clean & Safe
Download MiniTool Video Converter by clicking on the download button above. Then follow the on-screen instructions to install it on your computer.
Step 2. Upload your MPEG files.
After switching to the Compress Video tab, import your video file by clicking on the Add Files option.
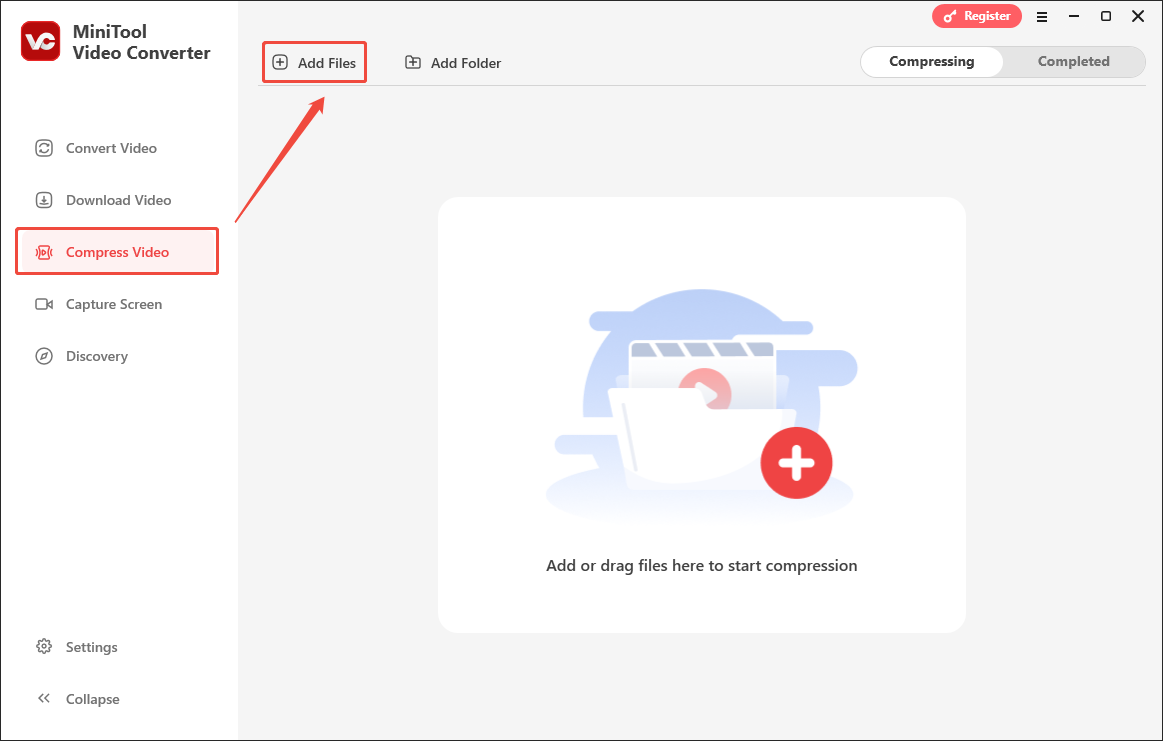
Step 3. Specify compression settings.
Access the Compression Settings window by clicking on the Settings icon.
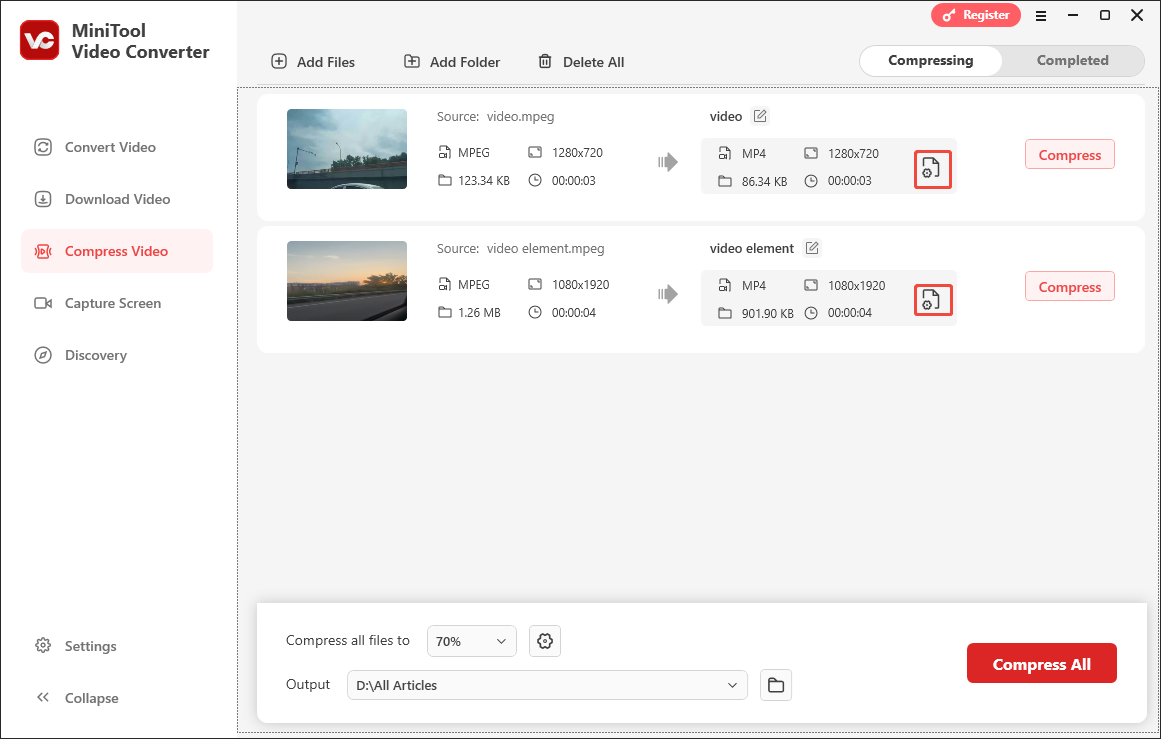
In the pop-up window, you can adjust the compression level by dragging the red slider. Expand the Format option to choose an output format. Then, click on Preview to preview the compressed videos. Finally, click on OK to save the changes.
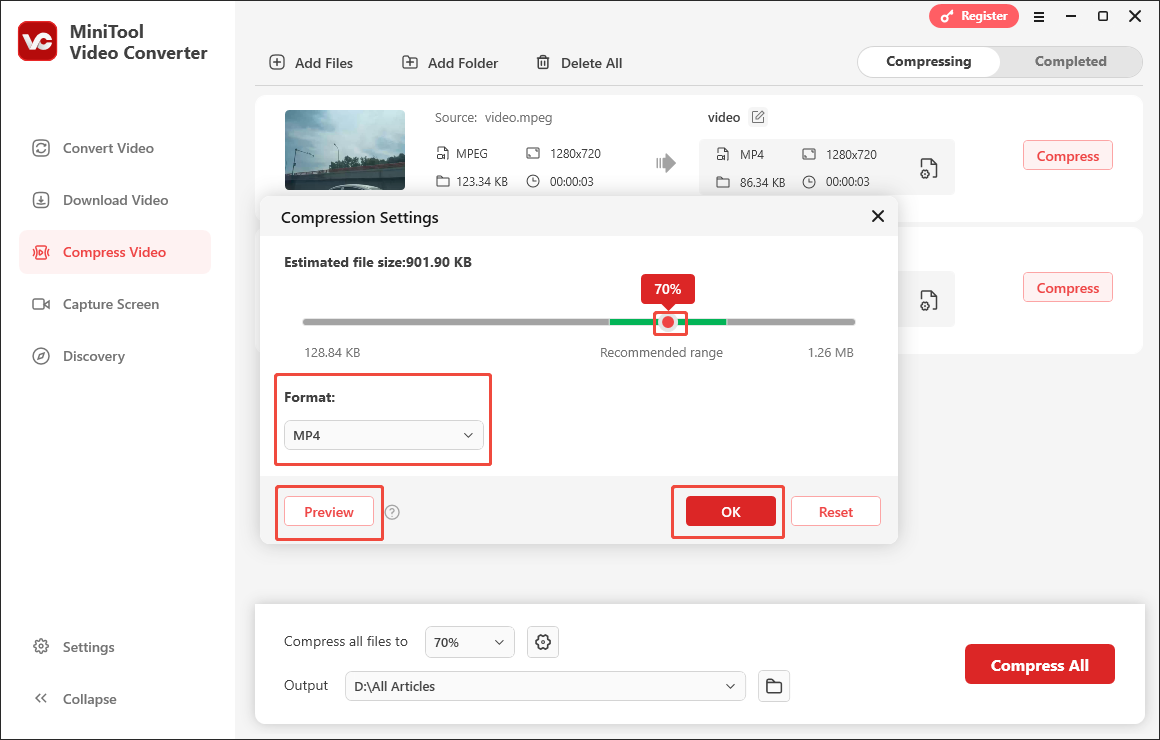
Step 4. Choose an output location.
Expand the bottom Output option to select a location to save your compressed files.
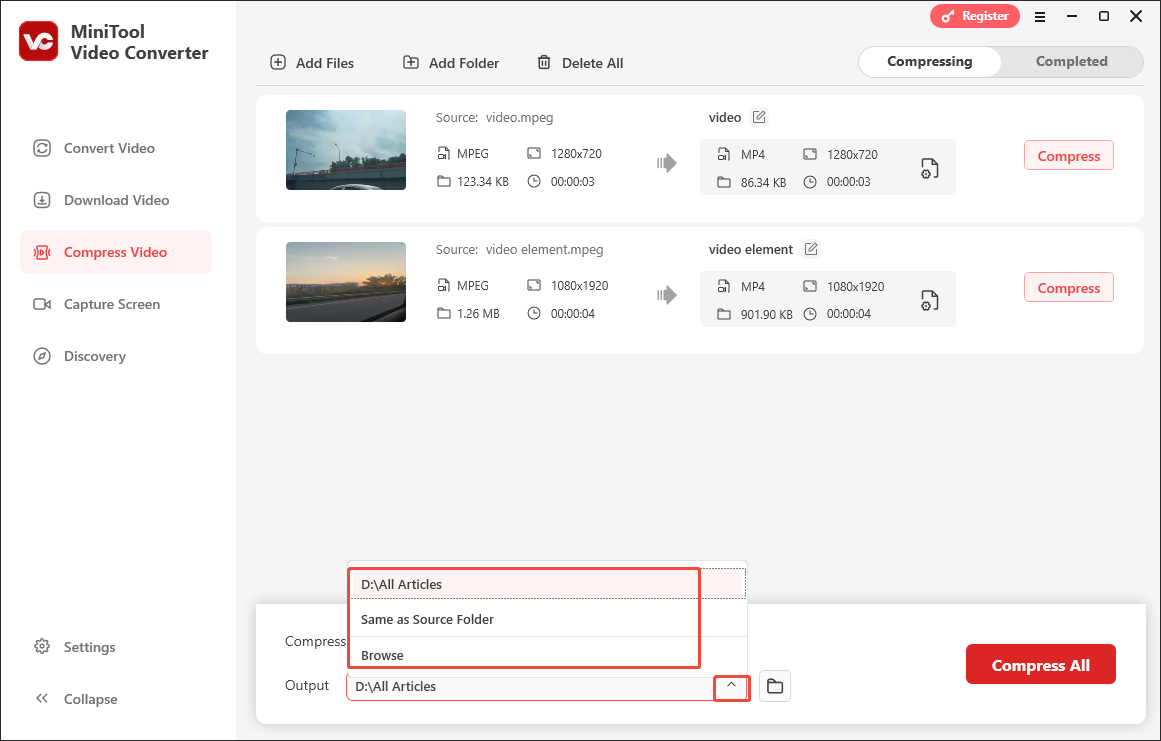
Step 5. Start compression.
Click on the Compress All button to begin to compress your MPEG files.
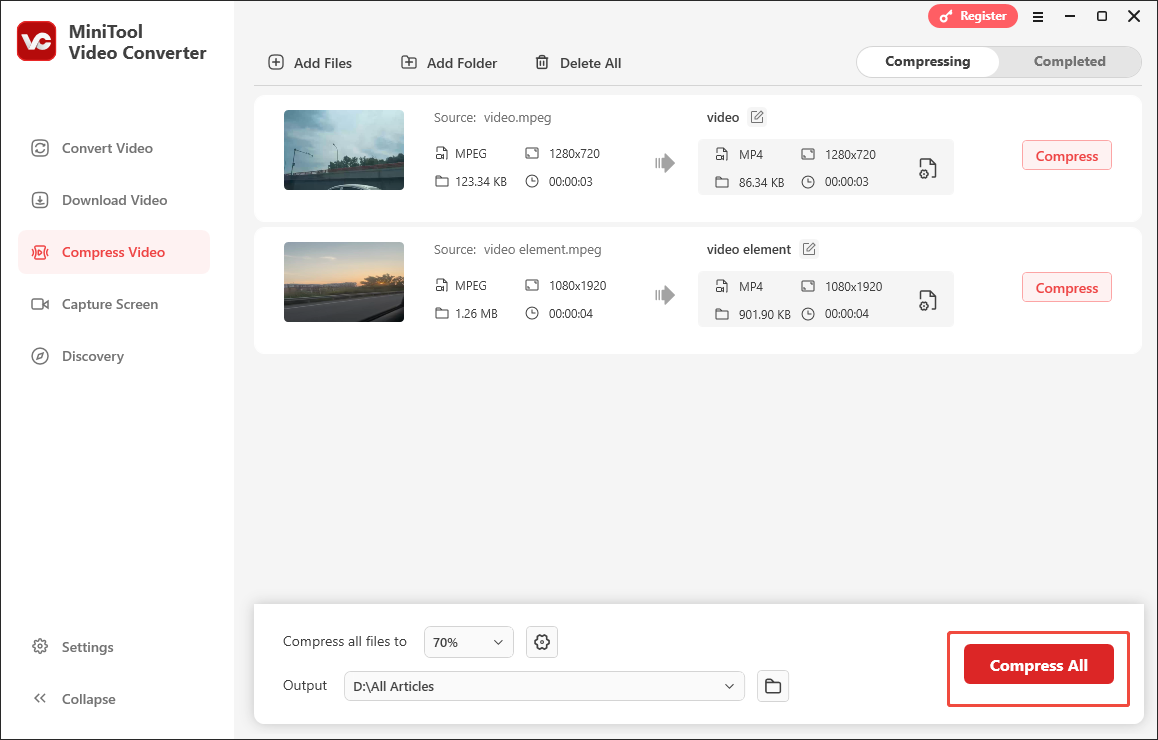
Step 6. Check compressed videos.
When the file compression completes, this file compressor will switch to the Completed section. There, click on the Folder icon to locate the output videos. To view them, click on the Play icon.
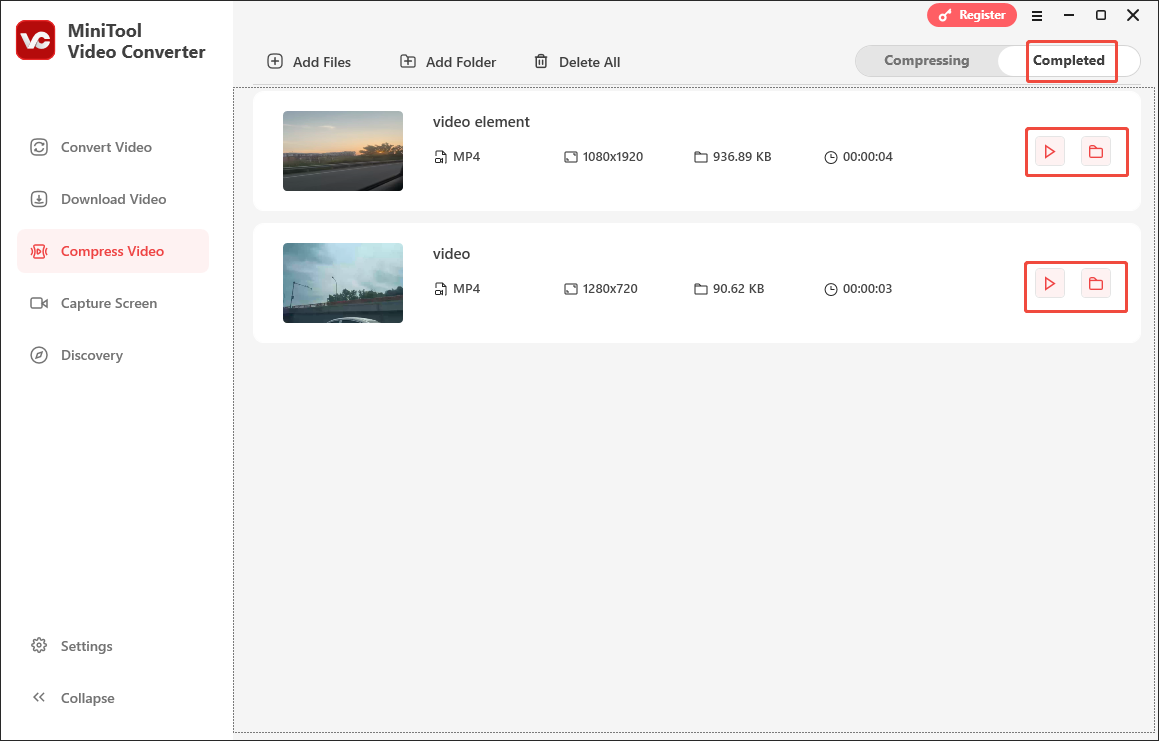
How to compress MPEG files on Windows? With the above-detailed steps, you can compress your files effortlessly.
In addition, MiniTool Video Converter, which is more than an MPEG compressor, also enables you to record your screen without watermarks and time limits. More importantly, MiniTool Video Converter, as a free video converter, allows for converting MPEG files to a wide range of formats such as M4A, AVI, VOB, AIFF, AC3, MP3, TS, WAV, and more.
MiniTool Video ConverterClick to Download100%Clean & Safe
How to Compress MPEG Files on Mac
If you are a Mac user and want to compress MPEG files, the detailed tutorial below can give you a hand.
Step 1. After running QuickTime Player, open your file in it. However, don’t play your MPEG file.
Step 2. Go to the Menu bar and click on File. Then select Export As.
Step 3. After choosing the resolution, select Greater Compatibility (H.264) codec by using the dropdown.
Step 4. Click on the Save button to save your compressed files.
With the detailed instructions above, Mac users can compress their files easily and quickly.
How to Compress MPEG Files Online
If you want to compress your files online, the guidance below can do you a favor.
Step 1. Go to the Compression Tool page of InVideo.
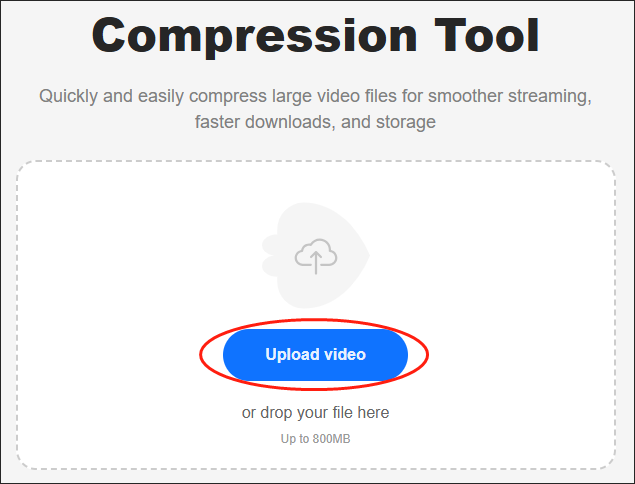
Step 2. Click on Upload Video to import the MPEG file that you want to compress.
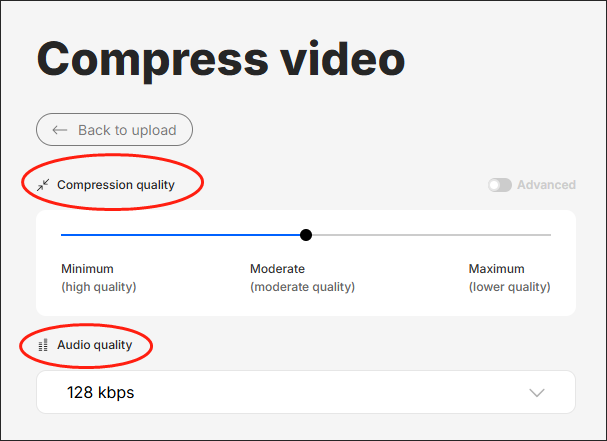
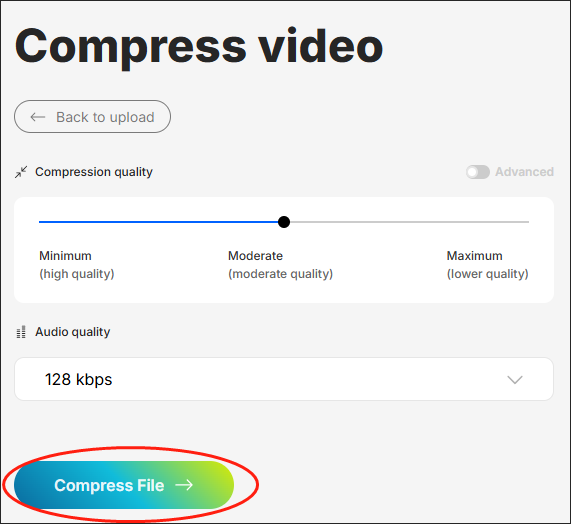
Step 3. Customize the compression quality and audio quality based on your needs.
Step 4. Click on the Compress File button to begin to compress your MPEG file.
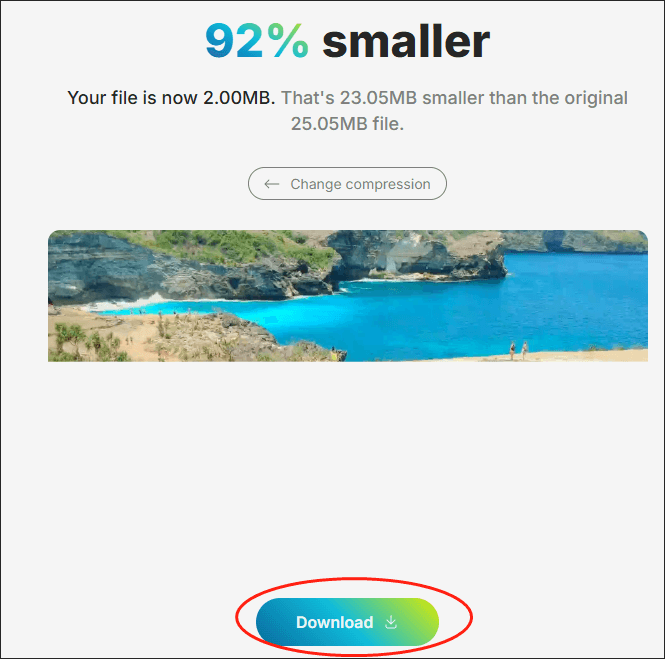
Step 5. Once your compression task is over, click on the Download button to download and check your compressed MPEG file.
If you want to compress MPEG files online, just follow the steps above.
Final Thoughts
If you want to compress MPEG files easily and quickly, the best way is to use MiniTool Video Converter.


User Comments :