People all over the world like to share interesting/precious videos with others. They can use apps to send videos or just send them via email. But sometimes the file size is so large that it’s not suitable for sending. They must reduce the video file size before sending it. How to compress video safely? If you don’t know, please read this page from a free file converter, MiniTool Video Converter.
Media files are used widely to entertain the public, record memorable moments, present problems and solutions, etc. With the development of the network, it becomes a breeze to send media files like videos and music tracks (I’ll focus on the former in the following content).
What is digital video?
You can think of a video simply as a collection of moving visual images in the form of encoded digital data.
How to share videos with other people?
- Most apps used currently allow users to send a video to their contacts directly.
- Besides, sending files via email has always been a universal action.
- There are now many online platforms (like YouTube) that welcome users to create and upload their videos in easy steps.
However, the problem is the file size of a video is so large sometimes that you can’t send it in the usual ways or the sending speed is very slow. In addition, some people said their hard drive is about to full so that they want to keep the video files in a smaller size without losing too much quality. In either case, you need to figure out solutions to making video files smaller. Please don’t get anxious if you have no idea at all how to compress video. I will introduce some safe and effective ways to help you compress video for email or reduce video file size for other purposes.
Compress Video for Email
You must be disappointed when you get everything ready but be told that you’re not allowed to send your video. Even if the video can be sent, the speed will be very slow. Meanwhile, the receiver needs a lot of patience and space to download and save the video files. Under such circumstances, you should compress the video first. But you may ask how to compress a video, right? Let’s have a look.
How to Compress Video on Windows
Creating a zip file keeps a good balance between reducing video file size and maintaining high video quality. The file size change isn’t huge and the quality is almost not being affected.
The steps to compress a video file by zipping it on Windows:
- Open File Explorer (formerly known as Windows Explorer) by pressing Windows + E or other ways.
- Browse your drive to find the folder that contains the video file you want to send through email.
- Locate the video file and select it.
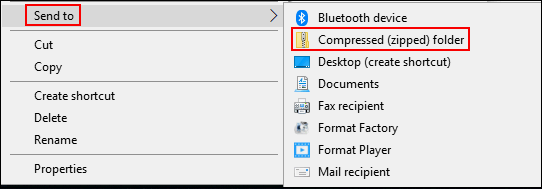
- Right click on the video -> navigate to Send to -> choose Compressed (zipped) folder -> give a name to the zip file and press Enter (this operation is optional).
- You can also follow this to replace step 4: click Share from the menu bar at the top -> select Zip from its drop-down menu -> type a new name and press Enter (also optional).
How to Compress a Video File on Mac
How to make a file size smaller on Mac? Apple also offers an easy way to help you with that.
The steps to compress video files (create a zip file) on Mac:
- Click on the Finder icon in the Dock located at the bottom. You can also open Finder directly by pressing Option + Command + Space.
- Locate the video file that you want to compress in it.
- Right-click or control-click on the target file.
- Select Compress “filename” from the menu.
- The video will be compressed automatically and the process will be finished very soon.
If you want to compress video files on an iOS device (iPhone, iPad, or iPod touch) or Android device, you need to install a third-party application capable of reducing the video file size.
Tips for Sharing Big Videos with Others
If you don’t want to compress the video before sending it to others, you’d better consider the following things.
#1. Share a Video Using Gmail
In addition to compression, you still have other choices for sending a large file. Generating a link to a video is what a lot of people are doing right now. Gmail is a world-famous free email service developed by Google. People like to send emails with pictures, documents, and even videos by using it.
How to send files with Gmail:
- Search for Gmail in Google Chrome or type the Gmail website into the address bar.
- Click on the Compose button located in the upper left section to open a new message window.
- Type the correct email address or select a recipient. Then, type a Subject to your email.
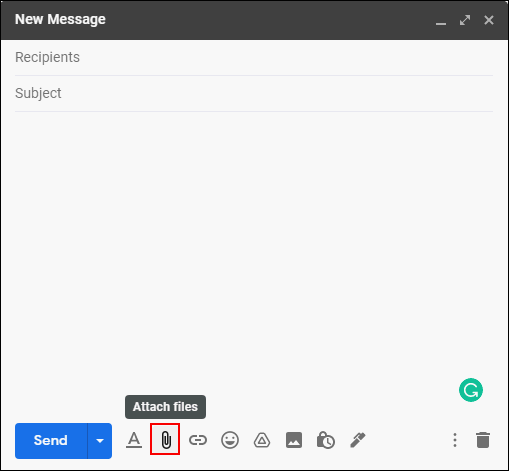
- Click on the Attach files icon at the bottom and follow the on-screen instructions to continue.
However, if the size of the file to upload is larger than the size restriction (25 MB), a message will pop up to inform you that you need to upload your file to Google Drive first, and then a corresponding link will be generated to access the file.
How to create a Google Drive link to a video in Gmail:
- Repeat step 1 to step 3 mentioned just now.
- Click on the Google Drive icon at the bottom. If you don’t know which one is, put your cursor onto each icon until you find the one that says “Insert files using Drive”.
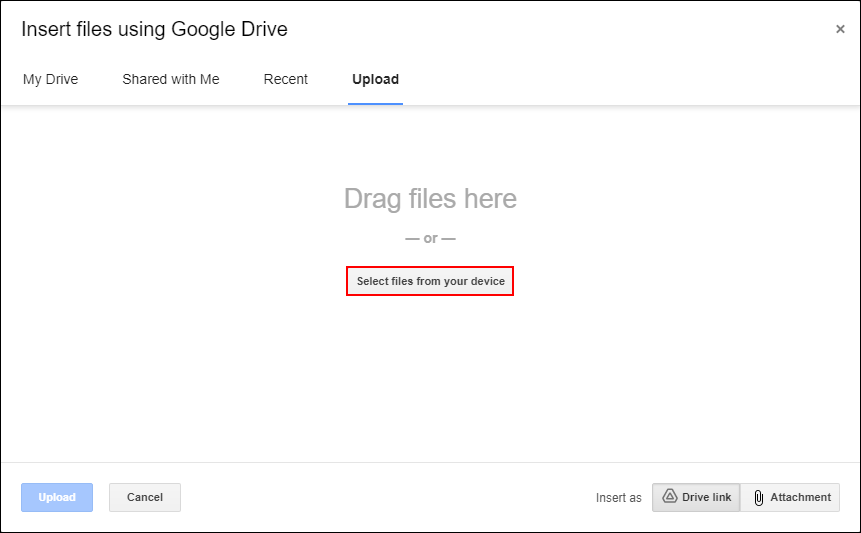
- Shift to the Upload tab at the top of the Insert files using the Google Drive window.
- Click on the Select files from your device button in the middle or drag your video file and release it there.
- Browse your device to select the video file you want to send and click Open.
- Click Upload and wait for the process to finish.
- A link will be generated and appeared automatically in your Gmail window.
Now, you’re just one step away to share your video link with others: click on the Send button and follow the instructions to offer anyone the link access to view your video file. When people receive your email, they can watch the video by just clicking on the link.
#2. Send a Video Using OneDrive (Outlook)
Like Gmail, Outlook gives a size limit to the file you tend to send using it. If you’d like to share a large video through it, you need the help of OneDrive: creating a link to the video using OneDrive and sending it to others.
- Visit the Outlook website and sign in with your account.
- Open the OneDrive window.
- Click Upload from the top menu bar.
- Select Files from the drop-down menu.
- Browse your drive to select the video file and then click Open.
- You can also click and drag the target video file into the OneDrive window directly.
- Click on the Share Link button in the small window that shows up at the end of the file upload.
- You can also click New -> Attach -> OneDrive to select the uploaded video manually.
- Enter the email address or select a recipient.
- Type the message text and click Send.
- The recipient can click on the link to view your video easily.

You can also turn to other cloud services to share or send large files.
- Mail Drop: the Mail Drop app allows you to send large files including videos via iCloud; the size limit is 5 GB. You can use the Mail app to send videos on iPhone, iPad, or iPod touch; also, you can send from iCloud.com on Mac or PC.
- DropBox: it’s a file hosting service that offers 5GB of free space for cloud storage as well as file synchronization, personal cloud, & client software. You can upload the large video files to DropBox and then let others download the files through a sharing link or add them to their DropBox accounts.
- Amazon Drive: Amazon Drive also offers 5 GB of space for free to anyone. It’s a good choice for large file storage and sharing if you have already hooked on the Amazon ecosystem.
Of course, there are many other cloud services and video compression apps you can use.
Bonus Tip
You can also try to re-download a video in a lower quality or make a GIF that captures the central idea of your video.
Use Video Editing Software to Make a Video File Smaller
How to reduce video file size? You can also use video editing software to compress your large files. In this part, I’ll show you how to make a file smaller on Windows and Mac step by step.
How to Make a Video File Smaller on Windows
#1. Use the Windows 10 Built-in Video Editor
- Open Video Editor: press Windows + S -> type Video Editor -> press Enter. You can also click on the Video Editor shortcut from the Start Menu (Start Menu troubleshooter for Windows 10).
- Click on the New video project button.
- Give a name to the new video and then click OK.
- Click on the Add button at the top left of the New smaller video window.
- You can also locate the target video and then drag & drop it onto the window.
- Please drag the video in the Project library and drop it on the storyboard at the bottom.
- Click on the Finish video button in the upper right corner of the window.
- Choose proper video quality: High 1080p is recommended, but you should choose Medium 720p or Low 540p (smallest file size).
- Click on the Export button and choose a place to save the compressed video.

#2. Use MiniTool Video Converter
MiniTool Video Converter is a professional video compressor that enables you to compress video files without quality loss. You can reduce your file size to any extent you want. It supports compressing videos of various formats, such as MP4, MKV, WMV, MOV, AVI, Xvid, WebM, FLV, etc. Up to 5 videos can be compressed at the same time.
Additionally, MiniTool Video Converter can function as a video converter, video downloader, and screen recorder. You can utilize it to convert video from one format to another, save online videos from several video platforms, and capture activities on your PC screen.
You can compress videos by following these steps:
Step 1. Download the software.
- Click on the download button below.
- Choose a safe place to keep it.
MiniTool Video ConverterClick to Download100%Clean & Safe
Step 2. Install the software.
- Navigate to the place you selected.
- Double-click on the setup program to initialize the installation wizard.
- Follow the on-screen instructions to finish the installation process.
Step 3. Compress video files.
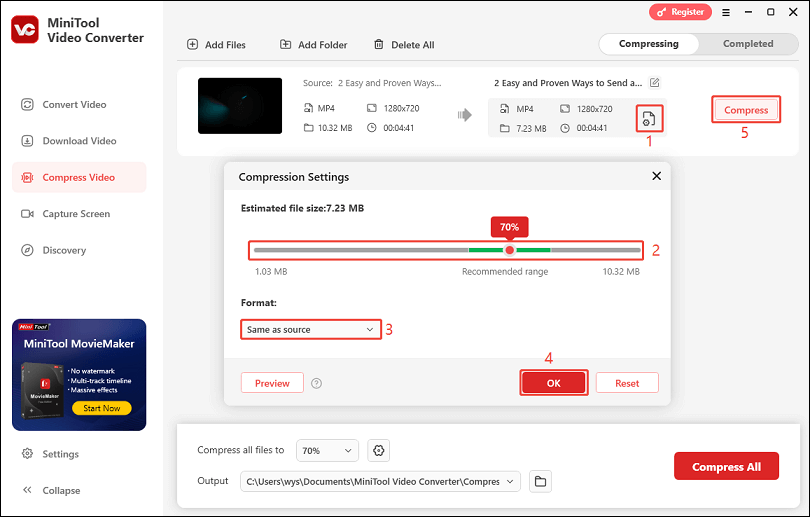
- Launch the software and navigate to the Compress Video module.
- Click on the Add Files button in the top left corner to select your videos. You can also drag and drop the videos onto the middle area (but this function is not available when you’re using the software for the first time).
- Click on the settings icon on the target video output.
- Decide the compression extent by dragging the slider.
- Select the output format by expanding the Format menu.
- Click on OK.
- Click on the Compress button and wait for the compression to finish.
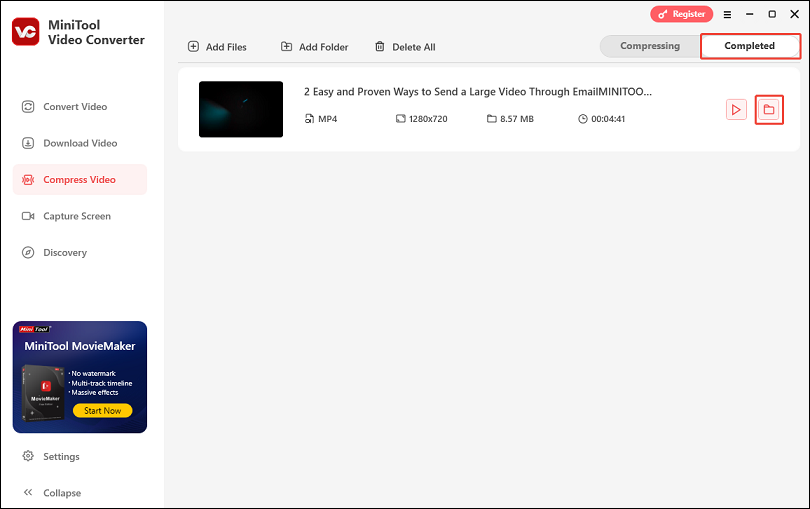
Step 4. Check the compressed file.
- Shift to the Completed tab.
- Click on the folder icon.
- Have a look at the files in File Explorer.
That’s how to make the file size smaller by compressing it using MiniTool Video Converter.
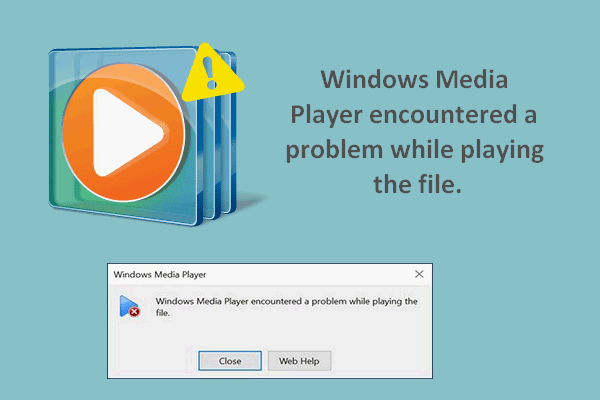
What to do if you can’t play a MOV file using Windows Media Player:
How to Make Video File Smaller on Mac
#1. Use iMovie
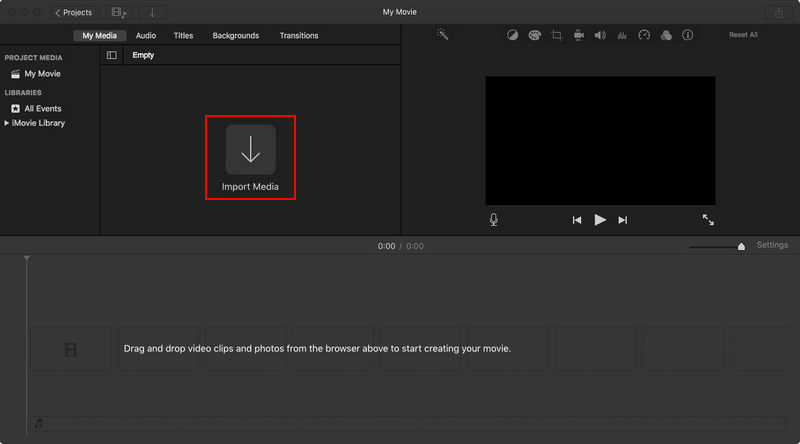
- Open iMovie on your Mac.
- Locate My Movie and click Projects.
- Give it a name and click on the OK button.
- Click on the add icon and select Movie.
- Click Import Media and open the target video file.
- Edit the video as you like.
- Click File -> navigate to Share > select File.
- Choose a smaller Resolution and lower Quality.
- Select Faster for Compress.
- Click Next.
- Type a name and choose a location.
- Click on the Save button to confirm.
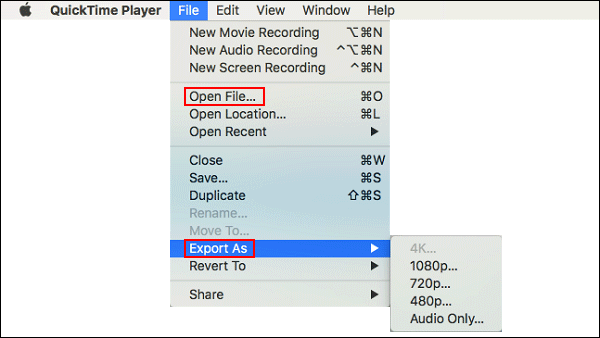
#2. Use QuickTime Player
- Open QuickTime Player on your Mac.
- Click File from the top menu bar.
- Select Open File and choose the video you want to compress.
- Click the File menu again.
- Navigate to Export As.
- Choose 720p or 480p (assume that your original video is 1080p).
- Wait for the process to end.
Also, you can use other third-party video editing software that offers both Windows version and Mac version: Handbrake, VLC, etc. Besides, you can turn to online video compression tools like VideoSmaller.
Conclusion
It’s a terrible experience to receive an error message saying that your video file is too large when you are about to send it to other people. But luckily, this post can help you solve this problem easily. It shows you how to compress video for email. Then, it gives you some tips for sharing a big file like a video. Finally, it introduces some software to help you reduce the size of your video files on Windows PC and Mac. After reading this page, you must know well about how to make files smaller.
User Comments :