Published by the best free file converter – MiniTool Video Converter, this article aims to explain sample rate and tell you the importance of changing the sample rate of WAV file. At the same time, it will offer you a step-by-step tutorial on how to change sample rate of WAV file and recommend an awesome WAV player and editor.
What Is Sample Rate
Also known as sampling rate, sample rate is a multimedia parameter that denotes how many audio samples are recorded per second. Taking 44,100 Hertz as an example, this sample rate refers to the 44,100-time measurement of the audio signal every second.
Generally speaking, higher sample rates have much to offer in capturing more sound waves and converting them to digital audio recording. Hence, when the sample rates are higher, the audio quality will also be better.
More than that, the Nyquist-Shannon theorem is an integral part of calculating the sample rate. According to it, to get digital signals from analog audio smoothly, the sample rate must not be lower than two times the original captured sound wave, which is the lowest requirement.
Why Change the Sample Rate of WAV File
Considering that 48,000 Hertz is capable of recording anything accessible to people’s hearing, it is suggested you apply a 48 kHz sample rate to record audio. On the other hand, in terms of uncompressed audio formats, the best setting is stereo 44,100 Hertz/24-bit, which will bring you the best auditory experience.
Therefore, it is highly recommended that you record audio with a sample rate of 48 kHz and then convert it to 44 kHz. To facilitate your conversion between different WAV sample rates, please read on for more details.
How to Change Sample Rate of WAV File with MiniTool Video Converter
This section consists of an introduction to a great WAV sample rate changer and a step-by-step tutorial on how to change the WAV file sample rate.
Is MiniTool a Robust Sample Rate Converter
MiniTool Video Converter is a professional tool that enables you to change the sample rate of multiple audio/video files, including WAV, MP4, MP3, AIFF, M4A, and more. More than that, with it, you don’t have to pay for your changing tasks. Plus, MiniTool Video Converter, which has an intuitive interface, is fairly user-friendly and accessible to users with different skill levels. Furthermore, it contains no ads that will bother you during the conversion.
How to Change Sample Rate of WAV File Step-by-Step
Below are the detailed steps to change sample rate of WAV file.
Step 1. Download and install MiniTool Video Converter on your PC.
MiniTool Video ConverterClick to Download100%Clean & Safe
Click on the download button above to download and install MiniTool Video Converter on your Windows computer. Then, launch it to enter the main interface.
Step 2. Import your WAV files and choose a saving path for your converted files.
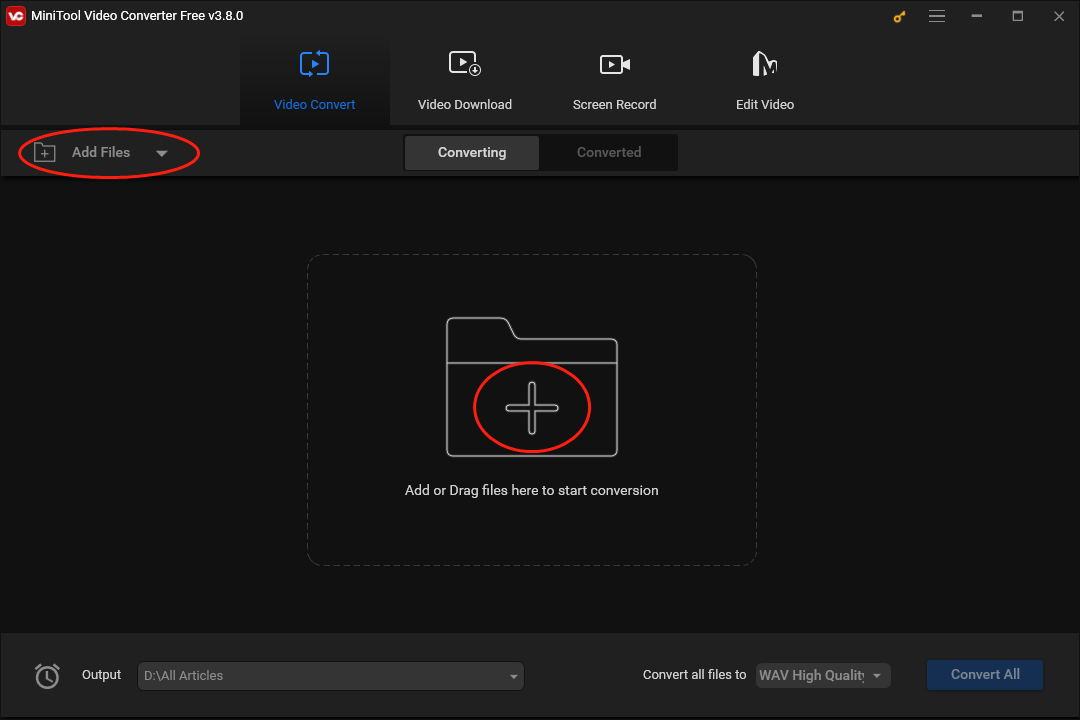
Click on the Add Files button or the big plus icon to upload the WAV files whose sample rate you want to change.
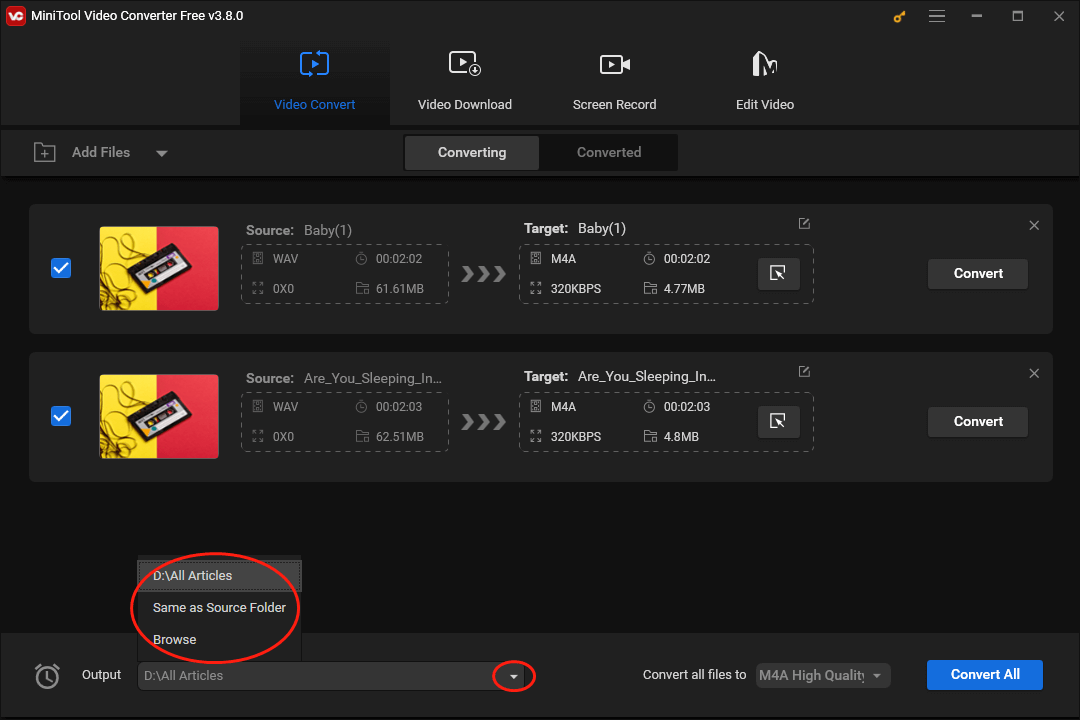
Expand the Output option at the bottom left of MiniTool Video Converter and choose a location that will save your converted files.
Step 3. Set the output format for your WAV files.
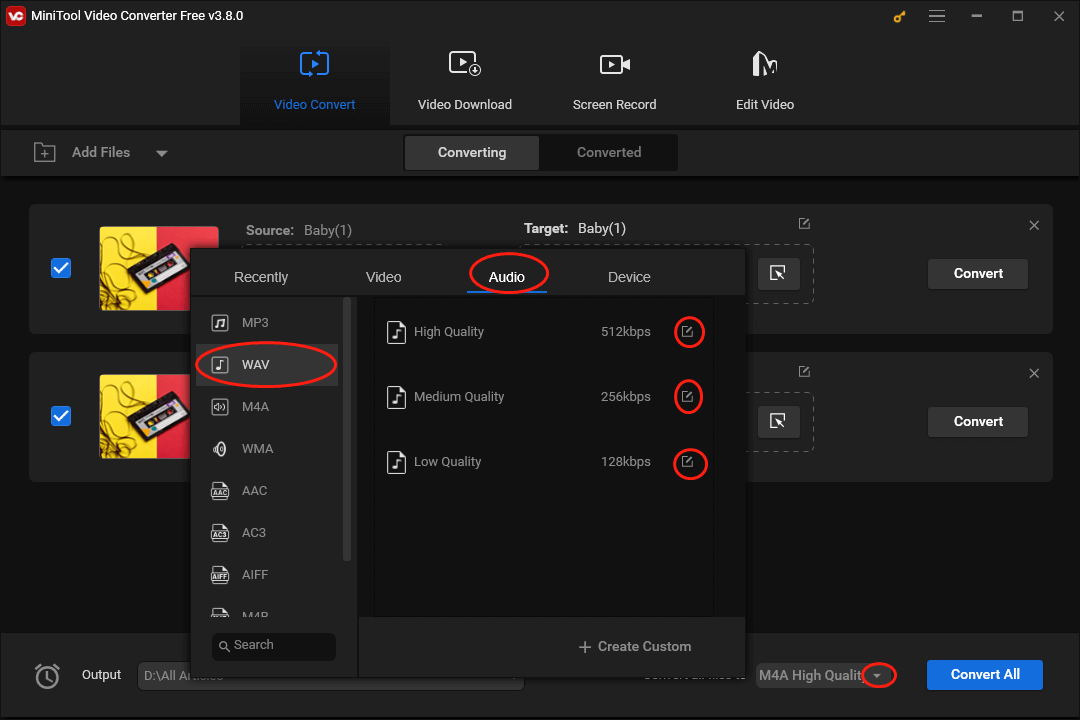
Expand the Convert all files to option at the bottom right to access the output format window. Then, switch to the Audio module and click on WAV. In the next, you will see three preset profiles in the right part. After deciding on the quality that you want, click on the pen icon to access the Settings window, where you can customize the sample rate of the WAV file.
Expand the Sample Rate option and choose a sample rate that you desire. Then, click on the Create button to confirm the changes.
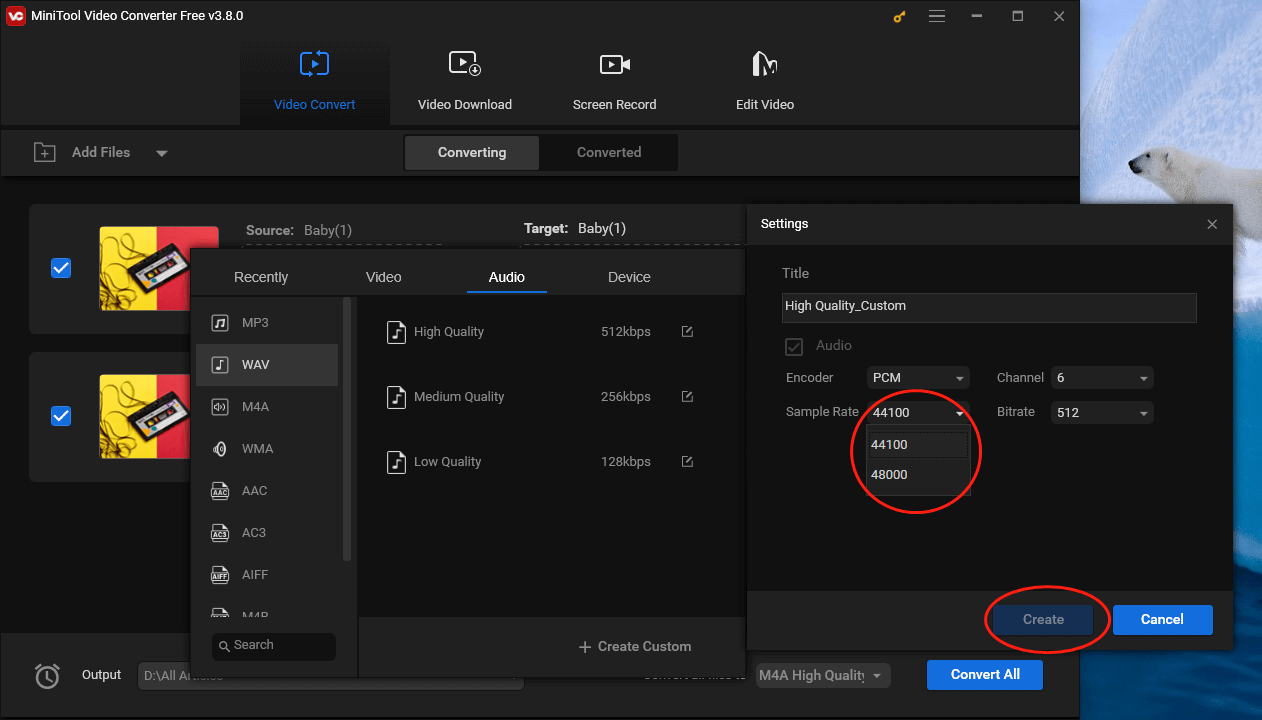
Click on High Quality_Custom to set the output format for your source files.
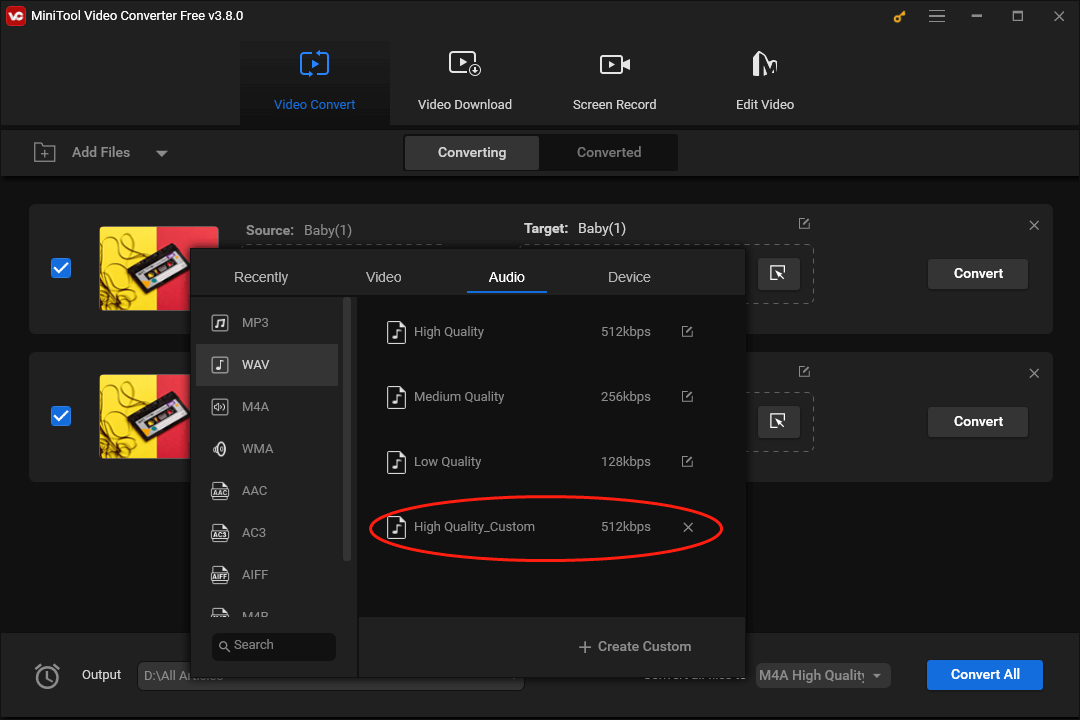
Step 4. Begin your conversion tasks and check your converted files.
Click on the Convert All button to begin your conversion tasks.
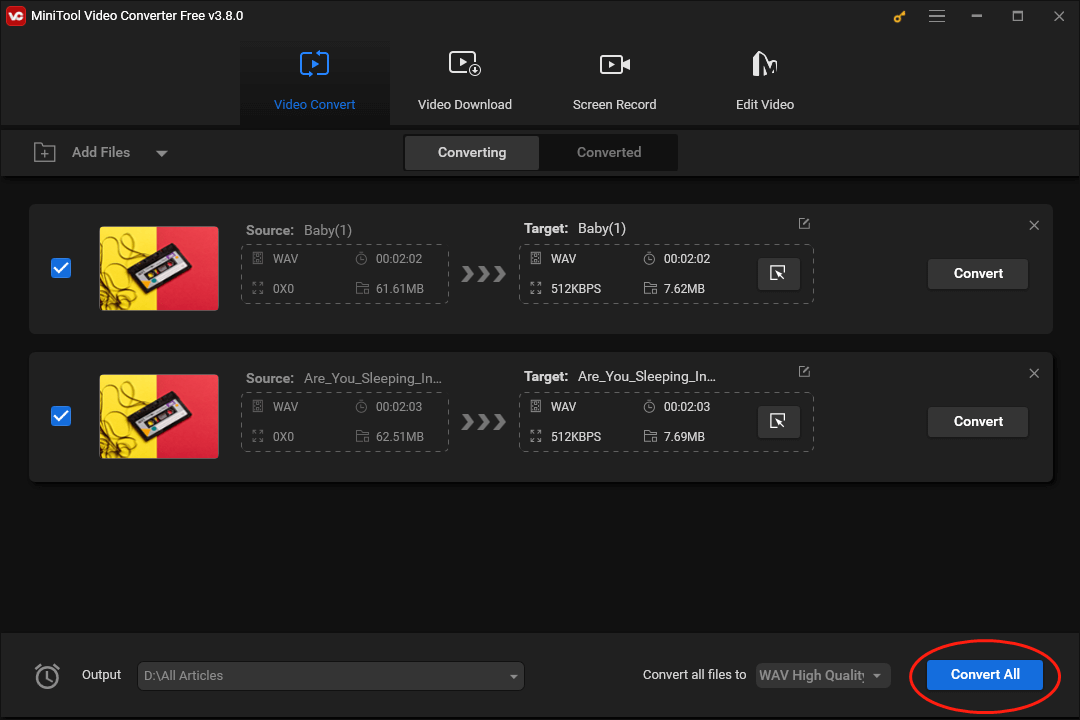
Once the conversion is done, switch to the Converted section and click on the Show in folder button to locate and check your converted files.
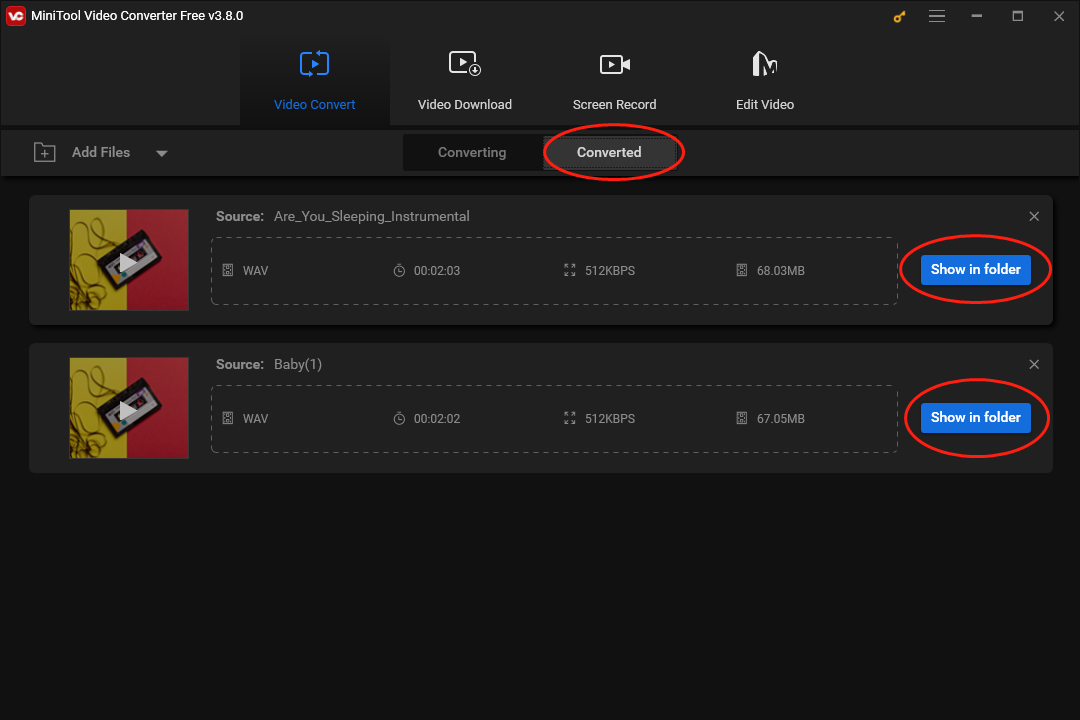
As you can see, it is effortless for you to use MiniTool Video Converter to change sample rate of WAV file.
MiniTool Video ConverterClick to Download100%Clean & Safe
Extended: How to Convert Your WAV Files with Images and Videos
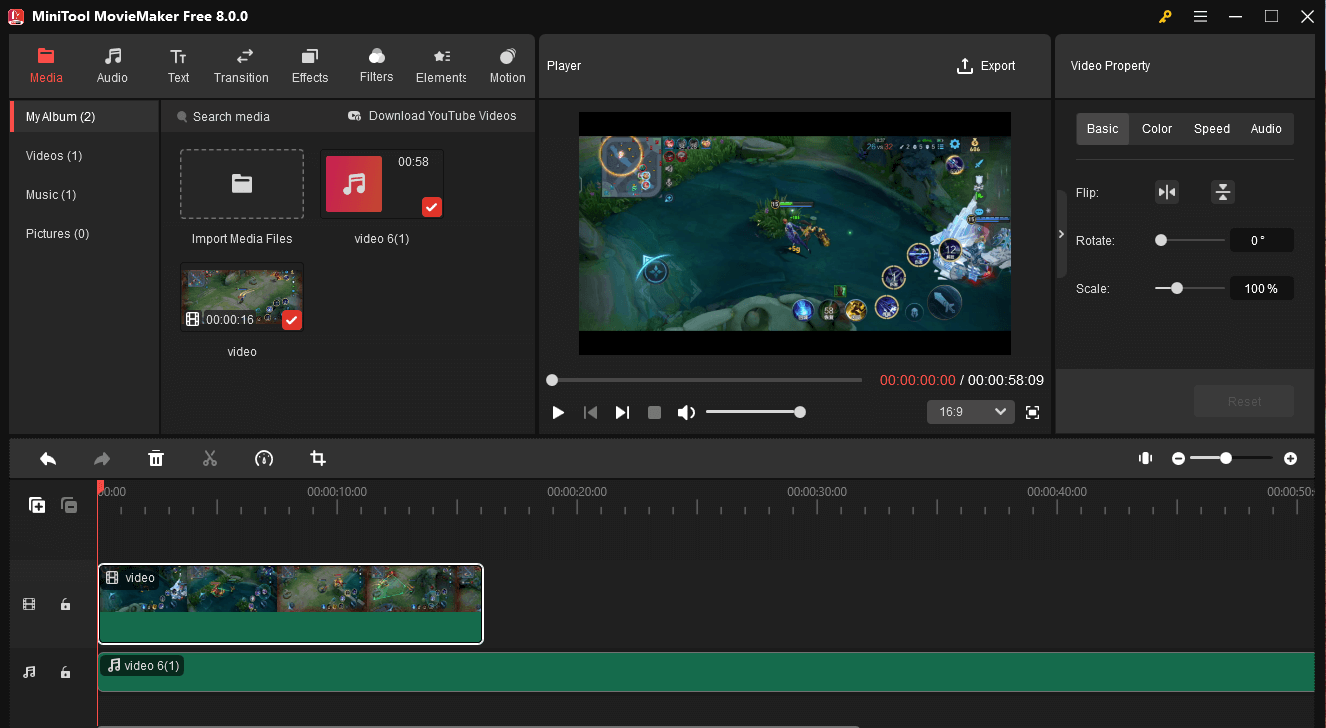
Now, you have grasped how to change the sample rate of a WAV file. Do you want to add your WAV files to your videos? If you do, MiniTool MovieMaker is a reliable video editor that can satisfy your needs. It empowers you to play WAV without hassle, trim your WAV files frame by frame, and adjust the volume and speed of your WAV files.
In addition, MiniTool MovieMaker allows you to combine your WAV files with images, videos, and other audio files. Meanwhile, you are capable of saving your WAV files in formats like MP4, MKV, AVI, and more.
MiniTool MovieMakerClick to Download100%Clean & Safe
To Wrap Things Up
This article has walked you through the definition of sample rate and explained why to change the sample rate of a WAV file. Meanwhile, it guides you to change sample rate of WAV file with MiniTool Video Converter step by step. Also, you can learn about a surpassing WAV editor and player in this article.
Finally, if you have any problems using MiniTool Video Converter or MiniTool MovieMaker, share them with me on Twitter, and I will give you a hand as quickly as possible. Also, you can ask for help by sending an e-mail to [email protected].


User Comments :