Lenovo laptops are used widely by people for business or other purposes. Like using smartphones, users need to record certain information while using a Lenovo laptop. But what some Lenovo users don’t know is how to take a snap of exactly what’s displayed on the screen. This free file converter post shows different methods for taking screenshots on Lenovo.
Whenever users need to record some information displayed on their screen, they think of taking a screenshot. However, some people have no idea of how to screenshot on Lenovo laptop and some only know that they can use the Print Screen button. But what if the Print Screen button not working? Are there other easy ways to screenshot on Lenovo? Please find your answers in the following content.
How to screenshot on Lenovo laptop? Let’s begin with some basic tips. You can find a Print Screen button on the keyboard of almost all laptops; it is designed to help users capture their screen easily and directly. The following part shows you how to take a screenshot on a Lenovo in simple steps.
What you need to know is that the name of this button varies; it may be PrtSc, PrtScr, PrtScn, PrtSc, PrntScrn, Print Scr, Prt Scrn, Print Scrn, or Pr Sc on different keyboards.
Read this page if you don’t know how to screenshot on Acer laptop:
Read this page to learn how to take a screenshot on HP:
How to Screenshot on ThinkPad
The following methods and steps work for how to take a screenshot on ThinkPad or other Lenovo laptop series.
How to Take a Screenshot on Lenovo Running Windows 10
You should locate the Windows key and Print Screen key; on the keyboard of ThinkPad and most other Lenovo laptops, the Print Screen key is shortened to PrtSc and located at the bottom right section.
How to capture the entire screen:
- Press Windows + PrtSc at the same time.
- Your Lenovo laptop screen will dim for a moment. That means the screenshot is taken successfully.
Where to find the Lenovo screenshot:
- You should open File Explorer on your Windows 10 laptop.
- Select This PC from the left sidebar.
- Click Pictures under it.
- Double click on the Screenshots folder in the right pane to open it.
- Now, you can view your screenshot images.
How to troubleshoot File Explorer not responding or stopped working?

Bonus tips:
One: the quickest way to save a screenshot on Lenovo laptops.
- You can press Fn + PrtSc to save a screenshot of your entire desktop to the clipboard.
- Then, you may open a program that allows you to insert images.
- Paste the screenshot into it by pressing Ctrl + V.
Two: there’s another way to screenshot on ThinkPad running Windows 10.
- Press Windows + W on the keyboard.
- Select Screen sketch from the pop-up right sidebar.
- Edit the screenshot image if you want.
- Click on the Save button to keep it.
Three: how can you screenshot an active window on Lenovo?
- Make sure the information you need is displayed on the currently active window.
- Press Alt + Print Screen on your keyboard.
- Open a program and paste your screenshot image into it.
How to Take a Screenshot on Lenovo without Windows 10
If you’re not running Windows 10 on your Lenovo laptop, the steps to screenshot on PC are not the same. But don’t worry; the process is also simple enough.
How to capture the entire screen:
- Locate the information you need on the screen.
- Press the Print Screen key on the keyboard.
- Then, your screen will be captured and the screenshot is saved to the clipboard.
How to view the screenshot image:
- Find a program that allows you to insert and view an image.
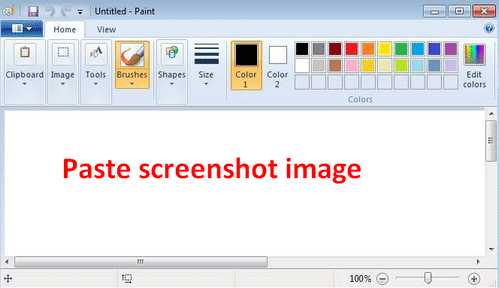
- Open the program on your Lenovo laptop; let’s take Microsoft Paint as an example.
- Press Ctrl + V to paste the image. Also, you can right on the blank section and select Paste.
- Edit your screenshot image if you want.
- Save the screenshot by pressing Ctrl + S Also, you can click File -> Save to keep it.
What if you’re using a Mac, instead of Windows? A snipping tool is also built in Mac to help users crop a picture easily. Besides, there are many other third-party snipping tools available for Mac users to choose from.
How to Take a Screenshot on Lenovo Yoga
Lenovo Yoga refers to the 2-in-1 laptop series of Lenovo: multimode laptops & ultrabooks with the latest processor, graphics, display, and audio technology options. For instance, you may use Yoga C Series, Yoga S Series, or Yoga Duet Series. How to screenshot on the Windows 2-in-1s and tablets from Lenovo?
How to screenshot on Lenovo:
- Let the Yoga screen displays what you want.
- Find the ON/OFF and Volume Down buttons on the keyboard.
- Press these two buttons simultaneously and your screen will flash. This means a snapshot is created.
Where to find the screenshot:
You should navigate to the Gallery or My Files folder on your Lenovo tablet to view the screenshot images.
Shortcuts for Making Screenshot on Tablet
If the above method didn’t work with your Lenovo tablet, you should follow these tips instead if you have an Fn key on the keyboard.
Fn + Print Screen
Pressing Fn + Print Screen helps you to take a screenshot of the entire tablet screen and the image is saved to the clipboard temporarily. It’s the same as pressing Print Screen on a standard keyboard.
Fn + Windows + Print Screen
Pressing Fn + Windows + Print Screen also takes a screenshot of your entire screen, but the image will be saved to your hard drive under the Screenshots folder. It’s the same as pressing Windows + Print Screen.
Fn + Alt + Print Screen
Pressing Fn + Alt + Print Screen captures your active window on the tablet and saves the screenshot to the clipboard. It’s the same as pressing Alt + Print Screen.
If you don’t like these shortcuts or they also failed, please refer to the later part on this page: How to Take a Screenshot on a Lenovo Laptop without Print Screen.
Print Screen Button Is Not Working, How to Fix
Some people complained that their Print Screen button is not working suddenly, and they are wondering how to screenshot on Windows. Of course, they should try to fix the Print Screen not working using the methods mentioned in this part.
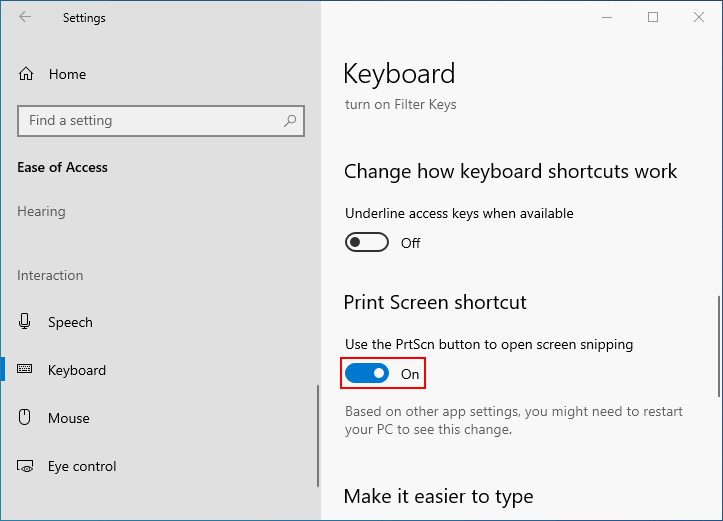
Let’s first show you how to enable Print Screen key in Windows 10.
- Open Settings by pressing Windows + I.
- Select Ease of Access. (Also, you can press Windows + U to open it directly.)
- Scroll down in the left pane to locate the Interaction section.
- Select Keyboard.
- Go to the Print Screen Shortcut section in the right pane.
- Toggle the switch of Use the PrtScn button to open screen snipping to On.
Windows Keyboard Shortcuts Not Working? Please Try These 7 Fixes.
Fix 1: Stop Programs
Some opening programs on your laptop may occupy the Print Screen hotkey, so pressing the key is not working for taking a screenshot. Therefore, you should stop the programs that may cause conflict with the capture of Windows 10.
You should close programs like OneDrive, Dropbox, and Snipping Tool.
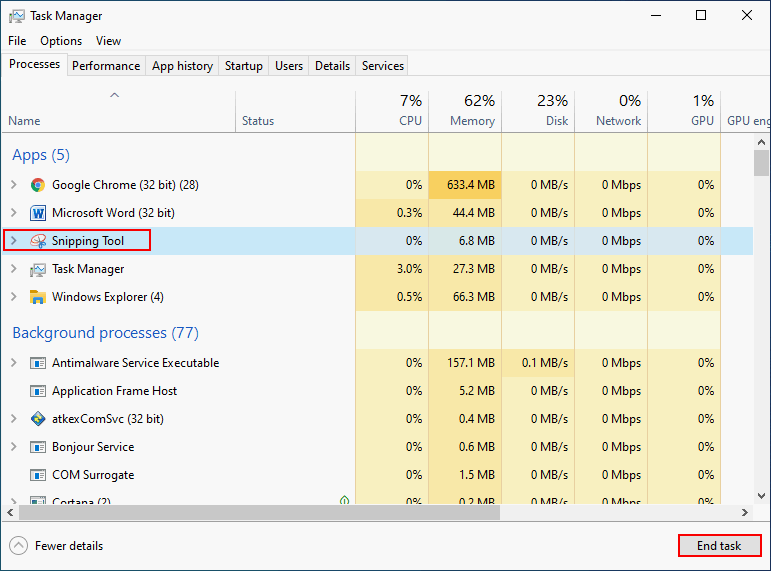
- Press Ctrl+Shift+Esc to open Task Manager.
- Browse the running programs under the Processes tab or the Details tab.
- Select one program at a time and click End task. Repeat this to close all programs possibly responsible for the Print Screen key not working issue.
- Restart your laptop.
If this didn’t work, you should also try to fix the problem by uninstalling the recently installed software.
Fix 2: Restart Lenovo Laptop
Choice 1: Safe Boot.
- Open Run by pressing Windows + R.
- Type msconfig and hit Enter.
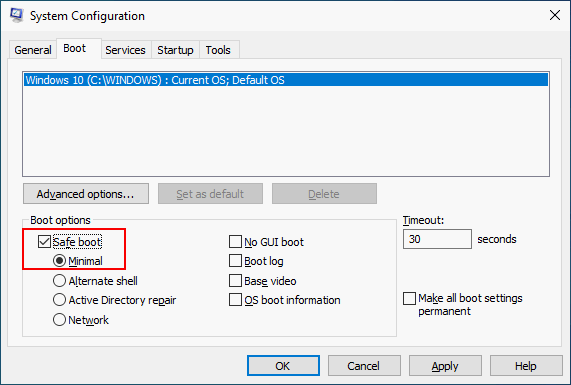
- Shift to the Boot tab at the top.
- Go to the Boot options Then, check Safe boot and keep the Minimal option check under it.
- Click OK and your laptop will be restarted in Safe mode.
Now, you can try to use the Print Screen key to screenshot on your Lenovo laptop.
Choice 2: Clean Boot.
- Open Run.
- Type msconfig and click OK.
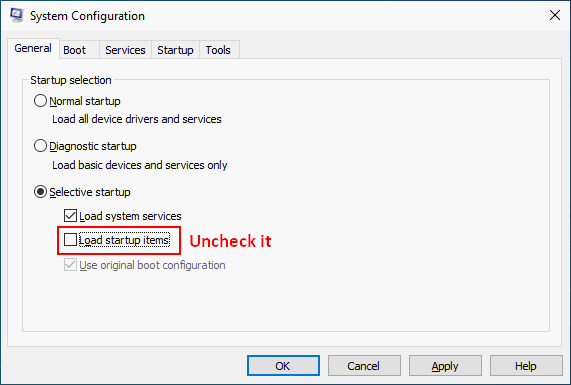
- Keep the General tab selected in the System Configuration window.
- Uncheck Load startup items under the Selective startup section at the bottom.
- Shift to the Services tab.
- Check Hide all Microsoft services at the bottom left section.
- Click Disable all.
- Click Apply and then OK to save changes.
- Restart your laptop.
Fix 3: Update Keyboard Driver
Step 1: open Device Manager.
- Open Run -> type msc -> click OK or press Enter.
- Right click on the Start button or press Windows + X -> select Device Manager from the WinX menu.
Step 2: locate your keyboard and update driver.
- Look for the Keyboards menu and click to expand it.
- Right click on the keyboard you’re using.
- Select Update driver.
- Click Search automatically for drivers to let Windows find the newest driver for your computer.
- Also, you can click Browse my computer for drivers if you have downloaded the latest version of the driver manually.
- Follow the on-screen instructions to continue.
How to fix WinX menu not working?
Fix 4: Run the Keyboard Troubleshooter
- Press Windows + I to open Settings.
- Select Update & Security.
- Shift to Troubleshoot in the left pane.
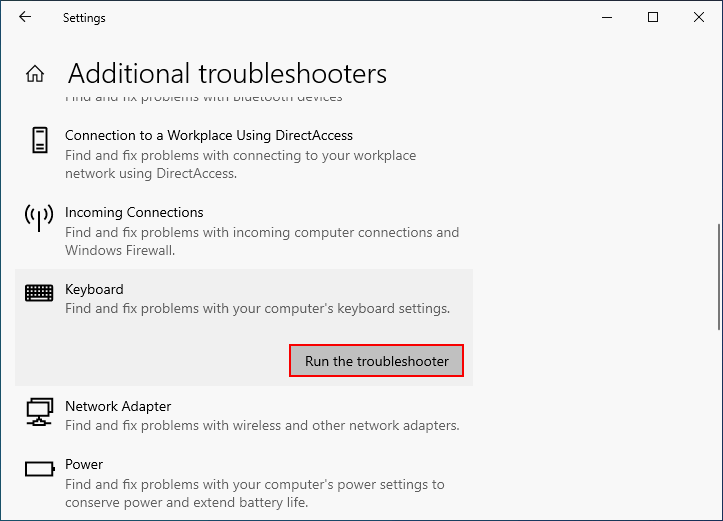
- Click Additional troubleshooters in the right pane.
- Scroll down to find the Keyboard option; select it.
- Click on the Run the troubleshooter button and wait.
Fix 5: Update Your System
The last trump card is to update your system if there’s a newer version available or roll back to a previous version/a restore point (using System Restore) where the problem didn’t occur.
How To Recover Lost Files After Windows Update?
How to Take a Screenshot on a Lenovo Laptop without Print Screen (#3 Is Awesome)
If you still can’t use the Print Screen key to take screenshots on Lenovo laptop or you need an advanced method for capturing the screen, please try the following tools instead.
#1. Snipping Tool
The Snipping Tool is built into the Windows system by default for taking screenshots.
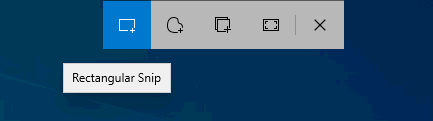
- It offers four Snipping modes for users: Free-form Snip, Rectangular Snip, Window Snip, and Full-screen Snip.
- It allows you to Delay snip creation in 1 Second, 2 Seconds, 3 Seconds, 4 Seconds, and 5 Seconds if you want.
How to open the Snipping Tool:
- Press the Start (Windows logo) key.
- Type snipping tool.
- Press Enter.
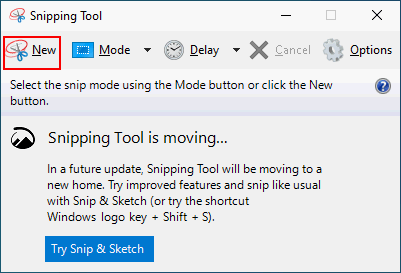
How to take a screenshot with the Snipping Tool:
- Select a Mode or define a Delay if you want.
- Click New in the upper left corner.
- Move your mouse pointer to define the area you need to record.
- Edit the image according to needs in the Snipping Tool.
- Click File -> Save As to store the screenshot.
#2. Snip & Sketch
Microsoft released a more advanced tool to replace the previous Snipping Tool – it’s Snip & Sketch.
How to open Snip & Sketch on Lenovo laptop:
- You can open the Snipping Tool and click Try Snip & Sketch.
- Also, you can search for snip & sketch from Start.
- Another easy way to open it is: pressing Windows + Shift + S.
It also provides 4 snipping modes: Rectangular Snip, Freeform Snip,Window Snip, and Fullscreen Snip.
How to open Snip & Sketch on Lenovo tablet:
- Click on your Notification Center located on the right side of the Windows taskbar.
- Click Expand All from the bottom section.
- Select Screen snip.
How to screenshot on Lenovo with Snip & Sketch:
- Select a mode you’d like to use. The mode you used last time will be selected by default when you open the app.
- Specify the area or the window you want to record. (This step is not needed if you’re using the Fullscreen mode).
- The screenshot will be taken and you’ll see a Snip saved to clipboard notification in the lower right corner of your laptop.
- Click on the notification to view the image in Snip & Sketch.
- Choose to edit, share, or save the image according to needs.
Also, you can open another program and press Ctrl + V to paste & view the screenshot image; then, modify or save the image directly.
#3. MiniTool Video Converter
There are lots of third-party tools that can be used to capture the screen of the Lenovo Laptop. Among them, MiniTool Video Converter deserves your attention.
MiniTool Video ConverterClick to Download100%Clean & Safe
How to Screenshot on a Lenovo:
- Download MiniTool Video Converter by clicking the button above.
- Navigate to the storage location and double click on the setup file.
- Follow the on-screen instructions to finish installing the software.
- Click Start Now at the end of the installation.
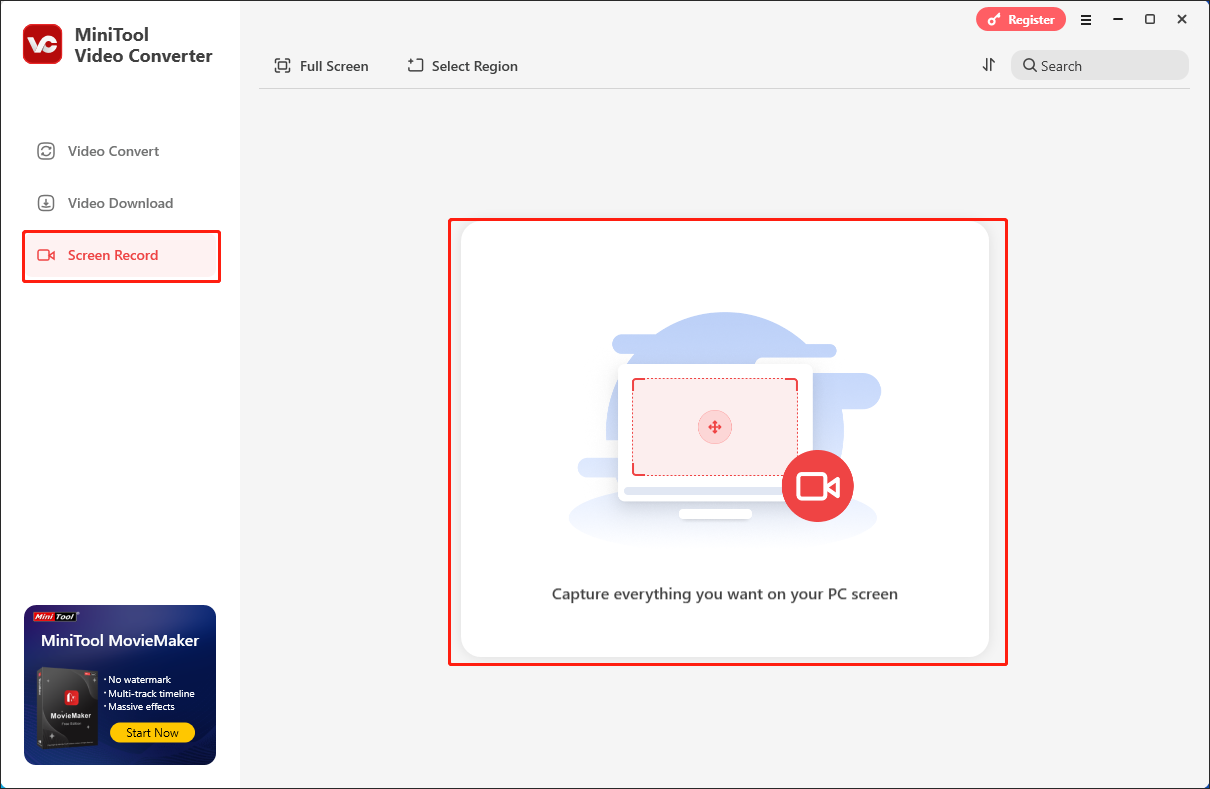
- Select the Screen Record option at the top of the software interface.
- Click on the Capture everything you want on your PC screen section to open MiniTool Screen Recorder.
- Choose Full screen or Select region from the left pane. (Optional)
- Specify the system audio or microphone sound in the middle pane. (Optional)
- Click on the red Record button in the right pane or press F6 to start.
- The record will be started after a countdown.
- Press F9 to pause/resume recording. (Optional)
- Press F6 to stop the recording.
- View the recorded video to see whether it satisfies your needs.
In addition to MiniTool Video Converter, there are many other third-party screen recorders provided online. Please choose a reliable one with high quality to avoid unnecessary troubles. How to screenshot on laptop using other tools? The basic steps are the same: download the screen recorder -> install it properly -> launch it and click the corresponding button to record.
Conclusion
This article is very helpful for users who want to know how to take screenshot on Lenovo laptop. In the beginning, it shows you how to screenshot on ThinkPad or Lenovo Yoga by using the Print Screen key (the basic method). Then, it tells you how to fix the Print Screen button not working issue on a laptop. After that, it also offers some tools you can use to capture the screen of a Lenovo laptop.
In addition, if you have any problems when using MiniTool Video Converter, please ask for help by sending an e-mail to support@minitool.com. Also, you can share your problems with me on Twitter. I will give you a hand as quickly as possible.
About The Author

Position: Columnist
With over 6 years of experience as a tech writer, Eien specializes in creating clear, simple guides for video conversion, transcription, screen recording, etc. He stays connected with the tech community and its readers to understand the real-world problems users face. By combining their feedback with his own hands-on testing, Eien always provides proven solutions to complex software problems in time.
User Comments :