Google Classroom is a crucial tool for both educators and students. Recording videos for Google Classroom provides a flexible learning experience, enriches the teaching content, etc. This post from the free video converter explains the importance of recording videos for Google Classroom and provides instructions on how to efficiently record video for Google Classroom.
Google Classroom is a free blended learning platform developed by Google. It simplifies the process of creating, distributing, and grading assignments in a paperless way, allowing teachers and students to share files quickly and easily. If teachers watch a useful and educational video, they can record it and share it with students, or add it to the assessment. There are several advantages to recording video for Google Classroom.
The Significance of Recording Video for Google Classroom
1. Providing instructions: Teachers can record video demonstrations to provide clear instructions and explanations for assignments and lessons.
2. Personalized feedback: Video recordings allow teachers to provide personalized feedback to students, making the learning experience more impactful.
3. Engaging teaching content: Teachers can record videos including animations, demonstrations, and other multimedia elements as teaching content, making learning more engaging and enjoyable.
How to Record Video for Google Classroom
How can we record video for Google Classroom? I highly recommend MiniTool Video Converter.
Method 1. MiniTool Video Converter
MiniTool Video Converter is a free video converter without watermarks or time limits for Windows. It supports various video and audio formats. Batch conversion is allowed, too. Users can also use it to comprise large files or upscale the quality of videos. In addition, users can use it to record videos.
Below is the guide to record video for Google Classroom with MiniTool Video Converter.
Step 1. Click the button below to download and install MiniTool Video Converter.
MiniTool Video ConverterClick to Download100%Clean & Safe
Step 2. Run the software.
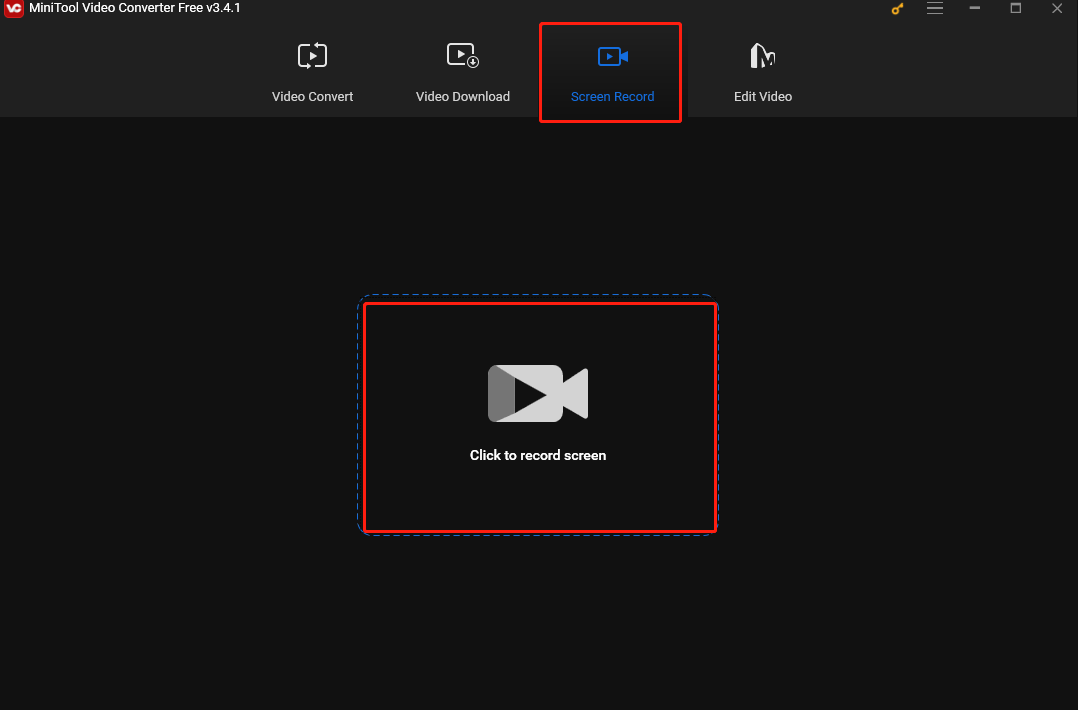
Step 3. Click Screen Record and Click to record screen area to open MiniTool Screen Recorder.
Step 4. The full-screen mode is by default. Click Full screen and hit Select region on the down-drop menu if you want to record the area you desire.
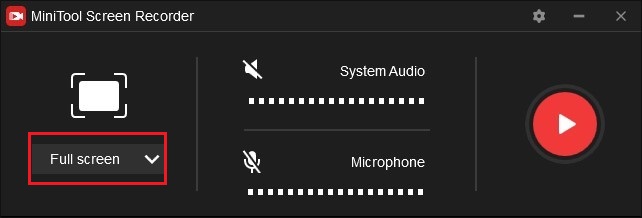
Step 5. This software offers users the option to record system audio and microphone simultaneously or separately. However, both are initially turned off. Users can click System Audio to record system audio or Microphone to capture microphone input.
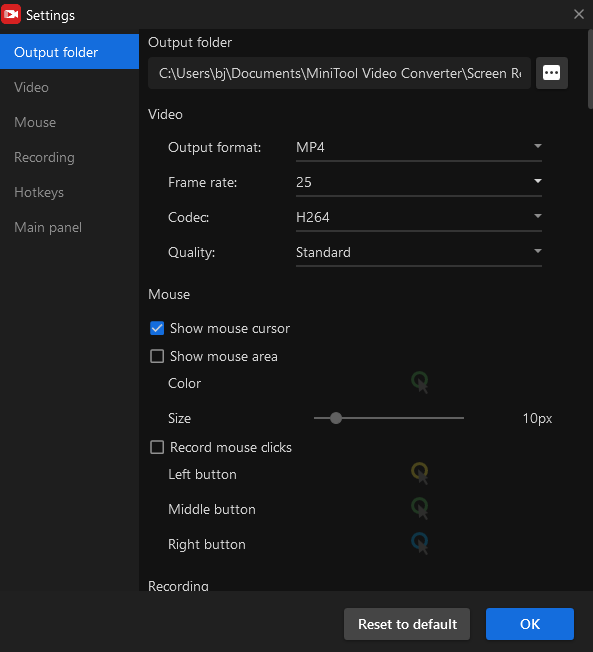
Step 6. Click the gear icon for more settings. Click OK to save your changes.
Step 7. Click the Record button or press F6 to start recording. Press F9 to pause the process if needed.
Step 8. Press F6 to stop the recording.
Step 9. The recording will appear on the list of the main window. Right-click it to preview, delete, or open the folder.
Method 2. VLC Media Player
VLC Media Player is also a handy tool to record video for Google Classroom. It’s a free open-source cross-platform multimedia player and framework that plays most multimedia files. Users can also use it to record videos. See as follows.
Step 1. Download, install, and launch the software.
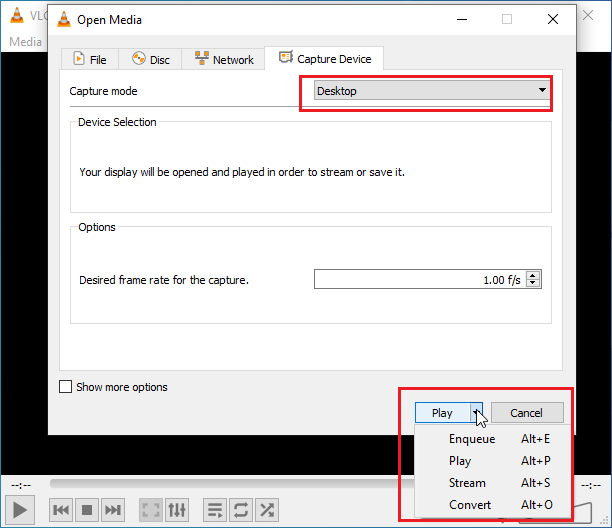
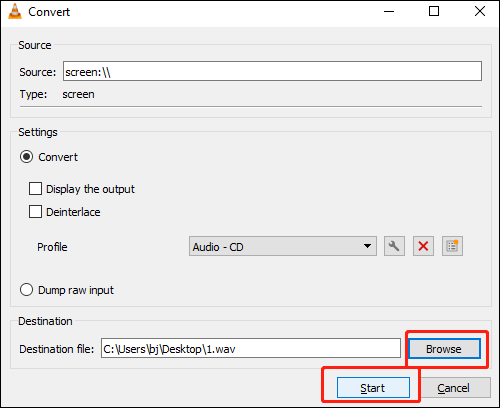
Step 2. Click Midea. Select Open Capture Device… on the down-drop menu. Change the capture mode to Desktop by clicking the down triangle icon on the Capture Device tab. Click the little down triangle icon next to the Play button on the Show more options area, and choose Convert on the drop-down menu.
Step 3. Select the output folder by clicking Browse in the Destination file section. Click Start to begin recording.
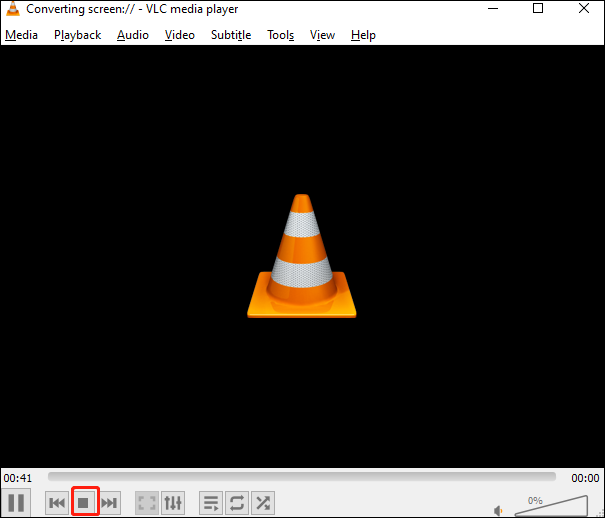
Step 4. Hit the rectangle icon in the left-bottom corner to stop the process.
Conclusion
Google Classroom serves as an important educational application nowadays. Learning how to record video for Google Classroom has various benefits. This post presents 2 free recorders to help you do so. I hope you find it useful.
If you have any issues with MiniTool Video Converter, don’t hesitate to contact us via [email protected].


User Comments :