With the world changing so fast, video interviews are becoming more and more prevalent for remote jobs. Skype is one of the most outstanding tools for providing virtual meeting services in the world. As for the OBS, it is an open-source program that is frequently used for streaming, providing several recording and editing functions. This free file converter post from MiniTool will show you specific ways to record Skype with OBS.
OBS is a free and full-featured recorder without any limitations that can help you record Skype with high quality. Keep reading this article and you will find your solution.
How to Record Skype with OBS
OBS, known as Open Broadcaster Software, is a professional and reliable recorder for Windows, Mac, and other devices. It can capture real-time video or audio with its excellent performance. Its simplified Settings menu allows you to adjust every aspect of your broadcast or recording with an extensive range of available configuration options. Besides, it has an intuitive main interface that is friendly to beginners, and you can record without a watermark.
Now, let’s see the detailed steps of how to use OBS to record:
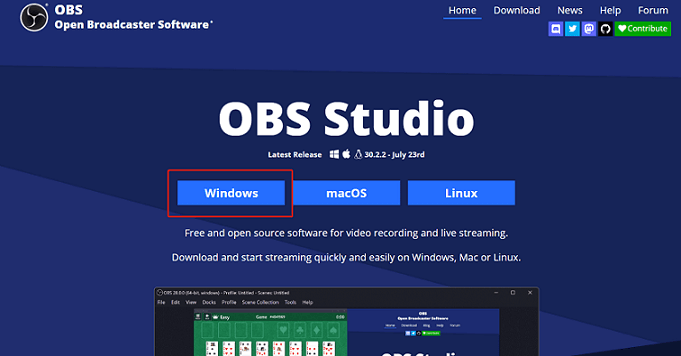
Step 1: Open the browser to search for the OBS official website then enter it. Click the Windows button to download and install this software on your PC.
Step 2: Launch this program, you will see the Auto-Configuration Wizard window, select a choice you prefer, if you want to use this software mainly for recording, then choose the second choice. Then click the Next button.
Choose a resolution and FPS, then click Next. Click the Apply Settings button then the application will get ready for use.
Step 3: In the OBS main interface, you will see five sections:
Scene: adding one or more scenes
Sources: adding various inputs
Audio Mixer: adjusting the microphone and desktop audio levels
Scene Transitions: adding amination when switching between scenes
Controls: a range of setting options.
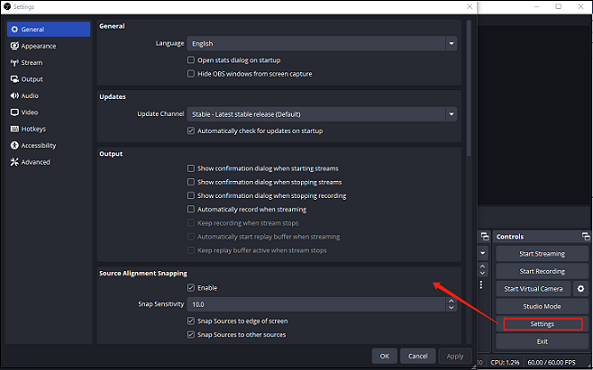
Click the Settings button, then a Settings window will open, and then you can set the parameters you prefer.
Step 4: After all the settings are done, click the + button at the bottom of the Sources section, then click the Display Capture button to record your entire computer screen. Open Skype to start your meeting. OBS will give you a three-second buffer, and then the recording will begin.

Step 5: Once the recording is done, click the Stop Recording button to save the Skype recording content.
Bonus: An Alternative Way to Record Skype
If you think the OBS is not suitable for you, maybe you can try MiniTool Video Converter. It is a robust and easy-to-use screen recorder that is capable of recording Skype with a high quality for you. MiniTool Video Converter allows you to record your Windows screen with a microphone or system audio. You can choose to record the entire computer screen or select a recording area. No complex operation, just a few clicks, then you can get a perfect Skype recording.
Let’s see how to use this Skype recorder to record:
Step 1: Click the download button below to download and install MiniTool Video Converter on your computer.
MiniTool Video ConverterClick to Download100%Clean & Safe
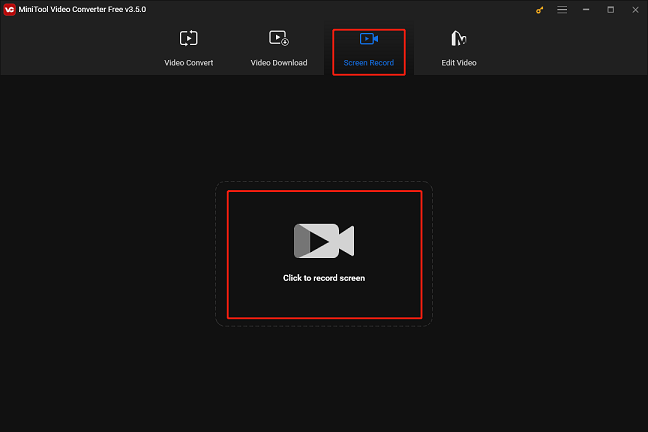
Step 2: Launch this software to enter its main interface. Select the Screen Record section, then click the Click to record screen button.
Step 3: The MiniTool Screen Recorder window will pop up, you can click the Settings icon to open the Settings window and customize the parameters you like. Also, you can choose to record the full screen or select a recording area and turn the microphone or system audio on or not. Then click the red Record button, it will give you a three-second delay so you can go back to Skype to start your meeting.

Step 4: Press F6 to stop recording, then you can check your Skype recording in your local folder.
Conclusion
It might be an issue for Skype users to record a call or meeting, so having a screen recording tool is quite desirable for them. This post has figured out this problem, showing you specific ways to record Skype with OBS. Moreover, we gave you an alternative recorder to help you more. Hope you can enjoy your Skype recording!
User Comments :