MiniTool Video Converter (a reliable free file converter) publishes this post to walk you through the Kaltura Capture app. At the same time, this article offers you four feasible methods to tackle the Kaltura not working error.
As a desktop screen recorder, Kaltura Capture enables you to capture webcam, microphone, and PC screen with simple clicks. This application may be a great boon to some of you. However, recently, some users have reported that they are bothered by the problem of Kaltura not working. Don’t worry. I will provide you with comprehensive solutions in the following content.
Method 1. Restart Your Computer
To cope with Kaltura not working, one of the most effortless ways is to restart your computer. Then, you need to restart the Kaltura Capture app. Finally, check whether the problem has been solved or not. If this method isn’t workable, please read on for more.

Method 2. Check the Internet Connection
A stable internet connection has much to offer in sustaining the normal operation of Kaltura Capture. Hence, ensure that you have connected your PC to a stable Wi-Fi network. If you want to know whether the internet speed is acceptable or not, please go to https://www.speedtest.net to test your internet speed.
Method 3. Uninstall Kaltura Capture and Re-download It
Another method to solve the Kaltura not working error is to uninstall and re-download the Kaltura Capture app. When you have downloaded and installed this application again, run Kaltura Capture and check whether the problem has been solved or not.

Method 4. Try a Kaltura Alternative
Undoubtedly, the problem of Kaltura not working is an obstacle to screen recording. If the solutions mentioned above don’t work, I highly recommend a powerful Kaltura alternative called MiniTool Video Converter. Meanwhile, I will show you how to use this screen recorder to capture the screen.
About MiniTool Video Converter
MiniTool Video Converter, which doesn’t have a time limit, enables you to record a wide range of computer activities for free and without any watermark. Moreover, this screen recorder has a user-friendly interface, which makes it ideal for greenhorns.
In addition, MiniTool Video Converter records anything in MP4 format, which means that your recording files can be compatible with all kinds of media players. Meanwhile, it provides you with simple hotkeys, which empower you to accomplish a recording task easily and quickly.
How to Record the Screen with MiniTool Video Converter
Below is a step-by-step tutorial on how to capture the screen using MiniTool Video Converter.
Step 1. Download MiniTool Video Converter by clicking on the download button below. Then, follow the on-screen instructions on your Windows PC.
MiniTool Video ConverterClick to Download100%Clean & Safe
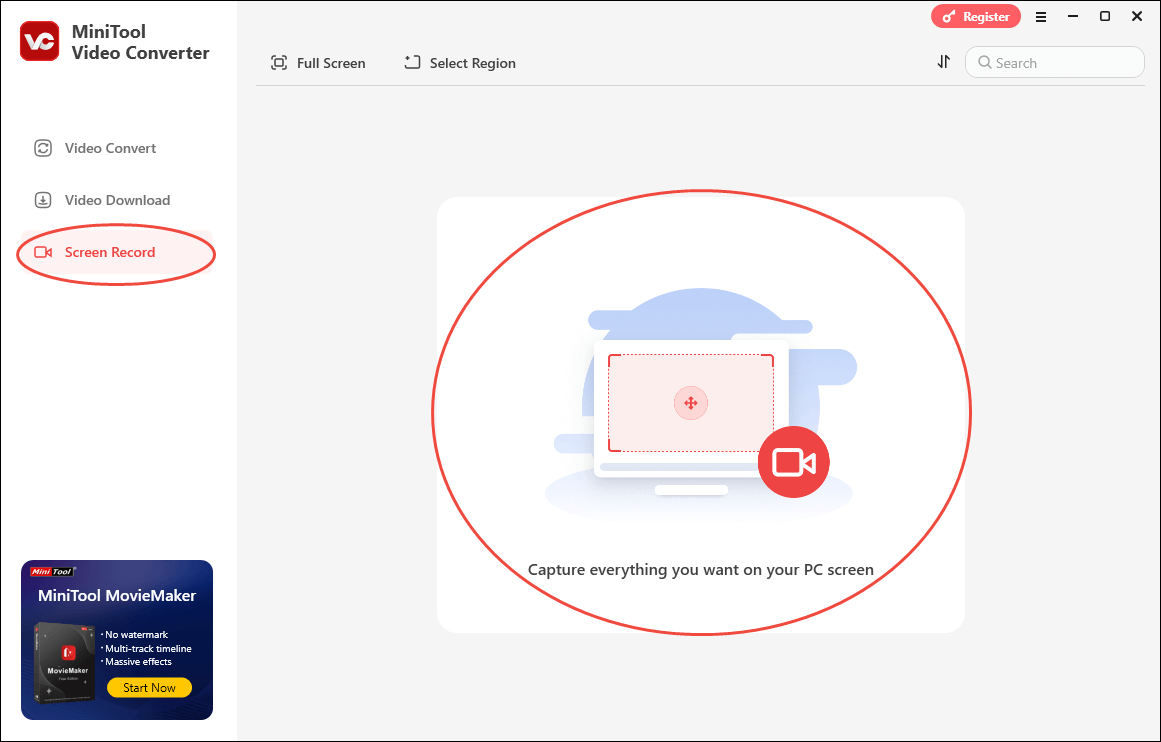
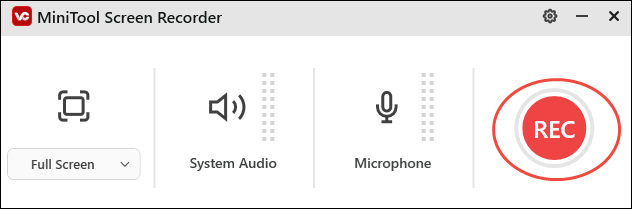
Step 2. After launching MiniTool Video Converter, navigate to the Screen Record module. Then, click on the Capture everything you want on your PC screen region to enter the MiniTool Screen Recorder window.
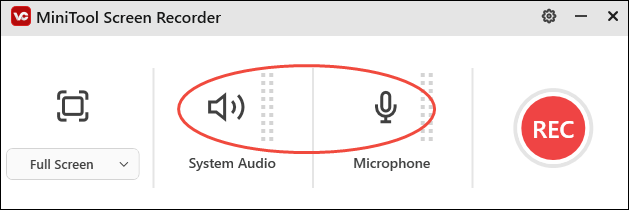
Step 3. Click on the System Audio icon and the Microphone icon to manage the audio recording.
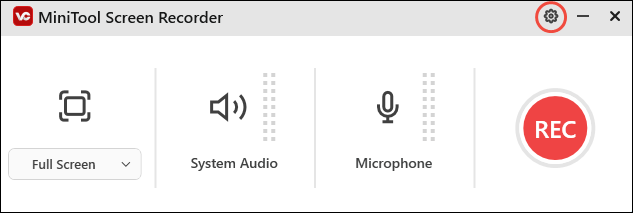
Step 4. Click on the upper-right Settings icon to enter the Settings window.
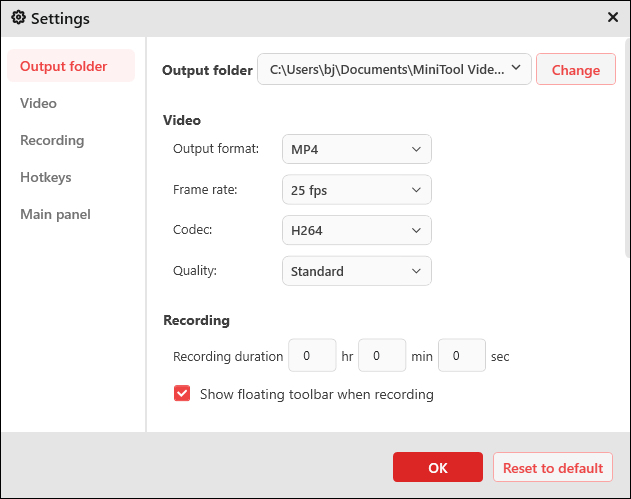
In the pop-up Settings window, you are free to choose a saving path for your recording file. Simultaneously, you can set the recording quality as standard quality, original quality, or high quality. Besides, the frame rate options, including 15fps, 20fps, 25fps, 30fps, and 50fps, are available. Finally, click on the OK button to confirm the changes.
Step 5. By default, MiniTool Video Converter adopts a full-screen recording mode. If you want to select a recording area, press the Alt + R keys and make a choice.
Step 6. Start the recording process by clicking on the REC button or pressing the F6 key. After a 3-second countdown, play the computer activity that you want to record.
Step 7. After the recording is over, press the F6 key again to end it.
Step 8. Click on the Play icon to view the recording file directly. Also, you can click on the Folder icon to locate and check the recording file.
As you can see, MiniTool Video Converter is a remarkable Kaltura alternative that you can try to solve the problem of Kaltura screen capture not working.
Final Words
There are four quick methods that can help you solve the problem of Kaltura not working. If you want a Kaltura alternative, never miss MiniTool Video Converter.
About The Author

Position: Columnist
With over 6 years of experience as a tech writer, Eien specializes in creating clear, simple guides for video conversion, transcription, screen recording, etc. He stays connected with the tech community and its readers to understand the real-world problems users face. By combining their feedback with his own hands-on testing, Eien always provides proven solutions to complex software problems in time.
User Comments :