Are you frustrated because you keep missing your favorite show on Philips Smart TV? The broadcast time just doesn’t fit into your busy schedule at all. Well, you are in the right place. In this post from the free video converter, I will show you how to record on Philips Smart TV. That way, you won’t have to worry about missing a second of your favorite programs ever again. Let’s get started!
How to Record on Philips Smart TV Using External Hard Drive
You can use an external hard drive to record on a Philips smart TV. To ensure a smooth recording experience, here are some things to check before you start:
- Update your TV software to the latest version.
- Make sure digital channels are installed on the TV’s internal tuner. (Note: Recording from a set-top box or other external devices isn't possible.)
- Your external hard drive should meet these requirements:
- Have at least 250GB of storage.
- A minimum writing speed of 30MB/s.
- A standard USB 2.0 connection.
- An external power supply.
Let’s see how to do recording on Philips smart TV.
Step 1. Before you connect the hard drive to your TV, make sure it’s empty. Once you plug it in, the TV will format the drive, and all the data on it will disappear.
Step 2. Plug the hard drive into the TV’s USB port.
Step 3. Press and hold the Pause button on your remote for 5 seconds to format the hard drive. This only works when you watch a digital broadcast.
Step 4. To start recording the show you are watching, press the Record button on the remote.
Step 5. You can also schedule a recording. You are allowed to do the recording up to 8 days in advance.
- Press TV Guide on the remote to find the channel and program you want to record. You can even just press the channel number to find it.
- When you find the show, press the RED button on the remote to set up the recording.
- Confirm the start and stop times.
Step 6. To watch the recording, open the TV guide and press the Yellow button.

How to Record on Philips Smart TV Using a Computer
If you have a computer, you can also use with MiniTool Video Converter to record on Philips TV. MiniTool Video Converter is a file converter, obviously. Surprisingly, it can record your screen. It can capture the full screen or a specific area. Additionally, this tool is free of charge, watermarks, time limits, bundles, or ads.
To do so, you need a cable.
Stage 1. Connect Your Computer to the TV Using a Cable
Step 1. On your computer, look for video input ports like HDMI or VGA. For your Philips smart TV, find the matching output ports. Most new smart TVs come with HDMI ports.
Step 2. If your computer and TV both have HDMI ports, use an HDMI cable. It can carry both audio and video signals. If your computer and the TV have VGA ports, use a VGA cable. But remember, since VGA only sends video, you might need a separate audio cable.
Step 3. Plug one end of the cable into the proper port on the computer. For instance, if it's an HDMI cable, plug it into the computer's HDMI input port. Then plug the other end into the corresponding output port on the Philips smart TV.
Step 4. Use the TV remote to turn on the TV and choose the correct output source. If you used an HDMI cable, select the HDMI output that matches the port where you connected the cable.
Stage 2. Set up MiniTool Video Converter
step 1. Hit the button below to install this recorder on your computer. Then, open this software.
MiniTool Video ConverterClick to Download100%Clean & Safe
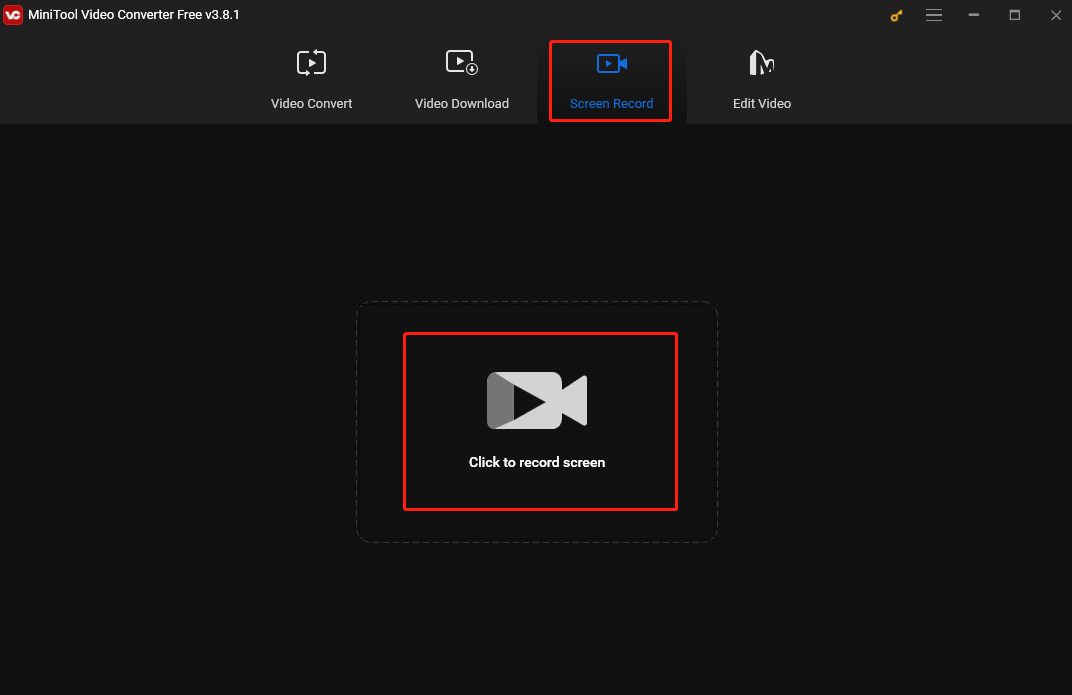
Step 2. Click the Screen Record tab and hit the Click to record screen area to enable MiniTool Screen Recorder.
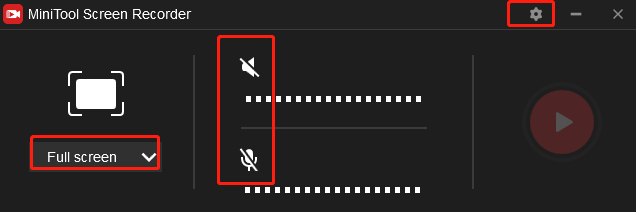
Step 3. On the MiniTool Screen Recorder panel, click Full screen, choose the Select region option from the dropdown, and then click and drag the cursor to choose the recording area. If you also stick with the default setting to capture your full screen.
Simply click the speaker and microphone icons to turn on/off the system and microphone sounds.
To adjust more settings for the recording, you can click the Gear icon in the upper right of the panel.
Stage 3. Start Recording
Step 1. Open your favorite shows. Press the default F6 on the keyboard or click the Record button in the panel to start recording.
Step 2. Press F6 again to end the recording. Then you can right-click on the recorded video in MiniTool Screen Recorder and choose to preview, delete, rename, or locate it.
Conclusion
How to record on Philips TV? This post offers you 2 easy and free methods. Now pick one and start the journey. Happy recording.
User Comments :