OBS is a free and open-source recording and streaming tool. As a recorder, it can record any activities on your screen, like streaming videos, video meetings, online calls, etc. It offers a game recording mode, allowing you to record games in high quality.
As a popular and powerful recorder, OBS offers many useful recording features. You can record your screen with or without audio. It also allows you to record a webcam. But sometimes, you may want to record webcam and gameplay separately. This allows for greater flexibility in post-production, enabling you to edit the two recordings independently to create high-quality content.
How to record camera and screen separately in OBS? Here’s a step-by-step guide.
How To Record Screen and Webcam Separately OBS
Step 1. Download, install, and open OBS.
First, make sure you have OBS installed on your computer. You can download it from the official website for free. Once installed, open the application.
Step 2. Add sources.
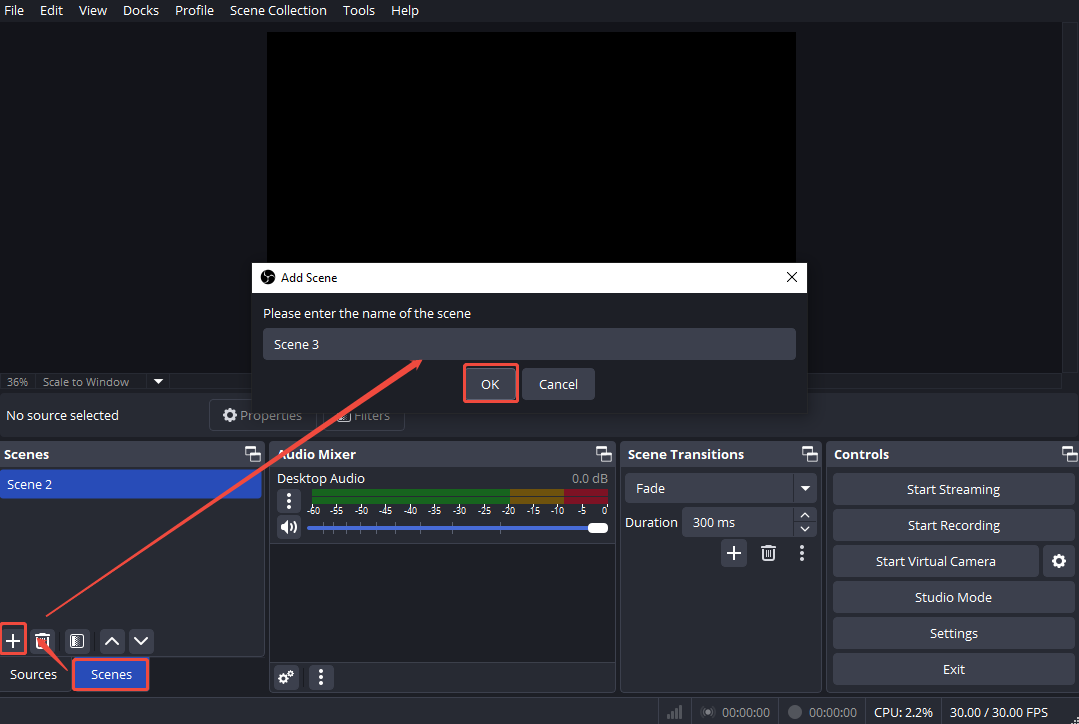
- Screen source. Under the Scenes tab (located at the bottom of the screen), click the + icon, and click OK to create your scene.
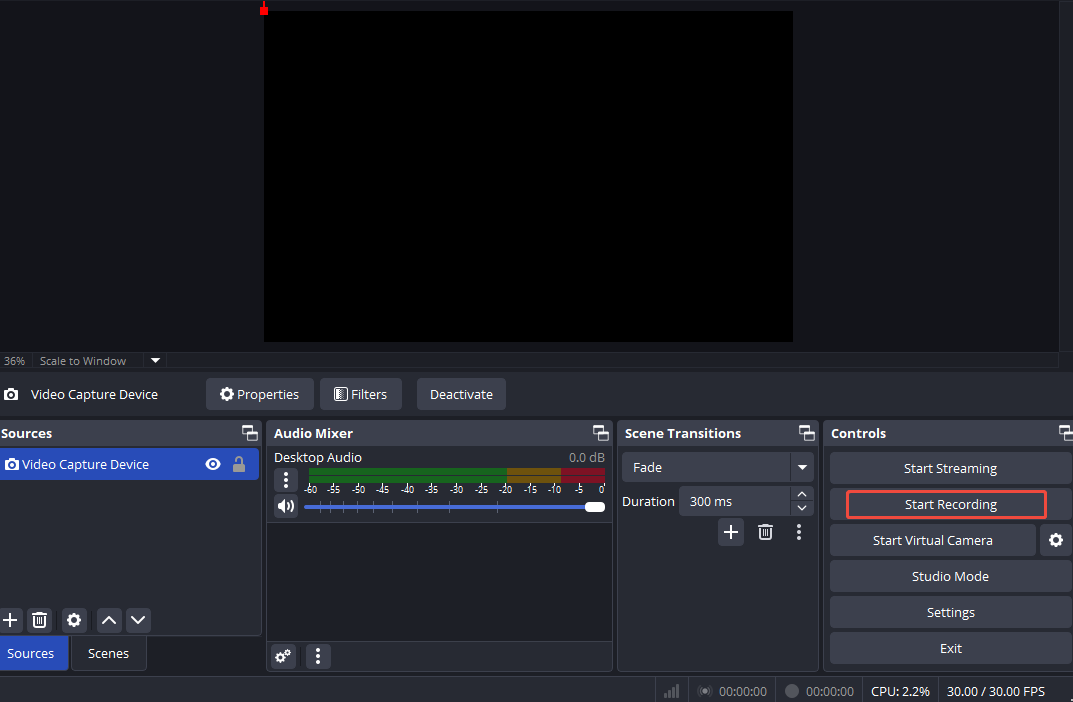
- Camera source. Go to the Sources tab and click the + button. From the list, select Video Capture Device from the drop-down menu. In the small popup, click OK to bring the next window. Here, expand the Device option and set your camera preferences. Click OK to confirm your changes.
In the Preview window, you'll see both your camera and screen sources
Step 3. Start recording.
Click the Start Recording button under the Controls tab. OBS will now start recording both your camera and screen separately.
Step 4. Stop recording.
When you’re finished recording, click the Stop Recording button.
Bonus: A Beginner-Friendly Screen Recorder – MiniTool Video Converter
OBS is powerful with so many recording features. However, it may be difficult for beginners. If you are new to screen recording, I recommend you use MiniTool Video Converter. This tool is free and easy to use. It offers an intuitive interface with everything laid out clearly. You can easily find all the necessary options for screen recording.
Additionally, MiniTool Video Converter can record the audio output from your computer, from your microphone, or both. You are allowed to record the full screen or a specific area. It also allows you to customize recording settings. You can change the frame rate, quality, etc.
Let’s see how to screen record with MiniTool Video Converter.
Step 1. Click the button below to download and install MiniTool Video Converter. Then, open it.
MiniTool Video ConverterClick to Download100%Clean & Safe
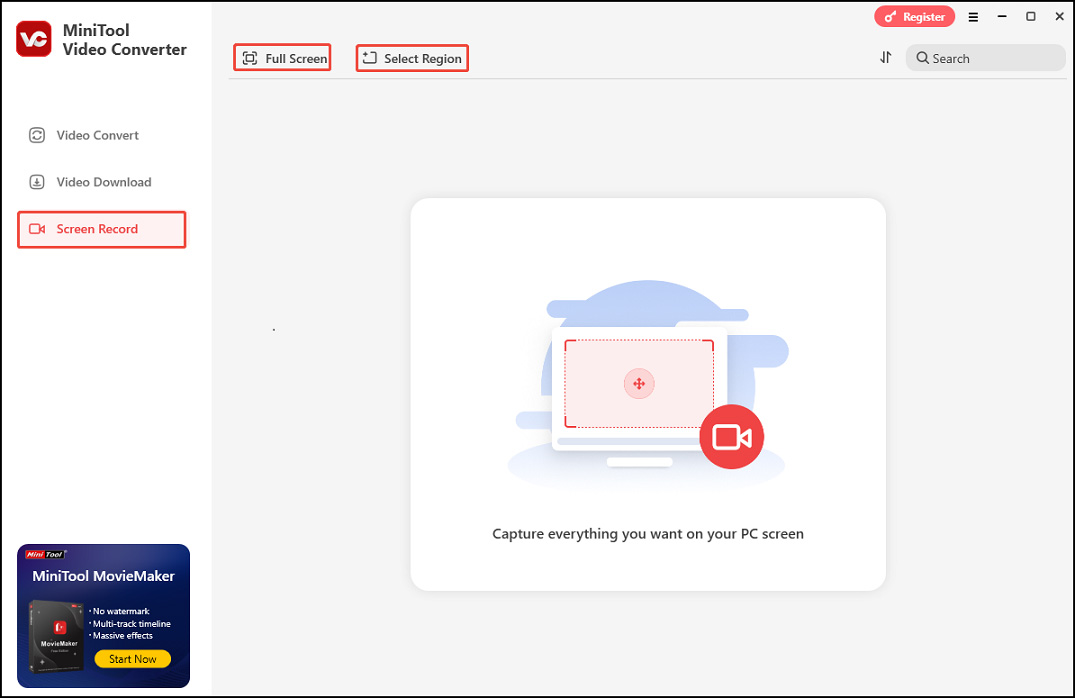
Step 2. Click Screen Record on the left. Click Full Screen to capture the entire screen. You can also click Select Region, left-click your mouse, and then move it to select the recording area.
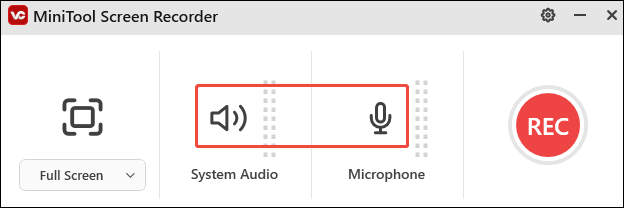
Step 3. In the MiniTool Screen Recorder panel, click the System Audio icon or the Microphone icon to capture the corresponding sound.
Step 4. Press the F6 key to start recording. During recording, you can press F9 to pause/resume recording.
Step 5. Once done, press F6 to stop recording.
Step 6. Then, the main interface of the MiniTool Video Converter will appear with your recording listed. Click the play icon beside it to watch.
Conclusion
By following these steps, you can easily record your camera and screen separately using OBS. So go ahead, give it a try, and unlock new possibilities for your content creation journey!
User Comments :