LiveText has a 200MB video file size limit. To help you bypass that limit, this post shows you how to compress a video for LiveText with MiniTool Video Converter or FreeConvert.
Why Compress a Video for LiveText
LiveText is a popular online platform for student learning and assignment management. Sometimes, students may need to submit a video to their instructors. However, LiveText has a 1000MB file size limit for the video upload.
Even worse, if you are using the LiveText Video Assessment feature, the file size limit is 200MB or less. This way, the videos may be too large to upload to LiveText. To solve that problem, you can compress LiveText videos. Don’t know how to do that? Read on to find out.
How to Compress a Video for LiveText
You can compress a video for LiveText with MiniTool Video Converter or FreeConvert.
Method 1. Use MiniTool Video Converter (Offline)
MiniTool Video Converter is one of the best video compressors for LiveText that I want to recommend.
About MiniTool Video Converter
MiniTool Video Converter is a watermark-free video compressor that doesn’t require any payment. In addition, it supports batch compression, allowing you to compress 5 videos simultaneously. As such, if you want to compress multiple LiveText videos as quickly as possible, MiniTool Video Converter must be an ideal choice.
More importantly, MiniTool Video Converter features a well-organized interface. Hence, even if you are an entry-level user, you can use it to accomplish the compression tasks with simple clicks. What’s more, MiniTool Video Converter provides you with various advanced options to customize the parameters, like encoder, resolution, frame rate, and more.
Besides, MiniTool Video Converter doesn’t have any file size limit, which means that you make the videos small regardless of their file sizes.
How to Compress Videos for LiveText with MiniTool Video Converter
Below is an in-depth guide on how to compress LiveText videos using MiniTool Video Converter.
Step 1. Download and install MiniTool Video Converter.
MiniTool Video ConverterClick to Download100%Clean & Safe
Download MiniTool Video Converter by clicking on the download button above. Then, follow the on-screen instructions to install this LiveText video compressor on your PC.
Step 2. Import the LiveText videos.
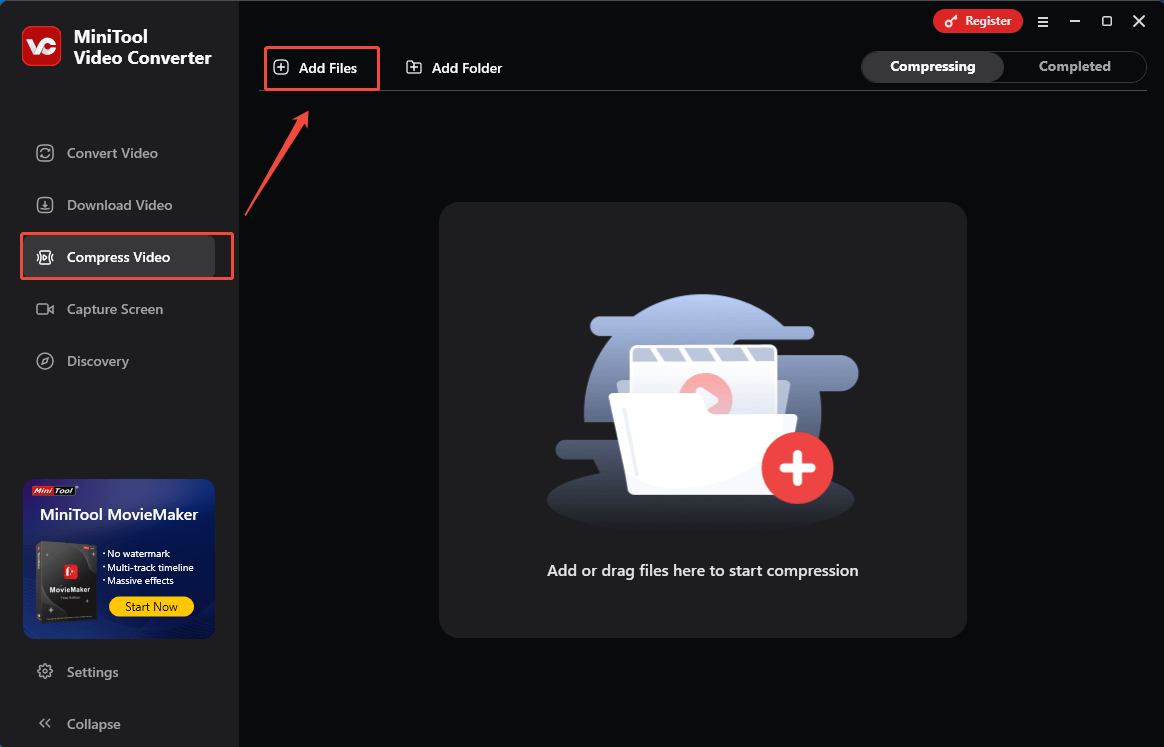
After launching MiniTool Video Converter, switch to the Compress Video tab. There, click on the Add Files option to import the LiveText videos that you want to compress.
Step 3. Specify the compression settings.
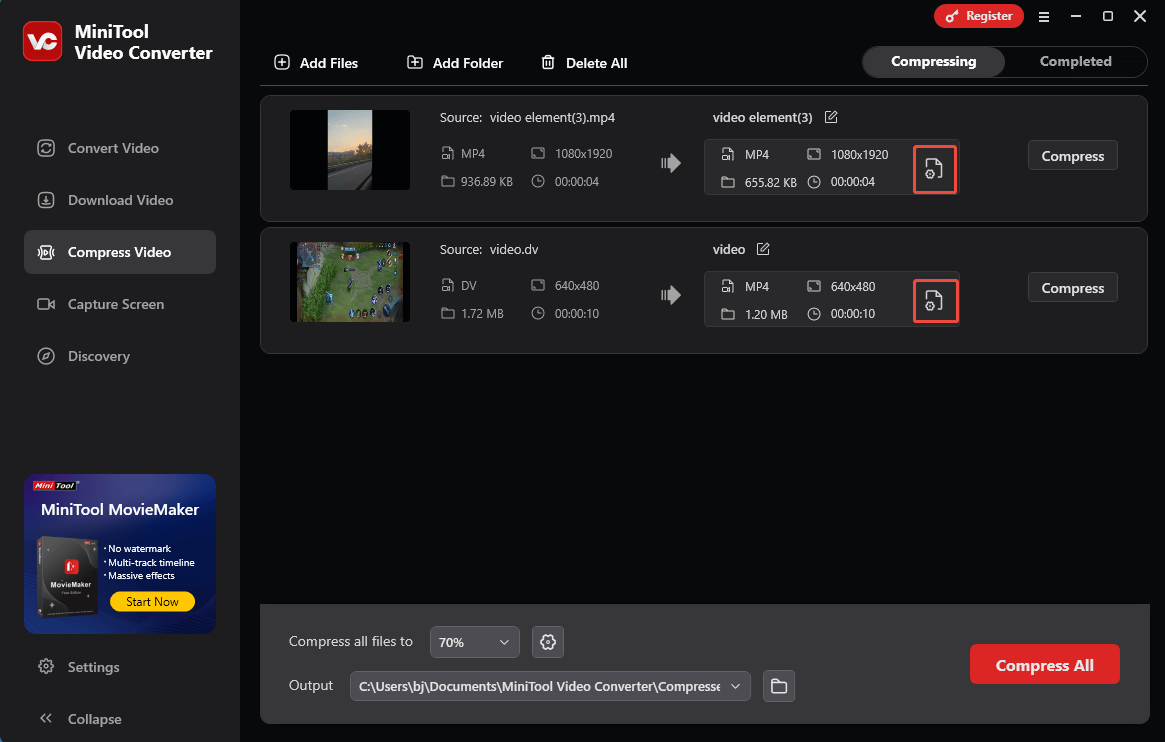
Click on the Settings icon to enter the Compression Settings window.
In the pop-up window, drag the red slider to adjust the output file size. Then, expand the Format option and choose an output format you want. Next, expand the Advanced Settings drop-down menu. There, you are free to adjust the video encoder, audio encoder, frame rate, bitrate, audio channel, and resolution of the video file.
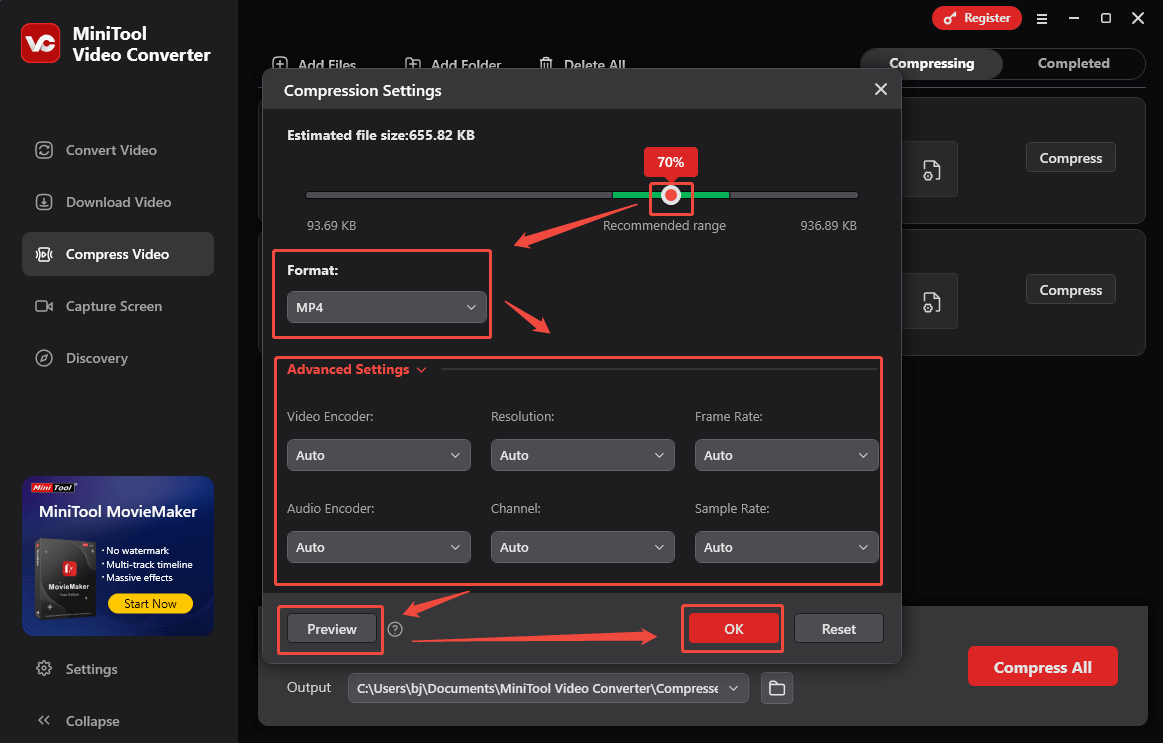
To check whether the compression level is appropriate, click on the Preview button. Then, click on the bottom-right OK button to apply the compression settings. Finally, repeat the above operations to configure the compression settings for other target files.
Step 4. Set an output folder and start compression.
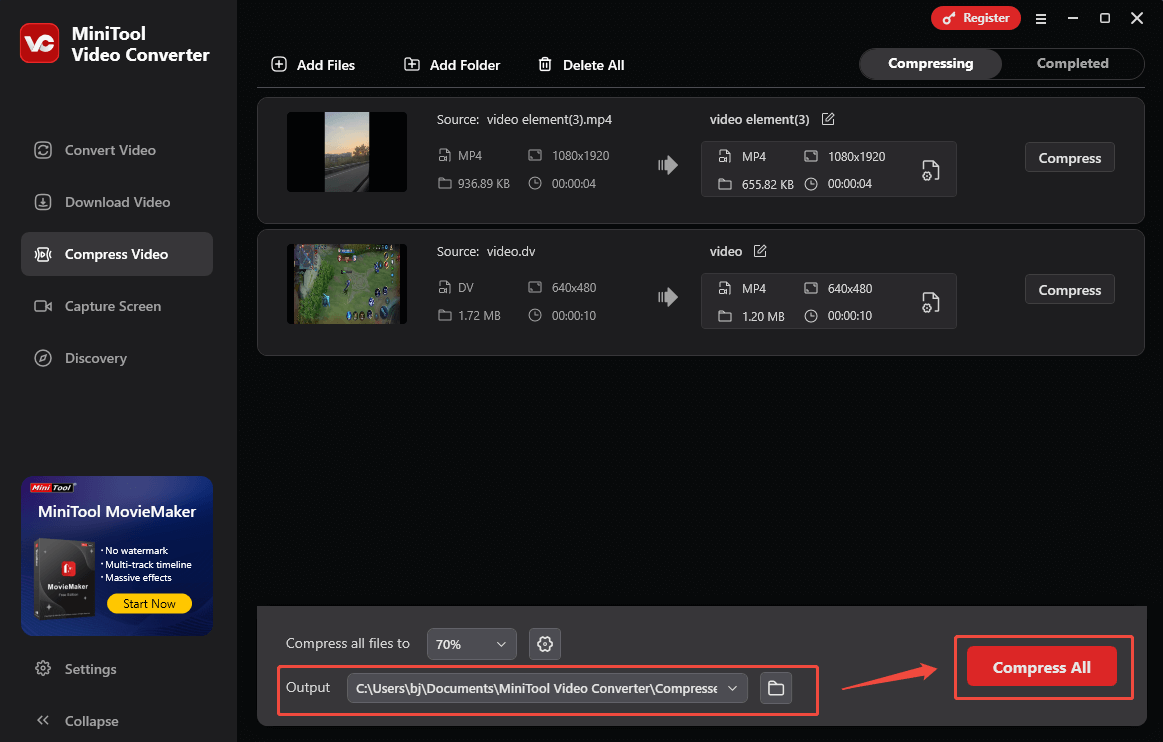
Expand the bottom Output option to choose a saving path for the compressed files. Then, click on the bottom-right Compress All button to start the compression process.
Step 5. Check the compressed videos.
When the file compression process ends, this file compressor will navigate to the Completed tab. There, click on the Play icon to view the output files. If you want to locate them, click on the Folder icon.
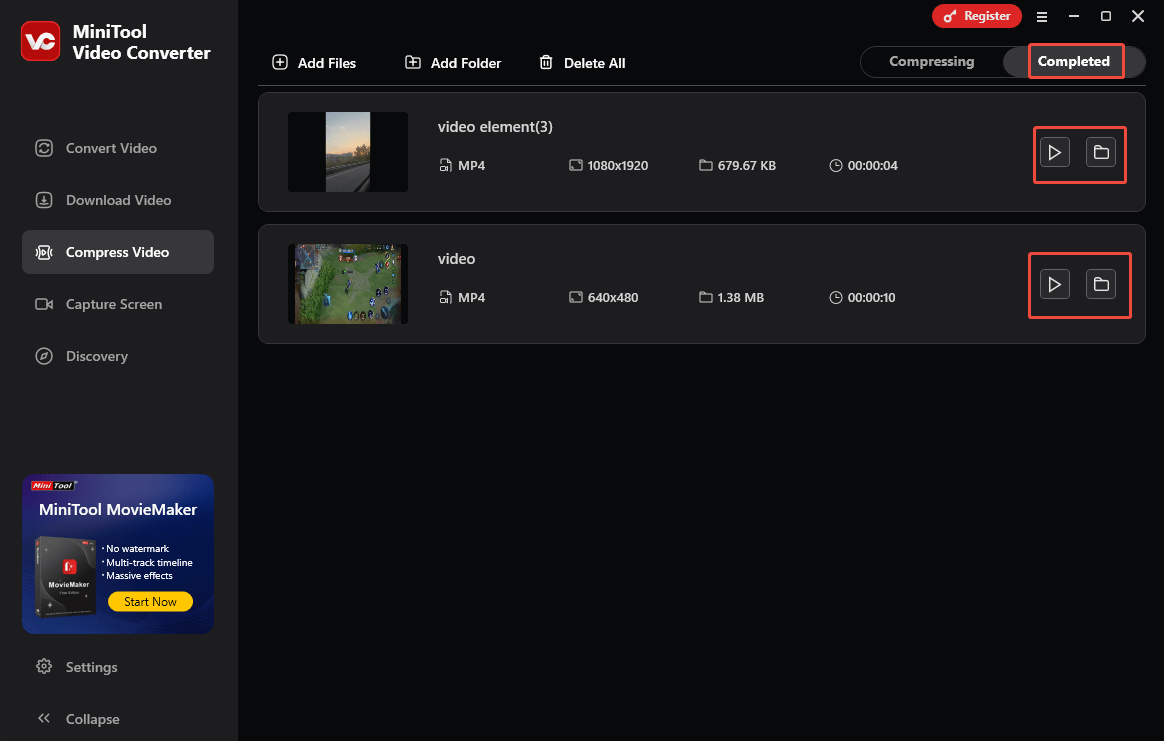
With the above-detailed steps. It will never be difficult for you to compress a video for LiveText. More than a video compressor, MiniTool Video Converter is also a free video converter and watermark-free screen recorder.
Method 2. Use FreeConvert (Online)
If you want to compress LiveText videos without downloading extra software, never miss FreeConvert. FreeConvert is a robust web-based video compressor with an intuitive interface. In addition, it supports file importing from Google Drive, OneDrive, Dropbox, and your device. Below is a detailed guide on how to reduce the file size of your LiveText videos.
Step 1. Go to the video compression page of FreeConvert.
Visit https://www.freeconvert.com/video-compressor.
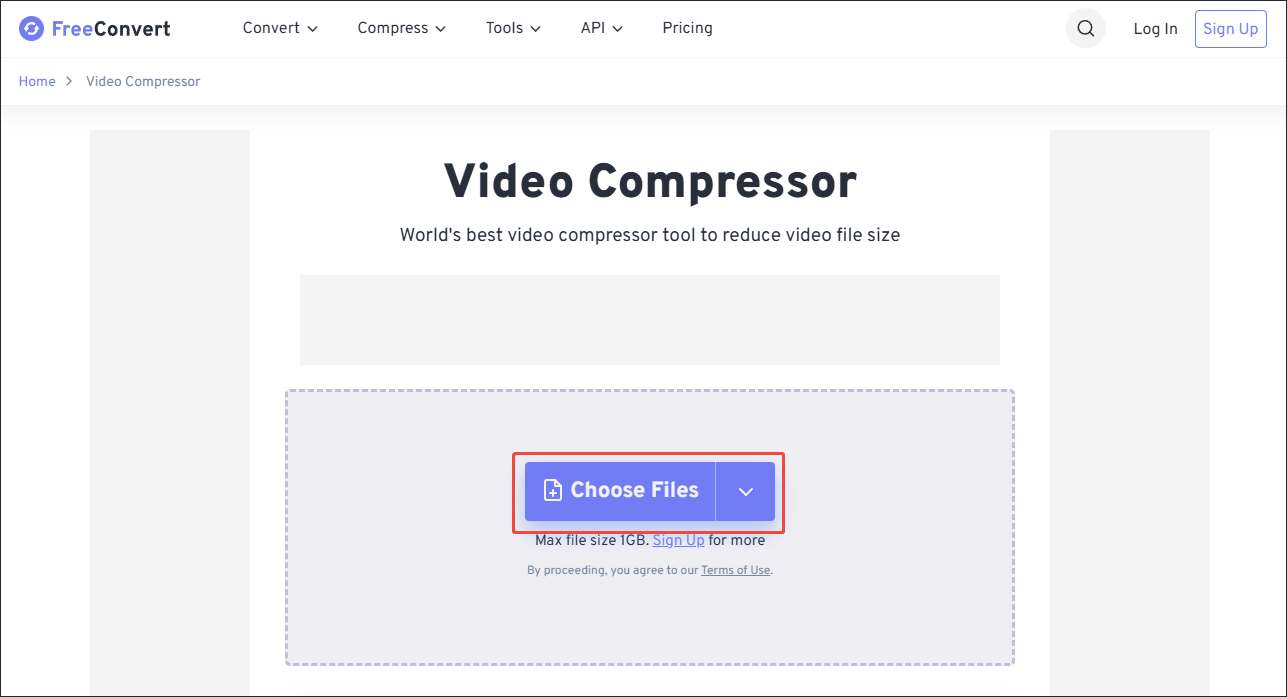
Step 2. Import the LiveText video.
Click on the Choose Files button to upload the LiveText video.
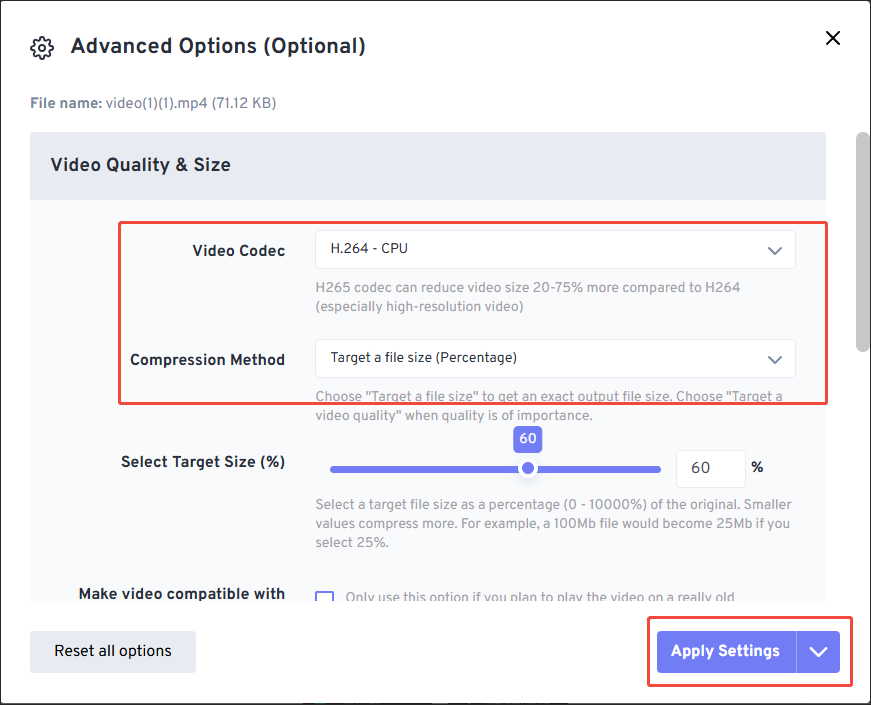
Step 3. Specify the compression settings.
Click on the Settings icon next to the output format to enter the Advanced Options window. There, you can customize the compression method and video codec. Finally, click on the Apply Settings button to confirm the changes.
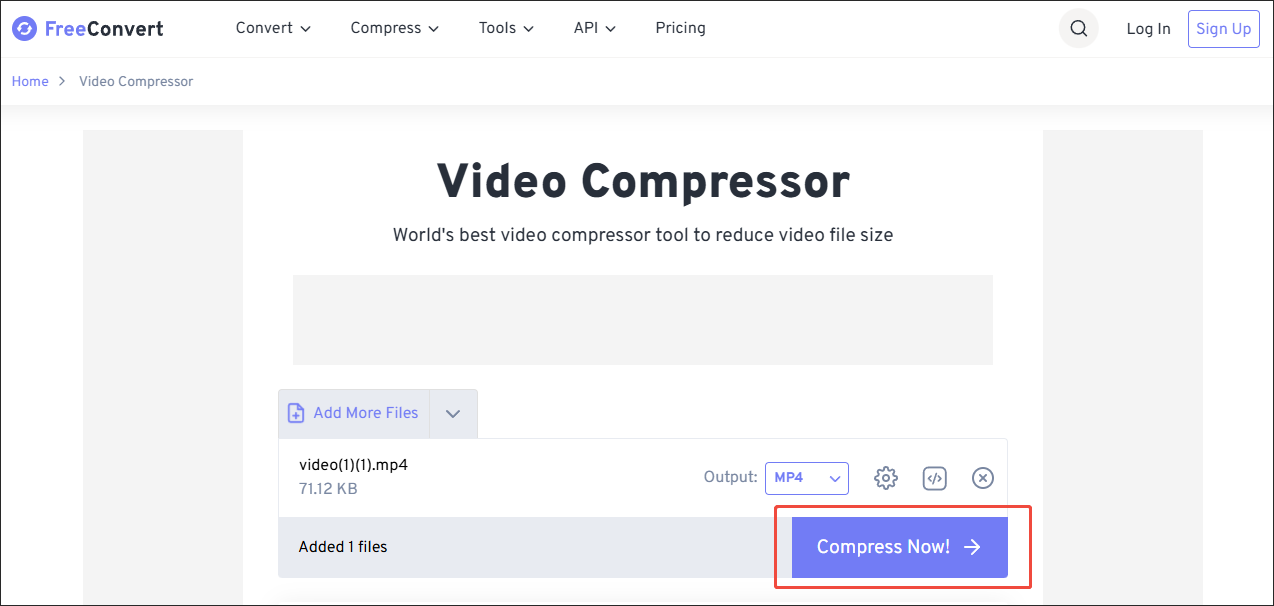
Step 4. Start compression and check the compressed file.
Begin the compression process by clicking on the Compress Now button. When the file compression process completes, download and check the output file.
Undoubtedly, FreeConvert is a great choice for you to compress a video for LiveText. However, it has a 1 GB file size limit for free users, which may bring some limitations when converting large LiveText videos.
Bonus: How to Edit Your LiveText Videos
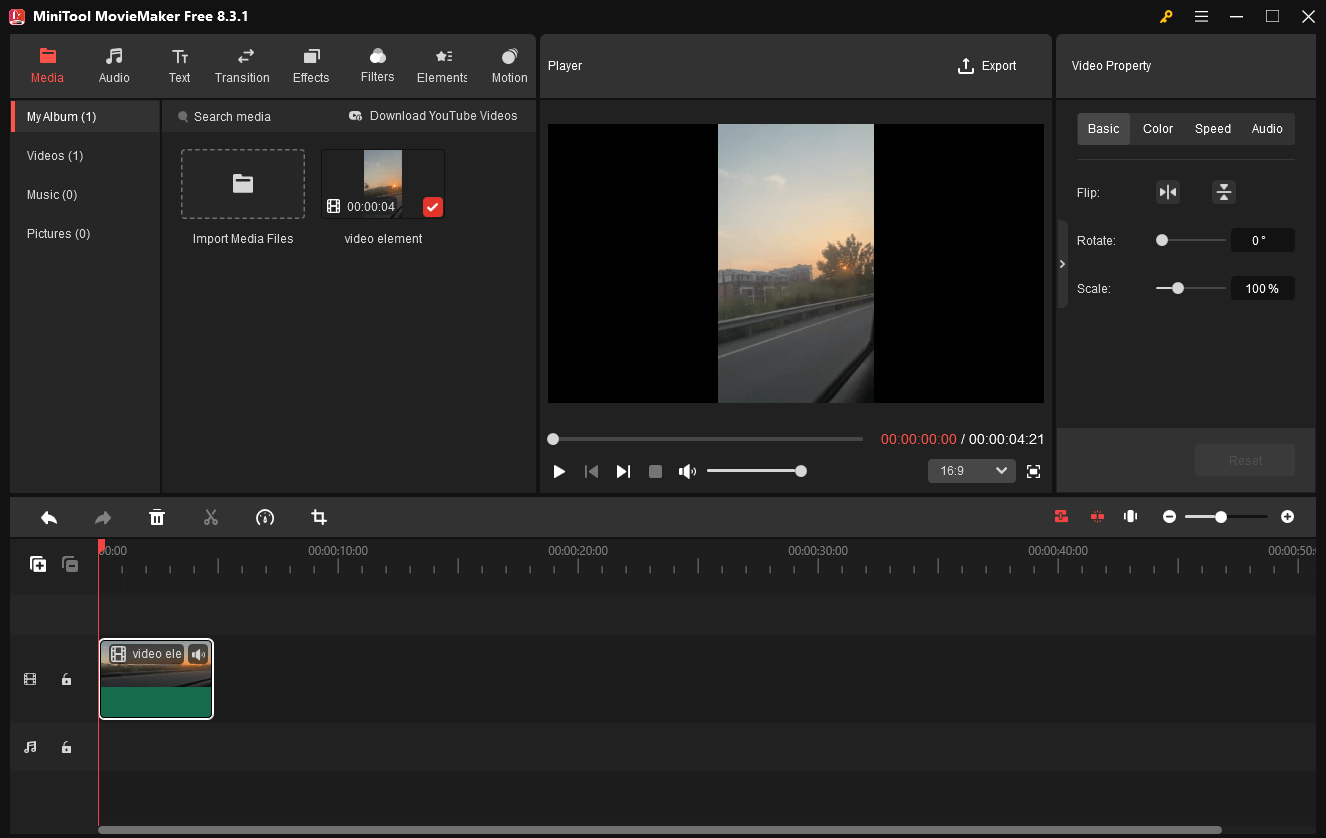
If you want to make your LiveText videos more understandable, try MiniTool MovieMaker. As a professional-grade video editor, MiniTool MovieMaker enables you to add captions, texts, music, filters, effects, and more elements to your LiveText videos. In addition, it enables you to crop, reverse, speed up, flip, or rotate the video files easily.
Even if you want to change the volume or the aspect ratio of your videos, MiniTool MovieMaker can do you a favor. Meanwhile, it can save your LiveText videos in multiple formats, including MP4, MOV, WMV, MKV, AIV, GIF, MP3, and more.
MiniTool MovieMakerClick to Download100%Clean & Safe
Final Words
Both MiniTool Video Converter and FreeConvert can help you compress a video for LiveText. If you don’t want to be limited by a large file size, try the former one. On condition that you don’t want to download extra software, try FreeConvert.


User Comments :