How to screen record on Dell laptop? This post provides detailed guides for you to do that. MiniTool Video Converter, an easy free video converter with a built-in screen recording feature, can also help you easily record screen video on PC for free.
Do you want to know how to screen record on Dell laptop? Maybe you want to record a Zoom meeting, share your gameplay on YouTube, or want to capture highlights from a video on a Dell computer. To meet your needs, a laptop screen recorder suitable for Dell is essential. Then, we will introduce several screen recorders for your Dell laptop.
How to Screen Record on Dell Laptop
1. MiniTool Video Converter
The first recorder for the Dell laptop is MiniTool Video Converter. It is a free screen recorder, video converter, and video downloader. It can be used on Windows.
Record screen – You can use MiniTool Video Converter to record all activities that occur on your computer screen without a time limit and watermark.
Convert video – You can use the program to easily convert any video or audio file to a preferred format for free. This best free video converter supports 1000+ video and audio formats. It possesses an extremely intuitive interface, fast conversion speed, and high output quality.
Download video – This software can be used to download YouTube videos for free so that you can watch YouTube videos or listen to YouTube music offline. You can download YouTube videos in MP4, WebM, MP3, or WAV format.
MiniTool Video ConverterClick to Download100%Clean & Safe
Now, let’s see how to record the screen with MiniTool Video Converter.
Step 1: Download and install MiniTool Video Converter to enter its main interface.
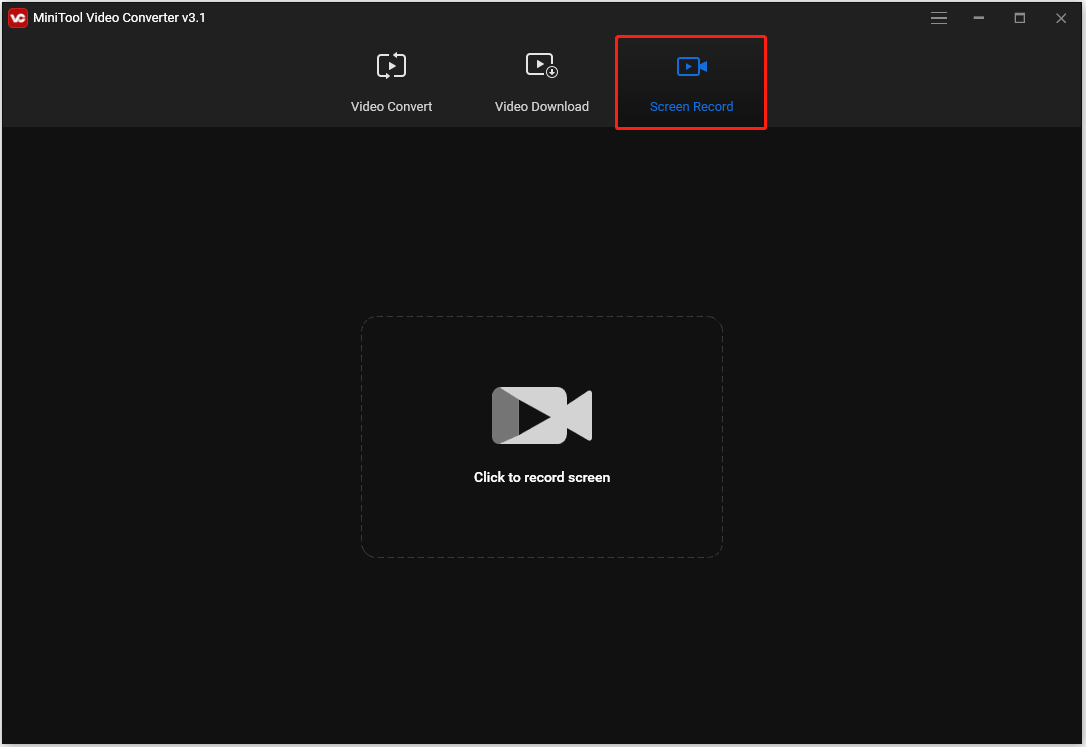
Step 2: Navigate to the Screen Record tab and click the Click to record screen area to enter the screen recording window.
Step 3: Open the Full-screen drop-down list to select the area to be recorded. You can choose Full screen or Select region.
Step 4: Determine if you want to record sound from the system or microphone. Just click the icon to turn on or off the sound.
Step 5: Click the Settings icon to enter the advanced settings page, where you can modify the output folder, output format, video frame rate, video quality, choose whether to display the floating toolbar when recording, and much more. Then, click OK to save your changes.
Step 6: Press the red Record button or F6 to start capturing your screen activity.
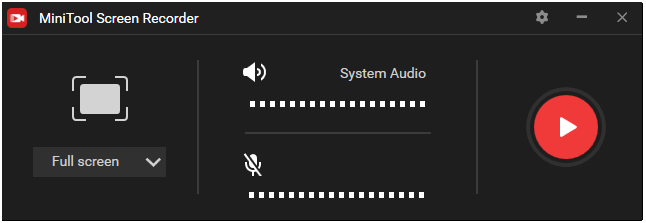
Step 7: During the recording process, you can press F9 to pause/resume the recording. Once done, press F6 to stop recording.
Step 8: Then the video you record will appear on the list. You can right-click it to preview, delete, rename the recording, or check its folder.
Pros
- 100% clean and free.
- No watermark.
- Simple operation.
- High recording quality.
Cons
- Lack of video editing features. But you can use another 100% clean and free program – MiniTool MovieMaker – to edit the video.
2. Xbox Game Bar
For Windows users, there is a built-in free screen recording tool named Game Bar. And this lets you record full screen on a Dell laptop for free without downloading any third-party software. You can turn on the Game Bar feature in Dell laptop by following the instructions.
Step 1: Press Windows + I. Click Gaming > Game Bar. You can find the Game Bar tool and its settings now.
Step 2: To enable Game Bar, you can turn on the Record game clips, screenshots, and broadcast using Game bar option.
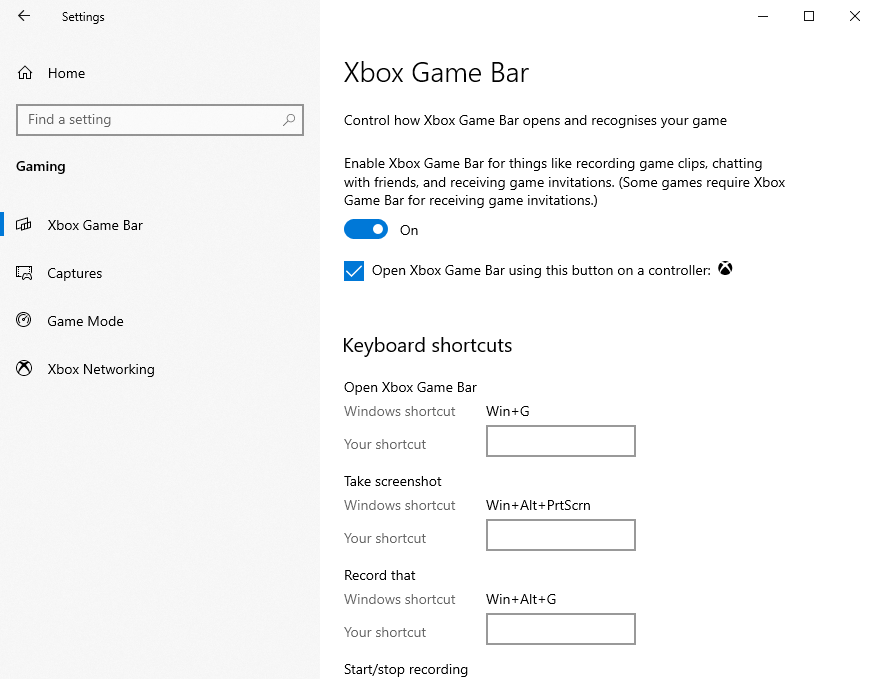
After turning on the Game Bar feature, you can use it to record video on the Dell laptop now.
Step 1: Open the screen you’d like to record.
Step 2: Press Windows + G keyboard shortcut to evoke Game Bar. Click Yes, this is a game, and then you can press the Win + Alt + R keyboard shortcut to start recording the video.
Step 3: To stop the recording, you can press the Win + Alt + R keyboard shortcut again.
Step 4: Then you can go to C:UsersAdministratorVideosCaptures to find the recorded file.
Pros
Free to use. Don’t need any software downloading or registrations.
Record screen video and audio activity.
Cons
- Full screen or specific area recording is not supported.
- Lack of video editing features.
3. Screencast-O-Matic
How to screen record on Dell laptop? Screencast-O-Matic is also a screen recording tool. It has a web-based version and a desktop app that is available on Windows, Mac, and Chromebook. You can use it to record your screen and edit the video.
Here is how to use Screencast-O-Matic to record the screen.
Step 1: Download Screencast-O-Matic from the official website, and install it.
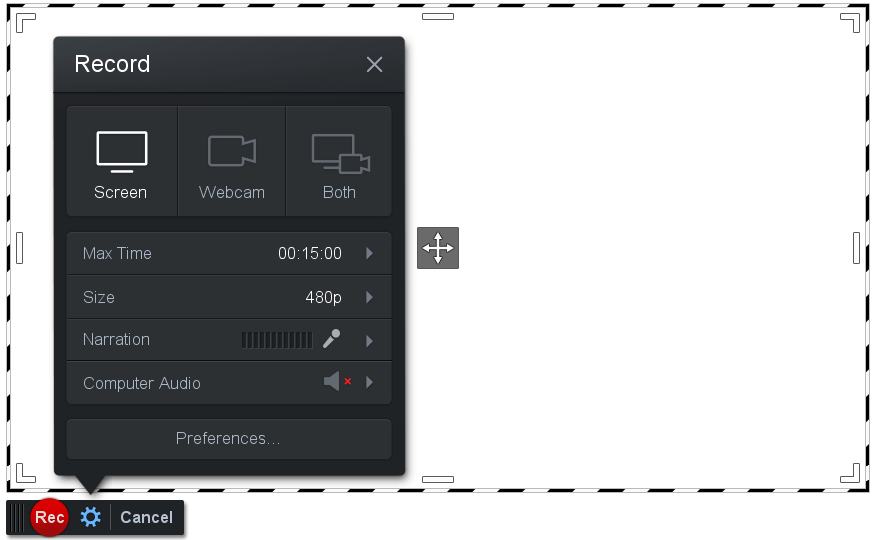
Step 2: After you launch this program, you can select Screen, Webcam, or Both to record.
Step 3: Next, you can click Size to select a size you’d like to record. To capture screen video on Windows 10 with computer audio and your microphone narration voice, you can turn on these two options.
Step 4: At last, you can click the red Rec button to begin the recording process.
Prons
- Upload your recorded video to YouTube.
- Add background music and captions to the recording screen video.
Cons
- The free version only allows you to record up to 15 minutes of screen video at a time.
- Many screen recording and video editing features are only available in the paid version.
4. OBS Studio
OBS Studio is another tool that can be used to screen record on Dell laptop. You can use this free screen video capture tool to record your computer screen, webcam, and microphone. It is also favored by gamers to broadcast their live gameplay footage.
Below is the step-by-step guide on how to record your Dell laptop with OBS.
Step 1: Go to the OBS website and download & install it on your computer.
Step 2: Once installed, click on Finish to launch OBS Studio.
Step 3: Then click the + and select the Display Capture option from the popup list. Click on OK to go on.
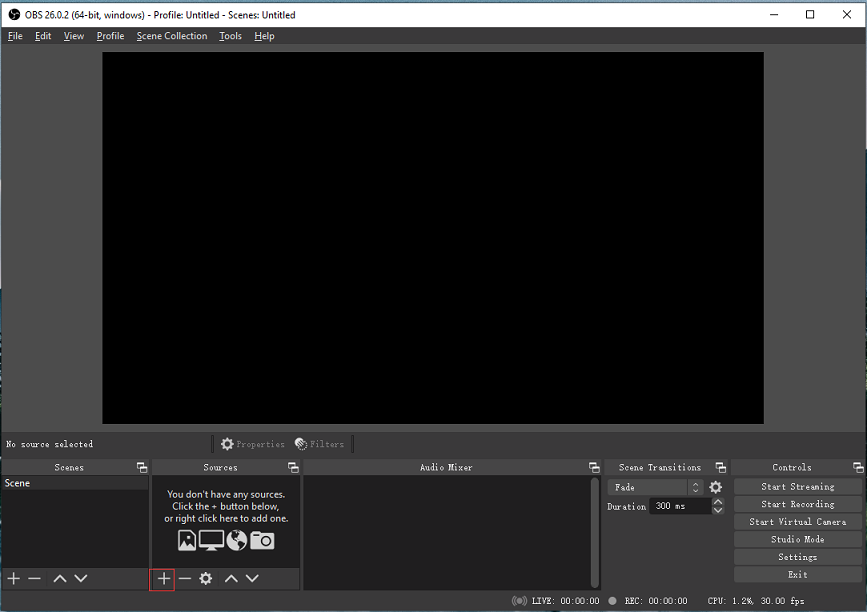
Step 4: Next, you need to adjust the output settings. Click on Settings in the Controls tab to open the Settings window.
Step 5: Go to Controls and press on Start Recording to capture your computer screen. To record the full screen, you’d better minimize the OBS window.
Step 6: When you are done, go to OBS main interface and click the Stop Recording button to finish the recording.
Pros
- Allow you to record the entire display, a window, a region of your computer screen.
- Stream recording videos to YouTube, Twitch, Facebook, etc.
Cons
- It doesn’t integrate a video editor.
Also see: How to Fix OBS Display Capture Not Working? Try These Methods
5. Share X
ShareX is a free and open-source program that allows you to capture or record any area of the screen and share it with just one click. It also allows uploading images, text or other types of files to more than 80 supported destinations you can choose. Read the following content to get detailed information.
Step 1: Go to the official website of ShareX and then click the Download button to download the program.
Step 2: After downloading, open the downloaded file. In the pop-up window, highlight the I accept the agreement option and click Next.
Step 3: Configure the install location based on your demand and click Next. As shown in the picture below, you can configure the settings according to your need. If you don’t want these additional shortcuts, just uncheck them. After that, click Next.
Step 4: Click Install to finish the installation.
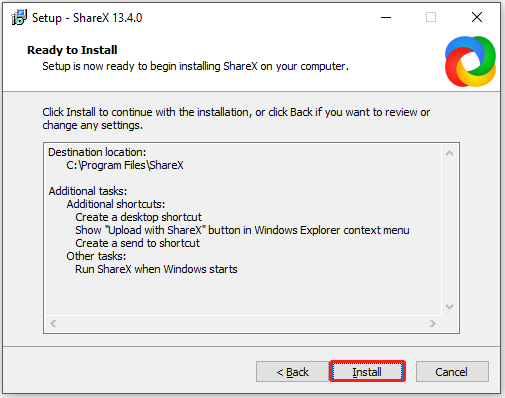
Step 5: When the installation process ends, the program will launch automatically. Click the Capture option in the left pane, and then click Scrolling capture to start the operation.
Pros:
- Absolutely free for all features.
- Simple interface that’s easy to navigate and comes with a lot of important and useful features.
Cons:
- Not available for Mac users.
- The shareable links to the images you have uploaded will expire over time.
6. Movavi Screen Recorder
The next recorder is Movavi Screen Recorder, which is one of the most convenient programs to record screens. It can record internal audio and video, and provides options for editing and sharing the results.
Now, let’s see how to use this recorder to record the screen.
Step 1: Download and install Movavi Screen Recorder on your Dell laptop.
Step 2: Launch the recorder. The pre-recording panel will appear on the screen. Select the recording tool and adjust the shooting area.
Step 3: Then, you can shorten the recording time or delete invalid parts.
Step 4: You can click the Export button. Then, you can choose the output file format. At last, click the Save button.
Pros
- Simultaneous recording from multiple sources.
- Customizable planning and capture settings.
Cons
- It’s not free.
Bottom Line
After reading this post, you must know how to record screen on Dell laptop. Now, choose a video converter and screen recorder on Dell laptop for free! If you have questions about this post or encounter problems when using MiniTool Video Converter, please feel free to contact us via [email protected] or leave comments below.


User Comments :